Samsung CLX-3305 Cloud Print Agent Users Guide - Page 18
Scanning and Sending to the Samsung Cloud Print
 |
View all Samsung CLX-3305 manuals
Add to My Manuals
Save this manual to your list of manuals |
Page 18 highlights
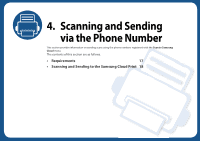
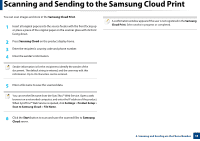
Scanning and Sending to the Samsung Cloud Print You can scan images and store in the Samsung Cloud Print. 1 Insert all original papers into the source feeder with the front facing up or place a piece of the original paper on the scanner glass with its front facing down. 2 Press Samsung Cloud on the product display home. 3 Enter the recipient's country code and phone number. 4 Enter the sender's information. Sender information is for the recipient to identify the sender of the document. The default string is entered, and the user may edit this information. Up to 45 characters can be entered. 5 Enter a file name to save the scanned data. You can set the file name from the SyncThru™ Web Service. Open a web browser on a networked computer, and enter the IP address of the product. When SyncThru™ Web Service is opened, click Settings > Product Setup > Scan to Samsung Cloud > File Name. 6 Click the Start button to scan and save the scanned files to Samsung Cloud server. A confirmation window appears if the user is not registered in the Samsung Cloud Print. Select works in progress or completed. 4. Scanning and Sending via the Phone Number 18
-
 1
1 -
2
-
3
-
4
-
5
-
6
-
7
-
8
-
9
-
10
-
11
-
12
-
 13
13 -
 14
14 -
 15
15 -
 16
16 -
 17
17 -
 18
18 -
 19
19 -
 20
20 -
 21
21 -
 22
22
 |
 |
