Samsung DW80R7060UG/AA User Manual - Page 32
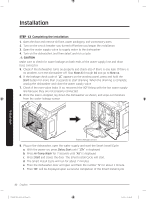
STEP 12, Completing the installation
 |
View all Samsung DW80R7060UG/AA manuals
Add to My Manuals
Save this manual to your list of manuals |
Page 32 highlights
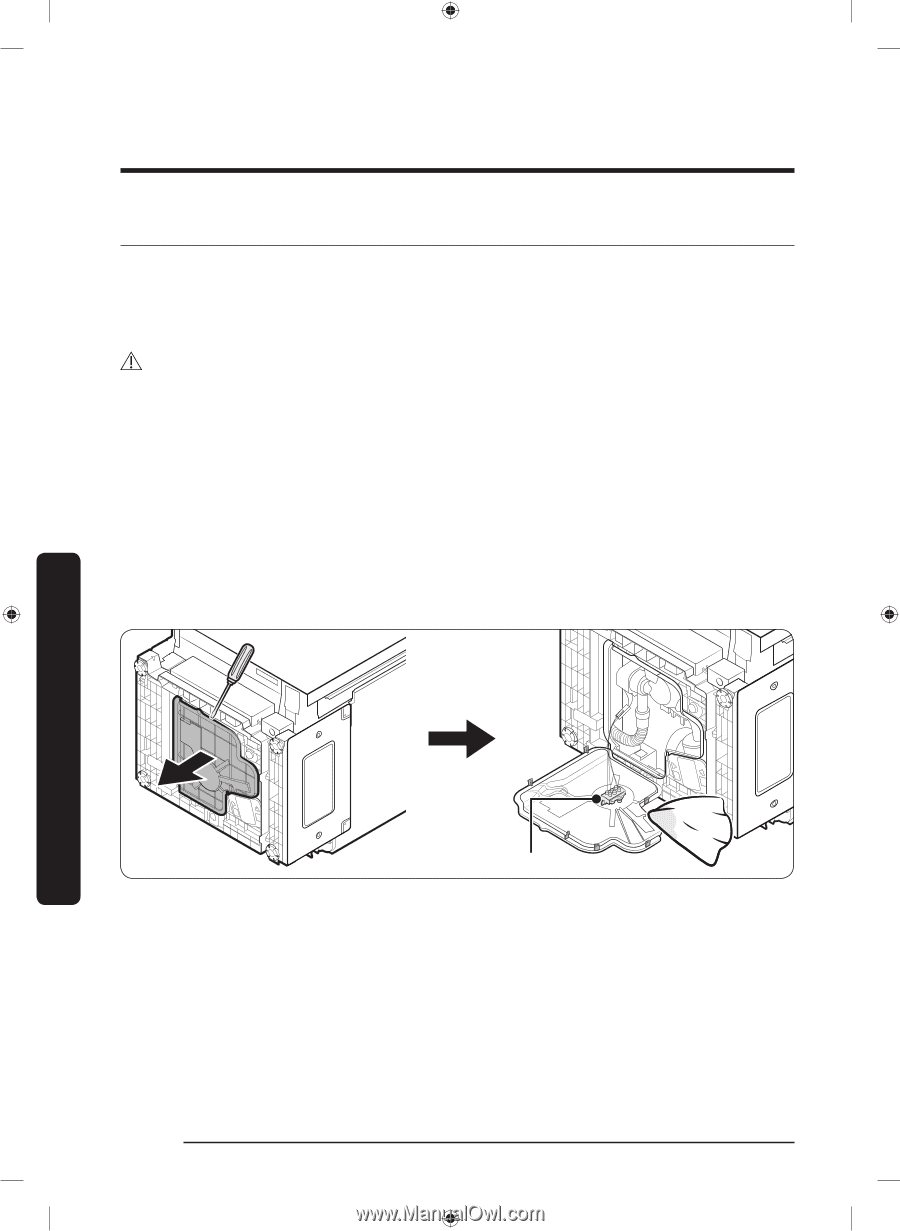
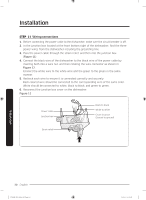
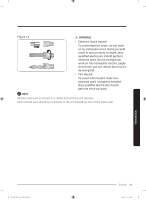
Installation STEP 12 Completing the installation 1. Open the door and remove all foam, paper packaging, and unnecessary parts. 2. Turn on the circuit breaker you turned off before you began the installation. 3. Open the water supply valve to supply water to the dishwasher. 4. Turn on the dishwasher, and then select and run a cycle. CAUTION Make sure to check for water leakage on both ends of the water supply line and drain hose connector. 5. Check if the dishwasher turns on properly and check also if there is any leak. If there is no problem, turn the dishwasher off. Skip Steps 6 through 10 and go to Step 11. 6. If the leakage check code of "LC" appears on the window panel, press and hold the Start button for more than 3 seconds to start draining. When the draining is complete, unplug the dishwasher and close the water supply valve. 7. Check if the inlet valve leaks. If so, reconnect the 90º fitting with the hot water supply line because they are not properly connected. 8. Once the leak is stopped, lay down the dishwasher as shown, and wipe out moisture from the water leakage sensor. Installation Water leakage sensor 9. Plug in the dishwasher, open the water supply and start the Smart Install Cycle. a. With the power on, press Delay Start until "17h" is displayed. b. Press Hi-Temp Wash for 7 seconds until "AS" is displayed. c. Press Start and closes the door. The Smart Install Cycle will start. d. The Smart Install Cycle will run for about 7 minutes. e. Then the dishwasher door will open and flash the number "5" for about 1 minute. f. Then "Ot" will be displayed upon successful completion of the Smart Install Cycle. 32 English DW8000R_DD68-00210A-00_EN.indd 32 4/25/2019 11:11:09 AM
-
 1
1 -
2
-
3
-
4
-
5
-
6
-
7
-
8
-
9
-
10
-
11
-
12
-
13
-
14
-
15
-
16
-
17
-
18
-
19
-
20
-
21
-
22
-
23
-
24
-
25
-
26
-
 27
27 -
 28
28 -
 29
29 -
 30
30 -
 31
31 -
 32
32 -
 33
33 -
 34
34 -
 35
35 -
 36
36 -
 37
37 -
38
-
39
-
40
-
41
-
42
-
43
-
44
-
45
-
46
-
47
-
48
-
49
-
50
-
51
-
52
-
53
-
54
-
55
-
56
-
57
-
58
-
59
-
60
-
61
-
62
-
63
-
64
-
65
-
66
-
67
-
68
-
69
-
70
-
71
-
72
 |
 |