Samsung HW-J355 User Manual - Page 12
Detaching The Wall Mount, Installing The Bracket Without Referring To Thewall-mount Installation
 |
View all Samsung HW-J355 manuals
Add to My Manuals
Save this manual to your list of manuals |
Page 12 highlights
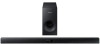
CONNECTIONS DETACHING THE WALL MOUNT 1. Pull the Soundbar upwards as shown in the figure to separate it from the wall mount. Using the Soundbar with Wall Mount [Detaching the Soundbar from the Wall Mount] ●● Do not hang onto the installed unit and avoid striking or dropping the unit. ●● Secure the unit firmly to the wall so that it does not fall off. If the unit falls off, it may cause an injury or damage the product. ●● When the unit is installed on a wall, please make sure that children do not pull any of the connecting cables, as it may cause it to fall. ●● For the optimal performance of a wall mount installation, install the speaker system at least 2 inches (5 cm) below the TV, if the TV is mounted on the wall. ●● For your safety, if you do not mount the unit on the wall, install it on a secure, flat surface where it is unlikely to fall. INSTALLING THE BRACKET WITHOUT REFERRING TO THE WALL-MOUNT INSTALLATION GUIDE 2 inches (5 cm) or more 2 inches (5 cm) or more 4.6 inches (11.6 cm) 5.1 inches (13 cm) Minimum 9.4 ~ 9.7 inches (23.9 ~ 24.6cm) 1. Place the "Wall Mount L" on the desired wall surface while paralleled to the floor as shown above, and fix a screw through the hole on its right end. 2. Place the "Wall Mount R" on the desired wall surface while paralleled to the floor as shown above, and fix a screw through the hole on its left end. ęę If Wall Mount L/R are to be mounted beneath the TV, check their fixing hole positions in steps 1 and 2, so that they are aligned appropriately to the center of the TV's bottom. 3. Fix screws through the rest of holes. 12
-
 1
1 -
2
-
3
-
4
-
5
-
6
-
 7
7 -
 8
8 -
 9
9 -
 10
10 -
 11
11 -
 12
12 -
 13
13 -
 14
14 -
 15
15 -
 16
16 -
 17
17 -
18
-
19
-
20
-
21
-
22
-
23
-
24
 |
 |
