Samsung L80 User Manual - Page 58
PictBridge : Picture Selection, PictBridge
 |
View all Samsung L80 manuals
Add to My Manuals
Save this manual to your list of manuals |
Page 58 highlights
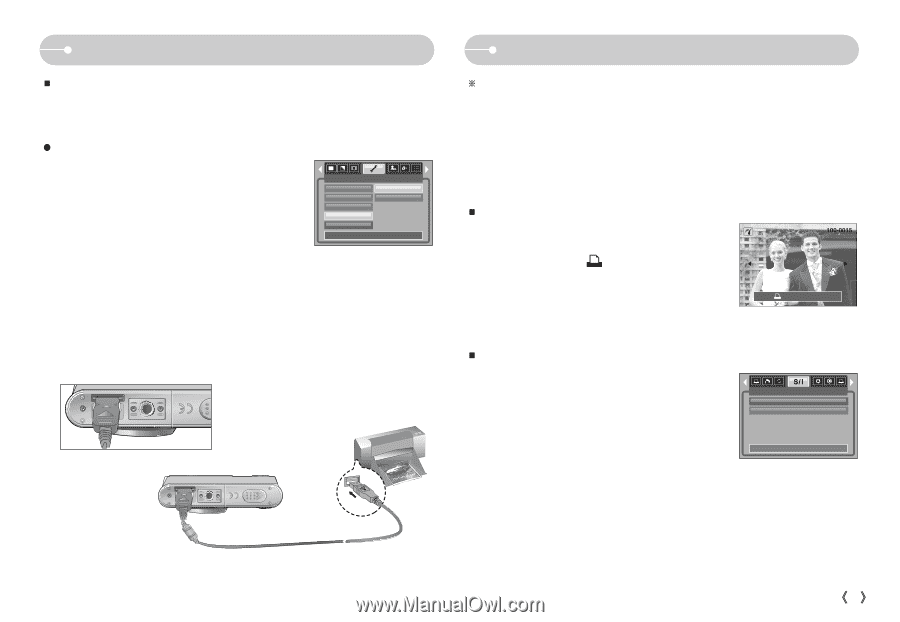
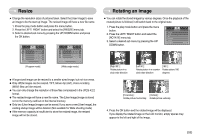
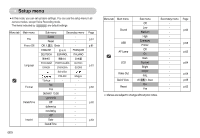
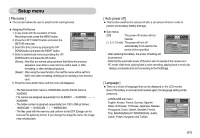
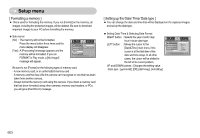
PictBridge ƈ You can use the USB cable to connect this camera to a printer that supports PictBridge (sold separately) and print the stored images directly. TIFF, Movie clips and voice files cannot be printed. ƃ Setting up the camera for connection with the printer 1. In any mode with the exception of Voice Recording mode, press the MENU button. 2. Press the LEFT/ RIGHT button and select [SETUP] menu tab. 3. Select [USB] menu by pressing the UP/ DOWN button and press the RIGHT button. SETUP Date&Time Imprint Sound USB AF Lamp Back: Computer Printer Set:OK 4. Select [Printer] menu by pressing the UP/ DOWN button and press the OK button. 5. Press the OK button to set the setting. 6. Use the supplied USB cable to connect the camera to the printer as shown below. 7. Turn on the printer and the camera will be connected to the printer. PictBridge : Picture Selection ſ If you selected [Computer] in Step 4, when you connected the camera to your printer, the [Connecting Computer] message will display and the connection will not be established. In this case, disconnect the USB cable, and then follow the procedure from Step 2 and onward. Or, press the Printer button and the camera is connected to the printer displaying the [Connecting Printer] message. But, the camera may not connect to the printer, depending on the manufacturer and model of the printer. ƈ Easy printing When you connect the camera to printer in the Play back mode, you can print a picture easily. - Pressing the printer( ) button : Currently displayed image will be printed with the printer's default setting. Print: - Pressing the Left / Right button : Selects a previous / next image. Menu:OK ƈ Select pictures to print 1. Press the Menu button. 2. The [IMAGES] menu will appear. 3. Use the UP and DOWN buttons to select the desired sub menu value, and then press the OK One Pic All Pics IMAGES button. When [One Pic] is selected Exit:MENU Move: : The PictBridge function will be applied only to the picture currently displayed. When [All Pics] is selected : The PictBridge function will be applied to all pictures, excluding TIFF, Movie clips and voice files. ŝ57Ş
-
 1
1 -
2
-
3
-
4
-
5
-
6
-
7
-
8
-
9
-
10
-
11
-
12
-
13
-
14
-
15
-
16
-
17
-
18
-
19
-
20
-
21
-
22
-
23
-
24
-
25
-
26
-
27
-
28
-
29
-
30
-
31
-
32
-
33
-
34
-
35
-
36
-
37
-
38
-
39
-
40
-
41
-
42
-
43
-
44
-
45
-
46
-
47
-
48
-
49
-
50
-
51
-
52
-
 53
53 -
 54
54 -
 55
55 -
 56
56 -
 57
57 -
 58
58 -
 59
59 -
 60
60 -
 61
61 -
 62
62 -
 63
63 -
64
-
65
-
66
-
67
-
68
-
69
-
70
-
71
-
72
-
73
-
74
-
75
-
76
-
77
-
78
-
79
-
80
-
81
-
82
-
83
-
84
-
85
-
86
-
87
-
88
-
89
-
90
 |
 |