Samsung ML 2851ND User Manual (ENGLISH) - Page 32
Printing a configuration Maintenance parts, Cancel, Items, Yield Average - cartridge
 |
UPC - 635753623222
View all Samsung ML 2851ND manuals
Add to My Manuals
Save this manual to your list of manuals |
Page 32 highlights
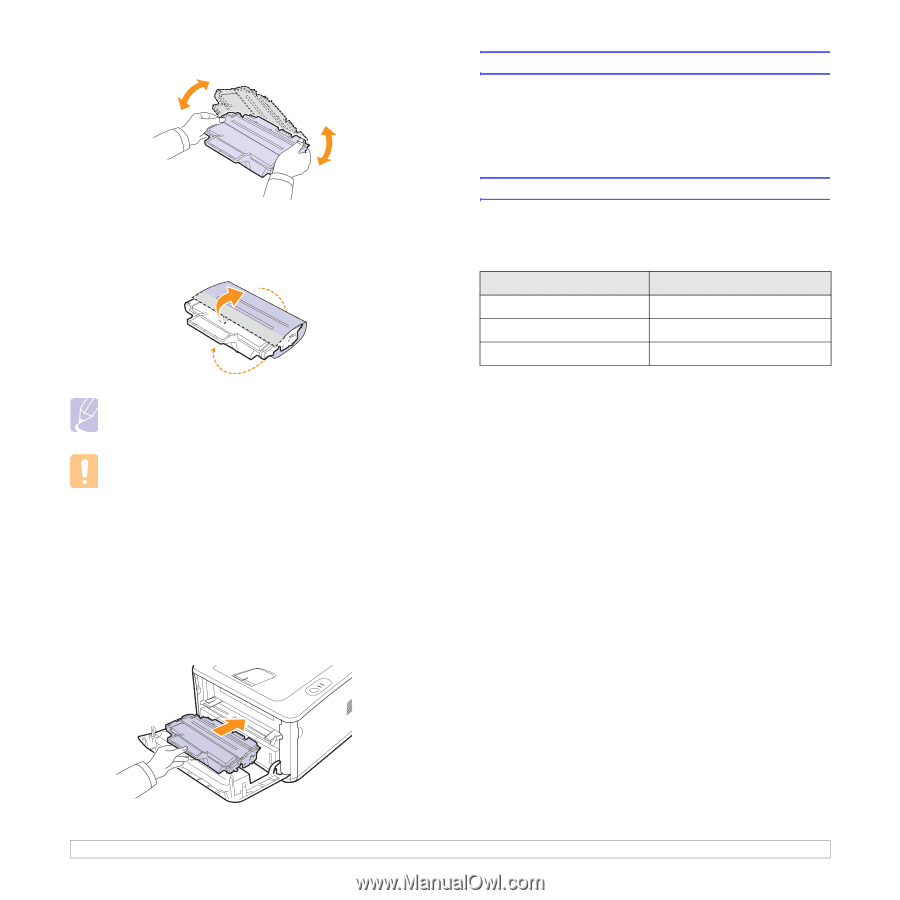
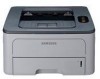
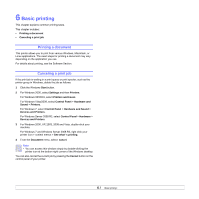
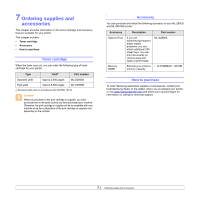
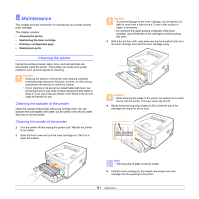
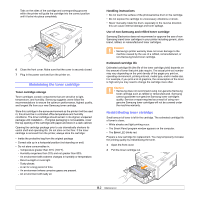
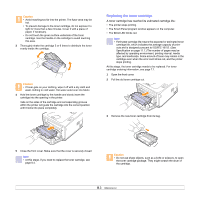
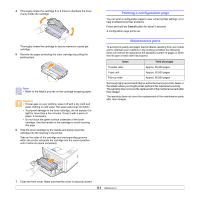
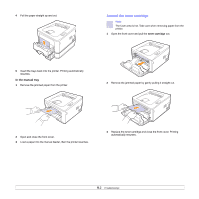
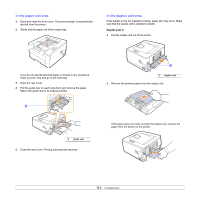
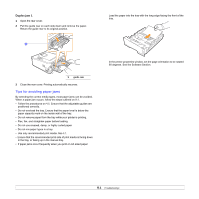
4 Thoroughly shake the cartridge 5 or 6 times to distribute the toner evenly inside the cartridge. Thoroughly shake the cartridge to assure maximum copies per cartridge. 5 Remove the paper protecting the toner cartridge by pulling the packing tape. Note • Refer to the helpful pictures on the cartridge wrapping paper. Caution • If toner gets on your clothing, wipe it off with a dry cloth and wash clothing in cold water. Hot water sets toner into fabric. • To prevent damage to the toner cartridge, do not expose it to light for more than a few minutes. Cover it with a piece of paper, if necessary. • Do not touch the green surface underside of the toner cartridge. Use the handle on the cartridge to avoid touching this area. 6 Hold the toner cartridge by the handle and slowly insert the cartridge into the opening in the printer. Tabs on the sides of the cartridge and corresponding grooves within the printer will guide the cartridge into the correct position until it locks into place completely. Printing a configuration page You can print a configuration page to view current printer settings, or to help troubleshoot printer problems. Press and hold the Cancel button for about 5 seconds. A configuration page prints out. Maintenance parts To avoid print quality and paper feed problems resulting from worn parts and to maintain your machine in top working condition the following items will need to be replaced at the specified number of pages or when the life span of each item has expired. Items Transfer roller Fuser unit Pick-up roller Yield (Average) Approx. 50,000 pages Approx. 50,000 pages Approx. 50,000 pages Samsung highly recommends that an authorized service provider, dealer or the retailer where you bought printer performs this maintenance activity. The warranty does not cover the replacement of the maintenance parts after their lifespan. The warranty does not cover the replacement of the maintenance parts after their lifespan. 7 Close the front cover. Make sure that the cover is securely closed. 8.4
-
 1
1 -
2
-
3
-
4
-
5
-
6
-
7
-
8
-
9
-
10
-
11
-
12
-
13
-
14
-
15
-
16
-
17
-
18
-
19
-
20
-
21
-
22
-
23
-
24
-
25
-
26
-
 27
27 -
 28
28 -
 29
29 -
 30
30 -
 31
31 -
 32
32 -
 33
33 -
 34
34 -
 35
35 -
 36
36 -
 37
37 -
38
-
39
-
40
-
41
-
42
-
43
-
44
-
45
-
46
-
47
-
48
-
49
-
50
-
51
-
52
-
53
-
54
-
55
-
56
-
57
-
58
-
59
-
60
-
61
-
62
-
63
-
64
-
65
-
66
-
67
-
68
-
69
-
70
-
71
-
72
-
73
-
74
-
75
-
76
-
77
-
78
-
79
-
80
-
81
-
82
-
83
-
84
-
85
-
86
-
87
 |
 |