Samsung PPM42M8HB User Manual (ENGLISH)
Samsung PPM42M8HB - 42" Plasma Panel Manual
 |
UPC - 729507805030
View all Samsung PPM42M8HB manuals
Add to My Manuals
Save this manual to your list of manuals |
Samsung PPM42M8HB manual content summary:
- Samsung PPM42M8HB | User Manual (ENGLISH) - Page 1
PDP Display (PLASMA DISPLAY PANEL) PPM42M8H PPM50M8H Owner's Instructions Before operating the unit, please read this manual thoroughly, and retain it for future reference. Intended for Commercial Use and Operation ON-SCREEN MENUS Picture In Picture (PIP) VIDEO WALL MDC (Multiple Display Control - Samsung PPM42M8HB | User Manual (ENGLISH) - Page 2
Instructions ◆ Screen Image retention Do not display a still image (such as on a video game or when hooking up a PC to this PDP Display) on the plasma PDP Display of the unit. ◆ Cell Defects The PDP Display uses a panel consisting of an authorized service center, when installing your PDP Display in a - Samsung PPM42M8HB | User Manual (ENGLISH) - Page 3
Parts Quick Setup Guide User's Guide Remote Control/AAA Batteries (Not available in all locations) Power Cord PC Cable Ferrite Cores for Speaker Wire (2EA) (Refer to page 14) Ferrite Core for Power Cord Stand-Base (2EA) Screws (4EA) ➢ Ferrite Core (Power Cord, Speaker Wire) The ferrite - Samsung PPM42M8HB | User Manual (ENGLISH) - Page 4
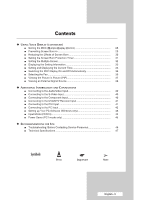
Stand-Base 9 ■ Installing the Display on the Wall Attachment Panel 10 ■ Installing the Display Vertically 12 ■ Before Using the Video Wall and the Multiple Display Control function ........ 12 ■ Connecting Speakers 13 ■ Switching Your PDP Display Sound Standard 22 ■ Customizing the Sound - Samsung PPM42M8HB | User Manual (ENGLISH) - Page 5
41 ■ Connecting to the PC Input 42 ■ Setting up Your PC Software (Windows only 43 ■ Input Mode (PC/DVI 44 ■ Power Saver (PC1 mode only 45 ◆ RECOMMENDATIONS FOR USE ■ Troubleshooting: Before Contacting Service Personnel 46 ■ Technical Specifications 47 Symbols ☛ ➢ Press Important Note - Samsung PPM42M8HB | User Manual (ENGLISH) - Page 6
may be different, depending on your model. Front of the PDP Display Speaker (Optional) Speaker (Optional) a b c a SOURCE - Select the external input source. - Store your settings in the menu. - When the Main menu is displayed on screen, the Main menu is not operated with source key. MENU - Samsung PPM42M8HB | User Manual (ENGLISH) - Page 7
supplied power cord. b) EXT SPEAKER (8Ω) Connect external speakers. c) DVI/PC AUDIO IN 42. ➢ Whenever you connect an audio or video system to your PDP Display, ensure that all elements are switched off. Refer to the documentation supplied with your equipment for detailed connection instructions - Samsung PPM42M8HB | User Manual (ENGLISH) - Page 8
OFF PICTURE STILL NEXT CHANNEL EXTERNAL INPUT SELECTION PREVIOUS CHANNEL INFORMATION DISPLAY EXIT FROM ANY DISPLAY CONFIRM YOUR CHOICE (STORE OR ENTER) SOUND EFFECT SELECTION PICTURE SIZE MULTIPLE DISPLAY CONTROL SCREEN EFFECT SELECTION (BURNING PROTECTION) ➢ The performance of the remote control - Samsung PPM42M8HB | User Manual (ENGLISH) - Page 9
mix battery types, i.e. alkaline and manganese. Assembling the Stand-Base 1 Assemble the PDP Display with the stand and firmly secure the PDP Display using 4 screws provided. ➢ Two or more people should carry the PDP Display. Never lay the PDP Display on the floor because of possible damage to the - Samsung PPM42M8HB | User Manual (ENGLISH) - Page 10
Installing the Display on the Wall Attachment Panel ➢ Refer to the correct installation guide according to your wall bracket. Installation Notes ◆ Contact a technician for installing the wall bracket. ◆ Samsung Electronics is not responsible for any damages to the product or harm to customers when - Samsung PPM42M8HB | User Manual (ENGLISH) - Page 11
it is firmly fixed to the bracket. Make sure to reinsert and tighten the safety pin (#) to securely hold the product to the bracket. PDP Display Wall Bracket Angle Adjustment ➢ Adjust the bracket angle to -2o before installing it on the wall. Wall Bracket Wall 1 Fix the product to the wall - Samsung PPM42M8HB | User Manual (ENGLISH) - Page 12
the Display Vertically ❋ Samsung shall not be liable for damages caused by installing the product at the different direction from the figure below. You can install the PDP Display vertically. In this case, the fan automatically works. If you wish to stop the fan, position the PDP Display - Samsung PPM42M8HB | User Manual (ENGLISH) - Page 13
on the rear of the PDP Display. PPM50M8H PPM42M8H PPM50M8H 3 Tighten the PDP Display and the speaker bracket using the screws removed from the PDP Display. PPM42M8H PPM50M8H ➢ When moving your PDP Display, do NOT hold the speaker connected to your PDP Display. It may damage the bracket clamping - Samsung PPM42M8HB | User Manual (ENGLISH) - Page 14
ends of the cable with the diagram on the PDP Display. ➢ ◆ The speakers MUST have a power handling capability of 10 watts minimum (impedance 8Ω). ◆ When you connect the speaker wire to the external speaker out connector, first bind the speaker wire round the ferrite core to secure it. Ferrite Cores - Samsung PPM42M8HB | User Manual (ENGLISH) - Page 15
again (or the OFF ( ) button on the remote control). Front of the PDP Display Choosing Your Language When you start using your PDP Display for the first time, you must select the language which will be used for displaying menus and indications. 1 Press the MENU ( ) button. Result: The main menu is - Samsung PPM42M8HB | User Manual (ENGLISH) - Page 16
. 3 Press the ENTER ( ) button. Result: The Mode is selected. 4 Press the ENTER ( ) button again. Result: The Mode menu is displayed. 5 Press the ENTER ( ) button. Result: The following options are available. Dynamic - Standard - Movie - Custom 6 Select the required option by pressing the ... or - Samsung PPM42M8HB | User Manual (ENGLISH) - Page 17
Sharpness - Color Tint (NTSC only) ◆ Contrast - Brightness - Color : PC or DVI Mode. 9 Press the ENTER ( ) button. Result: The horizontal bar is displayed. Press the œ or √ button until you reach the optimal setting. ➢ ◆ Press the ... or † button to select other option(s). ◆ The settings values - Samsung PPM42M8HB | User Manual (ENGLISH) - Page 18
the required option (Red, Green, or Blue) by pressing the ... or † button. 6 Press the ENTER ( ) button. Result: The horizontal bar is displayed. Press the œ or √ button until you reach the optimal setting. ➢ Press the ... or † button to select other option(s). 7 Press the ENTER ( ) button - Samsung PPM42M8HB | User Manual (ENGLISH) - Page 19
6 Press the ... or † button to select the option (Coarse or Fine) to be adjusted. Press the ENTER ( ) button. Result: The horizontal bar is displayed. Press the œ or √ button until you reach the optimal setting. ➢ Press the ... or † button to select other option(s). 7 Press the ENTER ( ) button. - Samsung PPM42M8HB | User Manual (ENGLISH) - Page 20
. Press the ENTER ( ) button. 9 Adjust the position by pressing the or √ button. 10 Press the MENU ( ) button. Result: The Zoom menu is displayed again. 11 To return the factory defaults, select Reset by pressing the ... or † button. Press the ENTER ( ) button. Result: The previously adjusted - Samsung PPM42M8HB | User Manual (ENGLISH) - Page 21
which best corresponds to your viewing requirements. 1 Press the MENU ( ) button. Result: The main menu is displayed. 2 Press the ... or † button to select Picture. Result: The Picture menu is displayed. 3 Press the ENTER ( ) button. 4 Press the ... or † button to select Size. Press the ENTER - Samsung PPM42M8HB | User Manual (ENGLISH) - Page 22
to be used when watching a given broadcast. 1 Press the MENU ( ) button. Result: The main menu is displayed. 2 Press the ▲ or ▼ button to select Sound. Result: The Sound menu is displayed. 3 Press the ENTER ( ) button. Result: The Mode is selected. 4 Press the ENTER ( ) button again. Select the - Samsung PPM42M8HB | User Manual (ENGLISH) - Page 23
has several settings which allow you to control the sound quality. 1 Press the MENU ( ) button. Result: The main menu is displayed. 2 Press the ... or † button to select Sound. Result: The Sound menu is displayed. 3 Press the ENTER ( ) button. 4 Press the ... or † button to select Equalizer. Press - Samsung PPM42M8HB | User Manual (ENGLISH) - Page 24
a patented SRS technology that solves the problem of playing 5.1 multichannel content over two speakers. TruSurround delivers a compelling, virtual surround sound experience through any two-speaker playback system, including internal PDP Display speakers. It is fully compatible with all multichannel - Samsung PPM42M8HB | User Manual (ENGLISH) - Page 25
Activating Panel Button Lock This feature allows you to lock the PDP Display panel buttons so that it cannot be operated via the PDP Display panel. It can, however, still be operated via the remote control. Only remote control can release the panel lock setting, so keep the remote control - Samsung PPM42M8HB | User Manual (ENGLISH) - Page 26
Change PIN : Off Move Enter Return IR Lock : On This feature allows you to lock the remote control so that it cannot be Display Panel buttons. 1 Press the MENU ( ) button. Result: The main menu is displayed. 2 Press the ▲ or ▼ button to select Function. Result: The Function menu is displayed - Samsung PPM42M8HB | User Manual (ENGLISH) - Page 27
Up Your Personal ID Number This feature sets viewing restrictions and prevents unauthorized access to your PDP Display through the PIN (Personal Identification Number), which is a 4 digit number. 1 Press the MENU ( ) button. Result: The main menu is displayed. 2 Press the ▲ or ▼ button to select - Samsung PPM42M8HB | User Manual (ENGLISH) - Page 28
the standby mode of ID Input. ➢ For further details, refer to the MDC program guide. ➢ You can select these options by simply pressing the MDC (Multiple Display Control) button on the remote control. ➢ You can download the MDC program from the "www.samsung.com" download center. English - 28 - Samsung PPM42M8HB | User Manual (ENGLISH) - Page 29
ENTER ( ) button. 4 Press the ... or † button to select Screen Burn Protection. Press the ENTER ( ) button. Result: The Screen Burn Protection menu is displayed with the Pixel Shift selected. 5 Press the ENTER ( ) button again. Result: The Pixel Shift menu is selected. ➢ You can select these options - Samsung PPM42M8HB | User Manual (ENGLISH) - Page 30
by changing the color of pixels to white. Use this function when there are remaining after images or symbols on the screen especially when you displayed a still image on the screen for a long time. ➢ Signal Pattern: This function removes after images on the screen by moving all the pixels on the - Samsung PPM42M8HB | User Manual (ENGLISH) - Page 31
Burn Protection. Press the ENTER ( ) button. 5 Press the ... or † button to select Timer. Press the ENTER ( ) button. Result: The Timer menu is displayed. 6 Press the ENTER ( ) button again. 7 Select On by pressing the ... or † button. Press the ENTER ( ) button. 8 Select the required option by - Samsung PPM42M8HB | User Manual (ENGLISH) - Page 32
▲ or ▼ button to select Video Wall. 5 Press the ENTER ( ) button. Result: The Video Wall menu is displayed with the Video Wall selected. 6 Press the ENTER ( ) button. Select On by pressing the ▲ or ▼ button. ◆ The VESA Format input does not support the Video Wall function in DVI mode. English - 32 - Samsung PPM42M8HB | User Manual (ENGLISH) - Page 33
select by pressing the "INFO" button on the remote control. AV Picture Sound SRS TS XT -- : -- : Dynamic : Custom : Off Setting and Displaying the Current Time You can set the PDP Display's clock so that the current time is displayed by pressing the "INFO" button. You must also set the time if - Samsung PPM42M8HB | User Manual (ENGLISH) - Page 34
Hour 12 Minute 00 Source Component Volume Activation 10 Yes Move Adjust Return You can set the on or off timers so that the PDP Display will: ◆ Switch on automatically and tune source of your choice at the time you select. ◆ Switch off automatically at the time you select. ➢ The first - Samsung PPM42M8HB | User Manual (ENGLISH) - Page 35
turned on by timer. This function is only available in timer "On" mode and prevents overheating, which may occur if a PDP Display is on for too long. Time Language PC Setup : English Move Enter Return Time Clock Set 12: 00 On Timer 12: 00 Off Off Timer - Samsung PPM42M8HB | User Manual (ENGLISH) - Page 36
the ▲ or ▼ button. Press the ENTER ( ) button. 6 Press the EXIT button to exit. ➢ ◆ If your PDP Display is displayed vertically, the fan automatically works. ◆ The message Check Fan is displayed if there is a fan problem. ◆ Please use the fan when the temperature is over 35 degrees. English - 36 - Samsung PPM42M8HB | User Manual (ENGLISH) - Page 37
. Result: The main menu is displayed. 2 Press the ... or † button to select Picture. Result: The Picture menu is displayed. 3 Press the ENTER ( button to exit. Easy functions of the remote control. Buttons PIP SOURCE Feature Used to activate or deactivate the PIP function directly. Used to assign - Samsung PPM42M8HB | User Manual (ENGLISH) - Page 38
◆ You can also set these options simply by pressing the SOURCE button on the remote control. 6 Repeat steps 1 to 3. Result: The Input menu is displayed again. 7 Press the ... or † button to select Edit Name. Press the ENTER ( ) button. 8 Press the ... or † button to select external source to be - Samsung PPM42M8HB | User Manual (ENGLISH) - Page 39
the AV OUT only when the signal source is AV. ☛ Whenever you connect an audio or video system to your PDP Display, ensure that all elements are switched off. Refer to the documentation supplied with your equipment for detailed connection instructions and associated safety precautions. English - 39 - Samsung PPM42M8HB | User Manual (ENGLISH) - Page 40
The S-VIDEO and RCA (AUDIO-L/R) connectors are used for equipment with an S-Video output, such as a camcorder or VCR. Rear of the PDP Display Camcorder ① and VCR ① To play picture and sound, both the S-VIDEO and RCA connectors must be used. Connecting to the Component Input Rear of the PDP - Samsung PPM42M8HB | User Manual (ENGLISH) - Page 41
Connecting to the DVD/DTV Receiver Input Rear of the PDP Display Y / PB / PR L / R The "COMPONENT IN" (or "Y/PB/PR" (video) and "AUDIO") connectors are used for equipment with a DVD/ DTV Receiver output. (480i, 576i, 480p, 576p, 720p, 1080i) DVD Digital Set-Top Box Connecting to the DVI Input - Samsung PPM42M8HB | User Manual (ENGLISH) - Page 42
Input The "PC 1" (or "PC IN2 (BNC)") and "AUDIO" connectors are used for interfacing with your PC. Rear of the PDP Display Personal Computer or Only when watching PDP Display in PC1 mode, you can use the RGB OUT port to connect the current screen to another PDP in the same mode - Samsung PPM42M8HB | User Manual (ENGLISH) - Page 43
(If not, contact your computer manufacturer or Samsung Dealer.) 1 Right click the mouse on the Windows Desktop, then click on Properties. The Display Properties will be displayed. 2 Click on Settings tab, then set the Display Mode with reference to the Display Modes Table. You do not need to change - Samsung PPM42M8HB | User Manual (ENGLISH) - Page 44
. ◆ A " " mark means that this mode is recommended. The picture may be blurred when the resolution is not a recommended resolution. ◆ In DVI mode, this product does not support DDC in DTV format (1080i/720p/480p); some of DVD/STBs supporting DTV format may display the poor picture. English - 44 - Samsung PPM42M8HB | User Manual (ENGLISH) - Page 45
Saver. This power management system saves energy by switching your PDP Display into a low-power mode when it has not been used for a certain amount of time. You use a software utility installed on your computer to set up this feature. See the table below for details. State Horizontal Sync Vertical - Samsung PPM42M8HB | User Manual (ENGLISH) - Page 46
Troubleshooting: Before Contacting Service Personnel Before contacting Samsung after-sales service, perform the following simple checks. If you cannot solve the problem using the instructions below, note the model and serial number of the PDP Display and contact your local dealer. No sound or - Samsung PPM42M8HB | User Manual (ENGLISH) - Page 47
Technical Specifications Dimensions (W x D x H) Weight (Without stand) Screen aspect ratio Screen size Native pixel resolution (H x V) Color systems Sound Audio output power Video inputs PDP Display outputs Audio inputs Audio outputs External control PPM42M8H - 1027 x 96.5 x 630.5 mm ; 40.43 x 3. - Samsung PPM42M8HB | User Manual (ENGLISH) - Page 48
This page is intentionally left blank. - Samsung PPM42M8HB | User Manual (ENGLISH) - Page 49
Correct Disposal of This Product (Waste Electrical & Electronic Equipment) (Applicable in the European Union and other European countries with separate collection systems) This marking shown on the product or its literature, indicates that it should not be disposed with other household wastes at the
-
 1
1 -
 2
2 -
 3
3 -
 4
4 -
 5
5 -
 6
6 -
 7
7 -
8
-
9
-
10
-
11
-
12
-
13
-
14
-
15
-
16
-
17
-
18
-
19
-
20
-
21
-
22
-
23
-
24
-
25
-
26
-
27
-
28
-
29
-
30
-
31
-
32
-
33
-
34
-
35
-
36
-
37
-
38
-
39
-
40
-
41
-
42
-
43
-
44
-
45
-
46
-
47
-
48
-
49
 |
 |

Professional PDP
Display
(P
LASMA
D
ISPLAY
P
ANEL
)
Owner’s Instructions
Before operating the unit,
please read this manual thoroughly,
and retain it for future reference.
ON-SCREEN MENUS
Picture In Picture (PIP)
VIDEO WALL
MDC
(Multiple Display Control)
Screen Burn Protection
SRS TruSurroundXT
Intended for Commercial Use and Operation
Register your product at www.samsung.com/global/register
Record your Model and Serial number here for future reference.
■
Model ________________
■
Serial No. ________________
PPM42M8H
PPM50M8H