Samsung RF28R6241SR/AA User Manual - Page 41
Autofill Pitcher, Fridge, Door Alarm, If the Lock Indicator
 |
View all Samsung RF28R6241SR/AA manuals
Add to My Manuals
Save this manual to your list of manuals |
Page 41 highlights
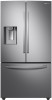
Autofill Pitcher If the Lock indicator ( ) is off, press and hold Fridge for 3 seconds to turn Autofill Pitcher on. Then, open the left door of the fridge and insert the water tank. Close the door and the water tank starts to fill with water up to the preset level. If the Lock Indicator ( ) is on, indicating Control Lock is active, press and hold Door Alarm for 3 seconds to deactivate Control Lock. When the Lock indicator goes out, immediately press and hold Fridge for 3 seconds to turn Autofill Pitcher on. Then, open the left door of the fridge and insert the water tank. Close the door and the water tank starts to fill with water up to the preset level. NOTE When you turn off Control Lock, you must press and hold Fridge within one minute or the Control Lock function will automatically reactivate. You cannot turn the Autofill Pitcher function on if Control Lock is active. For more information on Control Lock, see page 46. To turn the function off, press and hold Fridge again for 3 seconds. NOTE • By default, Autofill Pitcher is disabled. Enable this function after you have installed the water line. • If you open the door or push the dispenser lever, this function is stopped temporarily. • The Autofill Pitcher indicators blink if there is a leak. This may occur because the water pitcher overflows, or the water-line or water-level sensor fails. If this is the case, follow these steps. a. Open the rubber cap and drain water. b. When draining is complete, the indicators stop blinking and turn solid. c. Close the rubber cap. • If the indicators continue to blink, this might be a system failure. Contact a local service center. Operations Untitled-7 41 English 41 2020-04-21 2:17:21
-
 1
1 -
2
-
3
-
4
-
5
-
6
-
7
-
8
-
9
-
10
-
11
-
12
-
13
-
14
-
15
-
16
-
17
-
18
-
19
-
20
-
21
-
22
-
23
-
24
-
25
-
26
-
27
-
28
-
29
-
30
-
31
-
32
-
33
-
34
-
35
-
 36
36 -
 37
37 -
 38
38 -
 39
39 -
 40
40 -
 41
41 -
 42
42 -
 43
43 -
 44
44 -
 45
45 -
 46
46 -
47
-
48
-
49
-
50
-
51
-
52
-
53
-
54
-
55
-
56
-
57
-
58
-
59
-
60
-
61
-
62
-
63
-
64
-
65
-
66
-
67
-
68
-
69
-
70
-
71
-
72
-
73
-
74
-
75
-
76
-
77
-
78
-
79
-
80
-
81
-
82
-
83
-
84
-
85
-
86
-
87
-
88
-
89
-
90
-
91
-
92
-
93
-
94
-
95
-
96
-
97
-
98
-
99
-
100
-
101
-
102
-
103
-
104
-
105
-
106
-
107
-
108
-
109
-
110
-
111
-
112
-
113
-
114
-
115
-
116
-
117
-
118
-
119
-
120
-
121
-
122
-
123
-
124
-
125
-
126
-
127
-
128
-
129
-
130
-
131
-
132
-
133
-
134
-
135
-
136
-
137
-
138
-
139
-
140
-
141
-
142
-
143
-
144
-
145
-
146
-
147
-
148
-
149
-
150
-
151
-
152
-
153
-
154
-
155
-
156
-
157
-
158
-
159
-
160
-
161
-
162
-
163
-
164
-
165
-
166
-
167
-
168
-
169
-
170
-
171
-
172
-
173
-
174
-
175
-
176
-
177
-
178
-
179
-
180
-
181
-
182
-
183
-
184
-
185
-
186
-
187
-
188
-
189
-
190
-
191
-
192
-
193
-
194
-
195
-
196
-
197
-
198
-
199
-
200
-
201
-
202
-
203
-
204
-
205
-
206
-
207
-
208
-
209
-
210
-
211
-
212
-
213
-
214
-
215
-
216
-
217
-
218
-
219
-
220
-
221
-
222
-
223
-
224
-
225
-
226
-
227
-
228
-
229
-
230
-
231
-
232
-
233
-
234
-
235
-
236
-
237
-
238
-
239
-
240
-
241
-
242
-
243
-
244
-
245
-
246
-
247
-
248
-
249
-
250
-
251
-
252
-
253
-
254
-
255
-
256
-
257
-
258
-
259
-
260
-
261
-
262
-
263
-
264
-
265
-
266
-
267
-
268
-
269
-
270
-
271
-
272
-
273
-
274
-
275
-
276
-
277
-
278
-
279
-
280
 |
 |
