Samsung SCD5000 User Manual (ENGLISH)
Samsung SCD5000 - DuoCam MiniDV Camcorder/4MP Digital Still Camera Manual
 |
UPC - 036725301085
View all Samsung SCD5000 manuals
Add to My Manuals
Save this manual to your list of manuals |
Samsung SCD5000 manual content summary:
- Samsung SCD5000 | User Manual (ENGLISH) - Page 1
ENGLISH THIS CAMCORDER IS MANUFACTURED BY: ELECTRONICS SERVICE DIVISION 400 Valley Road, Suite 201, Mt. Arlington N.J. 07856 Tel: 1-800-SAMSUNG (1-800-726-7864) *Samsung Electronics' Internet Home Page http://www.samsungusa.com AD68-00655B(01) - Samsung SCD5000 | User Manual (ENGLISH) - Page 2
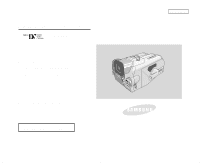
Digital Video Camcorder SCD5000 AF CCD LCD Auto Focus Charge Coupled Device Liquid Crystal Display Owner's Instruction Manual Before operating the unit, please read this instruction manual thoroughly, and retain it for future reference. US PATENT 4415844 ENGLISH ELECTRONICS - Samsung SCD5000 | User Manual (ENGLISH) - Page 3
and Safety Instructions Safety Instructions CAUTION RISK OF ELECTRIC SHOCK DO NOT OPEN CAUTION: TO REDUCE THE RISK OF ELECTRIC SHOCK, DO NOT REMOVE COVER(OR BACK). NO USER SERVICEABLE PARTS INSIDE, REFER SERVICING TO QUALIFIED SERVICE PERSONNEL. To prevent electric shock, match wide blade of - Samsung SCD5000 | User Manual (ENGLISH) - Page 4
power company. A CAMCORDER is intended to be operated from battery power, or other sources, refer to the operating instructions. 11. GROUNDING OR POLARIZATION: This CAMCORDER may be equipped with either a polarized 2-wire AC plug. 12. POWER-CORD PROTECTION: Power-supply cords should be routed so - Samsung SCD5000 | User Manual (ENGLISH) - Page 5
the power-supply cord or plug is damaged. b. If any liquid has been spilled onto, or objects have fallen into the CAMCORDER. c. If the CAMCORDER has been exposed to rain or water. d. If the CAMCORDER does not operate normally by following the operating instructions, adjust only those controls that - Samsung SCD5000 | User Manual (ENGLISH) - Page 6
Notices and Safety Instructions 22. To prevent damage which may result in fire or shock hazard, do not expose this appliance to rain or moisture. 23. If this power supply is used at 240V ac, a suitable plug adapter should be use. NOTE TO CATV SYSTEM INSTALLER: This reminder is provided to call the - Samsung SCD5000 | User Manual (ENGLISH) - Page 7
Preparation 24 How to use the Remote Control ...24 Battery Installation for the Remote Control ...24 Self Record using the Remote Control ...24 Adjusting the Hand Strap ...25 Hand strap ...25 Shoulder strap...25 Connecting a Power Source ...26 To use the AC Power adapter and DC Cable ...26 Using - Samsung SCD5000 | User Manual (ENGLISH) - Page 8
Contents ENGLISH Setting to CAMCORDER / CAMERA modes ...30 Setting the Power Switch ...31 Adjusting the LCD ...32 Using the VIEWFINDER ...33 Adjusting the Focus ...33 Adjusting the LCD during PLAY ...34 Controlling Sound from the Speaker ...34 Functions 35 Using MENU ...35 Setting menu items - Samsung SCD5000 | User Manual (ENGLISH) - Page 9
CAMCORDER Mode ...57 Digital Zoom in CAMCORDER Mode ...58 EIS (Electronic Image Stabilizer) ...59 DSE(Digital Special Effects) SELECT in CAMCORDER Mode ...60 Selecting a Digital effect in CAMCORDER ...73 NITE PIX (0 Lux Recording) ...74 POWER NITE PIX ...75 Various Recording Techniques ...76 - Samsung SCD5000 | User Manual (ENGLISH) - Page 10
with a DV Connection Cable ...82 Using the CAMERA 83 MEMORY STICK ...83 Memory Stick Functions ...83 Inserting and Ejecting the Memory Stick ...84 Inserting the Memory Stick ...84 Ejecting the Memory Stick ...84 Structure of the Folders and Files on the Memory Stick...85 MEMORY FILE NUMBER - Samsung SCD5000 | User Manual (ENGLISH) - Page 11
(WHITE BALANCE) - CAMERA Mode ...98 DSE(Digital Special Effects) SELECT in CAMERA Mode ...99 Selecting a Digital effect in CAMERA Mode ...100 SPOT-AE ...101 NIGHT SCENE ...102 Selecting the Image Quality ...103 Select the Image Quality ...103 Number of images on the Memory Stick ...103 Selecting the - Samsung SCD5000 | User Manual (ENGLISH) - Page 12
Video Heads ...120 Using Your Camcorder Abroad ...121 Power Sources ...121 Color System ...121 Troubleshooting 122 Troubleshooting ...122 Self Diagnosis Display ...122 Moisture Condensation ...122 Self Diagnosis Display in M.REC, M.PLAY Mode ...123 Specifications 125 INDEX 126 Warranty 128 - Samsung SCD5000 | User Manual (ENGLISH) - Page 13
Camcorder Care ✤ Please note the following precautions for use: ✤ Please keep your device in a safe place. This device contains a lens or power Samsung service parts to corrode. s For better quality, please use CAMERA mode when taking still images. (CAMERA mode image quality is better than CAMCORDER - Samsung SCD5000 | User Manual (ENGLISH) - Page 14
because it is a Camcorder and Digital Still Camera in one system. Please read this manual thoroughly. ✤ Before using the device, install the accessories in the following order: 1. Install the battery pack. 2 2. Insert the Memory Stick into the slot. 3. Charge the battery pack by connecting the - Samsung SCD5000 | User Manual (ENGLISH) - Page 15
ENGLISH Notes and Safety Instructions Notes Regarding the Rotation of the LCD Screen Please rotate the LCD screen carefully as illustrated. Over rotation may cause damage to the inside of the hinge that connects the LCD screen to the Camcorder. 1. LCD screen closed. 1 2. Standard recording using - Samsung SCD5000 | User Manual (ENGLISH) - Page 16
Notes and Safety Instructions Notices Regarding COPYRIGHT Television programs, video tapes, DVD titles leave the camcorder in a dry, warm room with the cassette compartment opened and the battery removed, for at least two hours. Notes Regarding the CAMCORDER 1. Do not leave the camcorder exposed to - Samsung SCD5000 | User Manual (ENGLISH) - Page 17
ENGLISH Notes and Safety Instructions Notes Regarding the Battery Pack - Make sure that the battery pack is fully charged before starting to record. - To preserve battery power, keep your camcorder turned off when you are not operating it. - If your device is in CAMCORDER mode with a tape installed, - Samsung SCD5000 | User Manual (ENGLISH) - Page 18
Note Regarding the LENS - Do not film with the camera lens pointing directly at the sun. Direct sunlight can damage the CCD(Charge Coupled Device). - Over-rotating of the LENS body block may damage it. ENGLISH Notes Regarding Electronic Viewfinder 1. Do not position the camcorder such that the - Samsung SCD5000 | User Manual (ENGLISH) - Page 19
various images. • Unique Style & Free Style Shooting An integrated digital imaging device that easily converts between a CAMCORDER and a CAMERA by using a revolving Lens Body Block. • High Resolution Image Quality (Digital Still Camera) Employing a 4.13 Mega Pixels CCD, a maximum resolution of 2272 - Samsung SCD5000 | User Manual (ENGLISH) - Page 20
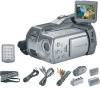
with your digital video camera. ENGLISH Basic Accessories 1. Lithium Ion Battery Pack 2. AC Power Adapter 3. AC Cord 4. AUDIO/VIDEO Cable 5. Instruction Manual 6. Lithium Battery for Remote Control. (TYPE: CR2025) 7. Shoulder Strap 8. USB Cable 9. Software CD 10.Remote Control 11.Memory Stick 12 - Samsung SCD5000 | User Manual (ENGLISH) - Page 21
Know Your Device Front & Left View 1. Internal MIC 2. Memory Stick Slot 3. Remote Sensor 4. Lens 1. Internal MIC 2. Memory Stick Slot 3. Remote Control Sensor 4. Lens 16 8. Nite Pix 7. Slow Shutter 6. Battery release button 5. Battery 5. Battery 6. Battery release button 7. Slow Shutter 8. Nite Pix - Samsung SCD5000 | User Manual (ENGLISH) - Page 22
Getting to Know Your Device Left Side View 14. Flash 13. NIGHT SCENE Button 12. MACRO Button 1. Display 2. MF/AF 3. PB zoom 4. Easy Button 5. External MIC / Earphone 1. Display 2. MF/AF 3. PB Zoom 4. Easy Button 5. External MIC / Earphone 6. Hook for handstrap 7. MENU Button ENGLISH 11. Rotation - Samsung SCD5000 | User Manual (ENGLISH) - Page 23
ENGLISH Getting to Know Your Device Right & Top View 1. PHOTO button 2. Viewfinder 3. START/STOP button 4. Power switch 1. Photo Button 2. Viewfinder 3. Start/Stop Button 5. Zoom Lever 6. Memory Stick Slot 4. Power switch 5. Zoom Lever 6. Memory Stick Slot 18 - Samsung SCD5000 | User Manual (ENGLISH) - Page 24
REW) : (FF) : (PLAY/STILL) : (STOP) REC EASY REC SEARCH - REC SEARCH + FADE BLC 2. Speaker 3. Hook for the shoulder strap MEMORY PLAY MULTI REV FWD SLIDE SHOW SPOT AE 4. DV Jack 5. USB Jack 6. Charging Indicator 7. DC Jack 8. AV/S-Video 9. FLASH 10. Night Scene Button 11. MACRO Button 12. Tripod - Samsung SCD5000 | User Manual (ENGLISH) - Page 25
Getting to Know Your Device Remote Control 1. START / STOP 2. (STILL) 3. PHOTO 4. (REW) / RPS 5. A.DUB START/STOP PHOTO F.ADV TW STILL ZERO MEM. REW/RPS PLAY FF/FPS A.DUB STOP SELF TIMER SLOW 12. TELE (F.ADV -) 11. WIDE (F.ADV +) 10. ZERO MEMORY 9. (PLAY) 8. (FF) / FPS 7. SELF TIMER - Samsung SCD5000 | User Manual (ENGLISH) - Page 26
CAMERA and PLAYER Modes) 1. Battery Level (See page 29) 2. Easy Mode (See pages 46) 3. Slow Shutter (See pages 68) 4. DSE (Digital (See page 72) 28. Volume Control (See page 34) 29. DV IN (DV data transfer mode) (See page 82) 30. DEW (See page 11) ENGLISH OSD in CAMCORDER mode 26 25 24 23 22 1 - Samsung SCD5000 | User Manual (ENGLISH) - Page 27
Getting to Know Your Device OSD (On Screen Display in CAMERA/M.PLAY Modes) 1. Battery Level (See page 27) 2. DSE (Digital Special Effects) Mode (See page 99) 3. SPOT AE Mode (See page 101) 4. Focus Area 5. White Balance Mode (See page 98) 6. Manual Focus (See page 57) 7. NIGHT SCENE (See page 102 - Samsung SCD5000 | User Manual (ENGLISH) - Page 28
ON/OFF Press the DISPLAY button. - Each press of the button toggles the OSD function ON and OFF. - When you turn the OSD OFF, In CAMCORDER / CAMERA mode: The STBY, REC, EASY.Q modes are always displayed on the OSD, even when the OSD is turned OFF. The key input is displayed for - Samsung SCD5000 | User Manual (ENGLISH) - Page 29
not to reverse the polarity of the battery. Self Timer Recording and Photography Using the Remote Control When you use the Self Timer function on the remote control, recording begins automatically in 10 seconds. 1. Set the device to CAMCORDER or CAMERA mode. 2. Press the SELF-TIMER button until - Samsung SCD5000 | User Manual (ENGLISH) - Page 30
before you begin recording. The hand strap enables you to : - Hold the camcorder in a stable, comfortable position. - Press the Zoom START/STOP, and PHOTO cover open and release the Hand Strap. b. Adjust its length and stick it back into the Hand Strap cover. c. Close the Hand Strap cover. ENGLISH - Samsung SCD5000 | User Manual (ENGLISH) - Page 31
that can be connected to your camcorder. - The AC Power Adapter with the AC cord : used for indoor recording. - The Battery Pack : used for outdoor recording. To Use the AC Power Adapter and DC Cable 1. Connect the AC Power adapter to the AC cord. 2. Connect the AC cord to a wall socket. Note The - Samsung SCD5000 | User Manual (ENGLISH) - Page 32
available. Charging the Lithium Ion Battery Pack 1. Attach the battery pack to the device. 2. Connect the AC Power adapter to the AC cord and connect the AC cord to a wall socket. 3. Connect the DC cable to the DC jack socket on the camcorder. 4. Turn the Camera power switch to OFF, and the - Samsung SCD5000 | User Manual (ENGLISH) - Page 33
Pack Table of Continuous Recording Time Based on Model and Battery Type. ✤ If you close the LCD screen, it in the table above are approximations. Actual recording time depends on usage. Time Charging Battery time Continuous recording time LCD ON EVF ON SB-L70G Approx. 1hr 20min Approx. - Samsung SCD5000 | User Manual (ENGLISH) - Page 34
environment. The continuous recording times in the operating instructions are measured using a fully charged battery pack at 77°F(25°C). As the temperature and environmental conditions may differ from this when you actually use the camcorder, the remaining battery time may not be the same as the - Samsung SCD5000 | User Manual (ENGLISH) - Page 35
Setting to CAMCORDER / CAMERA modes ✤ This device switches between the DVC (Digital Video Camcorder) mode and the DSC (Digital Still Camera) mode by revolving the Lens Body Block. ✤ Switching between CAMCORDER/CAMERA Modes s To set your device to CAMERA Mode from CAMCORDER Mode: Rotate the Lens Body - Samsung SCD5000 | User Manual (ENGLISH) - Page 36
modes of the device. s REC mode: Record onto a tape or store images on the Memory Stick. FADE S.SHOW BLC DELETE PLAY TAPE MEMORY OFF REC s OFF: Turn the device off. To recharge the battery, connect the power cable while the Power Switch is set to OFF. s TAPE PLAY (PLAYER) mode: Play and edit the - Samsung SCD5000 | User Manual (ENGLISH) - Page 37
which you are using the camcorder (indoors or outdoors), you can adjust ; s BRIGHT ADJUST s COLOR ADJUST 1. Set the POWER switch to REC mode. s to enter the sub-menu. CAMCORDER REC MODE INITIAL CAMCORDER CAMERA MEMORY VIEWER LCD ADJUST DATE/TIME TV DISPLAY CAMCORDER REC MODE VIEWER SET LCD - Samsung SCD5000 | User Manual (ENGLISH) - Page 38
Preparation 8. Press the MENU DIAL. s Use the MENU DIAL to adjust the value of BRIGHT ADJUST and COLOR ADJUST. s You can set the values for BRIGHT ADJUST between 0 ~ 35 and COLOR ADJUST between 0 ~ 35. 9. Press the MENU button to complete the setting. ENGLISH Using the VIEWFINDER ✤ The VIEWFINDER - Samsung SCD5000 | User Manual (ENGLISH) - Page 39
CAMERA mode. (See page 32) Controlling instructions below to decrease or mute speaker volume in PLAYER mode. - Take the following steps to lower the volume or mute the sound while playing a tape on the camcorder. 1. Set the device to CAMCORDER and set the Power TAPE MEMORY OFF REC REV FWD 0 : 2 3 : - Samsung SCD5000 | User Manual (ENGLISH) - Page 40
the Time Using the Remote Control Record Indicator Play Various Sound Effects Sound Effect for the Photo button Demonstration Selecting the Storage Media for Camcorder mode Selecting the Recording Speed Selecting the Image Stabilizing Function Selecting Digital Zoom in CAMCORDER Mode Selecting the - Samsung SCD5000 | User Manual (ENGLISH) - Page 41
ENGLISH Functions MENU CAMCORDER CAMERA MEMORY VIEWER SUB MENU PLAY SET PHOTO SEARCH PHOTO COPY AUDIO SELECT the Memory Stick Selecting the Audio playback channel Continuous Shot Selecting White Balance in CAMERA Mode Selecting Digital Zoom in CAMERA Mode Setting special effects in CAMERA mode - Samsung SCD5000 | User Manual (ENGLISH) - Page 42
Functions Setting menu items MENU INITIAL CAMCORDER SUB MENU CLOCK SET WL.REMOTE REC.LAMP BEEP SOUND SHUT. SOUND DEMO REC SELECT REC MODE EIS D. ZOOM RECORD SET PROGRAM AE WHT. BALANCE DSE SELECT AUDIO MODE WIND CUT - Samsung SCD5000 | User Manual (ENGLISH) - Page 43
ENGLISH Functions MENU CAMCORDER CAMERA MEMORY VIEWER SUB MENU PLAY SET PHOTO SEARCH PHOTO COPY AUDIO SELECT CONT. SHOT WHT. BALANCE D. ZOOM DSE SELECT M.PLAY SELECT PHOTO SET QUALITY SIZE MPEG4 - Samsung SCD5000 | User Manual (ENGLISH) - Page 44
Functions q Setting the Camcorder to REC, TAPE PLAY, MEMORY PLAY modes 1. Press the MENU button. 2. The MENU OSD is displayed. The cursor ( HIGHLIGHT ) indicates an item. 4. You can exit Menu mode by pressing the MENU button. ENGLISH CAMCORDER REC MODE CAMCORDER SET RECORD SET PLAY SET 39 - Samsung SCD5000 | User Manual (ENGLISH) - Page 45
q Availability of Functions in CAMCORDER Mode. Requested Operating Mode Mode EIS EIS Digital functions D.ZOOM PHOTO (TAPE) O O SLOW SHUTTER D.ZOOM PHOTO O O * ✕ O ✕ SLOW SHUTTER O Digital Special Effects O O O O NITE PIX O O O Digital special effects O O O O ✕ NITE PIX - Samsung SCD5000 | User Manual (ENGLISH) - Page 46
works in CAMCORDER or CAMERA modes. ✤ The DATE/TIME is automatically recorded onto the tape and Memory Stick. Before CAMCORDER REC MODE INITIAL CAMCORDER CAMERA MEMORY VIEWER CLOCK SET WL. REMOTE REC LAMP BEEP SOUND SHUT. SOUND DEMO CAMCORDER REC MODE INITIAL SET CLOCK SET SET TIME! WL.REMOTE - Samsung SCD5000 | User Manual (ENGLISH) - Page 47
try to use it, the remote control icon will blink for 3 seconds and disappear on the LCD. CAMCORDER REC MODE INITIAL CAMCORDER CAMERA MEMORY VIEWER CLOCK SET WL. REMOTE REC LAMP BEEP SOUND SHUT. SOUND DEMO CAMCORDER REC MODE INITIAL SET CLOCK SET WL.REMOTE RECORD LAMP BEEP SOUND SHUTTER SOUND - Samsung SCD5000 | User Manual (ENGLISH) - Page 48
mode is switched OFF. 1. Set the device to CAMCORDER and set the power switch to REC mode. 2. Press the MENU button. CAMCORDER REC MODE INITIAL CAMCORDER CAMERA MEMORY VIEWER CLOCK SET WL. REMOTE REC LAMP BEEP SOUND SHUT. SOUND DEMO CAMCORDER REC MODE INITIAL SET CLOCK SET WL.REMOTE - Samsung SCD5000 | User Manual (ENGLISH) - Page 49
before setting the DATE/TIME in the Camera's memory. - When the lithium battery becomes weak or dead. s Before you can use the DATE/TIME function, you must set the Clock. See CLOCK SET on page 41. 44 CAMCORDER REC MODE INITIAL CAMCORDER CAMERA MEMORY VIEWER LCD ADJUST DATE/TIME TV DISPLAY - Samsung SCD5000 | User Manual (ENGLISH) - Page 50
the left side of the camcorder to turn ON/OFF all of the OSD displayed on the LCD/EVF/TV. 1. Set the Power switch to REC or PLAY modes exit, press the MENU button. CAMCORDER REC MODE INITIAL CAMCORDER CAMERA MEMORY VIEWER LCD ADJUST DATE/TIME TV DISPLAY CAMCORDER REC MODE VIEWER SET LCD ADJUST - Samsung SCD5000 | User Manual (ENGLISH) - Page 51
CAMCORDER and CAMERA modes. 1. Set the Power Switch to REC mode. 2. By pressing the EASY button, all functions on the camera The EASY mode settings are deleted when the battery pack is uninstalled from the camcorder and therefore, they must be reset when a battery pack has been replaced. STBY 0 : - Samsung SCD5000 | User Manual (ENGLISH) - Page 52
that make automatic focusing difficult and/or unreliable. Auto Focusing ✤ In CAMCORDER Mode, turning on the device will set it to automatic focus . In CAMERA Mode, pressing the Photo Button halfway down will set the focus. Manual Focusing ✤ In the following cases you may obtain better results by - Samsung SCD5000 | User Manual (ENGLISH) - Page 53
Functions Zooming In and Out with DIGITAL ZOOM ✤ The Zoom works in CAMCORDER and CAMERA modes. Zooming In and Out ✤ . 3. W(Wide angle) side: Subject appears farther away. 1-1 1-2 TELE WIDE Note You can record a subject that is a minimum of 1 m (about 2.65 feet) away from the lens surface in - Samsung SCD5000 | User Manual (ENGLISH) - Page 54
Using the CAMCORDER - Basic Recording Inserting and Ejecting a Cassette ✤ When inserting a tape or closing the cassette holder, do not apply excessive force. This may cause a malfunction. ✤ Do not use any tapes other than Mini DV cassettes. 1. Connect a power source. Slide the TAPE OPEN/EJECT - Samsung SCD5000 | User Manual (ENGLISH) - Page 55
. ✤ Use M.Play mode to view the motion clips stored on the Memory Stick. 1. Set the device to CAMCORDER and set the power switch to REC mode. 2. Press the MENU button. s The menu list will appear. 3. Turn the MENU DIAL highlight to CAMCORDER and press the MENU DIAL. s The sub-menu list will appear - Samsung SCD5000 | User Manual (ENGLISH) - Page 56
Basic Recording Making Your First Recording 1. Connect a Power source to the camcorder. (See page 26) 1 (A battery pack or the AC power adapter) s Insert a cassette. (See page 49) 2. Set the device to CAMCORDER and set the power switch to REC mode. s Open the LCD monitor. s If the protection - Samsung SCD5000 | User Manual (ENGLISH) - Page 57
camcorder is left in the STBY mode for more than 5 minutes without being used, it will automatically turn off. To use it again, push the START/STOP button or set the Power switch to OFF and then back to CAMERA. This Auto Power Off feature is designed to save battery power , your camcorder will play - Samsung SCD5000 | User Manual (ENGLISH) - Page 58
Use the LCD frame as a guide to determine the horizontal plane. 6. Whenever possible, use a tripod. Recording with the Viewfinder 1. Hold the camcorder firmly using the hand strap. 2. Place your right elbow against your side. 3. Place your left hand under the camcorder to support it. Be sure not to - Samsung SCD5000 | User Manual (ENGLISH) - Page 59
monitor. ✤ Make sure that the battery pack is in place. 1. Set the device to CAMCORDER and the Power Switch to PLAY mode. 2. Insert the tape you wish to view. (See page 49) 1 FADE S.SHOW BLC PLAY TAPE MEMORY OFF REC REV FWD 2 3. Open the LCD screen. Adjust the angle of the LCD screen and set - Samsung SCD5000 | User Manual (ENGLISH) - Page 60
- Advanced Recording ENGLISH q PROGRAM AE ✤ The PROGRAM AE function works in CAMCORDER mode only. ✤ PROGRAM AE mode allows you to adjust shutter speeds and apertures to suit different recording conditions. ✤ It gives you creative control over the depth of field. s AUTO Mode - Auto balance between - Samsung SCD5000 | User Manual (ENGLISH) - Page 61
Setting PROGRAM AE 1. Press the MENU button. s The menu list will appear. 2. Turn the MENU DIAL to highlight CAMCORDER and press the MENU DIAL. CAMCORDER REC MODE INITIAL CAMCORDER CAMERA MEMORY VIEWER RECORD SET PLAY SET 3. Select PROGRAM AE from the sub-menu. 4. Press the MENU DIAL to enter - Samsung SCD5000 | User Manual (ENGLISH) - Page 62
in EASY mode. s Turn the Digital Zoom off (if necessary) to set CAMCORDER REC MODE INITIAL CAMCORDER CAMERA MEMORY VIEWER RECORD SET PLAY SET CAMCORDER REC MODE CACMCAOMRDCEOR RSEDTER REC MOD RECORD SET PLIANY ISTEITAL CAMCORDER CAMERA MEMORY VIEWER RECOR PLAY CAMCORDER REC MODE CAMCORDER - Samsung SCD5000 | User Manual (ENGLISH) - Page 63
the subject. ✤ We recommend that you use the EIS feature with DIGITAL ZOOM for picture stability. (See page 59) CAMCORDER REC MODE INITIAL CAMCORDER CAMERA MEMORY VIEWER RECORD SET PLAY SET 1. Set the power switch to CAMCODER or CAMERA mode. 2. Press the MENU button. s The menu list will appear - Samsung SCD5000 | User Manual (ENGLISH) - Page 64
and walking at the same time s Recording through the window of a vehicle 1. Set the device to CAMCORDER and set the power switch to REC mode. CAMCORDER REC MODE INITIAL CAMCORDER CAMERA MEMORY VIEWER RECORD SET PLAY SET 2. Press the MENU button. s The menu list will appear. 3. Turn the - Samsung SCD5000 | User Manual (ENGLISH) - Page 65
Using the CAMCORDER - Advanced Recording q DSE(Digital Special Effects) SELECT in CAMCORDER Mode ✤ The DSE function works in CAMCORDER mode only. ✤ The digital effects enable you to give a creative look to your recording by adding various special effects. ✤ Select the appropriate digital effect for - Samsung SCD5000 | User Manual (ENGLISH) - Page 66
not work. s The DSE function will not operate in EASY mode. ENGLISH CAMCORDER REC MODE INITIAL CAMCORDER CAMERA MEMORY VIEWER RECORD SET PLAY SET CAMCORDER REC MODE CAMCORDER SET RECORD SET PLAY SET CAMCORDER REC MODE CAMCORDER SET RECORD SET DSE SELECT AUDIO MODE WIND CUT AV IN/OUT 12bit OUT - Samsung SCD5000 | User Manual (ENGLISH) - Page 67
✤ The REC MODE function works in both CAMCORDER and PLAY(DV IN) modes. ✤ This camcorder records and plays back in SP (standard play tape. 1. Set the device to CAMCORDER and set the power switch to REC mode. CAMCORDER REC MODE INITIAL CAMCORDER CAMERA MEMORY VIEWER RECORD SET PLAY SET 2. Press - Samsung SCD5000 | User Manual (ENGLISH) - Page 68
when using this mode. 1. Set the device to CAMCORDER and set the power switch to REC mode. 2. Press the MENU button. s The menu CAMCORDER REC MODE INITIAL CAMCORDER CAMERA MEMORY VIEWER RECORD SET PLAY SET CAMCORDER REC MODE CAMCORDER SET RECORD SET PLAY SET CAMCORDER REC MODE CAMCORDER - Samsung SCD5000 | User Manual (ENGLISH) - Page 69
the sound of the wind. 1. Set the device to CAMCORDER and set the power switch to REC mode. 2. Press the MENU button. s The menu CAMCORDER REC MODE INITIAL CAMCORDER CAMERA MEMORY VIEWER RECORD SET PLAY SET CAMCORDER REC MODE CAMCORDER SET RECORD SET PLAY SET CAMCORDER REC MODE CAMCORDER - Samsung SCD5000 | User Manual (ENGLISH) - Page 70
available only in CAMCORDER mode. ✤ Quick Menu is used to adjust camera functions by REMOTE and press the MENU DIAL, the WL.REMOTE is switched to either enabled ( ) or disabled ( ) . s EIS( ) - Each time you select EIS and press the MENU DIAL, the EIS icon is displayed or set to OFF. s DSE(Digital - Samsung SCD5000 | User Manual (ENGLISH) - Page 71
pressing the MENU DIAL. Setting the Quick Menu 1. Set the device to CAMCORDER and set the power switch to REC mode. 2. Turn the MENU DIAL to select a function BLC PLAY TAPE MEMORY OFF REC REV FWD Notes s The Quick Menu function will not operate in EASY mode. s If you are using the Manual FOCUS( ) - Samsung SCD5000 | User Manual (ENGLISH) - Page 72
values can only be set in the Quick Menu. ✤ SHUTTER SPEED and EXPOSURE are automatically switched and/or deactivated. ENGLISH 1. Set the device to CAMCORDER and set the power switch to REC mode. 2. Turn the MENU DIAL until you see icon( ) on, and then press the MENU DIAL. s You see a screen on - Samsung SCD5000 | User Manual (ENGLISH) - Page 73
Recording SLOW SHUTTER (Low Shutter Speed) ✤ The SLOW SHUTTER function works in CAMCORDER mode only. ✤ The shutter speed can be controlled, allowing you to record slow moving objects. 1. Set the device to CAMCORDER and set the power switch to REC mode. 2. Press the SLOW SHUTTER button. 3. Each time - Samsung SCD5000 | User Manual (ENGLISH) - Page 74
to CAMCORDER. 2. Set the power switch to REC mode. 3. Press the BLC(STOP) button. s Normal - BLC - Normal s BLC enhances the subject. Notes s While setting NITE PIX to ON, the BLC function does not work. s The BLC function will not operate in EASY mode. FADE S.SHOW BLC PLAY TAPE MEMORY - Samsung SCD5000 | User Manual (ENGLISH) - Page 75
Out ✤ The FADE function works in CAMCORDER and CAMERA modes. ✤ You can give your recordings a professional look by using special effects such as fading in at the beginning of a sequence or fading out at the end of a sequence. FADE S.SHOW BLC PLAY TAPE MEMORY OFF REC To Start Recording 1. Before - Samsung SCD5000 | User Manual (ENGLISH) - Page 76
CAMCORDER. s If you want to use an external microphone, connect the microphone to the external MIC input jack on the camcorder. 2. Set the power the Remote Control. s A.DUB will be displayed on the LCD. s The camcorder is in a ready-to-dub state for dubbing. FADE S.SHOW BLC PLAY TAPE MEMORY OFF - Samsung SCD5000 | User Manual (ENGLISH) - Page 77
3. Press the MENU DIAL to enter the sub-menu. 4. Select PLAY SET and press the MENU DIAL. TAPE PLAY MODE INITIAL CAMCORDER CAMERA MEMORY VIEWER RECORD SET PLAY SET TAPE PLAY MODE CAMCORDER SET RECORD SET PLAY SET 5. Use the MENU DIAL to select AUDIO SELECT from the sub-menu. 6. Press the MENU - Samsung SCD5000 | User Manual (ENGLISH) - Page 78
displays the still image. 6. To exit, press the (STOP) button. ENGLISH TAPE PLAY MODE INITIAL CAMCORDER CAMERA MEMORY VIEWER RECORD SET PLAY SET TAPE PLAY MODE CAMCORDER SET RECORD SET PLAY SET TAPE PLAY MODE CAMCORDER SET PLAY SET PB DSE SELECT PHOTO SEARCH PHOTO COPY AUDIO SELECT SOUND1 73 - Samsung SCD5000 | User Manual (ENGLISH) - Page 79
mode only. ✤ The NITE PIX function enables you to record a subject in darkness. 1. Set the device to CAMCORDER and set the Power Switch to REC mode. 2. Slide the NITE PIX switch to ON. s (NITE PIX indicator) appears on the LCD monitor. s The infrared(invisible rays) light is - Samsung SCD5000 | User Manual (ENGLISH) - Page 80
the SLOW SHUTTER button when the NITE PIX switch is turned on. ✤ When you work in POWER NITE PIX mode, the POWER NITE PIX icon appears on the LCD continuously. 1. Set the device to CAMCORDER and set the power switch to REC mode. 2. Turn on the NITE PIX switch, and then press the SLOW - Samsung SCD5000 | User Manual (ENGLISH) - Page 81
screen carefully as excessive rotation may cause damage to the inside of the hinge that connects the LCD screen to the Camcorder. 1. General Recording. 2. Downward recording. Recording while viewing the LCD screen from above. 1 2 3. Upward Recording. Recording while viewing the LCD screen from - Samsung SCD5000 | User Manual (ENGLISH) - Page 82
the AC Power Adapter as the power source for the camcorder. Connecting to a TV which has Audio/Video Input Jacks 1. Connect the camcorder to or VCR User's Manual. 5. Play the tape. Video inputYellow TV Audio input (left)-White Audio input (right)-Red S-VIDEO input Camcorder Multi A/V cable - Samsung SCD5000 | User Manual (ENGLISH) - Page 83
for your VCR on the TV set. 6. Play the tape. Playback FADE S.SHOW PLAY TAPE MEMORY ✤ You can play the recorded tape in PLAY mode. OFF BLC 1. Connect a power source and set the device to CAMCORDER. REC 2. Set the power switch to PLAY mode. 3. Using the (FF) and (REW) buttons, find the first - Samsung SCD5000 | User Manual (ENGLISH) - Page 84
camcorder and the Remote Control. ✤ The F.ADV(Frame advance), SLOW buttons are located on the Remote Control only. ✤ To prevent tape and head-drum wear, your camcorder remote control during Playback. s To resume normal playback, press the (PLAY/STILL) button. FADE S.SHOW BLC PLAY TAPE MEMORY OFF - Samsung SCD5000 | User Manual (ENGLISH) - Page 85
. 1. Press the ZERO MEMORY button on the remote control during playback or while recording MEMORY mode may be canceled automatically: - At the end of the section marked with the ZERO MEMORY function. - When the tape is ejected. - When you remove the battery pack or power supply. s The Zero Memory - Samsung SCD5000 | User Manual (ENGLISH) - Page 86
capacity of the PC. Notes s When you transmit data from the camcorder to another DV device, some functions may not work. If this occurs, please reconnect the DV cable or turn the power OFF and ON again. s When you transmit data from the camcorder to the PC, the PC function button is not available in - Samsung SCD5000 | User Manual (ENGLISH) - Page 87
1. Set the device to CAMCORDER and the power switch to TAPE PLAY mode. 2. Connect the DV cable (not supplied) from the DV IN/OUT port of the camcorder to the DV IN/OUT port of the other DV device. s Make sure that DV IN appears on the screen. FADE PLAY TAPE MEMORY S.SHOW BLC DELETE REC - Samsung SCD5000 | User Manual (ENGLISH) - Page 88
Stick" and are trademarks of Sony Corporation. TM s All other product names mentioned herein are the trademarks or registered trademarks of their respective companies. Furthermore, "TM" and "®" will not be mentioned in each case in this manual. s Memory Sticks of 8MB ~ 128MB are supported - Samsung SCD5000 | User Manual (ENGLISH) - Page 89
ENGLISH Using the CAMERA Inserting and Ejecting the Memory Stick q Inserting the Memory Stick 1. Turn the Power switch to OFF. 2. Insert the Memory Stick into the CARD slot in the direction of the arrow. q Ejecting the Memory Stick 1. Turn the Power switch to OFF. 2. Push the Memory Stick, and it - Samsung SCD5000 | User Manual (ENGLISH) - Page 90
Using the CAMERA Structure of the Folders and Files on the Memory Stick ✤ The still images that you recorded are saved in JPEG file format on the card. ✤ Each file has a file number and all files are assigned - Samsung SCD5000 | User Manual (ENGLISH) - Page 91
will begin after the largest number that is memorized whether in the camera or the the Memory Stick. s File numbering starts from 0001 again when 9999 files have been saved. CAMERA REC MODE INITIAL CAMCORDER CAMERA MEMORY VIEWER M. PLAY SELECT PHOTO SET MPEG4 SIZE PRINT MARK PROTECT FILE NO - Samsung SCD5000 | User Manual (ENGLISH) - Page 92
-Taking Taking Your First Picture 1. Connect a power source to the CAMERA (See page 26) (A battery pack or an AC power adapter) 2. Set the device to CAMERA mode and the power switch to the REC mode. s Open the LCD monitor. s Ensure that the Memory Stick has been properly inserted into the device - Samsung SCD5000 | User Manual (ENGLISH) - Page 93
automatically and in consecutive order. To View a Single image 1. Set the device to CAMERA. 2. Set the power switch to MEMORY PLAY mode. s The last recorded image appears. - If there are no recorded images on the Memory Stick, "NO STORED PHOTO!" will appear on the screen. 3. Using the (FWD) and - Samsung SCD5000 | User Manual (ENGLISH) - Page 94
Basic Picture-Taking To View a Slide Show 1. Set the device to CAMERA 2. Set the power switch to MEMORY PLAY mode. s The last recorded image appears. - If there are no recorded images on the Memory Stick, "NO STORED PHOTO!" will appear on the screen. 3. Press the (S.SHOW) button. s All images will - Samsung SCD5000 | User Manual (ENGLISH) - Page 95
Quick Review ✤ Quick Review is used to view the last recorded image. 1. Record a picture using Photo Button. 2. Press the REV( ) Button to view the picture taken. 3. To return to CAMERA mode, press the REV( ) Button again or press the Photo Button halfway down. FADE S.SHOW BLC PLAY TAPE MEMORY OFF - Samsung SCD5000 | User Manual (ENGLISH) - Page 96
get a good image, please verify the focus is set properly before pressing the Photo Button firmly. ✤ While the camera is focusing (by pressing the Photo Button halfway down), a flashing icon( ) will appear on the OSD (On occur. s If the image still seems blurry, use the MF(Manual Focus) feature. 91 - Samsung SCD5000 | User Manual (ENGLISH) - Page 97
ENGLISH Advanced Techniques FOCUS LOCK ✤ Focus will be set to the AF frame of LCD screen. If the subject leaves the AF frame, the acquired image may blur. ✤ When objects are spread throughout the frame, use FOCUS LOCK to get even focusing. 1. First, adjust your frame so that the subject is within - Samsung SCD5000 | User Manual (ENGLISH) - Page 98
6X. s If you do not want to use the Digital Zoom function, set the D. ZOOM menu to OFF. 5. To exit, press the MENU button. CAMERA REC MODE INITIAL CAMCORDER CAMERA MEMORY VIEWER CONT. SHOT WHT. BALANCE D. ZOOM DSE SELECT CAMERA REC MODE CAMERA SET CONTINUOUS SHOT WHT. BALANCE D. ZOOM 6X DSE - Samsung SCD5000 | User Manual (ENGLISH) - Page 99
ENGLISH Advanced Techniques MACRO Mode ✤ The MACRO function works in CAMERA mode only. ✤ Use MACRO Mode for recording images at close range (under 31.5 inches). ✤ Effective focal distance in MACRO Mode is 11.8 inches ~ 31.5 inches. - Samsung SCD5000 | User Manual (ENGLISH) - Page 100
pictures can be recorded when using CONTINUOUS SHOT. 1. Set the device to CAMERA and set the power switch to REC mode. 2. Press the MENU button. s The menu list will appear. CAMERA REC MODE INITIAL CAMCORDER CAMERA MEMORY VIEWER CONT. SHOT WHT. BALANCE D. ZOOM DSE SELECT 3. Turn the MENU DIAL - Samsung SCD5000 | User Manual (ENGLISH) - Page 101
the CAMERA side of the Lens Body Block to the forward position, the FLASH will automatically open according to the lighting conditions. s To close the FLASH, push the FLASH cover until it clicks. s The Flash does not function in CONTINUOUS SHOT mode or CAMCORDER Mode. s The battery power will - Samsung SCD5000 | User Manual (ENGLISH) - Page 102
Advanced Techniques ENGLISH FLASH SELECT ✤ The FLASH SELECT function works in CAMERA mode only. s Auto : The Flash automatically strobes when the , museums, and theaters. 1. Set the device to CAMERA and the power switch to REC mode. 2. Press the PB ZOOM/ button to select flash function. 97 - Samsung SCD5000 | User Manual (ENGLISH) - Page 103
BALANCE according to indoor ambience. s OUTDOOR : This controls the WHITE BALANCE according to outdoor ambience. INITIAL CAMCORDER CAMERA MEMORY VIEWER CONT. SHOT WHT. BALANCE D. ZOOM 6X DSE SELECT 1. Set the device to CAMERA and set the power switch to REC mode. 2. Press the MENU button - Samsung SCD5000 | User Manual (ENGLISH) - Page 104
Effects function will apply special effects to the image while recording. ✤ There are 3 DSE (Digital Special Effects) in CAMERA Mode. You can check the DSE applied image on the LCD screen or the viewfinder. a. BLK & WHT Mode a This mode changes the images to black - Samsung SCD5000 | User Manual (ENGLISH) - Page 105
selected. 6. To exit, press the MENU button. Note s The DSE function will not operate in EASY mode. CAMERA REC MODE INITIAL CAMCORDER CAMERA MEMORY VIEWER CONT. SHOT WHT. BALANCE D. ZOOM 6X DSE SELECT CAMERA REC MODE CAMERA SET CONTINUOUS SHOT WHT. BALANCE D. ZOOM 6X DSE SELECT 100 - Samsung SCD5000 | User Manual (ENGLISH) - Page 106
contrast between the subject and background, for example on seashores or ski slopes. 1. Set the device to CAMERA and the power switch to REC mode. 2. Press the SPOT AE(STOP) button. s The Icon( ) is displayed on Button again or turn it off . FADE S.SHOW BLC PLAY TAPE MEMORY OFF REC REV FWD 101 - Samsung SCD5000 | User Manual (ENGLISH) - Page 107
mode only. ✤ The NIGHT SCENE function enables you to record a subject in darkness. 1. Set the device to CAMERA and set the Power Switch to REC mode 2. Press the NIGHT SCENE button. s The ( ) appears on the LCD monitor. s The infrared(invisible rays) light is automatically turned on. 3. To - Samsung SCD5000 | User Manual (ENGLISH) - Page 108
, press the MENU button. CAMERA REC MODE INITIAL CAMCORDER CAMERA MEMORY VIEWER M. PLAY SELECT PHOTO SET MPEG4 SIZE PRINT MARK PROTECT FILE NO DELETE FORMAT CAMERA REC MODE CAMERA SET PHOTO SET QUALITY SIZE SF L2272X1704 Number of Images on the Memory Stick (L2272) QUALITY SUPER FINE FINE - Samsung SCD5000 | User Manual (ENGLISH) - Page 109
in the Memory Stick will be decreased CAMCORDER CAMERA MEMORY VIEWER M. PLAY SELECT PHOTO SET MPEG4 SIZE PRINT MARK PROTECT FILE NO DELETE FORMAT CAMERA REC MODE MEMORY SET M. PLAY SELECT PHOTO SET MPEG4 SIZE PRINT MARK PROTECT FILE NO DELETE FORMAT PHOTO 320X240 000 SERIES 2. Set the Power - Samsung SCD5000 | User Manual (ENGLISH) - Page 110
DIAL. 9. Using the MENU DIAL, select the image size. s Press the MENU DIAL to confirm the image size. 10. To exit, press the MENU button. Memory Stick and Image Resolutions (SF mode) 8MB L2272 X 1704 7 P2272 X 1504 8 M1600 X 1200 14 S640 X 480 55 16MB 15 17 29 114 32MB 32 38 60 - Samsung SCD5000 | User Manual (ENGLISH) - Page 111
record onto the MEMORY STICK. 1. Check whether the MEMORY STICK has been inserted into the device. If it is not in the device, insert it into the slot. 2. Set the device to CAMCORDER and set the power switch to REC mode. CAMCORDER REC MODE INITIAL CAMCORDER CAMERA MEMORY VIEWER RECORD SET PLAY - Samsung SCD5000 | User Manual (ENGLISH) - Page 112
PB ✤ The MPEG PB function works only in MEMORY PLAY mode. ENGLISH 1. Check whether the MEMORY STICK has been inserted into the device. If it is not in the device, insert it into the slot. 2. Set the device to CAMCORDER and set the Power Switch to MEMORY PLAY mode. 3. Press the MENU button. s The - Samsung SCD5000 | User Manual (ENGLISH) - Page 113
MEMORY STICK has been inserted into the device. If it is not in the device, insert it into the slot. 2. Set the device to CAMCORDER and set the Power REC SELECT TAPE and press the MENU DIAL. CAMCORDER REC MODE INITIAL CAMCORDER CAMERA MEMORY VIEWER M. PLAY SELECT PHOTO SET MPEG4 SIZE PRINT - Samsung SCD5000 | User Manual (ENGLISH) - Page 114
copying. s Copying stops when the cassette is finished or when the Memory Stick is full. TAPE PLAY MODE INITIAL CAMCORDER CAMERA MEMORY VIEWER RECORD SET PLAY SET TAPE PLAY MODE CAMCORDER SET RECORD SET PLAY SET TAPE PLAY MODE CAMCORDER SET PLAY SET PB DSE SELECT PHOTO SEARCH PHOTO COPY AUDIO - Samsung SCD5000 | User Manual (ENGLISH) - Page 115
ENGLISH Advanced Techniques Marking Images for Printing ✤ This camcorder supports the DPOF (Digital Print Order Format) print format. ✤ You can automatically print images recorded on a Memory Stick with a printer supporting DPOF. ✤ There are 2 ways to make a PRINT MARK. s THIS FILE : You can set a - Samsung SCD5000 | User Manual (ENGLISH) - Page 116
protected images will be erased. 1. Set the device to CAMCORDER and set the Power Switch to MEMORY PLAY mode. 2. Using the (FWD) and (REV) MEMORY PLAY MODE INITIAL CAMCORDER CAMERA MEMORY VIEWER M. PLAY SELECT PHOTO SET MPEG4 SIZE PRINT MARK PROTECT FILE NO DELETE FORMAT MEMORY PLAY MODE MEMORY - Samsung SCD5000 | User Manual (ENGLISH) - Page 117
selected file. s ALL FILES : deletes all files stored in the Memory Stick. MEMORY PLAY MODE INITIAL CAMCORDER CAMERA MEMORY VIEWER M. PLAY SELECT PHOTO SET MPEG4 SIZE PRINT MARK PROTECT FILE NO DELETE FORMAT MEMORY PLAY MODE MEMORY SET M. PLAY SELECT PHOTO SET MPEG4 SIZE PRINT MARK PROTECT FILE - Samsung SCD5000 | User Manual (ENGLISH) - Page 118
Advanced Techniques 8. A box will appear to verify whether you wish to delete the image(s). s Using the MENU DIAL, select the item. s EXECUTE : Deletes the selected image(s). s CANCEL : Does not delete the selected image(s) and returns to the previous menu. 9. Select EXECUTE or CANCEL and press the - Samsung SCD5000 | User Manual (ENGLISH) - Page 119
Memory Stick to its initial state. ✤ The Memory Stick supplied with this camcorder has already been formatted. Attention ✤ If you execute the MEMORY FORMAT function, all images will be erased completely and cannot be recovered. 1. Set the device to CAMCORDER and set the Power Switch to the MEMORY - Samsung SCD5000 | User Manual (ENGLISH) - Page 120
Still Image. ✤ You can record a still image from a cassette onto a Memory Stick. ✤ If you want to recorded multiple still images from a cassette to a Memory Stick, use the COPY function. ENGLISH 1. Set the device to CAMCORDER and the Power Switch to REC mode. 2. Press the MENU DIAL. 3. Turn the - Samsung SCD5000 | User Manual (ENGLISH) - Page 121
a still image from a MEMORY STICK to a PC without additional add-on cards via a USB connection. ✤ You can transfer an image to a PC via a USB connection. ✤ If you transfer data to a PC, you need to install the software (Driver, Editing software) supplied with the camcorder. System Requirements s CPU - Samsung SCD5000 | User Manual (ENGLISH) - Page 122
USB removable Disk Driver (Windows® 98SE only) USB PC CAMERA Driver s Editing Software Using the "removable Disk" function ✤ You can easily transfer data from a memory stick to a PC without additional add-on cards via a USB connection. 1. Set the device to CAMERA and set the power switch to REC - Samsung SCD5000 | User Manual (ENGLISH) - Page 123
of the USB cable into the proper terminal on the camcorder. (USB jack) Disconnecting the USB cable ✤ After If you disconnect the USB cable from the PC or the camcorder while transferring, the data transmission will stop and the data the camcorder may not work properly. - If this occurs, - Samsung SCD5000 | User Manual (ENGLISH) - Page 124
✤ At the end of a recording you should remove the power source. ✤ When recording with a Lithium Ion Battery Pack, leaving the pack on the camcorder can reduce the life span of the battery. Therefore, it should be removed from the camcorder. 1. Slide the TAPE OPEN/EJECT switch in the direction of - Samsung SCD5000 | User Manual (ENGLISH) - Page 125
-shaped noise or distortion or a blue screen appears. 1. Set the device to CAMCORDER. 2. Insert the Cleaning Tape. 3. Press the (PLAY/STILL) button. 4. improved, repeat the operation. If the problem continues, contact your local authorized service center. s Clean the video heads with a dry- - Samsung SCD5000 | User Manual (ENGLISH) - Page 126
Each country or region has its own electric and color systems. ✤ Before using your camcorder abroad, check the following items. ENGLISH Power Sources s You can use your camcorder in any country or area with the supplied AC Power Adapter within 100V to 240V, 50/60 Hz. s Use a commercially available - Samsung SCD5000 | User Manual (ENGLISH) - Page 127
ENGLISH Troubleshooting Troubleshooting ✤ Before contacting a Samsung authorized service center, perform the following simple checks. They may save you the time and expense of an unnecessary call. Self Diagnosis Display Display Blinking Informs that... Action slow the battery pack is almost - Samsung SCD5000 | User Manual (ENGLISH) - Page 128
Troubleshooting Self Diagnosis Display in M.REC/M.PLAY Mode Display Blinking Informs that... MEMORY STICK! slow There no Memory stick in the camcorder. MEMORY FULL! slow There is not enough memory to record. NO STORED PHOTO! slow There are no images recorded on the Memory Stick. WRITE - Samsung SCD5000 | User Manual (ENGLISH) - Page 129
Troubleshooting ✤ If these instructions do not solve your problem, contact your nearest Samsung authorized service center. Symptom Explanation/Solution You cannot switch the camcorder on. Check the battery pack or the AC Power Adapter. START/STOP button Check the POWER switch is set to CAMERA - Samsung SCD5000 | User Manual (ENGLISH) - Page 130
): Mini DV cassette SP: approx. 18.81mm/s LP: approx. 12.56mm/s SP: 60 minutes (when using DVM 60), LP: 90 minutes (when using DVM 60) Approx. 180 sec. (using DVM60 tape) CCD (Charge Coupled Device), 413M CCD (DIGITAL CAMERA) F1.4 10x(Optical), 800x(Digital) Electronic zoom lens (CAMCORDER CAMERA - Samsung SCD5000 | User Manual (ENGLISH) - Page 131
size 104 - LLCD ...32 Lithium battery 13 - M MACRO ...94 MEMORY STICK 83 MENU ...35 MF/AF ...47 MPEG PB 107 MPEG REC 106 MPEG SIZE 108 - N NITE PIX ...74 NIGHT SCENE 102 - O OSD ...21 - PPHOTO ...73 Playback ...77 POWER NITE PIX 75 Power Source 26 Power Switch 31 PRINT MARK 110 PROGRAM - Samsung SCD5000 | User Manual (ENGLISH) - Page 132
INDEX ENGLISH - Q Quick Menu 65 Quick Review 90 - R REC MODE 62 Remote Control 24 - S Search ...52 SHUTTER SPEED & EXPOSURE 67 slide show 89 SLOW SHUTTER 68 Speaker ...34 SPOT-AE 101 - T Troubleshooting 122 TV DISPLAY 45 - U USB ...116 - V VIEWFINDER 33 Viewing Still images 88 - W WHT - Samsung SCD5000 | User Manual (ENGLISH) - Page 133
SAMSUNG (1-800-726-7864). Labor 90 days carry-in Parts 1 year On carry-in models, transportation to and from the service . Customer adjustments which are explained in the instruction manual are not covered under the terms of this gives you specific legal rights, and you may also have other rights
-
 1
1 -
 2
2 -
 3
3 -
 4
4 -
 5
5 -
 6
6 -
 7
7 -
8
-
9
-
10
-
11
-
12
-
13
-
14
-
15
-
16
-
17
-
18
-
19
-
20
-
21
-
22
-
23
-
24
-
25
-
26
-
27
-
28
-
29
-
30
-
31
-
32
-
33
-
34
-
35
-
36
-
37
-
38
-
39
-
40
-
41
-
42
-
43
-
44
-
45
-
46
-
47
-
48
-
49
-
50
-
51
-
52
-
53
-
54
-
55
-
56
-
57
-
58
-
59
-
60
-
61
-
62
-
63
-
64
-
65
-
66
-
67
-
68
-
69
-
70
-
71
-
72
-
73
-
74
-
75
-
76
-
77
-
78
-
79
-
80
-
81
-
82
-
83
-
84
-
85
-
86
-
87
-
88
-
89
-
90
-
91
-
92
-
93
-
94
-
95
-
96
-
97
-
98
-
99
-
100
-
101
-
102
-
103
-
104
-
105
-
106
-
107
-
108
-
109
-
110
-
111
-
112
-
113
-
114
-
115
-
116
-
117
-
118
-
119
-
120
-
121
-
122
-
123
-
124
-
125
-
126
-
127
-
128
-
129
-
130
-
131
-
132
-
133
 |
 |

ENGLISH
ELECTRONICS
*Samsung Electronics’ Internet Home Page
AD68-00655B(01)
THIS CAMCORDER IS MANUFACTURED BY:
SERVICE DIVISION
400 Valley Road, Suite 201, Mt. Arlington N.J. 07856
Tel: 1-800-SAMSUNG
(1-800-726-7864)