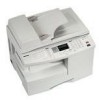
Samsung SCX-5312F User Manual (ENGLISH)
Samsung SCX-5312F - B/W Laser - All-in-One Manual
 |
View all Samsung SCX-5312F manuals
Add to My Manuals
Save this manual to your list of manuals |
Samsung SCX-5312F manual content summary:
- Samsung SCX-5312F | User Manual (ENGLISH) - Page 1
Visit us at: Home www.samsungelectronics.com/mfp P/N: JC68-00851A Rev. 2.00 User's Guide SCX-5312F/5112 - Samsung SCX-5312F | User Manual (ENGLISH) - Page 2
Installing Drum and Toner Cartridges 1.14 Turning the Product On 1.17 Loading Paper 1.17 Setting the Paper Size 1.20 Changing the Display Language 1.20 Using Save Mode 1.21 Toner Save 1.21 Paper Save 1.21 Power Save 1.22 Chapter 2: INSTALLING SOFTWARE About Samsung Software 2.2 MFP Driver - Samsung SCX-5312F | User Manual (ENGLISH) - Page 3
Copy 4.11 Chapter 5: PRINTING Printing a Document 5.2 Printer Settings 5.3 Accessing Printer Settings 5.3 Printer Properties Tabs 5.4 Printer Properties Buttons & Icons 5.12 Chapter 6: SCANNING Scanning using the Samsung SmarThru 6.2 Scanning Process with TWAIN-enabled Software ...... 6.4 ii - Samsung SCX-5312F | User Manual (ENGLISH) - Page 4
Messages 8.11 Solving Problems 8.13 Copier Problem Solution Chart 8.13 Printing Problem Solution Chart 8.15 Fax Problem Solution Chart 8.18 Chapter 9: APPENDIX General Specifications 9.2 Scanner and Copy Specifications 9.3 Printer Specifications 9.4 Facsimile Specifications 9.4 INDEX iii - Samsung SCX-5312F | User Manual (ENGLISH) - Page 5
misunderstood the operating instruction. If you cannot resolve the conflict, contact your sales or service representative for assistance. for the best scanning and/or faxing (usually the flatbed-type product). In this case, replace the cover after placing document on the scan glass, by holding - Samsung SCX-5312F | User Manual (ENGLISH) - Page 6
human access to laser radiation above a Class I level during normal operation, user maintenance, or prescribed service condition. WARNING Never operate or service the printer with the protective cover removed from Laser/ Scanner assembly. The reflected beam, although invisible, can damage your eyes - Samsung SCX-5312F | User Manual (ENGLISH) - Page 7
well ventilated area. If you need additional information about ozone, please request your nearest Samsung dealer. Power Saver This product contains advanced energy conservation technology that reduces power consumption when emblem does not represent EPA endorsement of any product or service. vi - Samsung SCX-5312F | User Manual (ENGLISH) - Page 8
User This equipment has been tested and found to comply with the limits for a Class A digital device, pursuant to Part instruction manual et Sciences Canada. Fax Branding The Telephone Consumer machine, business, business entity or individual. Refer to the Facsimile User's Guide for instructions - Samsung SCX-5312F | User Manual (ENGLISH) - Page 9
with the rules and regulations in FCC Part 68. If such changes can be approved by the manufacturer could void the user's authority to operate this equipment. In service, providing that they: a) Promptly notify the customer. b) Give the customer an opportunity to correct the equipment problem - Samsung SCX-5312F | User Manual (ENGLISH) - Page 10
fax modem on the same phone line as your product, you may experience transmission and reception problems service dispatcher of your intentions. The dispatcher will give you further instructions on how to actually test the emergency number. • This product may not be used on coin service Samsung - Samsung SCX-5312F | User Manual (ENGLISH) - Page 11
FAX) This Samsung product has been self-certified by Samsung problems, you should contact the Euro QA Lab of Samsung Electronics Co., Ltd. in the first instance. The product has been tested Plug (for UK Only) IMPORTANT The mains lead for this machine is fitted with a standard (BS 1363) 13 amp plug - Samsung SCX-5312F | User Manual (ENGLISH) - Page 12
IMPORTANT WARNING: You must earth this machine. The wires in the mains lead have the following colour code: • Green and Yellow: Earth • Blue: Neutral • Brown: Live If the wires in the mains - Samsung SCX-5312F | User Manual (ENGLISH) - Page 13
xii - Samsung SCX-5312F | User Manual (ENGLISH) - Page 14
, scanning, and faxing (SCX-5312F only) functions! This chapter provides step-by-step instructions on setting up the product, and installing the software. This chapter includes: • Unpacking • Component Location • Control Panel Functions • Making Connections • Installing Drum and Toner Cartridges - Samsung SCX-5312F | User Manual (ENGLISH) - Page 15
, back, and sides of the prodcut. Tape 2 Remove the label completely from the scanner module by pulling it straight, and the scan unlock switch automatically moves to the unlock position ( ). Scanner module NOTE: To scan or copy a document, the switch must be on that position. When you are moving - Samsung SCX-5312F | User Manual (ENGLISH) - Page 16
AC Power Cord* Telephone Line Cord* (For SCX-5312F only) TAM Lead (For SCX-5312F UK only) This User's Guide, SmarThru User's Guide, Facsimile User's Guide (SCX-5312F only), Quick install Guide Software CD Starter Toner Cartridge Drum Cartridge *. The appearance of the power cord and the - Samsung SCX-5312F | User Manual (ENGLISH) - Page 17
of your product. Front View Automatic Document Document Feeder Guides Control Panel (See page 1.6. SCX5312F. See page 1.9 for SCX-5112.) Document Input Tray Document Output Tray Paper Guides Bypass Tray Scanner Module Paper Cassette Release lever Front Cover Side Cover 1.4 GETTING - Samsung SCX-5312F | User Manual (ENGLISH) - Page 18
Rear View ADF (Automatic Document Feeder) Connector Telephone Connections (available in SCX-5312F only) Document Cover 1 Document Glass AC Power Cord Connector Parallel Connector Power Switch USB Connector Paper Exit Extension Paper Cassette GETTING STARTED 1.5 - Samsung SCX-5312F | User Manual (ENGLISH) - Page 19
Control Panel Functions SCX-5312F 1 2 3 4 5 6 7 13 8 9 10 11 12 1 01 02 21 22 -touch buttons to the locations 21 through 40. Adjusts the resolution of the documents for the current fax job. Use to choose the receive mode. The selected mode is displayed in Standby mode. Use - Samsung SCX-5312F | User Manual (ENGLISH) - Page 20
the jam, see page 8.4. Turns on when the toner or drum almost runs out. To replace the toner or drum cartridge, see page 7.3 and page 7.8. (Error indicators) fax job. C Use to specify the paper tray you want to use in O the Fax or the Copy mode. P Y Use to set up special copy features - Samsung SCX-5312F | User Manual (ENGLISH) - Page 21
Allows you to save toner by using less toner to 7 print a document. Allows you to save power by reducing power the zoom rate and to change the number of copies. 10 Selects the mode to activate: FAX or COPY. Also, confirms the selection on the display. 11 Engages the telephone line. 12 Use - Samsung SCX-5312F | User Manual (ENGLISH) - Page 22
SCX-5112 1 2 3 4 5 1 10 6 7 8 9 When an error occurs, the lamp in the when a paper jam occurs. To clear the jam, see page 8.4. Turns on when the toner or drum almost runs out. To replace the toner or drum cartridge, see page 7.3 and page 7.8. Turns on when the input tray you are using is - Samsung SCX-5312F | User Manual (ENGLISH) - Page 23
on a single page (Clone). Use to print the current copy job on both sides of paper. Use to enter numbers. Allows you to save toner by using less toner to print a document. Allows you to save power by reducing power consumption when not printing. Allows you to save paper by printing 2 pages - Samsung SCX-5312F | User Manual (ENGLISH) - Page 24
the side screws. NOTE: Without connecting the cord to the port, you cannot use the ADF. 2 If you have SCX-5112: Skip this step and proceed to step 3. If you have SCX-5312F: Connect the supplied telephone line to the LINE jack and the other end to the wall jack. GETTING STARTED 1.11 - Samsung SCX-5312F | User Manual (ENGLISH) - Page 25
If you want to use your product for receiving both faxes and voice calls, you will need to connect a telephone and/or answering machine to your product. Plug the cord of your extension phone or answering machine into the EXT jack. UK users should plug the cord of the extension phone into the - Samsung SCX-5312F | User Manual (ENGLISH) - Page 26
the parallel connector on your product. NOTE: • To connect the printer to the parallel port of the computer requires a certified parallel cable running Windows 98/ Me/2000/XP. • When using USB connection, your product provides two USB modes: Fast and Slow. Fast is the default mode. Some PC user may - Samsung SCX-5312F | User Manual (ENGLISH) - Page 27
Installing Drum and Toner Cartridges 1 Pull the release lever to open the side cover. CAUTION: Ensure that the side cover is always open before opening the front cover. 2 Open the front cover. 3 If the cartridge locking lever is on the lower position, turn the lever upward until it locks into place. - Samsung SCX-5312F | User Manual (ENGLISH) - Page 28
the drum cartridge from its bag and slide it into the product firmly until it locks into place completely. 1 5 Remove the starter toner cartridge from its bag. Gently shake the cartridge to loosen the toner. Thoroughly shaking the cartridge will assure maximum copies per cartridge. 6 Slide the toner - Samsung SCX-5312F | User Manual (ENGLISH) - Page 29
locking lever downwards until it locks into place. 8 Close the front cover 1 and the side cover 2 . 2 1 NOTE: When the drum or toner cartridge need to be replaced, the display indicates the corresponding message with the error indicator. Refer to the list of error messages on page 8.11. To - Samsung SCX-5312F | User Manual (ENGLISH) - Page 30
text in another language, see page 1.20. Loading Paper The paper cassette can hold a maximum of 550 sheets of 20lb plain paper. For copying or faxing, you can use A4-, letter-, or legal-size paper only. 1 Pull open the paper cassette. GETTING STARTED 1.17 - Samsung SCX-5312F | User Manual (ENGLISH) - Page 31
plate until it locks in position. 3 Adjust the rear paper guide to the desired paper length. It is preset to Letter or A4 size depending on country. To load another size, lift and insert the rear guide into the corresponding position. Rear guide LGL FOLIO A4 LTR 4 Fan the paper and insert it - Samsung SCX-5312F | User Manual (ENGLISH) - Page 32
the paper corners are under the corner snubbers. 1 Corner snubber Do not fill above the max fill line. Max Fill Line 6 While squeezing the side guide as shown, move it toward the stack of paper until it lightly touches the side of the stack. Do not too tightly to press the - Samsung SCX-5312F | User Manual (ENGLISH) - Page 33
language that is displayed on the LCD display, take the following steps: 1 Press Menu/Exit and then System Setup from the one- touch dial keypad. SCX-5112 users should press Menu and then Enter. 2 Press or until "SELECT LANGUAGE" appears on the top line of the display. The current setting appears on - Samsung SCX-5312F | User Manual (ENGLISH) - Page 34
Toner Save 1 Toner Save feature allows the printer to use less toner on each page. Activating this mode will extend the life of the toner cartridges two times longer than normal mode, but will reduce the print quality. To turn the Toner 3 Press Mode/Enter (Enter for SCX-5112) to save the selection. - Samsung SCX-5312F | User Manual (ENGLISH) - Page 35
Power Save The Power Save mode allows the printer to reduce power consumption when it is not in a reduced power state. 1 Press Menu/Exit and then System Data from the one- touch dial keypad. SCX-5112 users should press Menu and then Enter. 2 Press or until "POWER SAVE" appears on the display. Make - Samsung SCX-5312F | User Manual (ENGLISH) - Page 36
on installing the supplied Samsung software. You must install the Samsung software to use your product as a printer and scanner. The topics included in this chapter are: • About Samsung Software • System Requirements • Installing Samsung Software • Configuring Fax and Internet Gates • Uninstalling - Samsung SCX-5312F | User Manual (ENGLISH) - Page 37
About Samsung Software You must install the SmarThru CD-ROM after you have setup your product and connected it to your computer. The SmarThru CD-ROM includes the following: • MFP Driver • SmarThru Software • OCR Software (AnyPage Lite) MFP Driver To use your product as a printer and scanner, you - Samsung SCX-5312F | User Manual (ENGLISH) - Page 38
your system meets the minimum requirements. Supported Operating System Windows 95 OSR2/Windows 98/Windows 98 SE/Windows Me/ 2 Windows NT 4 Workstation or Server with Service Pack 3/ Windows 2000 Professional or Advanced Server/Windows XP Home edition or Professional. Minimal Requirements - Samsung SCX-5312F | User Manual (ENGLISH) - Page 39
Installing Samsung Software NOTES: • For Windows 95/98/Me/NT 4.0/2000/XP users, cancel the "New Hardware Found" screen when the computer boots up. • Make sure that your product is plugged in and connected to your computer's parallel port or USB port before installing software from the CD. Windows 95 - Samsung SCX-5312F | User Manual (ENGLISH) - Page 40
for advanced users. 2 If you select the Custom installation, you may choose the options you want to install. • SmarThru Software: to scan and edit images and work with electronic documents. • OCR Software: AnyPage Lite software to enable OCR. • MFP Driver: to print and scan. 6 Selecting the - Samsung SCX-5312F | User Manual (ENGLISH) - Page 41
use any networking features such as Remote Fax or Remote Scan service. If you selected SmarThru networking, you can select to install Server, Client, or both. Server allows you to share local fax modem and/or scanner over a LAN. You can control sharing by managing remote service user. Client allows - Samsung SCX-5312F | User Manual (ENGLISH) - Page 42
does not shut down and restart automatically, you must shut it down manually and restart it before the changes will be saved. NOTE: When you install the software, the Digital Signature Not Found window appears in Windows 2000 and Windows XP. Click OK in Windows 2000 and click Continue Anyway in - Samsung SCX-5312F | User Manual (ENGLISH) - Page 43
, please refer to the SmarThru User's Guide. NOTE: To configure the Internet gate, you must enter your e-mail address, incoming (POP3 or IMAP4) and outgoing (SMTP) mail server address, and account name. Ask your Internet service provider or on-line service provider for the information on your - Samsung SCX-5312F | User Manual (ENGLISH) - Page 44
Next. The e-mail address has been assigned to you by your Internet service provider. 2 4 Enter the addresses of your incoming and outgoing mail servers. Choose the incoming mail server type, then click Next. Your Internet service provider will be able to provide you with this information. INSTALLING - Samsung SCX-5312F | User Manual (ENGLISH) - Page 45
5 Enter your account name and password to access your Internet mail server, then click Next. Your Internet service provider will be able to provide you with this information. 6 Enter the account record name, then click Next. 2.10 INSTALLING SOFTWARE - Samsung SCX-5312F | User Manual (ENGLISH) - Page 46
7 Click Finish to quit the wizard and enable Internet e-mail service. 2 NOTE: If you wish, you can reconfigure the Internet gate later by using SmarThru Configuration. For details, refer to the SmarThru User's Guide. INSTALLING SOFTWARE 2.11 - Samsung SCX-5312F | User Manual (ENGLISH) - Page 47
If you want to uninstall the scan driver, select TWAIN Driver Uninstaller. If you want to uninstall the printer driver, select Samsung SCX-5x12 Series Driver Uninstall. If you want to uninstall the Remote Control Panel, select Uninstall SCX-5x12 Series Remote Control Panel. 2.12 INSTALLING SOFTWARE - Samsung SCX-5312F | User Manual (ENGLISH) - Page 48
When the uninstallation is done, click OK. 5 The message box recommends you restart your computer. Click OK, then restart Windows. NOTE: If you want to install the printer driver or the scan driver using the SmarThru CD-ROM, make sure that you select the Setup Type to Compact. Or select Custom then - Samsung SCX-5312F | User Manual (ENGLISH) - Page 49
as you can easily lose your data. •Leave intact: Uninstalls SmarThru software leaving data and option intact. This can be useful, if, for Stand Alone configuration over SmarThru Networking. In this case, uninstall Samsung SmarThru having Leave intact option set and install SmarThru Stand Alone - Samsung SCX-5312F | User Manual (ENGLISH) - Page 50
5 Follow the on-screen instructions to complete the un- installation. The SmarThru software and all components will be removed. 2 6 When uninstalling is done, click OK. The message box recommends restarting your computer. 7 Click OK. Shut down and restart - Samsung SCX-5312F | User Manual (ENGLISH) - Page 51
window does not appear, select Run from the Start menu, then type X:Autorun.exe, replacing "X" with the letter of your drive and click OK. 2 If you are asked to select the language, choose the desired language. 3 Click Uninstall the Samsung Software on your PC. 4 Follow the on-screen instructions - Samsung SCX-5312F | User Manual (ENGLISH) - Page 52
3 PAPER HANDLING This chapter introduces you to the basics of selecting print media and loading print media into your product. This chapter includes: • Selecting Print Media • Paper Guidelines • Loading Paper in Cassette • Using the Bypass Tray • Setting the Paper Size for Copying - Samsung SCX-5312F | User Manual (ENGLISH) - Page 53
that meets the guidelines for use with this product. Using a print media that is not recommended may cause paper jams or print quality problems. Media Size Input Sources and Capacities Media Size Input Source/Capacitya Paper Cassette Bypass Tray Plain paper Letter (8.5 x 11 in.) Folio (8.5 x 13 - Samsung SCX-5312F | User Manual (ENGLISH) - Page 54
quality. • Use only high quality copier grade paper. Avoid paper with embossed with those listed under "General Specifications" on page 9.2. • Use - DO NOT use envelopes with windows, coated lining, self-adhesive seals, media recommended for use in laser printers. • To prevent special media such - Samsung SCX-5312F | User Manual (ENGLISH) - Page 55
wrinkled, bubbled, or otherwise damaged. Loading Paper in Cassette The paper cassette can hold a maximum of 550 sheets of 20lb plain paper. For copying or faxing, you can use A4-, letter-, or legal-size paper only. To load paper, pull open the paper cassette and load paper with the print side - Samsung SCX-5312F | User Manual (ENGLISH) - Page 56
PC using the paper cassette, make sure that you select the Paper source and the correct paper size from your software application before starting your print job. • If you experience problems feeding paper, place the paper in the Bypass tray. • When printing on the used paper from the cassette, you - Samsung SCX-5312F | User Manual (ENGLISH) - Page 57
stack of sheets laid, without being touched by hands, on a flat surface. Notes: • Always load only the print media specified in Specifications to avoid paper jams and print quality problems. • Do not hit the bypass tray or rest your hands on it; otherwise the tray may be damaged or detached from - Samsung SCX-5312F | User Manual (ENGLISH) - Page 58
located on the right side of the product. Unfold the paper support extension as shown. 3 Paper support Bypass tray 2 Prepare a stack of paper or envelope for loading that are deposited on the transparency can cause print quality problems. If you are using the transparencies with paper backing, - Samsung SCX-5312F | User Manual (ENGLISH) - Page 59
4 Adjust the paper guide to the width of the stack of print material. Make sure that you have not loaded too much print media. tray, the printed side should be facing up and the edge without curl at the left side. If you experience problems feeding paper, turn the paper around. 3.8 PAPER HANDLING - Samsung SCX-5312F | User Manual (ENGLISH) - Page 60
buttons. These settings will apply to the Copy mode, and the Fax mode (SCX-5312F only). In PC printing mode, you have to select the paper Press Menu/Exit and then System Data from the one- touch dial keypad. SCX-5112 users should press Menu and then Enter. The display shows "CASSETTE PAPER" on - Samsung SCX-5312F | User Manual (ENGLISH) - Page 61
NOTE 3.10 PAPER HANDLING - Samsung SCX-5312F | User Manual (ENGLISH) - Page 62
4 COPYING This chapter provides step-by-step instructions for copying documents. This chapter includes: • Loading Paper for Copy Output • Selecting Paper Tray • Making Copies from the Automatic Document Feeder • Making Copies on the - Samsung SCX-5312F | User Manual (ENGLISH) - Page 63
The instructions for loading the print media are the same whether you are printing, faxing, or copying. For details, see page 1.17 and 3.6. Selecting Paper Tray After loading print media for copy output, you have to select the paper tray you will use for the copy job, and the fax job (SCX-5312F only - Samsung SCX-5312F | User Manual (ENGLISH) - Page 64
the paper size marked on the ADF. 4 Document guides 2 SCX-5312F users should verify that the product is in the Copy size Number of copies Note that you cannot make copies in the Fax mode. The product will only sound an error beep. 3 Make features such as collation and duplex copy. COPYING 4.3 - Samsung SCX-5312F | User Manual (ENGLISH) - Page 65
characteristics, use the document glass to load document. 1 Lift the document cover. 2 Place the document face down on the glass and align it with registration guide on the left top corner of the document glass. 4.4 COPYING - Samsung SCX-5312F | User Manual (ENGLISH) - Page 66
toner consumption. • If you are copying a page from a book or magazine, close the cover flat. The slanted cover may cause heavy exposure of the light when scanning. 4 SCX-5312F users /Clear button. 7 If necessary, you can use special copy features such as Auto Fit and Clone. 8 Press Copy/Start to - Samsung SCX-5312F | User Manual (ENGLISH) - Page 67
quality is good but the copy speed is low. 3 Press Mode/Enter (Enter on SCX-5112) to save the selection. NOTE: If you select the MIXED mode when you a catalogue, from the document glass using the normal contrast, the machine will automatically remove the background colour. This will make the copy - Samsung SCX-5312F | User Manual (ENGLISH) - Page 68
( ) to increase or decrease the number by 1. If you press and hold the buttons, the number increases or decreases rapidly. 3 Press Mode/Enter (Enter on SCX-5112) to save the selection. Zoom 4 Using the Zoom ( ) button, you can reduce or enlarge the size of a copied image from 25% to 400% when - Samsung SCX-5312F | User Manual (ENGLISH) - Page 69
Auto Fit This feature automatically reduces or enlarges the original image to fit on the special copy mode, SCX-5312F users should press Special Copy in the Copy mode (see page 4.5) and SCX-5112 users should press Autofit/Clone. 4 Press Special Copy (Autofit/Clone on SCX-5112) repeatedly or use the - Samsung SCX-5312F | User Manual (ENGLISH) - Page 70
Clone The Clone feature prints multiple image copies from original document on a single special copy mode, SCX-5312F users should press Special Copy in the Copy mode (see page 4.5) and SCX-5112 users should press Autofit/Clone. 4 4 Press Special Copy (Autofit/Clone on SCX-5112) repeatedly or - Samsung SCX-5312F | User Manual (ENGLISH) - Page 71
or use the navigation buttons to select the binding orientation. If you select "OFF", you cannot use duplex copying. 5 Press Mode/Enter (Enter on SCX-5112) to save the selection. 6 If necessary, customise the copy settings incluing the number of copies, copy size, contrast and image type using the - Samsung SCX-5312F | User Manual (ENGLISH) - Page 72
. See page 4.2. 3 To enter the collation copy mode, SCX-5312F users should press Special Copy in the Copy mode (see page 4.3). SCX-5112 users should press Collation Copy, and press 4 Collation Copy or the navigation buttons to select "ON" to turn the feature on. 4 Press Mode/Enter (Enter on SCX - Samsung SCX-5312F | User Manual (ENGLISH) - Page 73
NOTE 4.12 COPYING - Samsung SCX-5312F | User Manual (ENGLISH) - Page 74
5 PRINTING Read this chapter to learn how to select and load print media and how to use the print settings. This topics included in this chapter are: • Printing a Document • Printer Settings - Samsung SCX-5312F | User Manual (ENGLISH) - Page 75
, see "Installing Samsung Software" on page 2.4. 3 Start the program you are using to create the document, and create or open the document you want to print. 4 Choose Print or Print Setup from the File menu. Make sure that Samsung SCX-5x12 Series PCL 6 is selected as your default printer. Click - Samsung SCX-5312F | User Manual (ENGLISH) - Page 76
to start the print job. Printer Settings You can use the product with all your Windows 95/98/Me/2000/ XP or Windows NT 4.0 applications. Be sure to set Samsung SCX-5x12 Series PCL 6 as the default printer for all your Windows operations. Most Windows software applications allow you to make changes - Samsung SCX-5312F | User Manual (ENGLISH) - Page 77
from within any Windows application. • Select Samsung SCX-5x12 Series PCL 6 printer from the Printers and Faxes folder, click the right mouse button, then select Printing Preferences from the drop-down list. Printer Properties Tabs When the Printer Properties are displayed, you can review and change - Samsung SCX-5312F | User Manual (ENGLISH) - Page 78
Paper Tab Use the Paper tab to select what size of paper you have in your printer, the orientation, the number of copies to print, etc. 1 2 3 4 Click on the box to put a check mark to use the different paper source for the - Samsung SCX-5312F | User Manual (ENGLISH) - Page 79
to adjust print quality for your specific printing needs. 1 3 2 they have jagged or uneven edges. Set this Samsung Resolution enhancement Technology (SRT) option to improve Toner Save Mode allows the printer to use less toner on each page. Using this mode will extend the life of your 4 toner cartridge - Samsung SCX-5312F | User Manual (ENGLISH) - Page 80
Output Tab The Output tab provides options for you to adjust how the document will appear on the printed page. The Output Mode Type options includes Multiple Pages per Side, Booklet Printing, Fit to Page, Poster and Duplex printing. Multiple Pages per Side Choose the Multiple Pages per Side option - Samsung SCX-5312F | User Manual (ENGLISH) - Page 81
Booklet Printing The Booklet Printing option allows you to print a document out as a booklet. Once your document prints, fold the pages in half and staple the pages. 7 Fit to Page Choose this option to scale your print job to any selected paper size regardless of the logical document size. 5.8 - Samsung SCX-5312F | User Manual (ENGLISH) - Page 82
Poster Choose the Poster option to enlarge the printed document. 1 To determine the scaling factor, select the style. You can choose from: 2x2, 3x3, or 4x4. 1 For example, if you select 2x2, the output will be automatically stretched to cover 4 physical pages. 5 PRINTING 5.9 - Samsung SCX-5312F | User Manual (ENGLISH) - Page 83
Duplex Printing Choose the Duplex option from the Output tab to print the document on both sides of the paper. 1 Choosing Long Edge lets you have the binding orientation along the long edge of the paper as in a megazine. 1 Choosing Short Edge lets you have the binding orientation along the short - Samsung SCX-5312F | User Manual (ENGLISH) - Page 84
By changing the watermark settings, you can create faint watermarks that are not intrusive to a document, or bold watermarks to call attention to specific information. 5 To create a watermark, enter the desired text message in the Text field, and select the desired watermark options. You can select - Samsung SCX-5312F | User Manual (ENGLISH) - Page 85
gives you the program version number. If you click on the globe image on the window, you will be connected to the Samsung web site provided you are an internet user. Printer Properties Buttons & Icons • Click OK when done reviewing or making changes. • Click Cancel if you want to exit the tab menus - Samsung SCX-5312F | User Manual (ENGLISH) - Page 86
your computer. Then you can fax or e-mail the files, display them on your web site, or use them to create projects that you can print out using Samsung SmarThru software which came with your product. This chapter includes: • Scanning using the Samsung SmarThru • Scanning Process with TWAIN-enabled - Samsung SCX-5312F | User Manual (ENGLISH) - Page 87
using the SmarThru: 1 Feed the document(s) to be scanned face up into the ADF. Or Place a single document on the document glass face down then close the cover. 2 Once you installed Samsung software, you see the SmarThru icon on the desktop window. Double-click the SmarThru 3 icon. Double click. The - Samsung SCX-5312F | User Manual (ENGLISH) - Page 88
window. Scan Wizard icon. The Scan Wizard lets you use the following services: •Scan Lets you scan the original documents and save them in the Image Manager of the Samsung a scanned image into text that you can edit in a word processing program. After you scan your document, the software processes - Samsung SCX-5312F | User Manual (ENGLISH) - Page 89
page on the document glass. • Opening an application (such as PhotoDeluxe or Photoshop). • Opening the TWAIN window and setting scan options. • Scanning and saving your scanned image. You have to follow the program's instructions for acquiring an image. Please refer to the application User's Guide. - Samsung SCX-5312F | User Manual (ENGLISH) - Page 90
for maintaining the cartridge and your product. This chapter includes: • Cleaning the Scan Unit • Expected Cartridge Life • Replacing the Toner Cartridge • Setting to Notify Toner Low (Available in SCX-5312F only) • Cleaning the Drum • Replacing the Drum Cartridge • Consumables and Replacement Parts - Samsung SCX-5312F | User Manual (ENGLISH) - Page 91
clean helps ensure the best possible copies. We suggests that you clean the scan unit at the start of each day and during the day as needed. CAUTION: Do not pour or spray water directly onto any part of the product. Do not use ammonia-based cleaner or volatile solvents such as - Samsung SCX-5312F | User Manual (ENGLISH) - Page 92
may vary according to the print density of the page you print. If you print a lot of graphics, you may need to change the cartridge more often. Replacing the Toner Cartridge When the toner cartridge is near the end of its life, white streaks or hue change will occur. The LCD displays warning message - Samsung SCX-5312F | User Manual (ENGLISH) - Page 93
2 Open the front cover. 3 Turn the cartridge locking lever upwards to release the toner cartridge. 4 Pull the toner cartridge out and gently shake the cartridge to distribute the toner evenly inside the cartridge. NOTE: If the toner gets on your clothing, wipe it off with a dry cloth and wash - Samsung SCX-5312F | User Manual (ENGLISH) - Page 94
blank pages will print when a print job is sent, or when a fax is received. At this stage, the toner cartridge needs to be replaced. The display shows warning message "TONER EMPTY". Take the following steps to replace the toner cartridge: 1 Open the side cover, then the front cover. Make sure that - Samsung SCX-5312F | User Manual (ENGLISH) - Page 95
the environment by recycling your used toner cartridge. Refer to the recycling brochure packed with the toner cartridge for details. 4 Shake the new toner cartridge horizontally four or five times. Save the box and the cover for shipping. 5 Slide the new toner cartridge in until it locks in place - Samsung SCX-5312F | User Manual (ENGLISH) - Page 96
Low (Available in SCX-5312F only) If you have set this NOTIFY TONER LOW menu option to "ON", when the toner cartridge needs to be replaced, your product automatically sends a fax to your service company or the dealer to notify them that your product requires a new toner cartridge. 1 Press Menu/Exit - Samsung SCX-5312F | User Manual (ENGLISH) - Page 97
, you may set the product to clean the drum cartridge. 1 Before setting the cleaning procedure, make sure that paper is loaded in the product. 2 SCX-5312F users should press Menu/Exit then Maintenance from the one-touch dial keypad. SCX-5112 users should press Menu then press or until "MAINTENANCE - Samsung SCX-5312F | User Manual (ENGLISH) - Page 98
unlock the toner cartridge, then pull the toner cartridge out. NOTE: The toner cartridge must be removed to replace the drum cartridge. 3 Pull the used drum cartridge. NOTE: Help the environment by recycling your used drum cartridge. Refer to the recycling brochure packed with the drum cartridge for - Samsung SCX-5312F | User Manual (ENGLISH) - Page 99
replace with a new one before "DRUM WARNING" or "DRUM EMPTY" appears on the display, replace the drum cartridge as described above then take the following steps to reset the drum counter: 1 Press Menu/Exit then Maintenance from the one-touch dial keypad. SCX-5112 users should press Menu then press - Samsung SCX-5312F | User Manual (ENGLISH) - Page 100
From time to time, you will need to replace the toner and drum cartridges, roller, and fuser unit to mainatin top performance and avoid print quality problems and paper feed problems resulting from worn parts. The following items should be replaced after you have printed a specified number of pages - Samsung SCX-5312F | User Manual (ENGLISH) - Page 101
NOTE 7.12 MAINTENANCE - Samsung SCX-5312F | User Manual (ENGLISH) - Page 102
8 ' TROUBLESHOOTING This chapter gives helpful information for what to do if you encounter an error. This chapter includes: • Document Jams • Paper Jams • LCD Error Messages • Solving Problems - Samsung SCX-5312F | User Manual (ENGLISH) - Page 103
cover. Then feed the documents back into the ADF. NOTE: To prevent document jams, use the document glass for the thick, thin or mixed documents. 8.2 TROUBLESHOOTING - Samsung SCX-5312F | User Manual (ENGLISH) - Page 104
ADF or the feed area by carefully pulling it rightwards using both hands. 8 3 Close the document cover. Then feed the documents back into the ADF. TROUBLESHOOTING 8.3 - Samsung SCX-5312F | User Manual (ENGLISH) - Page 105
jammed in the paper feed area, "PAPER JAM0" appears in the display. 1 Remove the paper cassette. After you pull it out completely, lift the front part of the cassette slightly up to release the cassette from the product. 2 Remove the jammed paper by gently pulling it straight out. If you remove - Samsung SCX-5312F | User Manual (ENGLISH) - Page 106
lever to open the side cover. NOTE: Do not touch the shiny drum cartridge surface. Scratches or smudges will result in poor copy quality. 4 Carefully the rear part of the cassette to align the rear edge to the corresponding slot of the machine, then insert it completely. 8 TROUBLESHOOTING 8.5 - Samsung SCX-5312F | User Manual (ENGLISH) - Page 107
paper. If paper is not seen in this area, skip to the Exit Area. NOTE: Do not pull paper up through the fusing unit. Unfused toner may adhere in the area, resulting in smudged copies. 3 Remove the jammed paper, in the direction shown - Samsung SCX-5312F | User Manual (ENGLISH) - Page 108
4 Push up on the fuser lever, then close the side cover. Paper Exit Area If jammed in the paper exit area, "PAPER JAM 2" appears in the display. 1 Press the release lever to open the side cover. 2 Open the front cover. 8 TROUBLESHOOTING 8.7 - Samsung SCX-5312F | User Manual (ENGLISH) - Page 109
3 Pull down on the fuser lever. This will release pressure on the paper. 4 Turn the jam remove lever in the direction of the arrow to move the paper to the exit area, then gently pull the paper out through the exit area. 5 Push up on the fuser lever. 8.8 TROUBLESHOOTING - Samsung SCX-5312F | User Manual (ENGLISH) - Page 110
duplexer, "DUPLEX JAM" appears in the display. 1 Press the release lever to open the side cover. 8 2 Remove the jammed paper. Then close the side cover. TROUBLESHOOTING 8.9 - Samsung SCX-5312F | User Manual (ENGLISH) - Page 111
paper loading when you try to print using the bypass tray. "BYPASS JAM" also may occur when the paper is not properly fed into the machine through the bypass tray. In that case, pull the paper out of the product. 8.10 TROUBLESHOOTING - Samsung SCX-5312F | User Manual (ENGLISH) - Page 112
unauthorised cartridge. Replace the drum cartridge. See page 7.8. Unplug the power cord and plug it back in. If the problem still persists, please call for service. You must use a Samsungapproved cartridge. LINE ERROR (for SCX-5312F only) Your product cannot connect with the remote machine, or - Samsung SCX-5312F | User Manual (ENGLISH) - Page 113
Display MEMORY FULL (for SCX-5312F only) NO ANSWER (for SCX-5312F only) POLLING ERROR (for SCX-5312F only) NO DEVELOPER CARTRIDGE NO PAPER RX TRAY FULL PAPER JAM 0 PAPER JAM 1 PAPER JAM 2 RETRY REDIAL? (for SCX-5312F only) SCANNER LOCKED Meaning Solution The memory is full. Either delete - Samsung SCX-5312F | User Manual (ENGLISH) - Page 114
TONER EMPTY TONER LOW Meaning The toner cartridge has run out. The product stops. The toner is almost empty. Solution Replace with a new toner cartridge. See page 7.3. Take out the toner cartridge the problem is corrected. If the problem persists, please call for service. Copier Problem Solution - Samsung SCX-5312F | User Manual (ENGLISH) - Page 115
paper guides. Toner may be lodged in the cartridge. Remove the toner cartridge. Shake the toner cartridge and tap along the top of the toner cartridge over a waste receptacle. Take care not to touch the exposed toner on the left side of the cartridge. Fewer copies from the toner cartridge Scanner - Samsung SCX-5312F | User Manual (ENGLISH) - Page 116
Check the printer settings in the Windows Control Panel to make sure that the print job is being sent to the correct port. (For Example: LPT1.) Check that the toner and drum cartridges are installed properly. Reinstall the software. Use the IEEE-1284 parallel port cable supplied with the machine or - Samsung SCX-5312F | User Manual (ENGLISH) - Page 117
: 1. Press Menu/Exit then System Setup from the onetouch dial keypad. SCX-5112 users should press Menu then Enter. 2. Use or until "USB MODE" appears Refer to the Enabling High Speed Printer Communications section and your PC's user guide. If using Windows 95, the spool setting may TROUBLESHOOTING - Samsung SCX-5312F | User Manual (ENGLISH) - Page 118
print. There is a paper quality problem. Use only paper that meets the specifications required by the product. Toner may be unevenly distributed. Remove the toner cartridge and shake it gently to evenly distribute the toner. Then reinstall the toner cartridge. Black staining There is a paper - Samsung SCX-5312F | User Manual (ENGLISH) - Page 119
Fax Problem Solution Chart (Available in SCX-5312F the Facsimile User's Guide. The document fax machine you are sending to, to see if it can receive your fax. You cannot poll another machine. The fax machine you are polling may be using a poll code. Contact the remote opeator. 8.18 TROUBLESHOOTING - Samsung SCX-5312F | User Manual (ENGLISH) - Page 120
copy. The toner cartridge may be empty. Replace the toner cartridge, referring to page 7.3. Are some of the words on the incoming fax stretched? The fax machine sending you the fax had a temporary document jam. There are lines on the copies or documents you send. Check your scan glass for marks - Samsung SCX-5312F | User Manual (ENGLISH) - Page 121
NOTE 8.20 TROUBLESHOOTING - Samsung SCX-5312F | User Manual (ENGLISH) - Page 122
9 APPENDIX This chapter includes: • General Specifications • Scanner and Copy Specifications • Printer Specifications • Facsimile Specifications (SCX-5312F only) - Samsung SCX-5312F | User Manual (ENGLISH) - Page 123
Specifications Item Description Printing method Laser scanning unit Scanning method Sheet-fed and Flat-bed CCD(charge coupled device) module Effective scanning ) Consumables 2-piece Toner/Drum cartridge system Compatibility Win 95, 98, 2000, NT 4.0, Win-Me, Win XP PC Interface IEEE 1284 - Samsung SCX-5312F | User Manual (ENGLISH) - Page 124
LCD 16 Characters x 2 lines Toner cartridge life 6,000 sheets @ 5% coverage (A4, Basic data) Drum cartridge life 15,000 sheets @ 5% coverage (A4, Basic data) SET Weight Paper: 2.7 Kg Plastic: 0.7 Kg Scanner and Copy Specifications Item Compatibility Resolution Color bit depth Mono bit - Samsung SCX-5312F | User Manual (ENGLISH) - Page 125
Specifications (SCX-5312F only) Item Compatibility Applicable line Data coding Modem speed Transmission speed Scanning speed Resolution User approx. 3 seconds/letter (at standard fax resolution mode) ADF: approx. 5 seconds/letter (at standard fax resolution mode) Standard(203x98 dpi), Fine(203x196 - Samsung SCX-5312F | User Manual (ENGLISH) - Page 126
INDEX A ADF load 4.3 B booklet print 5.8 C cartridge locking lever 1.16 clone in copy mode 4.9 in print mode 5.7 collation for copying 4.11 consumables 7.11 contrast for copying 4.6 copy size 4.7 D default printer 5.2 display language 1.20 document jam, clear 8.2 load in ADF 4.3 load on document - Samsung SCX-5312F | User Manual (ENGLISH) - Page 127
5.9 power save 1.22 printer driver install 2.4 uninstall 2.12 printer driver window 5.3 R resolution, print 5.6 S scan driver install 2.4 uninstall 2.12 scanner lock 1.2 SmarThru install 2.4 uninstall 2.14 software install 2.4 uninstall 2.16 T tel line, connect 1.11 toner cartridge install 1.14 life
-
 1
1 -
 2
2 -
 3
3 -
 4
4 -
 5
5 -
 6
6 -
 7
7 -
8
-
9
-
10
-
11
-
12
-
13
-
14
-
15
-
16
-
17
-
18
-
19
-
20
-
21
-
22
-
23
-
24
-
25
-
26
-
27
-
28
-
29
-
30
-
31
-
32
-
33
-
34
-
35
-
36
-
37
-
38
-
39
-
40
-
41
-
42
-
43
-
44
-
45
-
46
-
47
-
48
-
49
-
50
-
51
-
52
-
53
-
54
-
55
-
56
-
57
-
58
-
59
-
60
-
61
-
62
-
63
-
64
-
65
-
66
-
67
-
68
-
69
-
70
-
71
-
72
-
73
-
74
-
75
-
76
-
77
-
78
-
79
-
80
-
81
-
82
-
83
-
84
-
85
-
86
-
87
-
88
-
89
-
90
-
91
-
92
-
93
-
94
-
95
-
96
-
97
-
98
-
99
-
100
-
101
-
102
-
103
-
104
-
105
-
106
-
107
-
108
-
109
-
110
-
111
-
112
-
113
-
114
-
115
-
116
-
117
-
118
-
119
-
120
-
121
-
122
-
123
-
124
-
125
-
126
-
127
 |
 |

SCX-5312F/5112
User’s Guide
Home
Visit us at:
www.samsungelectronics.com/mfp
P/N: JC68-00851A Rev. 2.00