Samsung UN40B6000 Quick Guide (ENGLISH) - Page 3
Viewing the Menus
 |
UPC - 036725229891
View all Samsung UN40B6000 manuals
Add to My Manuals
Save this manual to your list of manuals |
Page 3 highlights
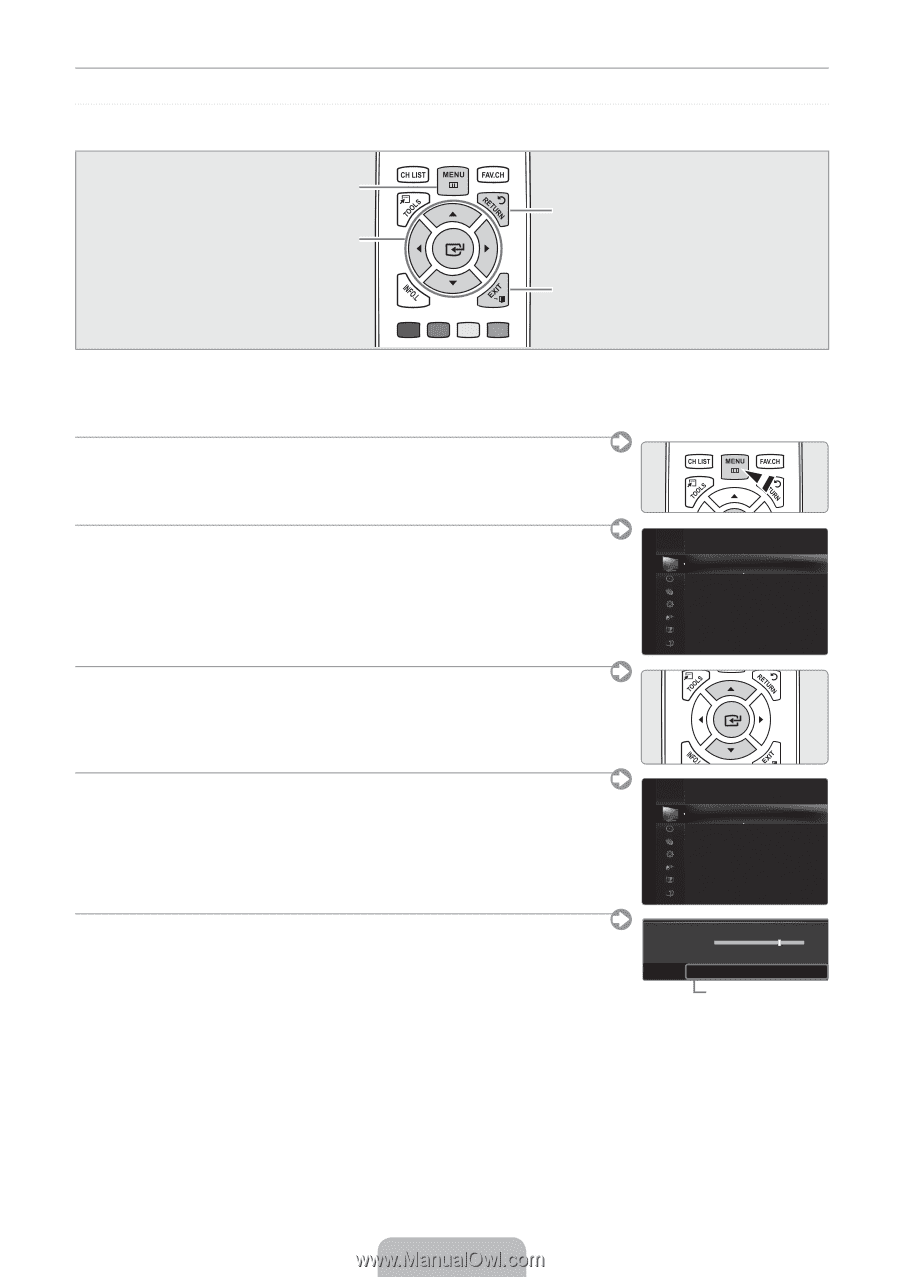
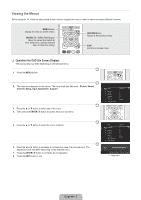
Viewing the Menus Before using the TV, follow the steps below to learn how to navigate the menu in order to select and adjust different functions. MENU Button Display the main on-screen menu. ENTERE / DIRECTION Button Move the cursor and select an item. Select the currently selected item. Confirm the setting. RETURN Button Return to the previous menu. EXIT Exit the on-screen menu. ❑ Operation the OSD (On Screen Display) The access step may differ depending on the selected menu. 1. Press the MENU button. 2. The main menu appears on the screen. The menu's left side has icons : Picture, Sound, Channel, Setup, Input, Application, Support. 3. Press the ▲ or ▼ button to select one of the icons. 4. Then press the ENTERE button to access the icon's sub-menu. Picture Mode : Standard ▶ Backlight Contrast Brightness Sharpness Colour Tint (G/R) Advanced Settings : 7 : 95 : 45 : 50 : 50 : G50/R50 5. Press the ▲ or ▼ button to select the icon's submenu. 6. Press the ◄ or ► button to decrease or increase the value of a particular item. The adjustment OSD may differ depending on the selected menu. 7. Press the ENTERE button to complete the configuration. 8. Press the EXIT button to exit. Picture Mode : Standard Backlight : 7 ▶ Contrast Brightness Sharpness Colour Tint (G/R) Advanced Settings Picture Options : 95 : 45 : 50 : 50 : G50/R50 ▲ Backlight ▼ 7 U Move L Adjust E Enter R Return Help icon English - 3
-
 1
1 -
 2
2 -
 3
3 -
 4
4 -
 5
5 -
 6
6 -
 7
7 -
 8
8 -
 9
9 -
10
-
11
-
12
-
13
-
14
-
15
-
16
-
17
-
18
-
19
-
20
 |
 |