Sanyo DP19649 Owners manual
Sanyo DP19649 - 720p 18.5" LCD HDTV Manual
 |
UPC - 086483073441
View all Sanyo DP19649 manuals
Add to My Manuals
Save this manual to your list of manuals |
Sanyo DP19649 manual content summary:
- Sanyo DP19649 | Owners manual - Page 1
37I0521A_EnSp.indb 1 3/24/09 4:19:46 PM ESPAÑOL ENGLISH - Sanyo DP19649 | Owners manual - Page 2
the included accessories, such as the remote control. The defective TV will be exchanged for the same model, or a replacement model of equal value, if necessary. Replacement model will be contingent on availability and at the sole discretion of Sanyo Manufacturing Corporation. THE FOREGOING WARRANTY - Sanyo DP19649 | Owners manual - Page 3
safety standards against risk of fire, casualty and electrical hazards. SANYO recommends keeping the TV set at its factory settings or moving Energy Saver settings from "Level 1" to "Level 2" or "Level 3" to further reduce power requirements and increase energy savings. Doing so contributes to the - Sanyo DP19649 | Owners manual - Page 4
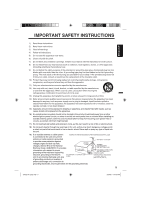
user to the presence of important operating and maintenance (servicing) instructions POLARIZED PLUG WITH AN EXTENSION CORD, RECEPTACLE OR OTHER OUTLET UNLESS , pursuant to Part 15 of the circuit different from that to which the receiver is connected. - Consult the dealer or an experienced radio/TV - Sanyo DP19649 | Owners manual - Page 5
system, extreme care should be taken to keep from touching such power lines or circuits, as contact with them might be fatal. 17) Do not overload wall outlets and extension cords, as this can result in a risk of fire or electric shock. 18) Do not push objects through any openings in this unit, as - Sanyo DP19649 | Owners manual - Page 6
, turn off the power and unplug all of the equipment from the wall outlet. Failure to do so may cause an electric shock and serious personal injury. Read the owner's manual of the other equipment carefully and follow the instructions when making any connections. 23) Sudden high volume sound may - Sanyo DP19649 | Owners manual - Page 7
safely support the size and weight of the unit, using the bracket and fasteners you have selected. • Keep cords and cables connected to this flat panel display out of reach of children. • To hang the television on a wall, remove these screws and then remove a stand. Before performing work spread - Sanyo DP19649 | Owners manual - Page 8
-screen, glass might break under pressure. Place the TV on its back onto a table. Align the stand's bottom-plate (supplied) as seen here. It will fit in only one direction. Press it in direction of arrow until you hear 'click'. Please assure " " mark on the stand is facing the LCD panel side. How to - Sanyo DP19649 | Owners manual - Page 9
TV Sleep Timer - Operable from the remote control, the LCD TV can be programmed for up to 120 minutes to turn off automatically. • V-Chip - The V-Chip function can read the rating of a broadcast program or movie content if the program is encoded with this information. V-chip will allow you to set - Sanyo DP19649 | Owners manual - Page 10
to attach the stand 8 How to remove the stand 8 Features 9 Power source 9 Contents 10 Parts and functions 11 Remote control 12 Antenna connections 13 Cable TV connections 14 Connections to other equipment 15 TV operation Starting setup 18 TV operation 18 Quick guide for menu operation - Sanyo DP19649 | Owners manual - Page 11
ENGLISH Front Rear Parts and functions Left side Remote sensor POWER indicator Red: Standby Green: On VOLUME +/- buttons CHANNEL / buttons MENU button INPUT/ENTER button POWER button To display the menu screen. Press MENU button to display the menu screen. CHANNEL / buttons, VOLUME +/- buttons - Sanyo DP19649 | Owners manual - Page 12
Remote control 1 2 3 10 4 11 5 12 13 6 14 7 15 8 16 9 17 1.POWER Button - Used to turn the power on/off to the LCD TV. 2.Direct Channel Selection Buttons (0-9) - Allows direct access to any channel of the LCD TV. 3.- Button -This button is the "-" button used when selecting digital - Sanyo DP19649 | Owners manual - Page 13
, follow the instructions below that correspond to your antenna system. If you are using a Cable TV service, see page 14 for Cable TV connections. Combination Jack Connect the UHF 300 ohm twin-lead wire to the Combiner (not supplied). Connect the VHF 300 ohm twin-lead wire to the 300-75 ohm - Sanyo DP19649 | Owners manual - Page 14
below. Set the TV to the output channel of the Converter/Descrambler box (usually channel 3 or 4) and use the Converter/Descrambler box to select channels. Incoming 75 ohm Cable TV Cable Converter/ Descrambler 75 ohm Cable to TV Antenna Jack For subscribers to unscrambled Cable TV service with - Sanyo DP19649 | Owners manual - Page 15
. Check the Owner's Manual provided with each component for the location of video and audio inputs and outputs. To connect the LCD TV to a VCR Rear of the unit To VIDEO/AUDIO IN To Video/Audio OUT Video/Audio cord (not supplied) VCR To connect the LCD TV to a VCR with an S-Video cord If you - Sanyo DP19649 | Owners manual - Page 16
, etc.) to this LCD TV using an HDMI cable or a DVI to HDMI cable, the image will not display if the output resolution of the component is set to 480i. To receive the picture you must change the output resolution on the external component. Should you require further instruction, please contact the - Sanyo DP19649 | Owners manual - Page 17
of the unit Audio cord (not supplied) VGA cable (not supplied) NOTE: • Save and close all documents, in case computer might need to be restarted. • Before connecting your computer to your TV, please refer to the following chart to set to a compatible resolution. • A Refresh Rate value of 60 Hz - Sanyo DP19649 | Owners manual - Page 18
Air/Cable setting, and program your channels automatically. IMPORTANT: Make sure that the antenna or cable TV system connection is made! 1 To turn on the TV, press POWER (POWER indicator on the front of the unit changes green. It may take approx. 10 seconds for a picture to appear on screen.). The - Sanyo DP19649 | Owners manual - Page 19
• Signal type • Picture size • Resolution Press DISPLAY again to clear the call display. Quick guide for menu operation Call menu and for example: Select Language. 1 Press INPUT SELECT to select TV mode. 2 Press MENU. The TV menu screen will appear. Main Menu Picture >> Audio Channel Lock - Sanyo DP19649 | Owners manual - Page 20
is On, a station being viewed stops broadcasting and the TV is not operated, the TV will automatically shut itself off after 15 minutes. The Reset function returns your settings to the factory settings. "Picture Size", "MTS", "Audio Language" and "HDMI Audio" cannot be reset by this function. NOTE - Sanyo DP19649 | Owners manual - Page 21
TV set that channel into memory. • If you are unsure of the digital channels available in your area, you may visit www.antennaweb.org to receive a list based on your address or zip code. Should you require further assistance you may call our toll-free customer service picture to appear on screen - Sanyo DP19649 | Owners manual - Page 22
label for that input source. Video Label Video - Component - HDMI - : Select - VCR DVD DTV SAT CBL HD : Adjust : Uses the default label name : Video cassette recorder : DVD video : Digital TV set-top box : Satellite box : Cable box : HDMI device (only for HDMI inputs) 37I0521A_EnSp.indb 22 - Sanyo DP19649 | Owners manual - Page 23
the V-Chip An age limitation can be set to restrict children from viewing or hearing violent scenes or pictures that you may choose to exclude. The restriction applies to "TV Rating" and "Movie Rating" if this data is transmitted. You may set this restriction separately. To use the V-Chip function - Sanyo DP19649 | Owners manual - Page 24
are overlapping. NOTE: • If the program or video you selected is not closed- captioned, no captions will display on-screen. • If text is not available in your viewing area, a black rectangle may appear on-screen. If this happens, set the CC Setting to "Off". • When selecting Closed Captions, the - Sanyo DP19649 | Owners manual - Page 25
SCREEN SIZE on the remote control. Natural In some cases, this image will display the size of standard 4:3 with a black side bar. A B C D E F G A B C D E F G Full (for 16:9 source programs) Full will display the picture at the maximum size. Native (for PC mode only) Detects the resolution - Sanyo DP19649 | Owners manual - Page 26
the direction and position of the antenna or installing an RFI filter may improve the picture. PICTURE SIZE VARIATION A slight picture size variation is normal when you adjust the CONTRAST or BRIGHTNESS settings. CARE AND MAINTENANCE To prevent fire or shock hazard, disconnect the TV from the power - Sanyo DP19649 | Owners manual - Page 27
color. Picture wobbles or drifts. POSSIBLE SOLUTIONS • Make sure the power cord is plugged in. • Try another AC outlet. • Power is off, check fuse or circuit breaker. • Unplug unit for an hour, then plug it back in. • Station or Cable TV experiencing problems, tune to another station. • Check sound - Sanyo DP19649 | Owners manual - Page 28
ohms coaxial Digital audio out: 0.5 Vp-p 75 ohms terminated 25.4 mm × 68.6 mm (1 inch × 2-11/16 inches), 8 ohms × 2 1.5W + 1.5W Remote control Batteries AAA × 2 AC Cord Stand Screws × 2 Designs and specifications are subject to change without notice. 28 37I0521A_EnSp.indb 28 3/24/09 4:20:43 - Sanyo DP19649 | Owners manual - Page 29
Memo ... 37I0521A_En.indd 29 3/24/09 5:56:09 PM - Sanyo DP19649 | Owners manual - Page 30
accesorios incluídos, como el control remoto. La TV defectuosa será cambiada por una del mismo modelo, o un modelo equivalente o de igual valor, si es necesario. El reemplazo de la TV será en contingencia y disponibilidad y a la exclusiva discreción de Sanyo Manufacturing Corporation. ESTA GARANT - Sanyo DP19649 | Owners manual - Page 31
HDMI, el logo HDMI y "High-Definition Multimedia Interrface" son marcas registradas de HDMI Licensing LLC. ENERGY STAR "Como un Asociado de Energy Star®, Sanyo riesgos de incendio, accidentes o descargas eléctricas. SANYO recomienda mantener su TV en el modo de fábrica o cambiar los 00:07 AM - Sanyo DP19649 | Owners manual - Page 32
el riesgo de perder la autorización para hacer funcionar este equipo en caso de que ejecute un cambio o modificación no aprobado por la parte responsable para la conformidad con las Reglas FCC. Las lámparas dentro de este producto contienen mercurio. Su desecho debe realizarse de acuerdo con las - Sanyo DP19649 | Owners manual - Page 33
murales ni los cables de extensión, ya que esto podría causar incendios o descargas eléctricas. 18) Nunca introduzca objetos de ningún tipo por las aberturas de la unidad, ya que podría tocar DE SISTEMA ELECTRODO DE PUESTA A TIERRA (NEC ART 250, PARTE H) 5 37I0521A_EnSp.indb 5 3/24/09 4:20:46 PM - Sanyo DP19649 | Owners manual - Page 34
y heridas graves. Lea cuidadosamente el manual de instrucciones del otro equipo y respete llamar la atención de quien instale el sistema TV cable, con respecto al Artículo 820-40 más cerca del punto de entrada del cable como sea posible. 26) El enchufe debe estar instalado cerca de la unidad y ser - Sanyo DP19649 | Owners manual - Page 35
síntomas. • Las TV LCD están fabricadas con una tecnología de gran precisión; sin embargo, a veces hay partes de la pantalla en tornillos y después retire la base. Antes de hacer el trabajo extienda material acojinado en el área sobre la que pondrá la TV LCD. 37I0521A_EnSp.indb 7 Agujeros para - Sanyo DP19649 | Owners manual - Page 36
o presione la pantalla de la TV, ya que el cristal podría romperse con la presión. Coloque la TV sobre su respaldo encima de la LCD. Cómo quitar el soporte L Por último, fije la placa base con 2 tornillos (suministrada). Cuando transporte este producto, retire la base y empaque contra la parte - Sanyo DP19649 | Owners manual - Page 37
audición. • Ajustes de imagen utilizando el control remoto - La indicación en pantalla permite sala de conciertos. • Jacks S-Video/Video componente - Se puede conectar una videocasetera, favor asegúrese de insertar firmemente el cable tanto en la TV LCD como en el enchufe de la pared. • El cable el - Sanyo DP19649 | Owners manual - Page 38
el soporte 8 Características 9 Fuente de alimentación 9 Índice 10 Partes y sus funciones 11 Control remoto 12 Conexiones de la antena 13 Conexiones de TV por Cable 14 Conexiones a otros equipos 15 OPERACIÓN Configuración inicial 18 Operación del TV 18 Guía rápida para el manejo de men 19 - Sanyo DP19649 | Owners manual - Page 39
ESPAÑOL Parte delantera Parte trasera Partes y sus funciones Lado izquierdo Sensor de control remoto Indicador POWER Rojo: Standby Verde: Encendido Botones VOLUME +/- Botones CHANNEL / Botón MENU Botón INPUT/ENTER Botón POWER Para visualizar la pantalla de menús. Pulse MENU para visualizar el - Sanyo DP19649 | Owners manual - Page 40
de canal (CH + / - / CURSOR / ) - Usado para operar las funciones del menú de la TV LCD, y para cambiar los canales de la TV LCD. 8.Botón INPUT SELECT - Se utiliza para cambiar la entrada externa. 9.Botón SCREEN SIZE - Se utiliza para cambiar el tamaño de la imagen. 10.Botón RECALL - Esta funci - Sanyo DP19649 | Owners manual - Page 41
interiores o exteriores, siga las instrucciones de abajo que correspondan a su sistema de antena. Si está utilizando el servicio de TV por Cable, vea la página 14 para las conexiones de TV cable. Antena combinada de VHF/UHF (Cable único de 75 ohmios ó cable con doble conductor de 300 ohmios) Jack - Sanyo DP19649 | Owners manual - Page 42
, conecte el cable coaxial de 75 ohmios al jack de la antena en la parte trasera del aparato. Cable coaxial de 75 ohmios Para abonados al servicio codificado de TV por Cable Si usted es abonado a un servicio de TV por Cable que requiere el uso de un convertidor/caja decodificadora, conecte el - Sanyo DP19649 | Owners manual - Page 43
en los diagramas de conexión sugeridos. Para más detalles, deberá consultar el manual de instrucciones de cada componente. Parte trasera del TV LCD A entrada de VIDEO/AUDIO A salida de Video/Audio Cable de Video/Audio (no suministrado) Juegos de o vídeo 15 37I0521A_EnSp.indb 15 3/24 - Sanyo DP19649 | Owners manual - Page 44
HDMI-a-DVI, sólo transfiere la señal de video. Se requieren cables de audio separados. Parte trasera del TV LCD A salida de HDMI Dispositivo HDMI o A entrada de PC/HDMI AUDIO A entrada de HDMI Cable HDMI con el fabricante del 16 componente externo. 37I0521A_EnSp.indb 16 3/24/09 4:21:00 PM - Sanyo DP19649 | Owners manual - Page 45
PC y el otro extremo a la entrada de PC/HDMI AUDIO Input en la TV (cable de Audio Estéreo Mini no incluido). TIP: 18:10 4:3 4:3 15:9 16:9 16:9 FRECUENCIA DE BARRIDO (Hz) 60 72 75 70 56 60 72 75 60 60 60 60 FRECUENCIA HORIZONTAL (kHz) 31.47 37.86 37.50 31.47 35.16 37.88 48.08 46.88 48.36 47.78 45.00 - Sanyo DP19649 | Owners manual - Page 46
TV esté conectado! 1 Para encender el aparato, presione POWER. (El indicador POWER canal, la 18 selección de TV LCD, tal como una videocasetera presione INPUT SELECT, después presione / o los correspondientes Botones de número (0-4), luego presione ENTER. Podrá seleccionar TV, Video, Component, HDMI - Sanyo DP19649 | Owners manual - Page 47
ón digital. 62-001 HDTV Moving Picture1 CH-1 TV-MA Digital Air No SLEEP) Para programar el apagado automático de la TV LCD pasado cierto tiempo utilice el botón SLEEP del TV. 2 Presione MENU. Aparece la pantalla del menú. Main Menu Picture >> Audio Channel Lock Setup : Select ENTER:Set - Sanyo DP19649 | Owners manual - Page 48
Picture Size Film Mode On/Off PC Setting Hor Position / Ver Position Clock Phase Auto Adjust DNR On/Off Bass / Treble / Balance MTS Stereo / SAP / Mono Surround On/Off Audio Language HDMI Audio HDMI DVI Add / Delete DTV Signal Auto Ch Memory Ch Label Closed Caption Language Video - Sanyo DP19649 | Owners manual - Page 49
el sistema típico de la localización de los canales por cable. 4 El TV comenzará a memorizar todos los canales disponibles en su área. • Puede llevar Found : 5 Programming Now : Select ENTER:Cancel : Select ENTER:Set 4 Presione o para seleccionar "Adding Channel", luego presione o ENTER. - Sanyo DP19649 | Owners manual - Page 50
Clear 15-1 A >> : Select ENTER:Set Comprobación de la potencia de la señal digital Esta TV le permitirá ver el medidor de señal video La función Video Label le permite etiquetar cada fuente de entrada de su TV. 1 Seleccionar "Setup", luego presione o ENTER. 2 Presione o para seleccionar "Video - Sanyo DP19649 | Owners manual - Page 51
á cada clasificación debajo. Clasificación TV TV Rating ALL D L S V FV TV-Y TV-Y7 TV-G TV-PG TV-14 TV-MA : Select ENTER:Set Puede establecer la clasificación empleando la edad y el género. Edad: TV-Y : Todos los niños TV-Y7 : 7 años o mayor TV-G : Audiencia general TV-PG : Con autorización de - Sanyo DP19649 | Owners manual - Page 52
"On". 4 Presione o para seleccionar "V-Chip Set (DTV)", luego presione o ENTER. 5 Si el TV no tiene el sistema de evaluación adicional, comenzar dos tipos de textos se sobrepongan. NOTA: • Si el programa o el video seleccionado no dispone de teletexto, no aparecerá texto en la pantalla. • Si - Sanyo DP19649 | Owners manual - Page 53
si la recepción del TV es muy insuficiente, el seleccionar "CC Setting" en " Black, White, Red, Green, Blue, Yellow, Magenta, Cyan Text Opacity: Auto, Solid, Transparent, Translucent, Flashing Background Auto, Black, White, Red, Green Picture Size también se visualizará presionando SCREEN SIZE en - Sanyo DP19649 | Owners manual - Page 54
sta se extiende en horizontal. No obstante; sólo se estira ligeramente por la parte superior e inferior. Puede que desaparezca el borde superior e inferior de la En el modo HDMI o COMPONENT, con velocidad de escaneado 720p y 1080i, sólo las funciones Cinema Wide2 y Full Picture están disponibles - Sanyo DP19649 | Owners manual - Page 55
Una pequeña variación del tamaño de la imagen es normal cuando usted ajusta los controles de CONTRAST (Contraste) o BRIGHTNESS (Brillo). CUIDADOS Y MANTENIMIENTO Para evitar incendios o peligros de choques eléctricos, desconecte el TV de la fuente de CA antes de la limpieza. El acabado del gabinete - Sanyo DP19649 | Owners manual - Page 56
án débiles o agotadas, o han sido insertadas en forma incorrecta. • El mando a distancia está fuera del alcance, acérquese a la TV LCD (15 pies). • Asegúrese de apuntar la unidad de control remoto hacia el sensor de control remoto. • Asegúrese de que no hay obstáculos entre el mando a distancia y la - Sanyo DP19649 | Owners manual - Page 57
Stand by: 0,8 Vatio 3,7 kg (8,2 lbs) Ancho: 472 mm (18 de 80% 18,5 pulgadas (470,1 mm diagonal) Panel LCD en color TFT VIDEO: Y: 1.0 V (p-p), 75 ohmios C: 0,3 V (p-p), 75 ohmios VIDEO: 1 V (p-p)/75 ohmios AUDIO: COMPONENTE: HDMI Vatios + 1,5 Vatios ACCESORIOS Control remoto Pilas AAA × 2 - Sanyo DP19649 | Owners manual - Page 58
Memo ... 37I0521A_EnSp.indb 30 3/24/09 4:21:37 PM - Sanyo DP19649 | Owners manual - Page 59
Memo ...31 37I0521A_Sp.indd 31 3/24/09 6:01:06 PM - Sanyo DP19649 | Owners manual - Page 60
J37I0521A SH 09/05 K 37I0521A_EnSp.indb 32 3/24/09 4:21:37 PM
-
 1
1 -
 2
2 -
 3
3 -
 4
4 -
 5
5 -
 6
6 -
 7
7 -
8
-
9
-
10
-
11
-
12
-
13
-
14
-
15
-
16
-
17
-
18
-
19
-
20
-
21
-
22
-
23
-
24
-
25
-
26
-
27
-
28
-
29
-
30
-
31
-
32
-
33
-
34
-
35
-
36
-
37
-
38
-
39
-
40
-
41
-
42
-
43
-
44
-
45
-
46
-
47
-
48
-
49
-
50
-
51
-
52
-
53
-
54
-
55
-
56
-
57
-
58
-
59
-
60
 |
 |

ESPAÑOL
ENGLISH
37I0521A_EnSp.indb 1
37I0521A_EnSp.indb
1
3/24/09 4:19:46 PM
3/24/09
4:19:46 PM