Sanyo PDG-DSU20N Owners Manual - Page 21
Adjusting Projection Image Size
 |
UPC - 086483068843
View all Sanyo PDG-DSU20N manuals
Add to My Manuals
Save this manual to your list of manuals |
Page 21 highlights
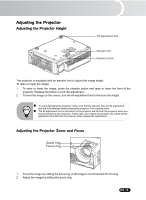
Adjusting Projection Image Size Refer to the graphic and table below to determine the screen size and projection distance. 306.0 278.0 255.0 127.5 231.8 115.9 76.5 69.5 51.0 46.4 30.6 27.8 1.2m (Min.) 2.0m 3.0m 5.0m 10.0m 12.0m(Max.) Projection Distance (meters) 1.2 2 3 5 10 12 Screen Size (for 4:3 aspect ratio diagonal length) Wide (inches) Tele (inches) 30.6 27.8 51.0 46.4 76.5 69.5 127.5 115.9 255.0 231.8 306.0 278.0 „ Position the projector in a horizontal position; other positions can cause heat build-up and damage to the projector. „ Make sure the heat ventilation holes are not blocked. „ Do not use the projector in a smoky environment. Smoke residue may cause build-up on critical parts (i.e. DMD, lens assembly, etc.) EN-20
-
 1
1 -
2
-
3
-
4
-
5
-
6
-
7
-
8
-
9
-
10
-
11
-
12
-
13
-
14
-
15
-
 16
16 -
 17
17 -
 18
18 -
 19
19 -
 20
20 -
 21
21 -
 22
22 -
 23
23 -
 24
24 -
 25
25 -
 26
26 -
27
-
28
-
29
-
30
-
31
-
32
-
33
 |
 |

EN-20
Adjusting Projection Image Size
Refer to the graphic and table below to determine the screen size and projection distance.
Projection Distance
(meters)
Screen Size (for 4:3 aspect ratio diagonal length)
Wide (inches)
Tele (inches)
1.2
30.6
27.8
2
51.0
46.4
3
76.5
69.5
5
127.5
115.9
10
255.0
231.8
12
306.0
278.0
30.6
(Min.)
51.0
76.5
127.5
306.0
255.0
(Max.)
278.0
231.8
115.9
69.5
46.4
27.8
1.2m
3.0m
5.0m
12.0m
10.0m
2.0m
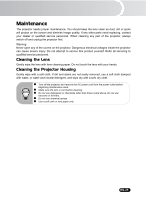
Position the projector in a horizontal position; other positions can cause heat build-up
and damage to the projector.
Make sure the heat ventilation holes are not blocked.
Do not use the projector in a smoky environment. Smoke residue may cause build-up
on critical parts (i.e. DMD, lens assembly, etc.)