Sanyo PLC-XR70N Installation - Page 5
Setup Projection Mirror
 |
View all Sanyo PLC-XR70N manuals
Add to My Manuals
Save this manual to your list of manuals |
Page 5 highlights
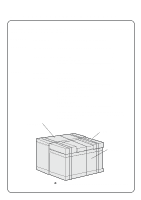
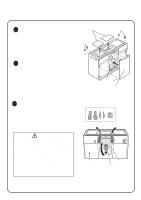
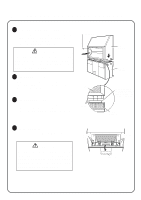
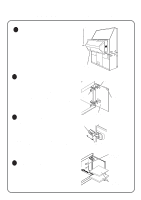
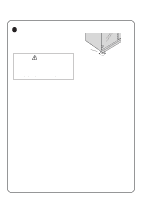
4 SETUP PROJECTION MIRROR 1 Preparation Remove the 4 Protection Pads inside of the Top Cabinet and remove the 2 Fixing Bands (right and left) of the Projection Mirror. CAUTION NEVER TOUCH THE PROJECTION MIRROR DIRECTLY. IT MAY EFFECT THE PROJECTION IMAGE QUALITY. MOVE THE MIRROR BY HOLDING THE MIRROR HANDLE. BE SURE TO REMOVE ALL THE PROTECTION PADS FROM THE CABINET. 2 Set Mirror Arms Remove the 8 Screws(A) of the Mirror Arms. Lift the Projection Mirror and raise the Mirror Arms backward. Loosen the Screws(B) on the end of the Mirror Arms. Put the Mirror Holder between the Adjusting Nut and the Washer at each side of the Mirror. And then fix the Mirror Holders on the Mirror Arms with the Screws(B) temporary. 3 Fix Projection Mirror Fix the Mirror Arms on the Cabinet with the Screws(A). Fix the Projection Mirror to the end of the Mirror Arms with the Screws(B) securely. Projection Mirror Fixing Bands Protection Pads (4pcs) Projection Mirror Fixing Bands (2 pcs) Mirror Handle Screws(A) (4 pcs X 2) Mirror Arm Screw(B) Mirror Arm Screws(A) (4 pcs X 2) Adjusting Nut Screw(B) Mirror Holder Mirror Arm Washer
-
 1
1 -
 2
2 -
 3
3 -
 4
4 -
 5
5 -
 6
6 -
 7
7 -
 8
8
 |
 |
