Sanyo PLC-XW56 Owners Manual
Sanyo PLC-XW56 - XGA LCD Projector Manual
 |
UPC - 086483069246
View all Sanyo PLC-XW56 manuals
Add to My Manuals
Save this manual to your list of manuals |
Sanyo PLC-XW56 manual content summary:
- Sanyo PLC-XW56 | Owners Manual - Page 1
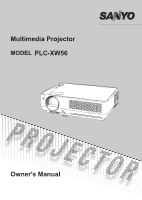
Multimedia Projector MODEL PLC-XW56 Owner's Manual - Sanyo PLC-XW56 | Owners Manual - Page 2
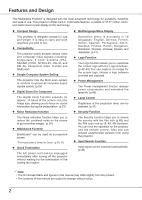
lamp life. (p.46) Lamp Control Brightness of the projection lamp can be selected. (p.47) Security Function The Security function helps you to ensure the security with the Key lock (p.48) and the PIN code lock (p.18, 48, 49) functions. You can lock the operation on the projector and the remote - Sanyo PLC-XW56 | Owners Manual - Page 3
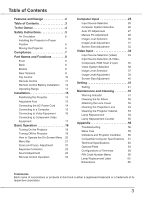
Lens 53 Cleaning the Projector Cabinet 53 Lamp Replacement 54 Lamp Replacement Counter 55 Appendix 56 Troubleshooting 56 Menu Tree 58 Indicators and Projector Condition 60 Compatible Computer Specifications 61 Technical Specifications 62 Optional Parts 63 Configurations - Sanyo PLC-XW56 | Owners Manual - Page 4
this manual. If the problem still persists, contact the dealer where you purchased the projector or the service center. CAUTION RISK OF ELECTRIC SHOCK DO NOT OPEN CAUTION: TO REDUCE THE RISK OF ELECTRIC SHOCK, DO NOT REMOVE COVER (OR BACK). NO USER-SERVICEABLE PARTS INSIDE EXCEPT LAMP REPLACEMENT - Sanyo PLC-XW56 | Owners Manual - Page 5
instructions marked on the projector. For added protection to the projector during projector to normal operation. e.If the projector has been dropped or the cabinet has been damaged. f. When the projector exhibits a distinct change in performance-this indicates a need for service. When replacement - Sanyo PLC-XW56 | Owners Manual - Page 6
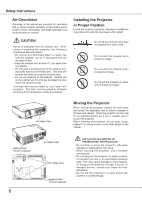
for ventilation and to ensure reliable operation of the product and to protect it from overheating, and these openings must not be blocked or covered. Installing the Projector in Proper Position Install the projector properly. Improper Installation may reduce the lamp life and cause a fire hazard - Sanyo PLC-XW56 | Owners Manual - Page 7
to the equipment unless otherwise specified in the instructions. If such changes or modifications should be made, you could be required to stop operation of the equipment. Model Number : PLC-XW56 Trade Name : Sanyo Responsible party : SANYO FISHER COMPANY Address : 21605 Plummer Street - Sanyo PLC-XW56 | Owners Manual - Page 8
(rear side) ③ Infrared Remote Receiver ④ Focus Ring (front side) ⑤ Projection Lens ⑥ Lens Cover CAUTION Do not turn on a projector with lens cap attached. Feet ⑭ Lamp Cover ⑮ Air Filters Kensington Security Slot This slot is for a Kensington lock used to deter theft of the projector. *Kensington - Sanyo PLC-XW56 | Owners Manual - Page 9
Rear Terminal ① ② Part Names and Functions ③ ④⑤ ⑥ ⑦ ① SERVICE PORT This jack is used to service the projector. ② COMPUTER IN /S-VIDEO IN /COMPONENT IN Connect output signal from a computer, RGB scart 21-pin video output, S-VIDEO output, or component video output to this - Sanyo PLC-XW56 | Owners Manual - Page 10
detects an abnormal condition. This also blinks red when the internal temperature of the projector exceeds the operating range. (p.51, 60) ⑦ LAMP REPLACE indicator Turn yellow when the life of the projection lamp draws to an end. (p.54, 60) ⑧ VOLUME +/- buttons Adjust the volume level. (p.23 - Sanyo PLC-XW56 | Owners Manual - Page 11
Menu. (p.20) - Pan the image in Digital zoom + mode. (p.33) - Adjust the volume LAMP CONTROL button Select the lamp mode. (p.24, 47) ⑪ ⑪ MUTE button Mute the sound. (p.23) ⑫ P-TIMER button Operate operation, please observe the following precautions: - Do not bend, drop or expose the remote - Sanyo PLC-XW56 | Owners Manual - Page 12
● Risk of explosion if a battery is replaced by an incorrect type. ● Dispose of used batteries according to the instructions. Operating Range Point the remote control toward the projector (Infrared Remote Receiver) when pressing any button. Maximum operating range for the remote control is about 16 - Sanyo PLC-XW56 | Owners Manual - Page 13
projector should be set horizontally to the flat screen. Note: • The brightness in the room has a great influence on picture quality. It is recommended to limit ambient lighting in order to obtain the best corrected by menu operation. (p.22, 41) Foot Lock Latch (Press upward) Adjustable Foot 13 - Sanyo PLC-XW56 | Owners Manual - Page 14
power system. If you are not sure of the type of power being supplied, consult your authorized dealer or service station. Connect the projector with all peripheral equipment before turning the projector on. (See pages 15-17 for connection.) CAUTION The AC outlet must be near this equipment and must - Sanyo PLC-XW56 | Owners Manual - Page 15
(Mini D-sub 15 pin) (Only one cable is supplied.) • Audio Cables (Mini Plug: stereo) ( Not all the cables are supplied with this projector.) External Audio Equipment Audio Output Monitor Output Monitor Audio Input Input Audio cable (stereo) VGA cable VGA cable COMPUTER IN MONITOR /S-VIDEO IN - Sanyo PLC-XW56 | Owners Manual - Page 16
• S-Video Cable • S-Video-VGA Cable • Audio Cables (RCA X 2, Mini Plug: stereo) ( Not all the cables are supplied with this projector.) S-Video Output (R) (L) S-Video cable Composite Video and Audio Output (R) (L) (Video) External Audio Equipment S-Video-VGA cable Audio cable Video and Audio - Sanyo PLC-XW56 | Owners Manual - Page 17
Audio Input Audio cable (stereo) AUDIO OUT (stereo) COMPONENT/ COMPUTER AUDIO IN Note: • When connecting AUDIO OUT to external audio equipment, the projector's built-in speaker is disconnected. • RGB Scart signal can not be output from the OUTPUT terminal. • See page 63 for ordering optional - Sanyo PLC-XW56 | Owners Manual - Page 18
Lamp mode status icon (see page 47) appears on the screen. If the projector is locked with a PIN code, PIN code Input Dialog Box appears. Enter the PIN code as instructed to operate the projector. Setting a PIN code prevents unauthorized use of the projector. A PIN code consists of a four-digit - Sanyo PLC-XW56 | Owners Manual - Page 19
after 4 seconds. TO MAINTAIN THE LIFE OF THE LAMP, ONCE YOU TURN THE PROJECTOR ON, WAIT AT LEAST FIVE MINUTES BEFORE TURNING IT OFF. DO NOT OPERATE THE PROJECTOR CONTINUOUSLY WITHOUT REST. CONTINUOUS USE MAY RESULT IN SHORTENING THE LAMP LIFE. TURN OFF THE PROJECTOR AND LET STAND FOR ABOUT AN HOUR - Sanyo PLC-XW56 | Owners Manual - Page 20
Basic Operation How to Operate the On-Screen Menu The projector can be adjusted or set via the On- The selected item is not active until the SELECT button is pressed. Top Control MENU button Remote Control SELECT button SELECT button MENU button POINT buttons On-Screen Menu Menu icon Menu bar - Sanyo PLC-XW56 | Owners Manual - Page 21
Basic Operation Menu Bar For detailed functions, see Menu Tree on p.58, 59. For computer source Guide Window Show of image. [Normal / True / Wide / Full / Digital zoom +/-] (p.32, 33) Setting Menu Used to set the projector's operating configurations. (p.41-50) Input Menu Used to select input - Sanyo PLC-XW56 | Owners Manual - Page 22
Basic Operation Zoom and Focus Adjustment Rotate the Zoom Lever to zoom in menu is displayed. Press the KEYSTONE ▲▼ buttons on the top control or the KEYSTONE button on the remote control. The keystone dialog box appears. Correct keystone distortion by pressing the KEYSTONE ▲▼ buttons on the top - Sanyo PLC-XW56 | Owners Manual - Page 23
. Dialog box display changes to "On" and the sound is cut off. To restore the sound to its previous level, press the Point ◄► buttons again. Remote Control Operation For some frequently used operations, using the remote control is advisable. Just pressing one of the buttons enables you to make the - Sanyo PLC-XW56 | Owners Manual - Page 24
the remote control to operate the Auto PC function. For more detail, see page 27. D.ZOOM buttons Press the D.ZOOM buttons on the remote control to the input signal Eco lower brightness reduces the lamp power consumption and extends the lamp life. Remote Control VOLUME +/- buttons (See p.23.) - Sanyo PLC-XW56 | Owners Manual - Page 25
control. Before using these buttons, correct input source should be selected through Menu operation as described below. Top Control INPUT button INPUT button Computer Video Remote Control COMPUTER button Menu Operation 1 Press the MENU button to display the On-Screen Menu. Press the Point - Sanyo PLC-XW56 | Owners Manual - Page 26
between your computer and the projector. (See "Troubleshooting" on page 56.) Mode 1 The preset system is manually adjusted in the PC Adjust Menu PC Adjustment function operates to adjust the projector. Selecting Computer System Manually PC system can also be selected manually. 1 Press the - Sanyo PLC-XW56 | Owners Manual - Page 27
Adjustment parameters from Auto PC Adjustment can be memorized in this projector. Once parameters are memorized, the setting can be done just not provided properly with this operation, manual adjustments are required. (p.28, 29) • The Auto PC Adjustment cannot be operated when 480i, 575i, - Sanyo PLC-XW56 | Owners Manual - Page 28
enables you to precisely adjust several parameters to match those signal formats. The projector has 5 independent memory areas to memorize those parameters manually adjusted. It allows you to recall the setting for a specific computer. 1 Press the MENU button to display the On-Screen Menu. Press - Sanyo PLC-XW56 | Owners Manual - Page 29
Input Display area H Press the Point ◄► buttons to adjust the horizontal area displayed by this projector. Display area V Press the Point ◄► buttons to adjust the vertical area displayed by this projector. Reset To reset the adjusted data, select Reset and press the SELECT button. The confirmation - Sanyo PLC-XW56 | Owners Manual - Page 30
Operation Select an image level among Dynamic, Standard, Real, Blackboard (Green), Image 1, Image 2, Image 3, and Image 4 by pressing the IMAGE button on the remote control. Dynamic Picture level suitable for viewing picture in a bright room. Standard Normal picture level preset on this projector - Sanyo PLC-XW56 | Owners Manual - Page 31
Computer Input Image Level Adjustment 1 Press the MENU button to display the On-Screen Menu. Press the Point ◄► buttons to move the red framed pointer to the Image Adjust Menu icon. 2 Press the Point ed buttons to move the red framed pointer to the item that you want to adjust, and then press the - Sanyo PLC-XW56 | Owners Manual - Page 32
Menu cannot be operated when 720p(HDTV), 1035i (HDTV), or 1080i (HDTV) is selected in the PC System Menu (p.26). • The projector cannot display any to the projector. • The image data in other than XGA (1024x768) is modified to fit the screen size in initial mode. • True, Full, and Digital zoom +/- - Sanyo PLC-XW56 | Owners Manual - Page 33
larger than the screen size. Remote Control POINT buttons SELECT button D.ZOOM + button D.ZOOM - button Digital zoom - When D.ZOOM - The panning function may not operate properly if the stored Mode in the PC Adjust Menu is used. (p.29) • True, Full, and Digital zoom +/- cannot be selected when - Sanyo PLC-XW56 | Owners Manual - Page 34
. Before using these buttons, correct input source should be selected through menu operation as described below. Top Control INPUT button INPUT button Video Computer Remote Control VIDEO button Menu Operation 1 Press the MENU button to display the On-Screen Menu. Press the Point ◄► buttons - Sanyo PLC-XW56 | Owners Manual - Page 35
the top control or press the COMPUTER button on the remote control. Before using these buttons, correct input source should be selected through Menu operation as described below. Top Control INPUT button INPUT button Computer Video Menu Operation 1 Press the MENU button to display the On-Screen - Sanyo PLC-XW56 | Owners Manual - Page 36
to optimize its performance. When Video System is PAL-M or PAL-N, select system manually. PAL/SECAM/NTSC/NTSC4.43/PAL-M/PAL-N If the projector cannot reproduce proper video image, it is necessary to select a specific broadcast signal format among PAL, SECAM, NTSC, NTSC 4.43, PAL-M, and PAL-N. AV - Sanyo PLC-XW56 | Owners Manual - Page 37
User preset image in the Image Adjust Menu (p.38, 39). Remote Control IMAGE button IMAGE button Dynamic Standard Cinema Blackboard (Green) Image 1 Image 2 Image 3 Menu Operation bright room. Standard Normal picture level preset on this projector. Cinema Picture level adjusted for the picture with - Sanyo PLC-XW56 | Owners Manual - Page 38
Video Input Image Level Adjustment 1 Press the MENU button to display the On-Screen Menu. Press the Point ◄► buttons to move the red framed pointer to the Image Adjust Menu icon. 2 Press the Point ▲▼ buttons to move the red framed pointer to the item that you want to adjust, and then press the - Sanyo PLC-XW56 | Owners Manual - Page 39
Select "L1" for an active picture. L2 . . . . Select "L2" for a still picture. Film . . . Select "Film" for watching a film. With this function, the projector reproduces pictures faithful to the original film quality. Reset To reset the adjusted data, select Reset and press the SELECT button. The - Sanyo PLC-XW56 | Owners Manual - Page 40
Video Input Screen Size Adjustment This projector has the picture screen resize function, which enables you to customize the image size the image at a wide screen ratio of 16:9. Note: Screen Menu cannot be operated when 720p, 1035i, or 1080i is selected in the AV System Menu (p.36). 40 - Sanyo PLC-XW56 | Owners Manual - Page 41
Setting Setting This projector has Setting menu that allows you to set up the other various functions described as follows: 1 Press the MENU button to display the On-Screen - Sanyo PLC-XW56 | Owners Manual - Page 42
instead of the countdown when turning on the projector. Use this function when you want to project the image as early as possible even when the lamp is not bright enough. Off Do not show decides the start-up display as follows: User . . . . the image you captured Default . . the factory-set - Sanyo PLC-XW56 | Owners Manual - Page 43
Logo select function and set it to "User". Then the captured image is displayed when turning on the projector next time or pressing the NO SHOW button . (p.30, 37.) • A signal from a computer can be captured up to XGA (1024x768). A signal from video equipment can be captured except for 720p, 1035i, - Sanyo PLC-XW56 | Owners Manual - Page 44
Change the Logo PIN code Logo PIN code can be changed to your desired four-digit number. Select "Logo PIN code change" with the Point ▼ button and press PIN code setting. For details on PIN code setting, refer to relevant instructions of the PIN code lock function on pages 48 and 49. caution: when - Sanyo PLC-XW56 | Owners Manual - Page 45
used to project the image from a ceiling mounting the projector. Ceiling Rear When this function is "On", the is set On1 or On2, the status of Input and Lamp are displayed every time the signal is switched. • Only VIDEO button on the remote control is pressed while Input search is on, Input - Sanyo PLC-XW56 | Owners Manual - Page 46
Setting Power management For reducing power consumption as well as maintaining the lamp life, the Power management function turns off the projection lamp when the projector is not used for a certain period. When the input signal is interrupted and no button is pressed for more than 30 seconds, the - Sanyo PLC-XW56 | Owners Manual - Page 47
the lamp power consumption and extends the lamp life. Remote control This projector provides two different remote control codes: the factory-set initial code (Code 1) and the secondary code (Code 2). This switching function prevents remote control interference when operating several projectors or - Sanyo PLC-XW56 | Owners Manual - Page 48
remote control. lock the operation of the remote control. To unlock, use the top control. If the top control accidentally becomes locked and you do not have the romote control or there is something wrong with your remote control, contact the dealer where you purchased the projector or the service - Sanyo PLC-XW56 | Owners Manual - Page 49
fix the number and move the pointer. Repeat it to complete entering a four-digit number. After entering the fourdigit number, move the pointer to "Set" by page 65, and keep it securely. If you forget your PIN code, the projector can no longer be started. Enter a PIN code The input numbers change to - Sanyo PLC-XW56 | Owners Manual - Page 50
the projector down. Lamp counter This function is used to reset the lamp replacement counter. When replacing the projection lamp, reset the lamp replacement counter by using this function. See page 55 for operation. Factory default This function returns all setting values except for the user logo - Sanyo PLC-XW56 | Owners Manual - Page 51
on once again to verify operation. If the projector cannot be turned on and the WARNING indicator emits a red light, disconnect the AC power cord and contact the service station. CAUTION DO NOT LEAVE THE PROJECTOR WITH THE AC POWER CORD CONNECTED UNDER THE ABNORMAL CONDITION. IT MAY RESULT IN - Sanyo PLC-XW56 | Owners Manual - Page 52
brush or rinse them softly. 4 When cleaning the air filters by rinsing, dry them well. Replace the air filters properly. Make sure that the air filters are fully inserted. CAUTION Do not operate the projector with the air filters removed. Dust may accumulate on the optical elements degrading picture - Sanyo PLC-XW56 | Owners Manual - Page 53
. Abrasive cleaners, solvents, or other harsh chemicals might scratch the surface. Maintenance and Cleaning Cleaning the Projector Cabinet Disconnect the AC power cord before cleaning. Gently wipe the projector body with a soft, dry cleaning cloth. When it is heavily soiled, use a small amount of - Sanyo PLC-XW56 | Owners Manual - Page 54
page . Screw Screw Handles ORDER REPLACEMENT LAMP Replacement lamp can be ordered through your dealer. When ordering a projection lamp, give the following information to the dealer. ● Model No. of your projector: PLC-XW56 ● Replacement Lamp Type No.: POA-LMP107 (Service Parts No. 610 330 4564 - Sanyo PLC-XW56 | Owners Manual - Page 55
the lamp should be replaced, i.e., if the LAMP REPLACE indicator lights up, replace the lamp with a new one IMMEDIATELY after the projector has cooled down. (Follow carefully the instructions in the Lamp Replacement section of this manual.) Continuous use of the lamp with the LAMP REPLACE indicator - Sanyo PLC-XW56 | Owners Manual - Page 56
's instruction manual for the setting. - It takes about 30 seconds to display an image after turning on the projector. See if the selected system is corresponding to your computer or video equipment. (See pages 26 and 36.) - Select a correct input source once again through menu operation. (See - Sanyo PLC-XW56 | Owners Manual - Page 57
function for the remote control. (See page 48.) WARNING: High voltages are used to operate this projector. Do not attempt to open the cabinet. If problems still persist after following all operating instructions, contact the dealer where you purchased the projector or the service center. Specify - Sanyo PLC-XW56 | Owners Manual - Page 58
Blackboard (Green) Image 1 Image 2 Image 3 Image 4 Contrast Brightness Color temp. Red Green Blue Sharpness Gamma Reset Store Quit Normal True Wide Full Digital zoom + Digital zoom - 0 - 63 0 - 63 High Mid Low XLow Adj. 0 - 63 0 - 63 0 - 63 0 - 15 0 - 15 Yes/No Image 1 Image 2 Image 3 Image 4 Quit - Sanyo PLC-XW56 | Owners Manual - Page 59
On start Lamp control Remote control Security Fan Lamp counter Factory User Capture Yes/No Logo PIN code lock Logo PIN code Off On Logo PIN code change Quit Quit On/Off On/Off On1/On2/Off Off Ready Shut down Timer (1-30 Min.) Quit On/Off Normal/Auto/Eco Code 1/Code 2 Key lock Off Projector Remote - Sanyo PLC-XW56 | Owners Manual - Page 60
cord and contact the dealer or the service center. Do not leave the projector on. It may cause an electric shock or fire hazard. • • • green blinks green • • • red blinks red • • • off When the life of the projection lamp draws to an end, the LAMP REPLACE indicator lights yellow. When this - Sanyo PLC-XW56 | Owners Manual - Page 61
Appendix Compatible Computer Specifications Basically this projector can accept the signal from all computers with the V, H-Frequency below mentioned and less than 140 MHz of Dot Clock. When selecting these modes, PC - Sanyo PLC-XW56 | Owners Manual - Page 62
Appendix Technical Specifications Mechanical Information Projector Type Dimensions (W x H x D) Net Weight Foot Adjustment Multi-media Projector 12.99" x 3.15" x 9.33" (330 mm x 80 mm x 237 mm) (Not including adjustable foot) 6.4 lbs (2.9 kg) 0˚ to 10.0˚ Panel Resolution LCD Panel System 0.6" - Sanyo PLC-XW56 | Owners Manual - Page 63
Accessories Owner's Manual (CD-ROM) Quick Reference Guide AC Power Cord Remote Control and Batteries VGA Cable PIN Code Label Lens Cover with string Lamp replacement Label Appendix ● The specifications are subject to change without notice. ● LCD panels are manufactured to the highest possible - Sanyo PLC-XW56 | Owners Manual - Page 64
4 ----- 12 ----- 5 Ground (Horiz.sync.) 13 Horiz. sync. Input/Output (Composite H/V sync.) 6 Ground (Red) 14 Vert. sync. 7 Ground (Green) 15 ----- 8 Ground (Blue) SERVICE PORT CONNECTOR Terminal: Mini DIN 8-PIN 876 5 43 21 Serial 1 RXD 2 ----3 ----4 GND 5 RTS/CTS 6 TXD 7 GND 8 GND 64 - Sanyo PLC-XW56 | Owners Manual - Page 65
Number Memo Write down the PIN code number in the column below and keep it with this manual securely. If you forgot or lost the number and unable to operate the projector, contact the service station. PIN Code Lock No. Logo PIN Code Lock No. Factory default set No: 1 2 3 4* Factory default set - Sanyo PLC-XW56 | Owners Manual - Page 66
Appendix Dimensions 13.0 (330) 3.74(95) 10°MAX 9.33(237) 5.83(148) 2.18(55.3) 3.62(92) Unit:inch(mm) Screw Holes for Celling Mount Screw: M4 Depth: 0.394(10.0) 4.72(120) 5.31(135) 2.95(75) 3.94(100) KK3AC SANYO Electric Co., Ltd.
-
 1
1 -
 2
2 -
 3
3 -
 4
4 -
 5
5 -
 6
6 -
 7
7 -
8
-
9
-
10
-
11
-
12
-
13
-
14
-
15
-
16
-
17
-
18
-
19
-
20
-
21
-
22
-
23
-
24
-
25
-
26
-
27
-
28
-
29
-
30
-
31
-
32
-
33
-
34
-
35
-
36
-
37
-
38
-
39
-
40
-
41
-
42
-
43
-
44
-
45
-
46
-
47
-
48
-
49
-
50
-
51
-
52
-
53
-
54
-
55
-
56
-
57
-
58
-
59
-
60
-
61
-
62
-
63
-
64
-
65
-
66
 |
 |
Multimedia Projector
Owner's Manual
PLC-XW56
MODEL