Sanyo PLV Z3000 Owners Manual
Sanyo PLV Z3000 - LCD Projector - HD 1080p Manual
 |
UPC - 086483072468
View all Sanyo PLV Z3000 manuals
Add to My Manuals
Save this manual to your list of manuals |
Sanyo PLV Z3000 manual content summary:
- Sanyo PLV Z3000 | Owners Manual - Page 1
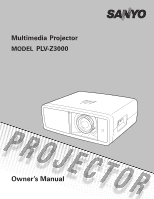
Multimedia Projector MODEL PLV-Z3000 Owner's Manual - Sanyo PLV Z3000 | Owners Manual - Page 2
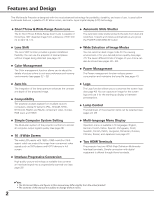
Control The brightness of the projection lamp can be selected (see pages 23, 29). ◆ Simple Computer System Setting The Multi-scan system of the projector conforms to almost all computer output signals quickly (see page 26). ◆ 16 : 9 Wide Screen The wide LCD panels with 1920 x 1080 resolution (16 - Sanyo PLV Z3000 | Owners Manual - Page 3
45 Cleaning the Air Filter 47 Resetting the Filter Counter 48 Cleaning the Projection Lens 48 Cleaning the Projector Cabinet 48 Lamp Replacement 49 Resetting the Lamp Replacement Counter 50 Appendix 51 Troubleshooting 51 Indicators and Projector Condition 53 Menu Tree 54 System - Sanyo PLV Z3000 | Owners Manual - Page 4
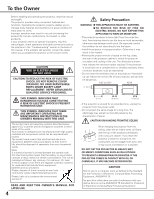
manual. If the problem still persists, contact the dealer where you purchased the projector or the service center. CAUTION RISK OF ELECTRIC SHOCK DO NOT OPEN CAUTION:TO REDUCE THE RISK OF ELECTRIC SHOCK, DO NOT REMOVE COVER (OR BACK). NO USER-SERVICEABLE PARTS INSIDE EXCEPT LAMP REPLACEMENT. REFER - Sanyo PLV Z3000 | Owners Manual - Page 5
Follow all warnings and instructions marked on the projector. For added protection to the projector during lightning projector exhibits a distinct change in performance, this indicates a need for service. When replacement parts are required, be sure the service technician has used replacement parts - Sanyo PLV Z3000 | Owners Manual - Page 6
Shift Lock to prevent damage to the lens and cabinet. When the projector is unused for an extended period, put it into a suitable case. Care must be taken when handling the projector; do not drop, bump, subject it to strong forces, or put other things on the cabinet. 6 CAUTION ON CEILING MOUNTING - Sanyo PLV Z3000 | Owners Manual - Page 7
Number(s) Trade Name Responsible party Address Telephone No. : PLV-Z3000 : Sanyo : SANYO FISHER COMPANY : 21605 Plummer Street, Chatsworth, California 91311 : (818)998-7322 AC Power Cord Requirement The AC Power Cord supplied with this projector meets the requirement for use in the country you - Sanyo PLV Z3000 | Owners Manual - Page 8
t Focus Ring y Zoom Lever u Infrared Remote Receiver i Vertical Lens Shift Ring (Up/Down) o Horizontal Lens Shift Ring (Left/Right) !0 Lens Shift Lock !1 Terminals and Connectors !2 Main On/Off Switch !3 Power Cord Connector !4 Air Intake Vent !5 Lamp Cover ✽ Kensington Security Slot This slot is - Sanyo PLV Z3000 | Owners Manual - Page 9
Rear Terminal q we Part Names and Functions r t y q COMPUTER Connect the computer output signal, 2 Connect the component video output signal to these jacks (p.15). r SERVICE PORT This jack is used to service the projector. t HDMI 1/HDMI 2* Connect the HDMI output signal from video equipment - Sanyo PLV Z3000 | Owners Manual - Page 10
). i INFO. button Display the input source information (p.43). e LAMP REPLACE indicator Lights yellow light when the projection lamp reaches its end of life (pp.49, 53). o POWER ON/STAND-BY button Turn the projector on or off (pp.18, 19). r MENU button Open or close the On-Screen Menu (p.20). 10 - Sanyo PLV Z3000 | Owners Manual - Page 11
LIGHT button Light up the remote control buttons for about 10 seconds (p.22). r MENU button Open or close the On-Screen Menu (p.20). @1 t POINT ed7 8 buttons Select an item or adjust the setting values in the On-Screen Menu. @0 y SCREEN button Select a screen size (pp.22, 35). u BRIGHTNESS - Sanyo PLV Z3000 | Owners Manual - Page 12
the batteries of the remote control are replaced, the remote control code automatically returns to the initial code (Code 1) (p.41). To ensure safe operation, please observe the following precautions: ● Use two (2) AA or LR6 type alkaline batteries. ● Always replace batteries in sets. ● Do not use - Sanyo PLV Z3000 | Owners Manual - Page 13
at minimum zoom. Refer to the figure and table below for the screen size and distance between the projector and screen. 30.2' (9.2 m) 15.1' (4.6 m) 9.8' (3.0 m) 7.9' (2.4 recommended to limit ambient lighting in order to obtain the best image. • All measurements are approximate and may vary from - Sanyo PLV Z3000 | Owners Manual - Page 14
V downmost ✔Note: • The best image is generally obtained at the central axis of the lens shift. • With maximum lens shift in each direction, image distortion may be observed at the edge of the screen. • With the maximum horizontal lens shift, the maximum vertical lens shift cannot be obtained, and - Sanyo PLV Z3000 | Owners Manual - Page 15
line noise may be noted only occasionally. Then adjust the value of Fine sync. The setting can be adjusted from 0 to +31 (see page 34). Unplug the power cords of both the projector and external equipment from the AC outlet before connecting the cables. Video Equipment Component Video Output - Sanyo PLV Z3000 | Owners Manual - Page 16
available). Computer Monitor Out DVI-VGA Cable VGA Cable ✔Note: • To order the optional cables, see page 58. Unplug the power cords of both the projector and external equipment from the AC outlet before connecting the cables. 16 COMPUTER - Sanyo PLV Z3000 | Owners Manual - Page 17
being supplied, consult your authorized dealer or service station. Connect the projector with all peripheral equipment before turning it your sales dealer. Projector side AC Outlet side For the U.S.A. and Canada For Continental Europe Ground For the U.K. To POWER CORD CONNECTOR on your projector. - Sanyo PLV Z3000 | Owners Manual - Page 18
on the projector. Lamp needs some time to stabilize after the power is turned on. Stored lamp mode and the image mode will be active after the lamp is stabilized. • When the shutter is manually closed slightly during projection, the shutter will be automatically closed. Top Control Remote Control - Sanyo PLV Z3000 | Owners Manual - Page 19
remote control. "Power off?" appears on the screen. Press the POWER ON/STAND-BY button again to turn off the projector. When the Power off confirmation function is set to "Off," the projector disappears after 4 seconds. TO MAINTAIN LIFE OF LAMP, ONCE YOU TURN PROJECTOR ON, WAIT AT LEAST FIVE (5) - Sanyo PLV Z3000 | Owners Manual - Page 20
submenus, which are further divided into other submenus. For each adjustment and setting procedure, refer to respective sections in this manual. 1 Press the MENU button on the top control or on the remote control to display the On-Screen Menu. 2 Use the Point ed buttons to highlight or select a main - Sanyo PLV Z3000 | Owners Manual - Page 21
Setting Change various settings; Language, Advanced menu, Menu position, Ceiling, Rear, HDMI 1 setup, HDMI 2 setup, Highland, Background, Rename, Display, Logo, Power off confirmation, Capture, Power management, Remote control, Shutter demo, Test pattern, Filter counter, Cleaning, Fan control, Lamp - Sanyo PLV Z3000 | Owners Manual - Page 22
have the desired operation quickly, and no need for calling up the On-Screen Menu. LIGHT button Press the LIGHT button to light up the remote control buttons. The light is automatically turned off when no buttons on the remote control are pressed for 10 seconds. RESET button Press the RESET button - Sanyo PLV Z3000 | Owners Manual - Page 23
the desired options. Press the MENU button after adjusting. For set in the logo setting. To cancel, press the LOGO button again or press any other button. For details, see page 40. LAMP CONTROL button Press the LAMP CONTROL button to select a lamp mode for changing the brightness of the screen - Sanyo PLV Z3000 | Owners Manual - Page 24
an input source with these buttons, each input must be set on a proper signal form via menu operation (see on pages 25 - 26). INPUT button INPUT button Video S-video Component 1 Component 2 HDMI 1 HDMI 2 Computer INPUT buttons on the remote control Press the VIDEO, S-VIDEO, C1, C2, H1, H2, or - Sanyo PLV Z3000 | Owners Manual - Page 25
Menu Input The currently set item is check marked. Video or S-Video When the video signal is connected to the VIDEO or S-VIDEO jacks, select Video or S-video respectively. Auto The projector select the system manually. PAL / SECAM / NTSC / NTSC4.43 / PAL-M / PAL-N If the projector cannot reproduce - Sanyo PLV Z3000 | Owners Manual - Page 26
of video equipment and the input signal of the projector do not match, you might not get an image with the best quality. If the blacks of the picture appears unclear (too dark or too light), try "HDMI 1 setup" or "HDMI 2 setup" in the Setting Menu on page 38. ✔Note: • When switching from HDMI1 - Sanyo PLV Z3000 | Owners Manual - Page 27
change the Image mode by pressing the PRESET button or the USER button on the remote control for more than 1 second. When the PRESET button is pressed, the Preset submenu with a check mark on the currently set image mode appears. When the USER button is pressed, the User submenu with a check mark - Sanyo PLV Z3000 | Owners Manual - Page 28
each input source and the adjustment is kept until the projector is turned off or the image mode is changed. Direct Operation Remote Control Press the IMAGE ADJ. button on the remote control to display the adjustment bar of Image adj. Menu items one at a time and directly adjust the selected item - Sanyo PLV Z3000 | Owners Manual - Page 29
screen. Use the Point 7 8 buttons to select the desired lamp mode. You can also select the lamp mode by pressing the LAMP CONTROL button on the remote reduction Noise interference on the screen can be reduced. Press the Point 7 8 buttons to adjust the setting values and press the OK button. If you - Sanyo PLV Z3000 | Owners Manual - Page 30
function can be selected only when Advanced menu in the Setting Menu (see page 37) is set to "On." You can adjust the following items through this function. Iris mode Adjust the lamp aperture. Select from the following options: Mode 1 �� Brightness is prioritized over contrast Mode 2 �� Contrast - Sanyo PLV Z3000 | Owners Manual - Page 31
3D-Y/C mode is "On" ✔Note: • 3D-Y/C may not appear depending on the input signal. Custom gamma Adjust R, G, B to get the desired balance of contrast. Select Custom gamma in the Advanced menu is made. • The values are set to 0 when no adjustment is make reflects on the screen as you change the - Sanyo PLV Z3000 | Owners Manual - Page 32
, COLOR PHASE, or GAMMA and the Point 7 8 buttons to adjust them. While adjusting, the changes are reflected in the image accordingly. If you press the MENU button while operating the color selection, the Color management pointer will be reset. After adjusting, press the OK button to go to the Color - Sanyo PLV Z3000 | Owners Manual - Page 33
the remote control. Store To store the adjusted data, select Store and press the Point 8 or OK buttons. The User Image Mode Menu settings, all the adjusted settings will be reset. • When resetting, the adjusted data in Advanced menu will be reset whether or not Advanced menu in the Setting Menu - Sanyo PLV Z3000 | Owners Manual - Page 34
the auto-tuning system of this projector. Picture Adjustment enables you to precisely adjust several parameters manually to match those signal formats. The parameters manually adjusted is stored for every input. 1 Press the Point ed buttons to select the Picture adj. Menu and press the Point 8 or - Sanyo PLV Z3000 | Owners Manual - Page 35
This projector has the picture screen resize function which enables you to customize the image size. Direct Operation Remote Control Press the SCREEN button on the remote control to select a screen size from among Full, Zoom, Normal, Natural wide, and Anamorphic. SCREEN button Menu Operation - Sanyo PLV Z3000 | Owners Manual - Page 36
adj. dialog box cannot be displayed when the OnScreen Menu is on. ✔Note: • The Screen Menu cannot be operated without an input signal. • The ϊ ồ Ϛ ϧ subtitles subtitles ϐ ỽ λ Ϧ ϫ Π υ subtitles subtitles Natural wide Anamorphic Screen: Look dark in the actual setting. 36 - Sanyo PLV Z3000 | Owners Manual - Page 37
. The Menu position screen appears. Use the Point ed7 8 buttons to select the desired position and press the OK button. Ceiling When this function is set to "On," the picture is top/bottom and left/right reversed. This function is used to project the image from a ceiling-mounted projector. Press - Sanyo PLV Z3000 | Owners Manual - Page 38
owner's manual of video equipment. Highland When using the projector in high altitudes (about 1,200 meters or more above the sea level), set this Off. ✔Note: • Failure to set this mode properly may affect the projector life. Background Select the background screen for when no input signal is - Sanyo PLV Z3000 | Owners Manual - Page 39
Setting Rename This function is used to change the name of the Input or the User image box appears, and select [Yes] to cancel your entry. To return to the on-screen keyboard to change the custom name, press the MENU button. The confirmation dialog box appears. Select [No] and press the OK button to - Sanyo PLV Z3000 | Owners Manual - Page 40
projector. Use this function when you want to project the image as early as possible even when the lamp is not bright enough. Off Hide the On-Screen Displays except; ● On-Screen Menu is set to "On," a confirmation dialog box with "Power off?" is displayed when turning off the projector (p.19 - Sanyo PLV Z3000 | Owners Manual - Page 41
projection lamp can be turned on when the input signal is reconnected or any button on the top control or remote control is pressed. Press the Point 8 or OK buttons to switch On/Off. Remote control Two different remote control codes are assigned to this projector: the factory-set code (Code 1) and - Sanyo PLV Z3000 | Owners Manual - Page 42
focus adjustment is available for use when setting up the projector. Filter counter This function is used to set a frequency for the filter cleaning. When the projector reached a specified time between cleanings, a Filter warning icon appears on the screen, notifying the cleaning is necessary. Use - Sanyo PLV Z3000 | Owners Manual - Page 43
projected and the operation of the projector. Direct Operation Press the INFO. button on the top control or on the remote control to display the Information Menu. Menu Operation Press the Point ed buttons to select the Information Menu. The Information Menu is displayed. Top Control See below - Sanyo PLV Z3000 | Owners Manual - Page 44
away from the duct or vent. - Is the air filter clean? Clean the air filter periodically or replace it with a new one. The projector is shut down and the WARNING indicator lights red. When the projector detects an abnormal condition, it is automatically shut down to protect the inside of the - Sanyo PLV Z3000 | Owners Manual - Page 45
of the internal parts (such as optical components) of the projector. When you use the projector for a lengthy period of time or a shadow of dust appears on the projected screen, clean the inside of the projector. Using the supplied air blower and with the Cleaning function in the Setting Menu (p.42 - Sanyo PLV Z3000 | Owners Manual - Page 46
blower watching the position of the dust from the screen. 6 When cleaning is done, pull the blower out of the hole and replace the hole cover. 7 Set the projector back into the right position, then press any button on the top control or on the remote control to quit the Cleaning function. * Do not - Sanyo PLV Z3000 | Owners Manual - Page 47
may accumulate on a lens, LCD panels, or optical elements inside the projector degrading the quality of a projected image. When the symptoms above are noticed, contact your authorized dealer or service station for proper cleaning. Air filter CAUTION Do not operate the projector with the air - Sanyo PLV Z3000 | Owners Manual - Page 48
Maintenance and Cleaning Resetting the Filter Counter Be sure to reset the Filter counter after cleaning or replacing the air filter. 1 Turn the projector on and press the MENU button to display the On-Screen Menu. Select the Setting Menu with the Point ed buttons. Press the Point 8 or OK buttons - Sanyo PLV Z3000 | Owners Manual - Page 49
Lamp Cover Handle Screws Lamp ORDER REPLACEMENT LAMP Replacement lamp can be ordered through your dealer. When ordering a projection lamp, give the following information to the dealer. ● Model No. of your projector: ● Replacement Lamp Type No.: PLV-Z3000 POA-LMP114 (Service Parts - Sanyo PLV Z3000 | Owners Manual - Page 50
sure to reset the lamp replacement counter after the lamp is replaced. When the lamp replacement counter is reset, the LAMP REPLACE indicator stops lighting. Lamp counter reset 1 Turn the projector on and press the MENU button to display the On-Screen Menu. Select the Setting Menu with the Point ed - Sanyo PLV Z3000 | Owners Manual - Page 51
it does not project an image, restart the computer. Problem: No power. Lens Shift does not work. The initial display is not shown. The initial display is not same with the default one. Filter warning icon appears during turning on the projector or switching the input source. Image is out of focus - Sanyo PLV Z3000 | Owners Manual - Page 52
the Ceiling item (see page 37). - With maximum lens shift, image distortion may be observed (see page 14). - The Auto adj. function cannot be operated with the video input, some incompatible computer input and digital signals (see page 34). - Check "Picture adj." menu or "Screen" menu and adjust - Sanyo PLV Z3000 | Owners Manual - Page 53
power cord and contact the dealer or service center for servicing and checkup. Do not leave the projector on. It may cause an electric shock or a fire hazard. The lamp does not turn on because malfunction occurs or the lamp reaches its end of life. ✽ The automatic slide shutter is not working - Sanyo PLV Z3000 | Owners Manual - Page 54
adj. Brightness Contrast Color Tint Color temp. Red Green Blue Sharpness Lamp Control Gamma Progressive Noise reduction Advanced menu Reset Store -31 to +31 -31 to +31 -31 pull down Off / Auto Dynamic gamma Off / Low / Mid / High 3D-Y/C On / Off Custom gamma Gamma R/G/B Yes / No User image 1 User - Sanyo PLV Z3000 | Owners Manual - Page 55
- Unknown Language Advanced menu Menu Position Ceiling Rear HDMI 1 setup HDMI 2 setup Highland Background Rename Display Logo Power off confirmation Capture Power management Remote control Shutter demo Test pattern Filter counter Cleaning Fan control Lamp counter reset Service Port Factory default - Sanyo PLV Z3000 | Owners Manual - Page 56
Appendix System Mode Chart PLV-Z3000 can basically accept the signal from all computers and some video equipment with V- and H-Frequency mentioned below and might be able to project images even when signals other than above are inputted, however the functions of the projector could be limited. 56 - Sanyo PLV Z3000 | Owners Manual - Page 57
Appendix Technical Specifications Projector Type Dimensions (W x H x D) Net Weight LCD Panel System Panel Resolution Number of Pixels Color System High Definition TV Signal Scanning Frequency Projection Image size (Diagonal) Projection Lens Throw Distance Projection Lamp Video Input Jacks Computer - Sanyo PLV Z3000 | Owners Manual - Page 58
Ground 12 ----- 13 Horiz.sync. Input (Composite H/V sync.) 14 Vert.sync. 15 ----- Optional Parts The parts listed below are optional. When ordering these parts, specify item name and Type No. to the sales dealer. ● HDMI Cable Type No.: POA-CA-HDMI (Category 1: This cable is compatible - Sanyo PLV Z3000 | Owners Manual - Page 59
Dimensions Unit: inch (mm) 6.5º 15.75 (400) 2.09 (53) Appendix 3.17 (80.5) 6.06 (154) 13.62 (346) 5.82 (147.9) 0.77 (19.6) 4.62 (117.3) 6.31 (160.3) 3.45 (87.7) 59 - Sanyo PLV Z3000 | Owners Manual - Page 60
ME4A SANYO Electric Co., Ltd.
-
 1
1 -
 2
2 -
 3
3 -
 4
4 -
 5
5 -
 6
6 -
 7
7 -
8
-
9
-
10
-
11
-
12
-
13
-
14
-
15
-
16
-
17
-
18
-
19
-
20
-
21
-
22
-
23
-
24
-
25
-
26
-
27
-
28
-
29
-
30
-
31
-
32
-
33
-
34
-
35
-
36
-
37
-
38
-
39
-
40
-
41
-
42
-
43
-
44
-
45
-
46
-
47
-
48
-
49
-
50
-
51
-
52
-
53
-
54
-
55
-
56
-
57
-
58
-
59
-
60
 |
 |
Multimedia Projector
MODEL
PLV-Z3000
Owner’s Manual