Sanyo VCC-HD4000 Instruction Manual, VCC-HD4000P Installation
Sanyo VCC-HD4000 - Network Camera Manual
 |
UPC - 086483072505
View all Sanyo VCC-HD4000 manuals
Add to My Manuals
Save this manual to your list of manuals |
Sanyo VCC-HD4000 manual content summary:
- Sanyo VCC-HD4000 | Instruction Manual, VCC-HD4000P Installation - Page 1
INSTRUCTION MANUAL Megapixel Camera THIS INSTALLATION SHOULD BE MADE BY A QUALIFIED SERVICE PERSON AND SHOULD CONFORM TO ALL LOCAL CODES. VCC-HD4000P VCC-HD4000 VCC-HDN4000PC Deutsch Español Français English Please read this instruction manual carefully in order to ensure correct installation. - Sanyo VCC-HD4000 | Instruction Manual, VCC-HD4000P Installation - Page 2
user to the presence of important operating and maintenance (servicing) instructions Canada This class B digital apparatus complies with Canadian ICES/NMB-003. Precautions ■ In case of a problem For repairs, consult your dealer or an Authorized Sanyo Service Center. ■ Be careful when handling the - Sanyo VCC-HD4000 | Instruction Manual, VCC-HD4000P Installation - Page 3
environment we live in! This SANYO FISHER Sales (Europe) GmbH Stahlgruberring 4, D-81829 München, Germany SANYO Electric Co., Ltd. 1-1, Sanyo-cho, Daito City, Osaka 574-8534, Japan For Russian Users the temperature may rise to high levels. ■ Cleaning • read all accompanying instructions. Make sure - Sanyo VCC-HD4000 | Instruction Manual, VCC-HD4000P Installation - Page 4
or moves the cursor to the right/left. D RESET button Press with a pen or other pointed object. • Restarts the camera. • Resets the settings. To return all settings to defaults (factory settings), press the RESET button while holding down the MENU button. E SET button Selects the menu and confirms - Sanyo VCC-HD4000 | Instruction Manual, VCC-HD4000P Installation - Page 5
hard disk case (VA-HDC4000) dedicated to use with this camera. For details, see the manual for the hard disk case. 6HDMI connector Outputs HD (High Definition) video. Connect this connector to an HD video device. MEMO: Select the SD OUT or HDMI terminal in on the TV OUT SETTING screen via the - Sanyo VCC-HD4000 | Instruction Manual, VCC-HD4000P Installation - Page 6
content of communication. Full High Definition A high definition monitor can be connected to enable monitoring with HD video device. b Downloading and Playing back • The supplied software "DLViewer_HDCDownloader" can be used to download live video recorded through the camera to your PC for playback - Sanyo VCC-HD4000 | Instruction Manual, VCC-HD4000P Installation - Page 7
Alarm Functions b Detection • The camera has a built-in motion sensor. The face detection function works in conjunction with the motion sensor of the monitored image. (Maximum 5 masks) Clipping Function You can clip a part of the live video for intensive monitoring and display it on the monitor. 6 - Sanyo VCC-HD4000 | Instruction Manual, VCC-HD4000P Installation - Page 8
higher nVIDIA Quadro FX550 series or higher • Display card : 1920 x 1200 pixels or higher • Web browser : Internet Explorer Ver.6.0 or higher ■Connecting the Camera to Your PC &P8 - P12 To set the network information below, see "Quick Reference". 1 Setting up the network information of the - Sanyo VCC-HD4000 | Instruction Manual, VCC-HD4000P Installation - Page 9
to the hub performance in the specifications, etc. PC Switching hub with PoE support ✱1 ✱1 ✱1: LAN cable: CAT5 or higher, straight type, Max. 100 m / 109 yds HDMI SD OUT HD Monitor Camera Control Unit Monitor B Connect the camera to the LAN through a power adapter and a switching hub using - Sanyo VCC-HD4000 | Instruction Manual, VCC-HD4000P Installation - Page 10
✱1 C LAN connection Switching hub ✱1 LAN cable (straight type) B Direct connection LAN cable (crossover type) LAN cable (straight type) Power Supply (AC24V/DC12V) ✱1 HDMI SD OUT HD Monitor ✱1: LAN cable: CAT5 or higher, straight type, 100 m / 109 yds max. Camera Control Unit Monitor 9 - Sanyo VCC-HD4000 | Instruction Manual, VCC-HD4000P Installation - Page 11
on the broadband router. For details on how to set port forwarding, please refer to your router's Instruction manual. b Port 1: JPEG/H.264 HTTP Port number (default): 80 (TCP) IP address (default): 192.168.0.2 Port number (default): 80 (TCP) • Set to same value as on LAN To LAN port To WAN port - Sanyo VCC-HD4000 | Instruction Manual, VCC-HD4000P Installation - Page 12
power cord until all other connections have been completed. Connection for Zoom/Focus Camera Control Unit (Options:VAC-70) +6V/12V (FAR) -6V/12V ( 2 SD OUT POWER ZOOM COM FOCUS GND DC 12V AC24V LAN EX-HDD ✱2 HD Monitor Alarm Signal Output If a lamp is connected to this cable, it will - Sanyo VCC-HD4000 | Instruction Manual, VCC-HD4000P Installation - Page 13
than RG-6U (5C-2V): 500 m / 547 yds. max. Monitor Connection (Non-PoE power supply) Power Supply Connection To prevent a fire hazard use any UL listed wire rated PC Switching hub Shielded LAN cable & "Connection when Using PoE (Power over Ethernet) Power Supply" (P8). & "Connection when Not Using - Sanyo VCC-HD4000 | Instruction Manual, VCC-HD4000P Installation - Page 14
title • Set on NETWORK SETTING screen via the network. Recording/downloading status ✱ Insert at the end of this manual Network Camera x1.0 E01 REC ALM1 Zoom magnification Alarm status Zoom and Focus The zoom and focus of live video can be adjusted with the buttons under the side cover. Focus - Sanyo VCC-HD4000 | Instruction Manual, VCC-HD4000P Installation - Page 15
menu screen. Network Settings &P15 MENU DHCP OFF IP ADDRESS SET y SUBNETMASK SET y GATEWAY SET y NETWORK SPEED NO LIMIT PORT 00080 DEFAULT OFF [MENU]_(MAIN MENU) Main Menu NETWORK SET SET y SD/HDD SET SET y PASSWORD SET y FIRMWARE VERSION SET y [MENU]_(MENU END) Press the MENU - Sanyo VCC-HD4000 | Instruction Manual, VCC-HD4000P Installation - Page 16
up the network information of the camera • DHCP : OFF • IP Address : 192.168.0.2 • Subnet Mask : 255.255.255.0 • Network Speed (bandwidth limitation) : NO LIMIT • Port Number : 80 • Gateway : 192.168.0.1 If you wish to use the default settings, the settings below are - Sanyo VCC-HD4000 | Instruction Manual, VCC-HD4000P Installation - Page 17
Media An SD card or external hard disk can be installed on the camera to record live video. Format the media before use. ● Installing an SD Card or External Hard Disk in the Camera & Please refer to your media's Instruction manual. When the media is formatted on the - Sanyo VCC-HD4000 | Instruction Manual, VCC-HD4000P Installation - Page 18
Setting a Password A password can be set to restrict access to the camera menu screen. ■ Setting the Password [PASSWORD LOCK] 1 Select [PASSWORD] in the main menu with the jl buttons and press the SET button. PASSWORD LOCK OFF y PASSWORD CHANGE SET y 2 Select [PASSWORD LOCK] with the jl buttons and - Sanyo VCC-HD4000 | Instruction Manual, VCC-HD4000P Installation - Page 19
This is monitoring software for use with Sanyo's cameras. This software allows monitoring of live video from multiple cameras (up to 128 cameras). & "VA-SW3050LITE" folder: Instruction Manual (PDF) ● H.264 Plug-in This is software for playing back high-quality video. This software is necessary for - Sanyo VCC-HD4000 | Instruction Manual, VCC-HD4000P Installation - Page 20
Software - This camera allows live video to be recorded. The supplied software can be used to download live video recorded through the camera to your PC for playback. ■ HDC Downloader (Software for Downloading screen instructions to install the software. Installation folder: C:\Program Files\SANYO\ - Sanyo VCC-HD4000 | Instruction Manual, VCC-HD4000P Installation - Page 21
from Camera" and enter the network information. B Connect the SD card or external hard disk to your PC and copy the required image/video data from it. &P26 2 Click "Copy from SD/HDD" and specify the drive and folder of the SD card or hard disk. • Password: download 3 Select the type of image - Sanyo VCC-HD4000 | Instruction Manual, VCC-HD4000P Installation - Page 22
Downloading and Playing back Recorded Video DLViewer Operation Flow 1 2 Select the language. The DLViewer screen appears. Click 3 Select the type of image/video to play back (JPEG or H.264) and specify the folder. [Example] Operation panel &P27 21 - Sanyo VCC-HD4000 | Instruction Manual, VCC-HD4000P Installation - Page 23
address (or URL) and port number. 5Password Enter the password of the download user set in the camera. • If you are entering the password for the first time, enter "download". 6Connection status display The status of the connection with the camera is displayed. 5 Select the type of image/video to - Sanyo VCC-HD4000 | Instruction Manual, VCC-HD4000P Installation - Page 24
a PC that does not have DLViewer installed, select the [with DLViewer] checkbox. The DLViewer playback software will be copied to the destination folder together with the necessary files. & Go to step 4. (&P24) ■ Download by Alarm Event✱1 1 2 3 4 The [Alarm list] does not contain any alarm when you - Sanyo VCC-HD4000 | Instruction Manual, VCC-HD4000P Installation - Page 25
-day (example: September 22, 2008) 4Hour-minute (example: 10:30) 5File number MEMO: To cancel the download, click the [Cancel] button. The download is cancelled; however, any data downloaded before the [Cancel] button is clicked is saved. Click [Play]. "DLViewer" automatically starts and the video - Sanyo VCC-HD4000 | Instruction Manual, VCC-HD4000P Installation - Page 26
detected by alarm input terminal 1/2 and the motion sensor. • Rec button: Data recorded with REC button. GResult: • Pass: Download succeeded • Fail: Download failed • No display: Download not yet executed HPrevious/Next button: Click this button to show the hidden alarms when the number of alarm - Sanyo VCC-HD4000 | Instruction Manual, VCC-HD4000P Installation - Page 27
the [...] button and specify the drive and folder of the SD card or hard disk. 4 Select the type of image/video to be downloaded (JPEG or H.264). To download both JPEG and H.264, select both types. 5 Click [Time/Date Search]. [Alarm Search] cannot be used. MEMO: [Alarm Search] (specifying an image - Sanyo VCC-HD4000 | Instruction Manual, VCC-HD4000P Installation - Page 28
and Playing back Recorded Video Playing back Downloaded Video Data (DLViewer) ■ Using the operation panel 1 : Moving back by frames and playing backward are not possible with H.264 video data. 4 3Speed bar (default setting: 3) Slide the knob to change the playback speed. • H.264: 5 steps • JPEG: 10 - Sanyo VCC-HD4000 | Instruction Manual, VCC-HD4000P Installation - Page 29
■ Saving and Printing Images Saving an Image 1 Click on the toolbar. ■ Date and Time Display Settings Setting the Date Format 1 Select [View] → [Date Display Format] on the menu bar. 2 Specify the folder, filename, and file type, and click [Save]. Image data is saved as a still image. File type - Sanyo VCC-HD4000 | Instruction Manual, VCC-HD4000P Installation - Page 30
VCC-HD4000P/VCC-HDN4000PC: (16:9) HD 1920×1080p, HD 1280×720p, 960×540p, 640×360p, 320×180p (4:3) 1080×864p, 720×576p, 360×288p VCC-HD4000: (16:9) HD 1920×1080p, HD 1000BASE-TX (PoE) TCP/IP, UDP, HTTP, HTTPS, SMTP, NTP, DHCP, FTP, UPnP, DDNS 16 BASIC authentication (ID/password), SSL supported -10 to - Sanyo VCC-HD4000 | Instruction Manual, VCC-HD4000P Installation - Page 31
off while the card is being accessed. - The medium has reached the end of its service life. b Options • Recording/Playback Software: VA-SW3050 Server/Client • Camera Control Unit: VAC-70 • SANYO-specified external hard disk case: VA-HDC4000 For more information on the recommended hard disks, check - Sanyo VCC-HD4000 | Instruction Manual, VCC-HD4000P Installation - Page 32
is a trademark of Sun Microsystems, Inc. SDHC is a trademark. HDMI, the HDMI Logo and High-Definition Multimedia Interface are trademarks or registered trademarks of HDMI Licensing LLC. All other brands and product names in this manual are the registered trademarks or trademarks of their respective - Sanyo VCC-HD4000 | Instruction Manual, VCC-HD4000P Installation - Page 33
SERVICE TECHNIQUE ET DOIT ETRE CONFORME A TOUS LES CODES LOCAUX. VCC-HD4000P VCC-HD4000 Deutsch Español Français English Veuillez lire ce manuel d'instructions informations de réseau de la caméra . P15 Formatage du support d'enregistrement 16 Définition d'un mot de passe 17 Utilisation du CD - Sanyo VCC-HD4000 | Instruction Manual, VCC-HD4000P Installation - Page 34
pas installé et utilisé conformément aux instructions, peut provoquer des interférences nuisibles aux obtenir de l'aide. Pour les clients situés au Canada Cet appareil numérique de classe B est conforme à à votre revendeur ou à un Centre de service Sanyo autorisé. ■ Ne l'ouvrez pas et ne - Sanyo VCC-HD4000 | Instruction Manual, VCC-HD4000P Installation - Page 35
les autres pays du monde. SANYO FISHER Sales (Europe) GmbH Stahlgruberring 4, D-81829 München, Germany SANYO Electric Co., Ltd. 1-1, Sanyo-cho, Daito City, Osaka 574 chiffon traité chimiquement, assurez-vous de lire toutes les instructions qui l'accompagnent. Assurez-vous qu'aucune pièce en - Sanyo VCC-HD4000 | Instruction Manual, VCC-HD4000P Installation - Page 36
Dénomination et fonctions des pièces ■Indicateur d'alimentation/d'erreur • Alimentation sur MARCHE : Allumé (heure de début : 30 s) • Alimentation sur ARRÊT : Éteint • Erreur (défaillance) : Clignotant N.B. : Pour activer l'indicateur d'alimentation via le réseau, réglez [LED D'ALIMENTATION - Sanyo VCC-HD4000 | Instruction Manual, VCC-HD4000P Installation - Page 37
cette caméra. Pour plus de détails, reportez-vous au manuel concernant le boîtier de disque dur. 6Connecteur HDMI Fournit une vidéo HD (Haute Définition). Reliez ce connecteur à un appareil vidéo HD. N.B. : Via le réseau, sélectionnez la borne SD OUT ou HDMI sur l'écran RÉGLAGES DE SORTIE DE TV. 4 - Sanyo VCC-HD4000 | Instruction Manual, VCC-HD4000P Installation - Page 38
une surveillance via le réseau à partir du navigateur Web de votre PC (Internet Explorer). Enregistrement et lecture de la vidéo en direct b Enregistrement • Un support (carte SD ou disque dur externe) peut être installé sur la caméra pour enregistrer une vidéo en direct quand une alarme est détect - Sanyo VCC-HD4000 | Instruction Manual, VCC-HD4000P Installation - Page 39
Fonctions d'alarme b Détection • La caméra est équipée d'un capteur de mouvement intégré. La fonction de détection du visage fonctionne conjointement avec le détecteur de mouvement pour détecter la présence d'une personne. b Notification • Quand une alarme est détectée, vous pouvez recevoir les - Sanyo VCC-HD4000 | Instruction Manual, VCC-HD4000P Installation - Page 40
Procédure pour les réglages de réseau ■Vérification de l'environnement de fonctionnement • PC : IBM PC/AT ou compatible • Système d'exploitation: Windows XP Professional/Windows Vista • Unité centrale : Core2Duo E6700 2,66 GHz ou supérieure • Mémoire : Windows XP : 1 Go ou plus Windows - Sanyo VCC-HD4000 | Instruction Manual, VCC-HD4000P Installation - Page 41
dans les spécifications, etc. PC Concentrateur de commutation avec prise en charge de la fonction PoE ✱1 ✱1 ✱1: câble LAN : CAT5 ou supérieur, de type droit, max. 100 m / 109 yds HDMI SD OUT Moniteur HD Télécommande pour caméra Moniteur B Reliez la caméra au réseau LAN via un adaptateur - Sanyo VCC-HD4000 | Instruction Manual, VCC-HD4000P Installation - Page 42
LAN Concentrateur de commutation ✱1 Câble LAN (droit) B Connexion directe Câble LAN (croisé) Câble LAN (droit) Alimentation électrique (24 V CA/12 V CC) ✱1 HDMI SD OUT Moniteur HD ✱1: câble LAN : CAT5 ou supérieur, de type droit, max. 100 m / 109 yds Télécommande pour caméra Moniteur 9 - Sanyo VCC-HD4000 | Instruction Manual, VCC-HD4000P Installation - Page 43
par port, veuillez vous reporter à le manuel d'instructions de votre routeur. b Port 1 : JPEG/H.264 HTTP Numéro de port (par défaut) : 80 (TCP) Adresse IP (par défaut) : 192.168.0.2 Vers port • Port 1 : [RESEAU] → « NUMÉRO DU PORT » • Port 2 : [CODEC/FLUX] → « PORT UDP (Diffusion indivi.) » 10 - Sanyo VCC-HD4000 | Instruction Manual, VCC-HD4000P Installation - Page 44
peuvent également être utilisées. ✱1 ALARM IN 1 ALARM OUT ALARM IN 2 SD OUT POWER ZOOM COM FOCUS GND DC 12V AC24V LAN EX-HDD ✱2 Moniteur HD Sortie du signal d'alarme Si un témoin est relié à ce câble, il s'allume lorsqu'un signal d'alarme est reçu ou lorsque le capteur intégr - Sanyo VCC-HD4000 | Instruction Manual, VCC-HD4000P Installation - Page 45
Plus épais que RG-6U (5C-2V) : 500 m / 547 yds. max. Branchement du moniteur (Alimentation non PoE) Connexion de l'alimentation Pour éviter tout risque d'incendie utilisez un fil répertorié UL nominal VW-1. GND ~ CA 24 V ~ Vérifiez si la polarité +/- est correcte. - + CC - Sanyo VCC-HD4000 | Instruction Manual, VCC-HD4000P Installation - Page 46
. Titre de la caméra • Défini sur l'écran RÉGLAGE RÉSEAU via le réseau. État de l'enregistrement/du téléchargement ✱ Inclus a la fin de cette brochure Network Camera x1.0 E01 REC ALM1 Agrandissement de zoom État des alarmes Zoom et mise au point Le zoom et la mise au point de la vid - Sanyo VCC-HD4000 | Instruction Manual, VCC-HD4000P Installation - Page 47
Web. Réglages de réseau &P15 MENU DHCP OFF IP ADDRESS SET y SUBNETMASK SET y GATEWAY SET y NETWORK SPEED NO LIMIT PORT 00080 DEFAULT OFF [MENU]_(MAIN MENU) Menu principal NETWORK SET SET y SD/HDD SET SET y PASSWORD SET y FIRMWARE VERSION SET y [MENU]_(MENU END) Pressez le - Sanyo VCC-HD4000 | Instruction Manual, VCC-HD4000P Installation - Page 48
nécessaires. 1 Sélectionnez [NETWORK SET] au moyen des boutons jl et pressez le bouton SET. DHCP OFF IP ADDRESS SET y SUBNETMASK SET y GATEWAY SET y NETWORK SPEED NO LIMIT PORT 00080 DEFAULT OFF [MENU]_(MAIN MENU) 2 Sélectionnez [DHCP] au moyen des boutons jl et pressez le bouton SET - Sanyo VCC-HD4000 | Instruction Manual, VCC-HD4000P Installation - Page 49
● Installation d'une carte SD ou d'un disque dur externe dans la caméra & Veuillez vous reporter au manuel d'instructions du support. - Sanyo VCC-HD4000 | Instruction Manual, VCC-HD4000P Installation - Page 50
moyen des boutons jl. Une fois terminé, pressez le bouton SET. • Si vous définissez un mot de passe pour la première fois, entrez « 1234 ». PASSWORD 1234 SET y x • Si vous entrez un mot de passe erroné trois fois de suite, vous devez répéter la procédure depuis le début. 3 Quand bouton - Sanyo VCC-HD4000 | Instruction Manual, VCC-HD4000P Installation - Page 51
Il s'agit d'un logiciel de surveillance utilisé avec les caméras de Sanyo. Ce logiciel permet de surveiller une vidéo en direct à partir de plusieurs caméras (jusqu'à 128 caméras). & Dossier « VA-SW3050LITE » : Manuel d'Instructions (PDF) ● H.264 Plug-in Il s'agit d'un logiciel de lecture vid - Sanyo VCC-HD4000 | Instruction Manual, VCC-HD4000P Installation - Page 52
direct enregistrée avec la caméra. ■ HDC Downloader (logiciel de téléchargement) &P20 Les données ou par événement d'alarme. • Vous pouvez relier un support (carte SD ou disque dur) à votre PC pour instructions à l'écran pour installer le logiciel. Dossier d'installation : C:\Program Files\SANYO - Sanyo VCC-HD4000 | Instruction Manual, VCC-HD4000P Installation - Page 53
sur « De copie de SD/HDD » et spécifiez le lecteur et le dossier de la carte SD ou du disque dur. • Mot de passe : download 3 Sélectionnez le type d'image/vidéo à télécharger (JPEG ou H.264). 4 Sélectionnez la méthode de recherche. 3 Sélectionnez le type d'image/vidéo à télécharger (JPEG ou H.264 - Sanyo VCC-HD4000 | Instruction Manual, VCC-HD4000P Installation - Page 54
Téléchargement et lecture de la vidéo enregistrée Flux de fonctionnement du DLViewer 1 L'écran DLViewer s'affiche. 2 Sélectionnez la langue. Cliquez 3 Sélectionnez le type d'image/vidéo à lire (JPEG ou H.264) et spécifiez le dossier. [Exemple] Panneau de commande &P27 21 - Sanyo VCC-HD4000 | Instruction Manual, VCC-HD4000P Installation - Page 55
les réglages de réseau requis pour la connexion à la caméra. 1Adress IP ou URL Entrez l'adresse IP (ou URL) de la caméra. Réglage par défaut : 192.168 Si vous entrez le mot de passe pour la première fois, entrez « download ». 6Affichage de l'état de la connexion L'état de la connexion avec la caméra - Sanyo VCC-HD4000 | Instruction Manual, VCC-HD4000P Installation - Page 56
Téléchargement et lecture de la vidéo enregistrée ■ Télécharger par date/heure 1 2 3 4 1 Le point de début [Haut] et le point de fin [Fin] s'affichent automatiquement. 2 Réglez l'heure de début ([Heure de début]) et l'heure de fin ([Heure de fin]). 3 Cliquez sur le bouton [...] et spécifiez le - Sanyo VCC-HD4000 | Instruction Manual, VCC-HD4000P Installation - Page 57
4 Cliquez sur [Telechargement]. La taille des données téléchargées est calculée et une boîte de dialogue de confirmation s'affiche. 5 Cliquez sur [Oui]. Le téléchargement démarre. « Terminé. » s'affiche quand le téléchargement est terminé. Le dossier ci-dessous est automatiquement créé dans le - Sanyo VCC-HD4000 | Instruction Manual, VCC-HD4000P Installation - Page 58
Téléchargement et lecture de la vidéo enregistrée (Explication de la liste des alarmes) AB C D EF G H AN°: Numéro de l'alarme BPré alarme : Date et heure de début de l'enregistrement par pré-alarme. CPoste d'alarme : Date et heure de début de l'enregistrement par post-alarme. DDurée : Durée - Sanyo VCC-HD4000 | Instruction Manual, VCC-HD4000P Installation - Page 59
B Reliez la carte SD ou le disque dur externe à votre PC et copiez, à partir de celle-ci/celui-ci, les données image/vidéo requises. 1 2 3 4 5 1 Sélectionnez la langue d'affichage. 2 Cliquez sur la case d'option « De copie de SD/HDD ». 3 Cliquez sur le bouton [...] et spécifiez le lecteur et le - Sanyo VCC-HD4000 | Instruction Manual, VCC-HD4000P Installation - Page 60
Téléchargement et lecture de la vidéo enregistrée Lecture des données vidéo téléchargées (DLViewer) ■ Utilisation du panneau de commande 1 2 3 1Glissière Faites glisser le coulisseau pour déplacer le point de lecture. N.B. : La date et l'heure du point de début et du point de fin du fichier s' - Sanyo VCC-HD4000 | Instruction Manual, VCC-HD4000P Installation - Page 61
■ Sauvegarde et impression des images Sauvegarde d'une image 1 Cliquez sur dans la barre d'outils. ■ Réglages de l'affichage de la date et de l'heure Réglage du format de la date 1 Sélectionnez [Vue] → [Format aff. date] dans la barre de menus. 2 Spécifiez le dossier, le nom de fichier et le - Sanyo VCC-HD4000 | Instruction Manual, VCC-HD4000P Installation - Page 62
é ambiante de service Source d'alimentation Consommation d'énergie Poids VCC-HD4000P: Normes couleur PAL VCC-HD4000: Normes couleur NTSC 100BASE-TX/1000BASE-TX (PoE) TCP/IP, UDP, HTTP, HTTPS, SMTP, NTP, DHCP, FTP, UPnP, DDNS 16 Authentification DE BASE (ID / mot de passe), support SSL de -10 à - Sanyo VCC-HD4000 | Instruction Manual, VCC-HD4000P Installation - Page 63
après-vente, entretien ou réparation, adressez-vous à votre revendeur ou un Centre de service Sanyo autorisé. b Remarques sur la mémorisation des données • Il est recommandé de copier les données importantes sur un support séparé. • Dans certaines situations, indiquées ci-après, il arrive que les - Sanyo VCC-HD4000 | Instruction Manual, VCC-HD4000P Installation - Page 64
obtenir des informations sur les autres produits ou services fournis par des tiers et présentés et le manuel électronique appartiennent à SANYO Electric Co., Ltd. Aucun des mat HDMI, le logo HDMI et High-Definition Multimedia Interface sont des marques déposées ou des marques commerciales de HDMI - Sanyo VCC-HD4000 | Instruction Manual, VCC-HD4000P Installation - Page 65
CÓDIGOS LOCALES. VCC-HD4000P VCC-HD4000 Deutsch Español Français English Leer atentamente este manual de instrucciones para suministrado 18 Descarga y reproducción de vídeo grabadas - Uso del software "DLViewer_HDCDownloader" - . . 19 Especificaciones principales 29 Tiempos de grabación - Sanyo VCC-HD4000 | Instruction Manual, VCC-HD4000P Installation - Page 66
. Cuidados ■ En caso de un problema No use la unidad si sale humo u olores extraños desde el interior, o si no funciona reparaciones, consulte en el lugar donde la compró o a un centro de servicio autorizado Sanyo. ■ Tenga cuidado al manipular la unidad Para evitar daños, no deje caer la - Sanyo VCC-HD4000 | Instruction Manual, VCC-HD4000P Installation - Page 67
sólo se aplican a los países de la UE y no a los demás países de otras áreas del mundo. SANYO FISHER Sales (Europe) GmbH Stahlgruberring 4, D-81829 München, Germany SANYO Electric Co., Ltd. 1-1, Sanyo-cho, Daito City, Osaka 574-8534, Japan ■ Protéjala de la humedad y el polvo Para no dañarla, no la - Sanyo VCC-HD4000 | Instruction Manual, VCC-HD4000P Installation - Page 68
Nombres y funciones de la piezas ■Indicador de alimentación/fallo • Alimentación ON : Encendido (Tiempo de inicio: 30 s) • Alimentación OFF : Apagado • Error (fallo) : Parpadea NOTA: Para habilitar el indicador de alimentación, a través de la red, ajustar [LED DE ALIMENTACION (DELANTERO)] en " - Sanyo VCC-HD4000 | Instruction Manual, VCC-HD4000P Installation - Page 69
deo SD (definición estándar). 3Terminales 24 VCA/12 VCC Conectar este terminal a la alimentación eléctrica. • Cuando manual de la carcasa de disco duro. 6Conector HDMI Produce vídeo HD (alta definición). Conectar este conector a un dispositivo de vídeo HD. NOTA: Seleccionar el terminal SD OUT o HDMI - Sanyo VCC-HD4000 | Instruction Manual, VCC-HD4000P Installation - Page 70
definición total Puede conectarse un monitor de alta definición para habilitar la monitorización mediante un dispositivo de vídeo HD. b Descarga y reproducción • El software suministrado "DLViewer_HDCDownloader" puede usarse para descargar vídeo en vivo grabado a través de la cámara en el PC para - Sanyo VCC-HD4000 | Instruction Manual, VCC-HD4000P Installation - Page 71
Funciones de alarma b Detección • La cámara está provista de un sensor de movimiento incorporado. La función de detección de caras funciona conjuntamente con el sensor de movimiento para detectar la presencia de humanos. b Aviso • Cuando se detecta una alarma, es posible recibir los datos de imá - Sanyo VCC-HD4000 | Instruction Manual, VCC-HD4000P Installation - Page 72
Procedimiento para los ajustes de red ■Verificación del entorno operativo • PC : IBM PC/AT o compatible • Sistema operativo : Windows XP Professional/Windows Vista • CPU : Core2Duo E6700 2.66 GHz o superior • Memoria : Windows XP : 1 GB o más Windows Vista : 2 GB o más • Interfaz de red - Sanyo VCC-HD4000 | Instruction Manual, VCC-HD4000P Installation - Page 73
de distancia, consultar las prestaciones del conmutador en las especificaciones, etc. PC Conmutador compatible con PoE ✱1 ✱1 ✱1: cable LAN: CAT5 o superior, tipo recto, Máx. 100 m / 109 yardas HDMI SD OUT Monitor HD Unidad de control de la cámara Monitor B Conectar la cámara a la LAN a trav - Sanyo VCC-HD4000 | Instruction Manual, VCC-HD4000P Installation - Page 74
la fuente de alimentación PoE (Power over Ethernet) PC A Conexión a Internet (&P10) Enrutador o módem ADSL ✱1 C Conexión a la LAN Conmutador ✱1 Cable LAN (recto) B Conexión directa Cable LAN (cruzado) Cable LAN (recto) Alimentación (CA 24 V/CC 12 V) ✱1 HDMI SD OUT Monitor HD ✱1: cable LAN - Sanyo VCC-HD4000 | Instruction Manual, VCC-HD4000P Installation - Page 75
de cómo configurar el redireccionamiento de puertos, consultar el manual de instrucciones del enrutador. b Puerto 1: JPEG/H.264 HTTP H.264 UDP Unicast Número de puerto (ajuste por defecto): 3939 (UDP) Dirección IP (ajuste por defecto): 192.168.0.2 Número de puerto (ajuste por defecto): 3939 ( - Sanyo VCC-HD4000 | Instruction Manual, VCC-HD4000P Installation - Page 76
terminales de entrada de alarmas. ✱1 ALARM IN 1 ALARM OUT ALARM IN 2 SD OUT POWER ZOOM COM FOCUS GND DC 12V AC24V LAN EX-HDD ✱2 Monitor HD Salida de señal de alarma Si hay una lámpara conectada a este cable, se enciende cuando se recibe una señal de alarma o cuando el - Sanyo VCC-HD4000 | Instruction Manual, VCC-HD4000P Installation - Page 77
Más grueso que el RG-6U (5C-2V): 500 m / 547 yardas máx. Conexión del monitor (Fuente de alimentación no PoE) Conexión de alimentación Para prevenir el riesgo de incendios utilizar los hilos indicados en la lista UL con características nominales VW-1. GND ~ 24 V CA ~ - Sanyo VCC-HD4000 | Instruction Manual, VCC-HD4000P Installation - Page 78
cámara • Ajustarlo en la pantalla AJUSTES RED a través de la red. Estado de grabación/descarga ✱ Que se incluye en el final de este manual Network Camera x1.0 E01 REC ALM1 Magnificación de zoom Estado de alarma Zoom y enfoque El zoom y enfoque del vídeo en vivo pueden ajustarse mediante los - Sanyo VCC-HD4000 | Instruction Manual, VCC-HD4000P Installation - Page 79
para web. Ajustes de red &P15 MENU DHCP OFF IP ADDRESS SET y SUBNETMASK SET y GATEWAY SET y NETWORK SPEED NO LIMIT PORT 00080 DEFAULT OFF [MENU]_(MAIN MENU) Menú principal NETWORK SET SET y SD/HDD SET SET y PASSWORD SET y FIRMWARE VERSION SET y [MENU]_(MENU END) Pulsar el bot - Sanyo VCC-HD4000 | Instruction Manual, VCC-HD4000P Installation - Page 80
Ajuste manual (ir al paso 3) ON: Ajuste automático (ir al paso 5) 3 Seleccionar [IP ADDRESS] mediante los botones jl y pulsar el botón SET. IP ADDRESS IP ADDRESS ajuste. DHCP OFF IP ADDRESS SET y SUBNETMASK SET y GATEWAY SET y NETWORK SPEED NO LIMIT PORT 00080 DEFAULT OFF [MENU]_(MAIN - Sanyo VCC-HD4000 | Instruction Manual, VCC-HD4000P Installation - Page 81
grabar vídeo en vivo. Formatear los medios antes del uso. ● Instalación de una tarjeta SD o de un disco duro externo en la cámara & Consultar el manual de instrucciones de los medios. Si los medios se formatean mediante la pantalla del menú de la - Sanyo VCC-HD4000 | Instruction Manual, VCC-HD4000P Installation - Page 82
los valores mediante los botones jl. Al terminar, pulsar el botón SET. • Si se ajusta una contraseña por primera vez, escribir "1234". PASSWORD 1234 SET y x • Si se escribe una contraseña incorrecta por tres veces consecutivas, se debe repetir el procedimiento desde el comienzo. 3 Cuando aparece - Sanyo VCC-HD4000 | Instruction Manual, VCC-HD4000P Installation - Page 83
ón de datos de vídeo (JPEG/H.264) grabados a través de la cámara. & Página 19 de este manual. ● VA-SW3050Lite Este es un software de monitorización que se usa con las cámaras de Sanyo. Este software permite la monitorización de vídeo en vivo desde varias cámaras (hasta 128 cámaras). & Carpeta "VA - Sanyo VCC-HD4000 | Instruction Manual, VCC-HD4000P Installation - Page 84
grabadas a través de la cámara en el PC para la reproducción. ■ HDC Downloader (Software para descarga) &P20 Los datos de vídeo grabados en una tarjeta SD o en en la pantalla para instalar el software. Carpeta de instalación: C:\Program Files\SANYO\HDC Utilites Al terminar la instalación, - Sanyo VCC-HD4000 | Instruction Manual, VCC-HD4000P Installation - Page 85
del mismo. &P26 2 Hacer clic en "Extraer de SD/HDD" y especificar la unidad y la carpeta de la tarjeta SD o del disco duro. • Contraseña: download 3 Seleccionar el tipo de imágenes/ vídeo que hay que descargar (JPEG o H.264). 3 Seleccionar el tipo de imágenes/ vídeo que hay que descargar - Sanyo VCC-HD4000 | Instruction Manual, VCC-HD4000P Installation - Page 86
Descarga y reproducción de vídeo grabadas Flujo de funcionamiento del DLViewer 1 Aparece la pantalla del DLViewer. 2 Seleccionar el idioma. Clic 3 Seleccionar el tipo de imágenes/vídeo que hay que reproducir (JPEG o H.264) y especificar la carpeta. [Ejemplo] Panel de operación &P27 21 - Sanyo VCC-HD4000 | Instruction Manual, VCC-HD4000P Installation - Page 87
red que se necesitan para la conexión a la cámara. 1Dirección IP o URL Escribir la dirección IP (o URL) de la cámara. Ajuste por defecto: 192.168.0.2 cámara. • Si se escribe la contraseña por primera vez, escribir "download". 6Pantalla del estado de conexión Se visualiza el estado de la conexión - Sanyo VCC-HD4000 | Instruction Manual, VCC-HD4000P Installation - Page 88
se reproducen los datos de vídeo en un PC en el que no se ha instalado DLViewer, seleccionar la casilla de verificación [con DLViewer]. El software de reproducción DLViewer se copia en la carpeta de destino con los archivos necesarios. & Ir al paso 4. (&P24) ✱1 Un evento de alarma es los datos - Sanyo VCC-HD4000 | Instruction Manual, VCC-HD4000P Installation - Page 89
4 Hacer clic en [Descargar]. Se calcula el tamaño de los datos de descarga y aparece un cuadro de diálogo de confirmación. 5 Hacer clic en [Si] La descarga inicia. Cuando la descarga termina, aparece "Terminado." La carpeta siguiente se crea automáticamente en la carpeta de destino. (Explicación de - Sanyo VCC-HD4000 | Instruction Manual, VCC-HD4000P Installation - Page 90
Descarga y reproducción de vídeo grabadas (Explicación de la lista de alarmas) AB C D EF G H ANúm.: Número de alarma BPre Alarma: Fecha y ora iniciales de la grabación de prealarma. CPost alarma: Fecha y ora iniciales de la grabación de postalarma. DDuración: Duración aproximada de la grabaci - Sanyo VCC-HD4000 | Instruction Manual, VCC-HD4000P Installation - Page 91
B Conectar la tarjeta SD o el disco duro externo al PC y copiar los datos de imágenes/vídeo necesarios del mismo. 1 2 3 4 5 1 Seleccionar el idioma de visualización. 2 Hacer clic en el botón de radio "Extraer de SD/HDD". 3 Hacer clic en el botón [...] y especificar la unidad y la carpeta de la - Sanyo VCC-HD4000 | Instruction Manual, VCC-HD4000P Installation - Page 92
Descarga y reproducción de vídeo grabadas Reproducción de datos de vídeo descargados (DLViewer) ■ Uso del panel de operación 1 2 3 1Barra deslizante Desplazar el punto de deslizamiento para mover el punto de reproducción. NOTA: La fecha y la hora del punto inicial y punto final del archivo - Sanyo VCC-HD4000 | Instruction Manual, VCC-HD4000P Installation - Page 93
■ Guardar e imprimir imágenes Guardar imágenes 1 Hacer clic en herramientas. en la barra de ■ Ajustes de visualización de la fecha y de la hora Ajuste del formato de la fecha 1 Seleccionar [Vista] → [Formato vis. fecha] en la barra del menú. 2 Especificar la carpeta, nombre de archivo y tipo de - Sanyo VCC-HD4000 | Instruction Manual, VCC-HD4000P Installation - Page 94
VCC-HD4000P/VCC-HDN4000PC: (16:9) HD 1920×1080p, HD 1280×720p, 960×540p, 640×360p, 320×180p (4:3) 1080×864p, 720×576p, 360×288p VCC-HD4000: (16:9) HD 1920×1080p, HD temporizador) Salida HD: conector HDMI Salida SD: seleccionable 10BASE-T/100BASE-TX/1000BASE-TX (PoE) TCP/IP, UDP, HTTP, HTTPS, SMTP, - Sanyo VCC-HD4000 | Instruction Manual, VCC-HD4000P Installation - Page 95
con su distribuidor o con un Centro de Servicio autorizado Sanyo. b Notas acerca del almacenamiento de datos • Se recomienda accediendo a la tarjeta. - Los medios han terminado su vida útil. b Opciones • Software de grabación/reproducción: VA-SW3050 Server/Client • Unidad de control de la cámara: - Sanyo VCC-HD4000 | Instruction Manual, VCC-HD4000P Installation - Page 96
de Sun Microsystems, Inc. SDHC es una marca registrada. HDMI, el logotipo HDMI y High-Definition Multimedia Interface son marcas o marcas registradas de HDMI Licensing LLC. Las demás marcas y nombres de productos citados en este manual son marcas registradas o marcas de sus respectivos propietarios - Sanyo VCC-HD4000 | Instruction Manual, VCC-HD4000P Installation - Page 97
SERVICE-PERSONAL VORBEHALTEN UND MUSS MIT ALLEN LOKALEN GESETZESVORSCHRIFTEN KONFORM SEIN. VCC-HD4000P . 7 Anschlüsse 8 Anzeigen von Live-Videobildern 13 Liste der Menübildschirme 14 - Bei Gebrauch der „DLViewer_HDCDownloader" Software 19 Wichtigste technische Daten 29 Aufnahmezeiten - Sanyo VCC-HD4000 | Instruction Manual, VCC-HD4000P Installation - Page 98
. Schalten Sie das Gerät sofort aus, ziehen Sie das Netzkabel aus der Steckdose und wenden Sie sich an Ihren Händler oder an ein autorisiertes Sanyo-Kundendienstzentrum. ■ Das Gerät darf nicht geöffnet und es dürfen keine Änderungen vorgenommen werden Das Gehäuse darf nicht geöffnet werden, weil es - Sanyo VCC-HD4000 | Instruction Manual, VCC-HD4000P Installation - Page 99
leben! Dieses Symbol und das entsprechende Recycling-System gelten nur für EU-Länder und finden in den anderen Ländern der Welt keine Anwendung. SANYO FISHER Sales (Europe) GmbH Stahlgruberring 4, D-81829 München, Germany SANYO Electric Co., Ltd. 1-1, Sanyo-cho, Daito City, Osaka 574-8534, Japan 2 - Sanyo VCC-HD4000 | Instruction Manual, VCC-HD4000P Installation - Page 100
die MENU-Taste gedrückt halten. E SET-Taste Für die Auswahl des Menüs und die Bestätigung der Einstellungen. HINWEIS: Der Zoom und die Scharfeinstellung der Live-Videobilder können eingestellt werden. &Seite 13 3 - Sanyo VCC-HD4000 | Instruction Manual, VCC-HD4000P Installation - Page 101
hierzu finden Sie im Handbuch des Festplattengehäuses. 6HDMI-Anschluss Er dient der Ausgabe von HD-Videobildern (High Definition). Schließen Sie diesen Anschluss an ein HD-Videogerät an. HINWEIS: Wählen Sie die SD OUT- oder HDMI-Buchse im Bildschirm TV OUT-EINSTELLUNGEN über das Netzwerk. 4 - Sanyo VCC-HD4000 | Instruction Manual, VCC-HD4000P Installation - Page 102
ösenden Monitor anschließen, um die Überwachung anhand eines HD-Videogeräts zu ermöglichen. b Herunterladen und Wiedergeben • Die mitgelieferte Software „DLViewer_HDCDownloader" kann zum Herunterladen von mit der Kamera aufgenommenen Live-Videobildern auf Ihren PC verwendet werden, um sie von hier - Sanyo VCC-HD4000 | Instruction Manual, VCC-HD4000P Installation - Page 103
Die Maskierung dient dem Schutz der Privatsphäre, indem ein bestimmter Bereich des Überwachungsbilds abgedeckt wird. (Maximal 5 Masken) Bildschnittfunktion Sie können einen bestimmten Abschnitt des Live-Videobildes zwecks genauerer Überwachung ausschneiden und auf dem Monitor anzeigen. 6 - Sanyo VCC-HD4000 | Instruction Manual, VCC-HD4000P Installation - Page 104
8 - Seite 12 Informationen über die Einstellung der Netzwerkdaten finden Sie unter „Kurzübersicht". 1 Einstellen der Netzwerkdaten der Kamera 2 Einstellen der Netzwerkdaten des Computers 3 Anzeigen der Live-Videobilder von der Kamera 7 - Sanyo VCC-HD4000 | Instruction Manual, VCC-HD4000P Installation - Page 105
Erweiterung der Übertragungsreichweite den technischen Leistungsdaten des Hubs, usw. PC Umschalt-Hub mit PoE-Unterstützung ✱1 ✱1 ✱1: LAN-Netzwerkkabel: CAT5 oder höher, Patchkabel, max. 100 m HDMI SD OUT HD-Monitor Kamerasteuergerät Monitor B Schließen Sie die Kamera über ein Netzteil und - Sanyo VCC-HD4000 | Instruction Manual, VCC-HD4000P Installation - Page 106
PoE-Stromversorgung (Power over Ethernet) PC A Internet (&Seite 10) Router oder ADSL ✱1 C LAN-Anschluss Umschalt-Hub ✱1 LAN-Netzwerkkabel (Patchkabel) B Direkter Anschluss LAN-Netzwerkkabel (Crossover-Kabel) LAN-Netzwerkkabel (Patchkabel) Stromversorgung (AC24V/DC12V) ✱1 HDMI SD OUT HD - Sanyo VCC-HD4000 | Instruction Manual, VCC-HD4000P Installation - Page 107
-Port Router b Port 2: H.264 UDP Unicast Anschlussnummer (Voreinstellung): 3939 (UDP) IP-Adresse (Voreinstellung): 192.168.0.2 Zu LAN-Port Anschlussnummer (Voreinstellung): 3939 (UDP) Netzwerk ein. • Port 1: [NETZWERK] → „ANSCHLUSSNUMMER" • Port 2: [CODEC/STREAMING] → „UDP (Unicast) PORT" 10 - Sanyo VCC-HD4000 | Instruction Manual, VCC-HD4000P Installation - Page 108
verwendet werden. ✱1 ALARM IN 1 ALARM OUT ALARM IN 2 SD OUT POWER ZOOM COM FOCUS GND DC 12V AC24V LAN EX-HDD ✱2 HD-Monitor Alarmausgangssignal Wenn eine Lampe an dieses Kabel angeschlossen ist, leuchtet diese auf, wenn ein Alarmsignal empfangen wird oder wenn der eingebaute Externes - Sanyo VCC-HD4000 | Instruction Manual, VCC-HD4000P Installation - Page 109
Durchmesser von mindestens RG-6U (5C-2V): 500 m max. Monitoranschluss (ohne PoE) Netzanschluss Verwenden Sie zur Vermeidung von Brandgefahr ein UL-Kabel nach VW-1. GND ~ AC 24V ~ Prüfen Sie, ob die +/- Polarität richtig ist. - + DC 12V ✱2 - Sanyo VCC-HD4000 | Instruction Manual, VCC-HD4000P Installation - Page 110
EINST. über das Netzwerk ein. Aufnahme-/Download-Status ✱ Siehe Beilage am Ende dieses Hefts Network Camera x1.0 E01 REC ALM1 Vergrößerungsverh ä ltnis beim Zoomen Alarmstatus Zoom und Scharfeinstellung Der Zoom und die Scharfeinstellung der Live - Sanyo VCC-HD4000 | Instruction Manual, VCC-HD4000P Installation - Page 111
-Version. Netzwerkeinstellungen &Seite 15 MENU DHCP OFF IP ADDRESS SET y SUBNETMASK SET y GATEWAY SET y NETWORK SPEED NO LIMIT PORT 00080 DEFAULT OFF [MENU]_(MAIN MENU) Hauptmenü NETWORK SET SET y SD/HDD SET SET y PASSWORD SET y FIRMWARE VERSION SET y [MENU]_(MENU END) Drücken - Sanyo VCC-HD4000 | Instruction Manual, VCC-HD4000P Installation - Page 112
. 1 Wählen Sie mit der jl-Taste die Option [NETWORK SET] und drücken Sie die SET-Taste. DHCP OFF IP ADDRESS SET y SUBNETMASK SET y GATEWAY SET y NETWORK SPEED NO LIMIT PORT 00080 DEFAULT OFF [MENU]_(MAIN MENU) 2 Wählen Sie mit der jl-Taste die Option [DHCP] und drücken Sie die SET - Sanyo VCC-HD4000 | Instruction Manual, VCC-HD4000P Installation - Page 113
Formatieren der Aufnahmemedien Für die Aufnahme von Live-Videobildern können Sie auch eine SD-Karte oder eine externe Festplatte für die Kamera installieren. Formatieren Sie die Medien vor dem Gebrauch. ● Installieren einer SD-Karte - Sanyo VCC-HD4000 | Instruction Manual, VCC-HD4000P Installation - Page 114
. • Wenn Sie zum ersten Mal ein Kennwort einstellen, geben Sie die Zahlenfolge „1234" ein. PASSWORD PASSWORD NOW PASSWORD **** SET y x Geben Sie das aktuelle Kennwort ein und drücken Sie die SET-Taste. PASSWORD NEW PASSWORD **** SET y x Geben Sie ein neues Kennwort ein und drücken Sie die SET-Taste - Sanyo VCC-HD4000 | Instruction Manual, VCC-HD4000P Installation - Page 115
ein Überwachungsprogramm zur Verwendung mit Kameras von Sanyo. Dieses Programm ermöglicht die Überwachung der Live-Videobilder von mehreren (bis zu 128) Wiedergabe von Videobildern mit hoher Qualität. Diese Software ist für die Anzeige von H.264 Live-Videobildern auf dem Bildschirm über das Netzwerk - Sanyo VCC-HD4000 | Instruction Manual, VCC-HD4000P Installation - Page 116
Live-Videodaten aufnehmen. Die mitgelieferte Software kann zum Herunterladen von mit der Kamera aufgenommenen Live-Videobildern auf Ihren PC verwendet werden, um sie von hier aus wiederzugeben. ■ HDC Downloader (Software Software zu installieren. Installationsverzeichnis: C:\Program Files\SANYO\HDC - Sanyo VCC-HD4000 | Instruction Manual, VCC-HD4000P Installation - Page 117
Klicken Sie auf „Kopieren von SD/ HDD" und geben Sie das Laufwerk und das Verzeichnis der SD-Karte oder der Festplatte an. • Kennwort: download 3 Wählen Sie die Art der Bilder/ Videos, die heruntergeladen werden sollen (JPEG oder H.264). 3 Wählen Sie die Art der Bilder/ Videos, die heruntergeladen - Sanyo VCC-HD4000 | Instruction Manual, VCC-HD4000P Installation - Page 118
Herunterladen und Wiedergeben von Videoaufnahmen DLViewer - Vorgehensweise 1 2 Wählen Sie die gewünschte Sprache. Der Bildschirm DLViewer wird angezeigt. Klicken 3 Wählen Sie die Art der Bilder/Videos, die wiedergegeben werden sollen (JPEG oder H.264), und geben Sie das Verzeichnis an. [Beispiel - Sanyo VCC-HD4000 | Instruction Manual, VCC-HD4000P Installation - Page 119
die Kamera erforderlich sind. 1IP-Adresse oder URL Geben Sie die IP-Adresse (oder URL) der Kamera ein. Voreinstellung: 192.168.0.2 2Port eingestellte Kennwort für den „download"-Benutzer ein. • Wenn Sie zum ersten Mal ein Kennwort einstellen, geben Sie „download" ein. 6Anzeige des Verbindungsstatus - Sanyo VCC-HD4000 | Instruction Manual, VCC-HD4000P Installation - Page 120
Sie die Videodaten auf einem PC ohne installierten DLViewer wiedergeben möchten, aktivieren Sie das Kontrollkästchen [mit DLViewer]. Die Wiedergabe-Software DLViewer wird mit allen notwendigen Dateien in das Zielverzeichnis kopiert. & Fahren Sie mit Schritt 4 fort. (&Seite 24) ■ Herunterladen nach - Sanyo VCC-HD4000 | Instruction Manual, VCC-HD4000P Installation - Page 121
-Monat-Tag (Beispiel: Sept. 22, 2008) 4Stunde-Minute (Beispiel: 10:30) 5Dateinummer HINWEIS: Wenn Sie den Download-Vorgang abbrechen möchten, klicken Sie auf [Aufheben]. Der Download-Vorgang wird nun abgebrochen; alle Daten, die vor dem Anklicken von [Aufheben] heruntergeladen wurden, werden jedoch - Sanyo VCC-HD4000 | Instruction Manual, VCC-HD4000P Installation - Page 122
: Mithilfe der Schaltfläche REC aufgenommene Daten. GErgebnis: • Pass: Die Daten wurden erfolgreich heruntergeladen. • Fail: Der Download-Vorgang ist fehlgeschlagen. • Keine Anzeige: Der Download-Vorgang wurde noch nicht ausgeführt. HSchaltflächen Zurück/Weiter: Klicken Sie auf diese Schaltflächen - Sanyo VCC-HD4000 | Instruction Manual, VCC-HD4000P Installation - Page 123
B Schließen Sie die SD-Karte oder die externe Festplatte an Ihren PC an und kopieren Sie die gewünschten Bild-/Videodaten von diesem Medium. 1 2 3 4 5 1 Wählen Sie die gewünschte Anzeigesprache. 2 Klicken Sie auf das Optionsfeld „Kopieren von SD/HDD". 3 Klicken Sie auf [...] und geben Sie das - Sanyo VCC-HD4000 | Instruction Manual, VCC-HD4000P Installation - Page 124
Herunterladen und Wiedergeben von Videoaufnahmen Wiedergabe von heruntergeladenen Videodaten (DLViewer) ■ Verwendung des Bedienfelds 1 2 3 1Schieberegler Sie können den Wiedergabepunkt verschieben, indem Sie den Schieberegler an die gewünschte Stelle ziehen. HINWEIS: An den beiden Enden des - Sanyo VCC-HD4000 | Instruction Manual, VCC-HD4000P Installation - Page 125
■ Speichern und Drucken von Bildern Speichern eines Bildes 1 Klicken Sie in der Symbolleiste auf . ■ Einstellungen für die Datumsund Uhrzeitanzeige Einstellen des Datumsformats 1 Wählen Sie in der Menüleiste [Ansicht] → [Form. Datumsanz.]. 2 Geben Sie das Verzeichnis, den Dateinamen und den - Sanyo VCC-HD4000 | Instruction Manual, VCC-HD4000P Installation - Page 126
), ALARM (Timeraufnahme) HD-Ausgang: HDMI-Anschluss SD-Ausgang: SUPERFEIN KEINE BESCHRÄNK oder auswählbar 10BASE-T/100BASE-TX/1000BASE-TX (PoE) TCP/IP, UDP, HTTP, HTTPS, SMTP, NTP, DHCP, FTP, UPnP, ündigung und Verpflichtung bleiben vorbehalten. b Service Die Kamera ist ein Präzisionsinstrument. - Sanyo VCC-HD4000 | Instruction Manual, VCC-HD4000P Installation - Page 127
die Karte zugegriffen wird. - Die Lebensdauer des Mediums ist abgelaufen. b Optionen • Aufnahme-/Wiedergabe-Software: VA-SW3050 Server/Client • Kamerasteuergerät: VAC-70 • Von SANYO zugelassenes externes Festplattengehäuse: VA-HDC4000 Weitere Informationen über die empfohlenen Festplatten finden Sie - Sanyo VCC-HD4000 | Instruction Manual, VCC-HD4000P Installation - Page 128
oder Hersteller. Die Software, diese Anleitung und die elektronische Anleitung unterliegen dem Urheberrecht der Sanyo Electric Co., Ltd ist ein Warenzeichen. HDMI, das HDMI Logo und High-Definition Multimedia Interface sind Markenbezeichnungen oder registrierte Warenzeichen der HDMI Licensing LLC. - Sanyo VCC-HD4000 | Instruction Manual, VCC-HD4000P Installation - Page 129
说明手册 摄像头 VCC-HD4000P VCC-HDN4000PC CD-ROM 目录 1 3 5 7 8 13 14 15 16 17 CD-ROM 18 DLViewer_HDCDownloader 19 29 Deutsch Español Français English 1 1/4"-20UNC 镜头盖 1 10 mm - Sanyo VCC-HD4000 | Instruction Manual, VCC-HD4000P Installation - Page 130
用户须知 注意事项 1 - Sanyo VCC-HD4000 | Instruction Manual, VCC-HD4000P Installation - Page 131
VCC-HDN4000PC 使用 10 T: 含有 铅 汞 (Pb) (Hg) F F F F T F 体 10 T F F F 附 件 其他 F F 镉 (Cd) 六价铬 (Cr6+) PBB) F F F F F F F F F F F F F F F F F F PBDE) F F F F F F 2 - Sanyo VCC-HD4000 | Instruction Manual, VCC-HD4000P Installation - Page 132
• 通电 30秒) • 断电 : 关 备注: OPTION SETTINGS POWER LED (FRONT ON"。 ■侧面 SD卡 SD卡插槽 侧盖 操作按钮 MENU A A MENU按钮 B jl按钮 C dc按钮 SET RESET B CDE D RESET按钮 MENU RESET按钮。 E SET按钮 13页 3 - Sanyo VCC-HD4000 | Instruction Manual, VCC-HD4000P Installation - Page 133
C COM D ALARM OUT端子 E ALARM IN 1/ALARM IN 2端子 654 2SD OUT 端子(BNC连接器) 输出SD 324 VAC/12 VDC 端子 POWER 亮。 4LAN 连接器(RJ-45) 5EX-HDD连接器 VA-HDC4000 6HDMI连接器 输出HD HD TV OUT SETTING SD OUT或HDMI端子。 4 - Sanyo VCC-HD4000 | Instruction Manual, VCC-HD4000P Installation - Page 134
通过使用LAN Web浏览器 (Internet Explorer b 录像 SD JPEG 安全措施 b ID b b SSL b DLViewer_HDCDownloader SD 全高清 HD 5 - Sanyo VCC-HD4000 | Instruction Manual, VCC-HD4000P Installation - Page 135
报警功能 b 检测 b 通知 未检测到 已检测到 隐私掩蔽 5 剪辑功能 6 - Sanyo VCC-HD4000 | Instruction Manual, VCC-HD4000P Installation - Page 136
CPU • 内存 : IBM PC/AT : Windows XP Professional/Windows Vista : Core2Duo E6700 2.66 GHz Windows XP : 1 GB 或更多 Windows Vista : 2 GB 100Base-TX/1000Base-T (RJ-45 ATI Radeon HD2600 nVIDIA: GeForce 8600 nVIDIA Quadro FX550 • 显卡 : 1920 x 1200 • Web浏览器 : Internet Explorer Ver - Sanyo VCC-HD4000 | Instruction Manual, VCC-HD4000P Installation - Page 137
连接 使用 PoE JPEG 和 H.264 PoE PoE A 使用LAN LAN。 PoE 支持 PoE 个人电脑 ✱1 ✱1 ✱1: LAN电缆:5 100 m HDMI SD OUT HD监视器 监视器 B 使用LAN LAN。 个人电脑 ✱1 ✱1 8 - Sanyo VCC-HD4000 | Instruction Manual, VCC-HD4000P Installation - Page 138
连接 未使用 PoE A Internet 连接 (&第10 ADSL ✱1 个人电脑 C LAN 连接 ✱1 LAN B LAN LAN 电源 (AC24V/DC12V) ✱1 HDMI SD OUT ✱1: LAN电缆:5 100 m HD 9 - Sanyo VCC-HD4000 | Instruction Manual, VCC-HD4000P Installation - Page 139
端口1:JPEG/H.264 HTTP 80(TCP) IP 192.168.0.2 80(TCP LAN 至LAN端口 至WAN端口 b 端口2:H.264 UDP Unicast(单播) 3939 (UDP) IP 192.168.0.2 路由器 3939 (UDP LAN 至LAN端口 至WAN端口 路由器 Internet 查看 H.264 UDP UDP 1 和端口 2 1:[NETWORK] → "PORT NUMBER 2:[CODEC/STREAMING] → "UDP (Unicast) PORT" 10 - Sanyo VCC-HD4000 | Instruction Manual, VCC-HD4000P Installation - Page 140
/12V (ZOOM) b 1 (选定 "1") (IN1) (COM) b 2 (选定 "2") (IN2) (COM) ✱1 ALARM IN 1 ALARM OUT ALARM IN 2 SD OUT POWER ZOOM COM FOCUS GND DC 12V AC24V LAN EX-HDD ✱2 HD监视器 外围设备 (AL OUT) (COM) ✱1 比 24 AWG 600 m 11 外置硬盘 EX-HDD - Sanyo VCC-HD4000 | Instruction Manual, VCC-HD4000P Installation - Page 141
比RG-6U (5C-2V 500 m (非PoE电源) UL VW-1的导线。 GND ~ AC 24V ~ - + DC 12V ✱2 比 18 AWG 粗 LAN 连接 个人电脑 个人电脑 LAN屏蔽电缆 & "使用 PoE 8页). PoE 9页). 个人电脑 12 - Sanyo VCC-HD4000 | Instruction Manual, VCC-HD4000P Installation - Page 142
TV OUT SETTINGS 12 NETWORK SETTING Network Camera x1.0 E01 REC ALM1 10x 160x MENU SET RESET 13 - Sanyo VCC-HD4000 | Instruction Manual, VCC-HD4000P Installation - Page 143
主菜单 NETWORK SET SET y SD/HDD SET SET y PASSWORD SET y FIRMWARE VERSION SET y [MENU]_(MENU END) 按下MENU MENU END 14 网络设置 &第15页 DHCP OFF IP ADDRESS SET y SUBNETMASK SET y GATEWAY SET y NETWORK SPEED NO LIMIT PORT 00080 DEFAULT OFF [MENU]_(MAIN MENU) &第16页 CAPACITY FORMAT - Sanyo VCC-HD4000 | Instruction Manual, VCC-HD4000P Installation - Page 144
GATEWAY SET y NETWORK SPEED NO LIMIT PORT 00080 DEFAULT OFF [MENU]_(MAIN MENU) 2 使用jl DHCP SET 按钮。 OFF DHCP IP ADDRESS SUBNETMASK GATEWAY OFF SET y SET y SET y 使用jl OFF"或 "ON SET按钮。 OFF 3) ON 5) 3 使用jl IP 下SET按钮。 ADDRESS IP ADDRESS IP ADDRESS 192.168.000.002 x 使用dc jl - Sanyo VCC-HD4000 | Instruction Manual, VCC-HD4000P Installation - Page 145
SD SD 80 : 20 RECORD] → [SD MEMORY CARD/EX HDD SETTINGS 1 使用jl SD/HDD SET SET按钮。 A BC CAPACITY FORMAT SD : 2GB NEW ON EX-HDD : 500GB FMT OFF FORMAT SET y [MENU]_(MAIN MENU) A SD:SD卡 EX-HDD B C FMT NEW 2 使用jl SET按钮。 OFF SD : 2GB NEW OFF 3 使用jl ON - Sanyo VCC-HD4000 | Instruction Manual, VCC-HD4000P Installation - Page 146
1 使用jl PASSWORD SET按钮。 PASSWORD LOCK OFF y PASSWORD CHANGE SET y PASSWORD CHANGE] 1 使用jl PASSWORD SET按钮。 PASSWORD LOCK ON y PASSWORD CHANGE SET y 2 使用jl PASSWORD LOCK SET按钮。 PASSWORD **** SET y x 使用dc jl SET 1234"。 PASSWORD 1234 SET y x 3 在出现 "OK MENU按钮。 PASSWORD屏幕, [PASSWORD LOCK - Sanyo VCC-HD4000 | Instruction Manual, VCC-HD4000P Installation - Page 147
CD-ROM光盘 ■ 软件 随附的 CD-ROM ● DLViewer_HDCDownloader JPEG/H.264 19页。 ● VA-SW3050Lite Sanyo 128 VA-SW3050LITE PDF) ● H.264 Plug-in H.264 VA-SW3050 Server/Client JPEG CD-ROM 浏览器:Internet Explorer 6.0 JavaScript 和 Cookie。 1 将CD-ROM CD 2 "图标。 Adobe Reader - Sanyo VCC-HD4000 | Instruction Manual, VCC-HD4000P Installation - Page 148
页 在 SD JPEG 或 H.264 SD ■ DLViewer 21页 JPEG 或 H.264 安装HDC Downloader和DLViewer "HDC Downloader"和 "DLViewer 1 CD-ROM CD-ROM驱动器。 2 在 "DLViewer_HDCDownloader Setup.exe"。 C:\Program Files\SANYO\HDC Utilites Internet Internet Explorer中单击[Tools] →[Internet Options]。 1 [Security]选项→[Custom - Sanyo VCC-HD4000 | Instruction Manual, VCC-HD4000P Installation - Page 149
HDC Downloader操作流程 1 出现HDC Downloader屏幕。 A 将SD 22页 2 单击 "Download from Camera"并 B 将SD &第26页 2 单击 "Copy from SD/HDD"并指定 SD download 3 JPEG 或H.264)。 4 3 JPEG 或H.264)。 4 单击 按钮。 5 6 单击 按钮。 20 - Sanyo VCC-HD4000 | Instruction Manual, VCC-HD4000P Installation - Page 150
DLViewer操作流程 1 2 出现DLViewer屏幕。 单击 3 JPEG或H.264 [示例] 27页 21 - Sanyo VCC-HD4000 | Instruction Manual, VCC-HD4000P Installation - Page 151
HDC Downloader) A 将SD 1 2 3 4 5 2 3 单击 "Download from Camera"单选按 钮。 4 1IP address or URL IP地址(或URL 192.168.0.2 2Port 80 3SSL 如要使用SSL 443"。 4Proxy URL 5Password "download"。 6 5 JPEG或 H.264)。 JPEG和H.264 6 打开Time/Date Search 23 打开Alarm Search 1 23页) 22 - Sanyo VCC-HD4000 | Instruction Manual, VCC-HD4000P Installation - Page 152
1 2 3 4 1 开始点[Top End 2 设置[Start time]和[End time]。 3 DLViewer with DLViewer DLViewer 4。 (&第24页) 1下载 1 2 3 4 Alarm Search Alarm list 1 指定在[Date Search]。 Alarm list]中。 2 在[Alarm list 3 DLViewer with DLViewer DLViewer 4。 (&第24页) ✱1 23 - Sanyo VCC-HD4000 | Instruction Manual, VCC-HD4000P Installation - Page 153
4 单击[Download]。 5 单击[Yes]。 Finished JPEG AL 20080922 1030 001 1 2 3 45 1 JPEG/H264) 2搜索方法 • TD AL 3 2008年9月22日) 4 10:30) 5文件号 Cancel Cancel 单击[Play]。 "DLViewer DLViewer 27页) 24 - Sanyo VCC-HD4000 | Instruction Manual, VCC-HD4000P Installation - Page 154
AB C D EF G H ANo.: 报警编号 BPre Alarm: CPost Alarm: DDuration: 2分钟 ESize (KB): FType: Alarm 1/2: 1/2 Motion: Network Failure: ALM1/2+M: 1/2 Rec button: 使用REC GResult: • Pass Fail HPrevious/Next按钮: 1000 25 - Sanyo VCC-HD4000 | Instruction Manual, VCC-HD4000P Installation - Page 155
B 将SD 据。 1 2 3 4 5 1 2 单击 "Copy from SD/HDD 3 SD 文件夹。 4 JPEG或 H.264 JPEG和H.264 5 单击[Time/Date Search]。 Alarm Search]。 SD Alarm Search 23页) 26 - Sanyo VCC-HD4000 | Instruction Manual, VCC-HD4000P Installation - Page 156
DLViewer 1 2 3 1滑动条 2播放按钮 H.264 4 3 3) H.264: 5 步 • JPEG: 10 步 4 (第28页) 5 5 GO 27 - Sanyo VCC-HD4000 | Instruction Manual, VCC-HD4000P Installation - Page 157
保存图像 1 1 View] → [Date Display Format]。 2 Save]。 JPEG。 打印图像 1 2 OK]。 b 1 File] → [Title Input]。 2 OK]。 View] → [Time Display Position 10 2在[Title Input [OK]。 28 - Sanyo VCC-HD4000 | Instruction Manual, VCC-HD4000P Installation - Page 158
HD 输出:HDMI 连接器 SD输出:BNC连接器 LAN:10BASE-T/100BASE-TX/1000BASE-TX(RJ-45连接器) USB 2.5" HDD) SD卡插槽:1(SDHC,最大32GB 1/2(NO(常开)或NC Day/Night NO/NC切换, 16V, 150mA 6至±12V MENU、 SET、 RESET 4) H.264/JPEG BASIC、 NORMAL、 ENHANCED、 FINE、 SUPER FINE NO LIMIT 10BASE-T/100BASE-TX/1000BASE-TX (PoE) TCP/IP - Sanyo VCC-HD4000 | Instruction Manual, VCC-HD4000P Installation - Page 159
b b SD b 选项 VA-SW3050 Server/Client VAC-70 • SANYO VA-HDC4000 SANYO SD 卡 (2 GB 至 32 GB) SD SANYO网站: www.sanyosecurity.com/ 30 - Sanyo VCC-HD4000 | Instruction Manual, VCC-HD4000P Installation - Page 160
主要规格 CD-ROM • 有关 CD-ROM SANYO Electric Co., Ltd 像。 Microsoft、 Windows、 ActiveX和Internet Explorer是Microsoft Corporation Windows Microsoft® Corporation (由UPnP Forum SC Java是Sun Microsystems, Inc SDHC HDMI、 HDMI 徽标和 High-Definition Multimedia Interface 是 HDMI Licensing LLC 31 - Sanyo VCC-HD4000 | Instruction Manual, VCC-HD4000P Installation - Page 161
Recording times and target sizes b Recording time by resolution VCC-HD4000P/VCC-HDN4000PC 1 Hard disk recording time P1 2 SD memory card recording time P3 VCC-HD4000 1 Hard disk recording time P5 2 SD memory card recording time P7 b Target size by resolution P9 - Sanyo VCC-HD4000 | Instruction Manual, VCC-HD4000P Installation - Page 162
■ Tiempo de grabación por resolución VCC-HD4000P/VCC-HDN4000PC 1 Hard disk recording time 1 Durée d'enregistrement du disque dur 1 Festplatte Aufnahmezeit 1 Tiempo de grabación de disco duro 1 80GB Picture quality Resolution Recording rate (ips - Sanyo VCC-HD4000 | Instruction Manual, VCC-HD4000P Installation - Page 163
Picture quality 80GB Resolution Recording rate SUPER FINE (ips) FINE ENHANCED NORMAL BASIC 2.5 16.0 19.0 23.4 30.4 43.2 1 2288 × table are reference values when an external hard disk is installed on this camera that may vary depending on the video image quality and other conditions. - Sanyo VCC-HD4000 | Instruction Manual, VCC-HD4000P Installation - Page 164
VCC-HD4000P 2SD memory card recording time 2Durée d'enregistrement de la carte mémoire SD 2SD-Speicherkarte Aufnahmezeit 2Tiempo de grabación de la tarjeta de memoria SD 2SD 2GB Picture quality Resolution Recording rate SUPER FINE (ips) FINE ENHANCED 1920 × 1080p 25 12.5 1280 × 720p 25 - Sanyo VCC-HD4000 | Instruction Manual, VCC-HD4000P Installation - Page 165
Picture quality 2GB Resolution Recording rate SUPER FINE (ips) FINE ENHANCED NORMAL BASIC 2.5 0.3 0.4 0.5 0.7 0.9 1 2288 × 1712 0.5 0.9 1.0 1.3 1.7 reference values when an SD memory card is installed in this camera that may vary depending on the video image quality and other - Sanyo VCC-HD4000 | Instruction Manual, VCC-HD4000P Installation - Page 166
VCC-HD4000 1 Hard disk recording time 1 Durée d'enregistrement du disque dur 1 Festplatte Aufnahmezeit 1 Tiempo de grabación de disco duro 1 80GB Picture quality Resolution Recording rate (ips) SUPER FINE FINE ENHANCED 1920 × 1080p 30 15 1280 × 720p 30 15 H.264 (16:9) 960 × 540p 30 - Sanyo VCC-HD4000 | Instruction Manual, VCC-HD4000P Installation - Page 167
Picture quality 80GB Resolution Recording rate SUPER FINE (ips) FINE ENHANCED NORMAL BASIC 3 13.4 15.8 19.5 25.3 36.0 1 2288 × table are reference values when an external hard disk is installed on this camera that may vary depending on the video image quality and other conditions. - Sanyo VCC-HD4000 | Instruction Manual, VCC-HD4000P Installation - Page 168
VCC-HD4000 2SD memory card recording time 2Durée d'enregistrement de la carte mémoire SD 2SD-Speicherkarte Aufnahmezeit 2Tiempo de grabación de la tarjeta de memoria SD 2SD 2GB Picture quality Resolution Recording rate SUPER FINE (ips) FINE ENHANCED 1920 × 1080p 30 15 1280 × 720p 25 12 - Sanyo VCC-HD4000 | Instruction Manual, VCC-HD4000P Installation - Page 169
Picture quality 2GB Resolution Recording rate SUPER FINE (ips) FINE ENHANCED NORMAL BASIC 3 0.3 0.3 0.4 0.6 0.8 1 2288 × 1712 0.5 0.9 1.0 1.3 1.7 2.4 reference values when an SD memory card is installed in this camera that may vary depending on the video image quality and other - Sanyo VCC-HD4000 | Instruction Manual, VCC-HD4000P Installation - Page 170
by resolution ■ Taille cible par résolution ■ Zielgröße nach Auflösung ■ Tamaño del objetivo por resolución VCC-HD4000P/VCC-HD4000/VCC-HDN4000PC Picture quality Resolution Recording rate SUPER FINE (ips) FINE ENHANCED NORMAL BASIC 1920 × 1080p 25 (30) 12.5 (15) 8000 7250 7000 6250 6000 - Sanyo VCC-HD4000 | Instruction Manual, VCC-HD4000P Installation - Page 171
AREA FULL W05: ALARM RECORDING AREA FULL W10: HDD TEMPERATURE W11: NO MEDIA ● System information S01: RESTORE FACTORY SETTINGS S02: FIRMWARE UPDATE:MAIN S03: FIRMWARE UPDATE:SUB S04: HDD FORMAT S05: SD CARD FORMAT S06: RESTORE SETTINGS/COPY RECORDING AREA SETTINGS: ON S07: RESTORE SETTINGS/COPY - Sanyo VCC-HD4000 | Instruction Manual, VCC-HD4000P Installation - Page 172
Dimensions 161 (6.3) 159 (6.2) 95 (3.7) 69 (2.7) 67 (2.6) Accessories Unit: mm (inch) *1 1 2 (VCC-HD4000) *1 VCC-HD4000P : English/Français/Deutsch VCC-HD4000 : English/Français/Español VCC-HDN4000PC 1AC6P1P3313-L5CL2/XE, US, C (0808KP-HS) SANYO Electric Co., Ltd.
-
 1
1 -
 2
2 -
 3
3 -
 4
4 -
 5
5 -
 6
6 -
 7
7 -
8
-
9
-
10
-
11
-
12
-
13
-
14
-
15
-
16
-
17
-
18
-
19
-
20
-
21
-
22
-
23
-
24
-
25
-
26
-
27
-
28
-
29
-
30
-
31
-
32
-
33
-
34
-
35
-
36
-
37
-
38
-
39
-
40
-
41
-
42
-
43
-
44
-
45
-
46
-
47
-
48
-
49
-
50
-
51
-
52
-
53
-
54
-
55
-
56
-
57
-
58
-
59
-
60
-
61
-
62
-
63
-
64
-
65
-
66
-
67
-
68
-
69
-
70
-
71
-
72
-
73
-
74
-
75
-
76
-
77
-
78
-
79
-
80
-
81
-
82
-
83
-
84
-
85
-
86
-
87
-
88
-
89
-
90
-
91
-
92
-
93
-
94
-
95
-
96
-
97
-
98
-
99
-
100
-
101
-
102
-
103
-
104
-
105
-
106
-
107
-
108
-
109
-
110
-
111
-
112
-
113
-
114
-
115
-
116
-
117
-
118
-
119
-
120
-
121
-
122
-
123
-
124
-
125
-
126
-
127
-
128
-
129
-
130
-
131
-
132
-
133
-
134
-
135
-
136
-
137
-
138
-
139
-
140
-
141
-
142
-
143
-
144
-
145
-
146
-
147
-
148
-
149
-
150
-
151
-
152
-
153
-
154
-
155
-
156
-
157
-
158
-
159
-
160
-
161
-
162
-
163
-
164
-
165
-
166
-
167
-
168
-
169
-
170
-
171
-
172
 |
 |

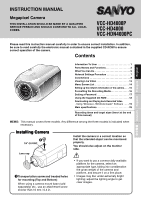
INSTRUCTION MANUAL
Megapixel Camera
THIS INSTALLATION SHOULD BE MADE BY A QUALIFIED
SERVICE PERSON AND SHOULD CONFORM TO ALL LOCAL
CODES.
Please read this instruction manual carefully in order to ensure correct installation. In addition,
be sure to read carefully the electronic manual contained in the supplied CD-ROM to ensure
correct operation of the camera.
Contents
Information To User . . . . . . . . . . . . . . . . . . . . . . . . . 1
Parts Names and Functions. . . . . . . . . . . . . . . . . . . 3
What You Can Do . . . . . . . . . . . . . . . . . . . . . . . . . . . 5
Network Settings Procedure . . . . . . . . . . . . . . . . . . 7
Connections . . . . . . . . . . . . . . . . . . . . . . . . . . . . . . . 8
Viewing Live Video . . . . . . . . . . . . . . . . . . . . . . . . . 13
Menu Screen List . . . . . . . . . . . . . . . . . . . . . . . . . . 14
Setting up the network information of the camera
. . . . 15
Formatting the Recording Media. . . . . . . . . . . . . . 16
Setting a Password . . . . . . . . . . . . . . . . . . . . . . . . . 17
Using the Supplied CD-ROM . . . . . . . . . . . . . . . . . 18
Downloading and Playing back Recorded Video
- Using "DLViewer_HDCDownloader" Software -
. . . 19
Main specifications. . . . . . . . . . . . . . . . . . . . . . . . . 29
Recording times and target sizes (Insert at the end
of this manual)
VCC-HD4000P
VCC-HD4000
VCC-HDN4000PC
English
Français
Español
Deutsch
中文简体
1
Transportation screw and treaded holes
for mounting (Top and Bottom)
When using a camera mount base (sold
separately) etc., use an attachment screw
shorter than 10 mm / 0.4 in.
Install the camera in a correct location so
that the intended object can be monitored
properly.
You should also adjust on the monitor
side.
•
If you want to use a commercially available
platform for the camera, select an
appropriate type, taking into consideration
the gross weight of the camera and
platform, and secure it on a firm place.
•
Images may blur under extremely bright
lighting; adjust the lighting angle to get
clear images.
1
Lens cap
1/4”-20 UNC
Installing Camera
Installing Camera
MEMO:
This manual covers three models. Any difference among the three models is indicated when
necessary.