Sanyo VPC-GH2 VPC-GH2 Owners Manual English - Page 19
Setup, Parts Names
 |
UPC - 086483077869
View all Sanyo VPC-GH2 manuals
Add to My Manuals
Save this manual to your list of manuals |
Page 19 highlights
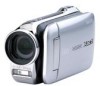
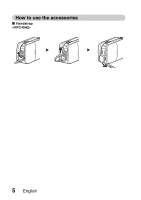
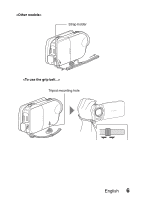
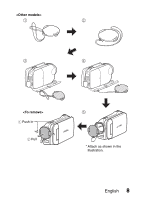
SETUP SETUP SETUP PARTS NAMES Front Sub-REC buttons [R] button Video recording button [O] button Photo shooting button 1 Insert your hand in the handstrap from the top of the camera. 2 Enfold the camera in the palm of your hand to grip it. 3 Use your thumb to operate the [O] and [R] buttons above the lens. Lens Zoom switch Monitor unit Flash Stereo microphone * The tripod mounting hole is on the bottom. English 10
-
 1
1 -
2
-
3
-
4
-
5
-
6
-
7
-
8
-
9
-
10
-
11
-
12
-
13
-
 14
14 -
 15
15 -
 16
16 -
 17
17 -
 18
18 -
 19
19 -
 20
20 -
 21
21 -
 22
22 -
 23
23 -
 24
24 -
25
-
26
-
27
-
28
-
29
-
30
-
31
-
32
-
33
-
34
-
35
-
36
-
37
-
38
-
39
-
40
-
41
-
42
-
43
-
44
-
45
-
46
-
47
-
48
-
49
-
50
-
51
-
52
-
53
-
54
-
55
-
56
-
57
-
58
-
59
-
60
-
61
-
62
-
63
-
64
-
65
-
66
-
67
-
68
-
69
-
70
-
71
-
72
-
73
-
74
-
75
-
76
-
77
-
78
-
79
 |
 |

English
10
SETUP
SETUP
SETUP
PARTS NAMES
Front
Flash
Lens
Monitor unit
Sub-REC buttons
[
O
] button
[
R
] button
*
The tripod mounting hole is on
the bottom.
Video recording
button
Zoom switch
Photo shooting button
Stereo microphone
1
Insert your hand in the
handstrap from the top of
the camera.
2
Enfold the camera in the
palm of your hand to grip it.
3
Use your thumb to operate
the [
O
] and [
R
] buttons
above the lens.