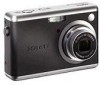
Sanyo VPC S6 Instruction Manual, VPC-S600 - Page 23
Setting the Date and Time
 |
UPC - 086483059193
View all Sanyo VPC S6 manuals
Add to My Manuals
Save this manual to your list of manuals |
Page 23 highlights
Setting the Date and Time Follow the steps below to set the date display style, current date and time. 1. Rotate the mode dial to and turn your camera on by pressing the power switch. 2. [Set-up1] is displayed. 3. Use the four-way controller (T) to select [Date & Time], then press the button. Set-up1 Set-up2 Set-up3 Format Beeper Louder Date & Time m/d/y Language English Select : 4. Press the four-way controller (WX) to select date style, Day, Month, Year and Time fields. „ To increase a value, press the four-way controller (S). „ To decrease a value, press the four-way controller (T). „ To select the time display in 12-hour or 24-hour format, press the four-way controller. 5. Press the button after all fields are set. Date & Time Date & Time m / d / y 12h 01 / 09 / 2007 Set : 00 : 00 AM Select : • The date illustration shown is for the purpose of explanation and may differ from the actual setting of your camera. EN-22
-
 1
1 -
2
-
3
-
4
-
5
-
6
-
7
-
8
-
9
-
10
-
11
-
12
-
13
-
14
-
15
-
16
-
17
-
 18
18 -
 19
19 -
 20
20 -
 21
21 -
 22
22 -
 23
23 -
 24
24 -
 25
25 -
 26
26 -
 27
27 -
 28
28 -
29
-
30
-
31
-
32
-
33
-
34
-
35
-
36
-
37
-
38
-
39
-
40
-
41
-
42
-
43
-
44
-
45
-
46
-
47
-
48
-
49
-
50
-
51
-
52
-
53
-
54
-
55
-
56
-
57
-
58
-
59
-
60
-
61
-
62
-
63
-
64
-
65
-
66
-
67
-
68
-
69
-
70
-
71
-
72
-
73
 |
 |
