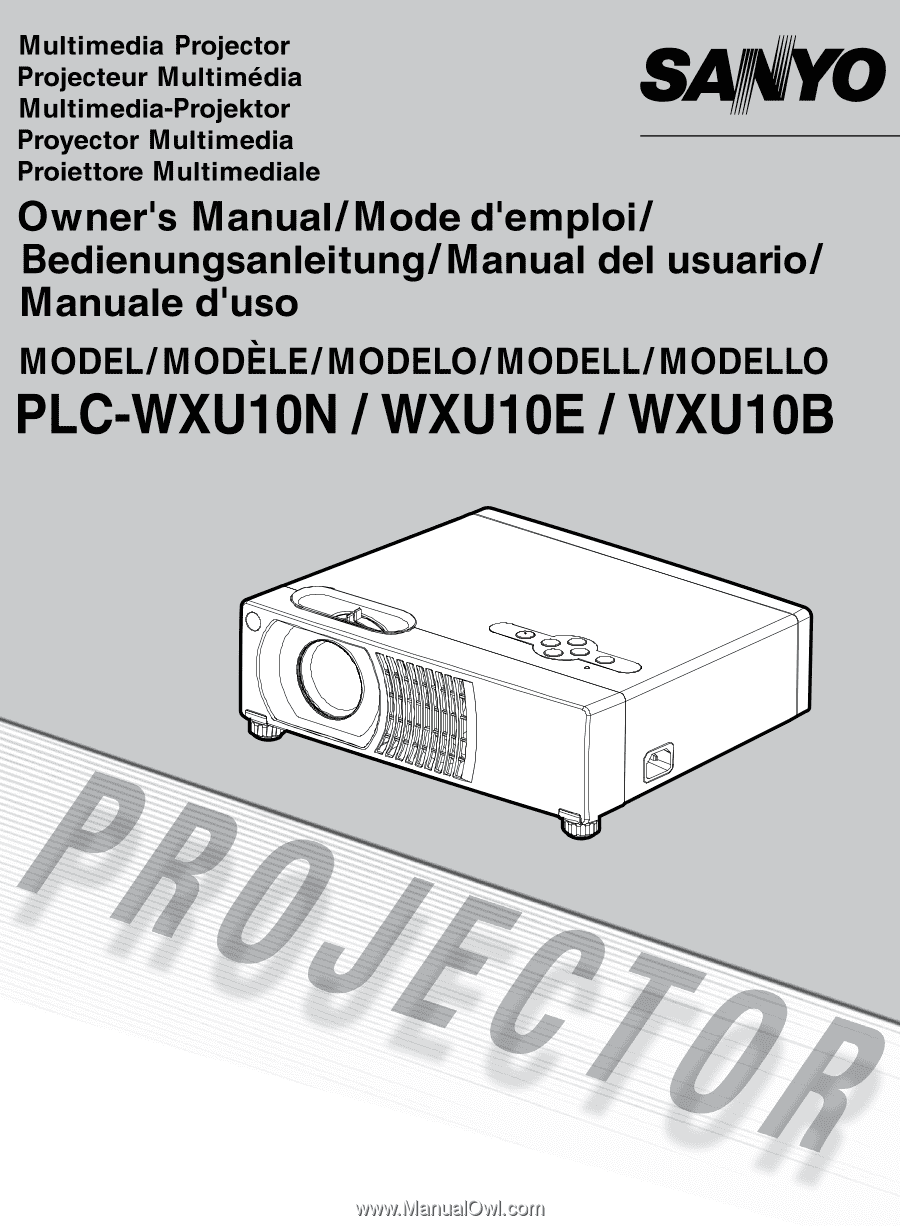
Sanyo WXU10 Instruction Manual, PLC-WXU10B
Sanyo WXU10 - PLC WXGA LCD Projector Manual
 |
View all Sanyo WXU10 manuals
Add to My Manuals
Save this manual to your list of manuals |
Sanyo WXU10 manual content summary:
- Sanyo WXU10 | Instruction Manual, PLC-WXU10B - Page 1
English EN-1 - Sanyo WXU10 | Instruction Manual, PLC-WXU10B - Page 2
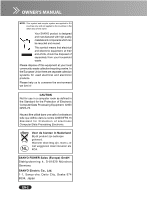
operate improperly, read this manual again, check operations and cable connections and try the solutions in the "Troubleshooting" section in the end of this booklet. If the problem still persists, contact the dealer where you purchased the projector or the service center. Safety Precaution WARNING - Sanyo WXU10 | Instruction Manual, PLC-WXU10B - Page 3
symbol and recycle system are applied to EU countres only and not applied to the countries in the other area of the world. Your SANYO product is designed and manufactured with high quality materials and components which can be recycled and reused. This symbol means that electrical and electronic - Sanyo WXU10 | Instruction Manual, PLC-WXU10B - Page 4
service personnel under the following conditions: a. When the power cord or plug is damaged or frayed. b. If liquid has been spilled into the projector. c. If the projector has been exposed to rain or water. d. If the projector does not operate normally by following the operating instructions - Sanyo WXU10 | Instruction Manual, PLC-WXU10B - Page 5
lens side up to protect the projector. When handling the projector, do not drop, bump, subject it to strong forces, or put other things on the cabinet. Installing the Projector in Proper Position Install the projector properly. Improper Installation may reduce the lamp life and cause a fire hazard - Sanyo WXU10 | Instruction Manual, PLC-WXU10B - Page 6
instructions. If such changes or modifications should be made, you could be required to stop operation of the equipment. Model Number : PLC-WXU10N Trade Name : Sanyo Responsible party : SANYO from the Parts Department indicated in your User Instructions. If the plug supplied is not suitable - Sanyo WXU10 | Instruction Manual, PLC-WXU10B - Page 7
below and proper AC Power Cord must be used. If supplied AC Power Cord does not match your AC outlet, contact your sales dealer. This projector is equipped with a grounding type AC line plug. Make sure that your outlet fits the plug. Do not defeat the safety purpose of this grounding - Sanyo WXU10 | Instruction Manual, PLC-WXU10B - Page 8
30 Maintenance ...31 Cleaning the Lens ...31 Cleaning the Projector Housing 31 Cleaning the Air Filter 32 Replacing the Lamp ...33 Specifications ...35 Appendix ...36 LED Indicator Messages 36 Optional Parts ...36 Compatibility Modes ...37 Troubleshooting ...38 Serial Control Interface 40 EN-7 - Sanyo WXU10 | Instruction Manual, PLC-WXU10B - Page 9
integrates high-performance optical engine projection and a user-friendly design to deliver high reliability and ease of use. The projector offers the following features: 3 panel 0.56 inch LCD projector WXGA (1280 x 800 pixels) 1.2X manual zoom lens Auto image re-sizing (Auto-Sync.) to 1280 - Sanyo WXU10 | Instruction Manual, PLC-WXU10B - Page 10
: J2552-0107-00) VGA Cable (D-Sub to D-Sub) (J2552-0072-03) Remote Control (IR) AAA size batteries for remote control Owner's Manual Projector Carrying Case Quick Start Guide Save the original shipping carton and packing material; they will come in handy if you ever to ship your unit. For - Sanyo WXU10 | Instruction Manual, PLC-WXU10B - Page 11
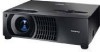
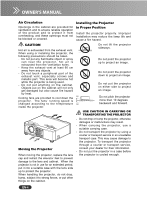
Projector Overview Front View 1 23 4 5 8 7 11 10 9 87 6 1 Front IR remote control sensor 2 Projection lens 3 Focus ring 4 Zoom ring 5 Control panel 6 AC power socket 7 Elevator foot 8 Elevator button 9 Ventilation holes 10 Lens cap strap 11 Lens cap EN-10 - Sanyo WXU10 | Instruction Manual, PLC-WXU10B - Page 12
2 Connection ports 3 Kensington lock 4 Rear IR remote control sensor 5 Speaker 1 2 Bottom View 1 Air filter cover 2 Lamp cover 3 Ceiling mount (3-M4*6) 1 3 3 5 43 2 3 This projector can be used with a ceiling mount for support. The ceiling mount is not included in the package. EN-11 - Sanyo WXU10 | Instruction Manual, PLC-WXU10B - Page 13
3 Button Function 3 ON / STAND-BY Refer to "Powering On/Off the Projector". 4 Four directional (INPUT/AUTO PC ) buttons - Use four directional buttons to select items or make adjustments to your selection. - Manually selects an input source. (Left button) - Automatically adjusts Fine Sync and Total - Sanyo WXU10 | Instruction Manual, PLC-WXU10B - Page 14
S-Video output from video equipment to this jack. 5 DVI-D IN Connects DVI output from a computer to this jack. 6 RS-232C When operating the projector via a computer, connect this to the controlling computer's RS-232C port. 7 MONITOR OUT This terminal can be used to output the incoming signal from - Sanyo WXU10 | Instruction Manual, PLC-WXU10B - Page 15
. Press again to cancel the NO SHOW function. 8 ASPECT Switch the image aspect ratio. 9 INPUT Manually selects an input source. 10 KEYSTONE + / Adjusts image distortion caused by tilting the projector. 11 VOLUME + / Press Volume + button to increase the volume. Press Volume - button to reduce the - Sanyo WXU10 | Instruction Manual, PLC-WXU10B - Page 16
Installing the Batteries 1. Open the battery cover in the direction shown. 2. Install batteries as indicated by the diagram inside the compartment. 3. Close the battery cover into position. Keep the batteries out of the reach of children. There is a danger of death by accidentally swallowing the - Sanyo WXU10 | Instruction Manual, PLC-WXU10B - Page 17
30 Operating the projector from the rear 30 Do not point the LED light pointer directly to the people's eyes (especially small children). There is a danger of injuiry to the eyes. The remote control may not operate when there is sunlight or other strong light such as a fluorescent lamp shining on - Sanyo WXU10 | Instruction Manual, PLC-WXU10B - Page 18
is a sample connection. This does not mean that all of these devices can or must be connected simultaneously. The cables that come with the projector may differ from the above illustration. The included cables are based on actual shipment delivery. See page 36 for ordering optional cables. EN-17 - Sanyo WXU10 | Instruction Manual, PLC-WXU10B - Page 19
than 15 minutes. J Faster on-off-cycles will damage the lamp and reduce lamp life. Wait at least for 7 minutes to turn off the projector after powering on. Powering Off the Projector: 1. Press ON / STAND-BY button to turn off the projector lamp. You will see a message "Power Off? Press Power again - Sanyo WXU10 | Instruction Manual, PLC-WXU10B - Page 20
Adjusting the Projected Image Adjusting the Projector Height Elevator button Elevator foot The projector is equipped with two elevator feet to adjust the image the elevator feet into position. To avoid damaging the projector, make sure that the elevator feet are fully retracted before placing the - Sanyo WXU10 | Instruction Manual, PLC-WXU10B - Page 21
Adjusting the Projector Zoom and Focus Zoom ring Focus ring 1. Adjust the image by rotating the zoom ring. Rotate to the right to reduce the image. Rotate to the left to enlarge the image. 2. Focus the image by rotating the focus ring. A still image is recommended for focusing. EN-20 - Sanyo WXU10 | Instruction Manual, PLC-WXU10B - Page 22
) Te l e 32 26.7 2.0 62 51.7 3.0 5.0 7.0 9.0 10.0 92 76.7 152 126.7 212 176.7 272 226.7 302 251.7 Position the projector in a horizontal position; other positions can cause heat build-up and damage to the projector. Make sure the heat ventilation holes are not blocked. Do not use the - Sanyo WXU10 | Instruction Manual, PLC-WXU10B - Page 23
Menu Operation The projector has multilingual On Screen Display menus that allow you to make image adjustments and change a variety of settings. EN-22 - Sanyo WXU10 | Instruction Manual, PLC-WXU10B - Page 24
. 4. Press MENU button, the screen will return to the main menu. 5. To exit OSD, press MENU button again. The OSD menu will close and the projector will automatically save the new settings. EN-23 - Sanyo WXU10 | Instruction Manual, PLC-WXU10B - Page 25
. Color Temperature Adjusts color temperature. At higher temperature, the screen looks colder; at lower temperature, the screen looks warmer. If you select "USER", "Red", "Green" and "Blue" can be adjusted. Red Manually adjusts red. Green Manually adjusts green. Blue Manually adjusts blue. EN-24 - Sanyo WXU10 | Instruction Manual, PLC-WXU10B - Page 26
. Color Temperature Adjusts color temperature. At higher temperature, the screen looks colder; at lower temperature, the screen looks warmer. If you select "USER", "Red", "Green" and "Blue" can be adjusted. Red Manually adjusts red. Green Manually adjusts green. Blue Manually adjusts blue. EN-25 - Sanyo WXU10 | Instruction Manual, PLC-WXU10B - Page 27
1 TO 1 1280 x 800 800 x 600 (4:3) If input signal is smaller than LCD resolution, it will keep the original size and aspect ratio. 1280 x 800 1600 x 900 only) 1280 x 800 1024 x 768 (4:3) If input signal is bigger than LCD resolution, it will full all the whole screen and ignore the aspect ratio. - Sanyo WXU10 | Instruction Manual, PLC-WXU10B - Page 28
FILL ALL 1280 x 800 Any type ofresolution. Always fill the whole LCD. H Position (Horizontal Position) Press W to move the image left. Press X to move the image right. V Position (Vertical Position) Press W to move the image down. Press X - Sanyo WXU10 | Instruction Manual, PLC-WXU10B - Page 29
Image (Video Mode) Aspect Use this function to choose your desired image size. Q 4:3 : Change the original aspect 1:1 to 4:3 at the composite video input or S-video input. Q 1 TO 1 : Keep the image with original width-height ratio at the component input. Q FILL ALL : The input source will be - Sanyo WXU10 | Instruction Manual, PLC-WXU10B - Page 30
from behind a translucent screen with ceiling mounted projection. ECO Mode Use this function to dim the projector lamp light output which will lower power consumption and increase lamp life. Input Search Use to automatically search input signal. Highland Turn on Highland mode operates the fans - Sanyo WXU10 | Instruction Manual, PLC-WXU10B - Page 31
Sound (Computer / Video Mode) Volume Press W to decrease the volume. Press X to increase the volume. Mute Choose "ON" to turn mute on. Choose "OFF" to turn mute off. Advanced (Computer / Video Mode) Factory Default Press X to enter its menu. Press MENU button to return the display parameters on all - Sanyo WXU10 | Instruction Manual, PLC-WXU10B - Page 32
first. Warning: Never open any of the covers on the projector. Dangerous electrical voltages inside the projector can cause severe injury. Do not attempt to service this product yourself. Refer all servicing to qualified service personnel. Cleaning the Lens Gently wipe the lens with lens cleaning - Sanyo WXU10 | Instruction Manual, PLC-WXU10B - Page 33
is torn, replace it. Consult your dealer for details. Replacement Filter Part No. : 610 337 9623 5. Replace the filter. 6. Plug the power back into the projector. 7. Be sure to reset the filter counter after cleaning or replacing the filter. See "Filter Counter Reset" on page 30. Turn off the - Sanyo WXU10 | Instruction Manual, PLC-WXU10B - Page 34
. If the lamp bursts, the mercury inside the lamp will go out of the projector. Leave the area immediately if the lamp shatters while being operated and ventilate the area for at least 30 minutes in order to avoid the inhalation of mercury fumes. Otherwise it could be harmful to user's health. EN - Sanyo WXU10 | Instruction Manual, PLC-WXU10B - Page 35
projector with the lamp cover removed. ORDER REPLACEMENT LAMP Replacement lamp can be ordered through your dealer. When ordering a projection lamp,give the following information to the dealer. Model No. of your projector: Replacement Lamp Type No.: PLC-WXU10N/ WXU10E/ WXU10B POA-LMP113 (Service - Sanyo WXU10 | Instruction Manual, PLC-WXU10B - Page 36
Specifications Display Type 3 panel 0.56 inch LCD projector Resolution (Pixels) 1280 x 800 (1,024,000 dot x 3) Lens Manual Zoom (1.2X) Aspect Ratio 16:10 (Default) Screen Size 26.7" - 302" Lamp 210W Video Compatibility NTSC3.58, NTSC4.43 PAL-60, PAL-M,N SECAM HDTV (480i/p, 576i/p, - Sanyo WXU10 | Instruction Manual, PLC-WXU10B - Page 37
LED Type Power LED Color Status Lamp LED Color Status Meaning Standby Green Flashing - Lamp waiting Green On - Lamp on Green On Green Lamp ignition Green On Red failure Off The projector is powered and ready. Off Preparing lamp ignition. On The lamp is in good condition. Flashing The - Sanyo WXU10 | Instruction Manual, PLC-WXU10B - Page 38
Compatibility Modes Computer (COMPUTER IN / DVI-D IN terminal): Mode VGA mode 3 VGA VESA 72 Hz VGA VESA 75 Hz VGA VESA 85 Hz SVGA VESA 56 Hz SVGA VESA 60 Hz SVGA VESA 72 Hz SVGA VESA 75 Hz SVGA VESA 85 Hz XGA VESA 60 Hz XGA VESA 70 Hz XGA VESA 75 Hz XGA VESA 85 Hz SXGA VESA 70 Hz SXGA VESA 75 Hz - Sanyo WXU10 | Instruction Manual, PLC-WXU10B - Page 39
Troubleshooting Refer to the symptoms and measures listed below before sending the projector for repairs. If the problem persists, contact your local reseller or service connected to the projector. the projector correctly. The lamp cover is loose. Tighten the screw on the lamp cover. Power goes - Sanyo WXU10 | Instruction Manual, PLC-WXU10B - Page 40
range. (p. 16) There are some obstructions Check that there are not between the remote control and obstructions between the remote projector. control and projector. There are some fluorescent or Check that there are not any other bright lights shining at the fluorescent or other bright lights - Sanyo WXU10 | Instruction Manual, PLC-WXU10B - Page 41
setup the communication condition as follows: 3 Send the command strings by the HEX key (HEX is in the range of 0-9 and a-f) for controlling the projector. Baud rate Parity check Stop bit Flow control Data bit : 19200 bps : none : 1 : none : 8 „ Command Format The command is sent from PC to the - Sanyo WXU10 | Instruction Manual, PLC-WXU10B - Page 42
Printed in China Part No. 1AA6P1P5446-(KJ3A) SANYO Electric Co., Ltd. EN-41
-
 1
1 -
 2
2 -
 3
3 -
 4
4 -
 5
5 -
 6
6 -
 7
7 -
8
-
9
-
10
-
11
-
12
-
13
-
14
-
15
-
16
-
17
-
18
-
19
-
20
-
21
-
22
-
23
-
24
-
25
-
26
-
27
-
28
-
29
-
30
-
31
-
32
-
33
-
34
-
35
-
36
-
37
-
38
-
39
-
40
-
41
-
42
 |
 |