Schwinn 206 Recumbent Bike Assembly Manual
Schwinn 206 Recumbent Bike Manual
 |
View all Schwinn 206 Recumbent Bike manuals
Add to My Manuals
Save this manual to your list of manuals |
Schwinn 206 Recumbent Bike manual content summary:
- Schwinn 206 Recumbent Bike | Assembly Manual - Page 1
206 Schwinn® Recumbent Exercise Bike Parts List Full Size Hardware Chart Product Illustration Assembly Instructions 206 Recumbent Exercise Bike - Schwinn 206 Recumbent Bike | Assembly Manual - Page 2
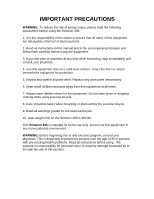
, please read the following precautions before using the Schwinn 206. 1. It is the responsibility of the owner to ensure that all users of this equipment are adequately informed of all precautions. 2. Read all instructions in this manual and in the accompanying literature and follow them carefully - Schwinn 206 Recumbent Bike | Assembly Manual - Page 3
206 Schwinn Recumbent Bike Parts List, Hardware Chart, and Assembly Instructions Assembly of the 206 Recumbent Bike is divided into 5 easy stages; each comprised of only a few setup steps. Before proceeding with the assembly, please read over the easy to follow instructions to familiarize yourself - Schwinn 206 Recumbent Bike | Assembly Manual - Page 4
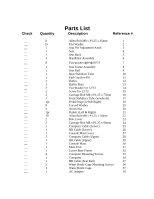
1pr 8 4 1pr 19 2 2 1 1 1 1 1 1 1 1 4 1 1 2 1 1 Parts List Description Reference # Allen Bolt M8 x P1.25 x 45mm 1 Flat Washer 2 Seat Pin Adjustment Knob 3 M8 x P1.25 x 90mm 24 Computer Cable (Lower) 25 HR Cable (Lower) 26 Console Mast Cover 27 Computer Cable (Upper) 28 HR Cable ( - Schwinn 206 Recumbent Bike | Assembly Manual - Page 5
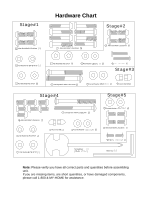
Curved Washer Curved Washer Allen Bolt M8xP1.25x16mm Flat Washerф 8* ф 19* 2T Screwdriver Allen Key Note: Please verify you have all correct parts and quantities before assembling unit. If you are missing items, are short quantities, or have damaged components, please call 1-800-4-MY-HOME for - Schwinn 206 Recumbent Bike | Assembly Manual - Page 6
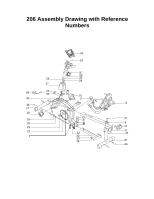
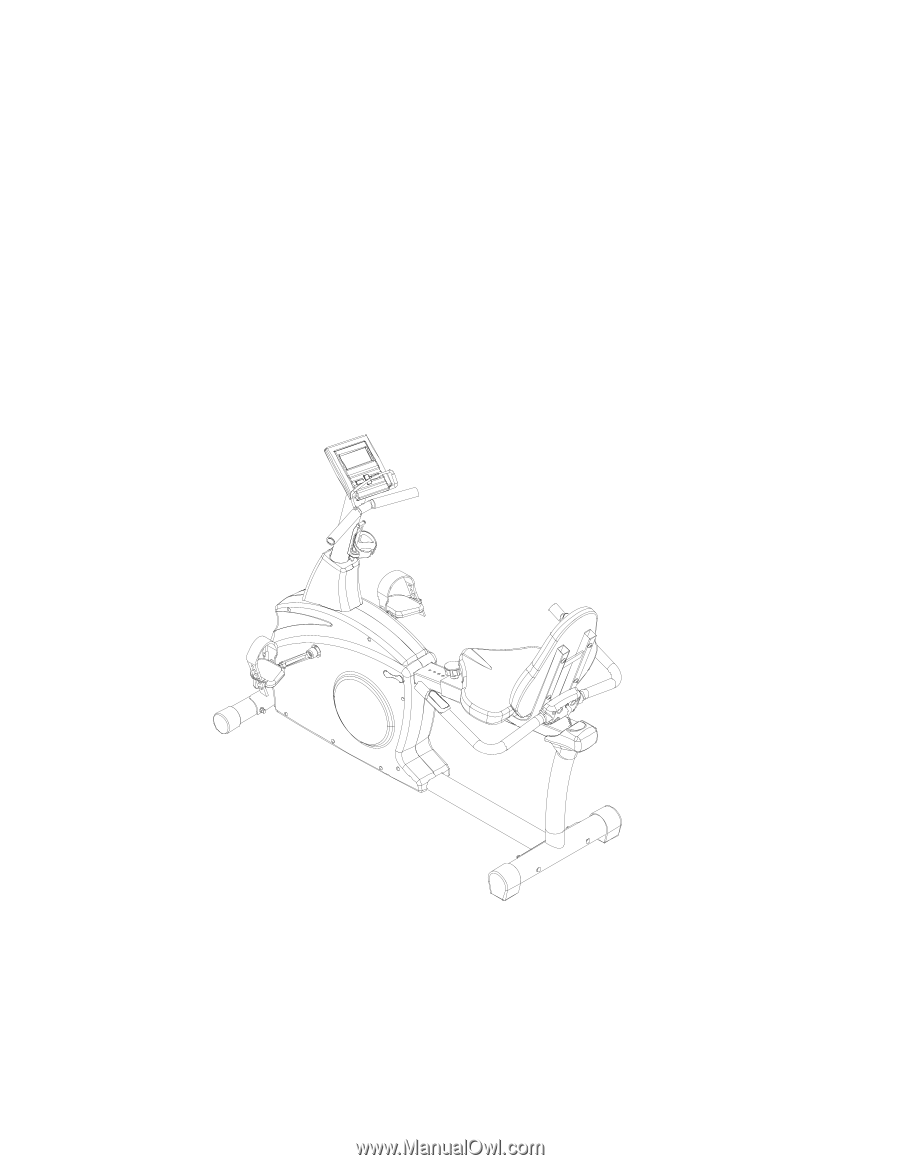
206 Assembly Drawing with Reference Numbers 34 33 57 56 29 30 28 27 58 22 19 26 25 21 31 3 8 16 17 18 19 12 47 13 20 14 9 23 15 11 22 2 22 22 2 32 20 19 10 24 - Schwinn 206 Recumbent Bike | Assembly Manual - Page 7
25 26 27 28 29 30 32 33 34 56 57 Replacement Parts List Description Seat Pin Adjustment Knob Seat Seat Back Handlebar Assembly Seat Computer Cable (Lower) HR Cable (Lower) Console Mast Cover Computer Cable (Upper) HR Cable (Upper) Console Mast Lower Base Frame Computer Mounting Screws Computer - Schwinn 206 Recumbent Bike | Assembly Manual - Page 8
and parts with the enclosed parts list and full size hardware chart. Each step of the assembly process has been broken down into 5 easy-to-follow stages. Please take just a few moments to read over these instructions to familiarize yourself with the process to make assembly quick and trouble-free - Schwinn 206 Recumbent Bike | Assembly Manual - Page 9
Step 3: Attach SEAT BACK (#5) to SEAT FRAME (#8) with 4 ALLEN BOLTS (#1) and 4 WASHERS (#2). Tighten Bolts. Note: Finished seat should look like picture below: - Schwinn 206 Recumbent Bike | Assembly Manual - Page 10
Assembly Stage #2 Attach Rear Stabilizer and Seat Rail to Seat Assembly . Assembly hardware required: (4) M8 Allen Bolts 16mm (item #22) (4) Flat Washers Ø8 * Ø19 * 2T(item#2) Step 4: Attach SEAT RAIL (#9) to REAR STABILIZER TUBE (#10) with 4 FLAT WASHERS (#2) and 4 ALLEN BOLTS (#22). Tighten - Schwinn 206 Recumbent Bike | Assembly Manual - Page 11
Assembly Stage #3 Attach Front Stabilizer Tube and Pedals to Main Unit Assembly Hardware Required: (2) M8 Bolt 75mm long (item #16) (2) Curved Washers (item #19) (2) Acorn Nut(item #20) Step 8: Attach FRONT STABILIZER TUBE (#17) to the MAIN UNIT (#31) with the M8 BOLT 75mm (#16), CURVED WASHER (# - Schwinn 206 Recumbent Bike | Assembly Manual - Page 12
Assembly Stage #4 Attach Seat Rail and Lower Base Frame to Main Unit 9 31 Assembly Hardware Required: (7) Allen Bolts 16 mm long (item #22) (3) Flat Washers (item #2) (2) Allen Bolts 90 mm long (item #24) (2) Curved Washers (item #19) (4) Flat Washer (item #7) Step 10: Slide the LOWER BASE FRAME - Schwinn 206 Recumbent Bike | Assembly Manual - Page 13
and replace the end cap on the end of the seat rail. After completing assembly stage 5 verify that the handgrip heart rate works by hitting manual start and then placing your hand on the grip heart pad located on the handlebars. Verify that a heart rate registers on the - Schwinn 206 Recumbent Bike | Assembly Manual - Page 14
(4) Allen Bolts 16 mm long (item #22) (4) Curved Washers (item #19) (4) Computer Screws (item #33) (2) Water Bottle Cage Screws M5*12 mm (item #56) Step the CONSOLE MAST, attach both HR CABLES (#29 & #26) as well as the COMPUTER CABLE (#28 & #25). To easily complete this step it would be helpful to - Schwinn 206 Recumbent Bike | Assembly Manual - Page 15
MAST (#30), the reading rack should wrap around the bottom of the COMPUTER. Attach COMPUTER to CONSOLE MAST with COMPUTER MOUNTING SCREWS (#33). (In computer back) Tighten with Phillips head screwdriver. Step 16: Plug power adapter into the wall and into the recumbent bike. The power input on the - Schwinn 206 Recumbent Bike | Assembly Manual - Page 16
Troubleshooting the Schwinn 206 Recumbent Exercise Bike TIP: Use assembly diagram(s) as reference when troubleshooting unit. PROBLEM: Computer will not start, function, or is blank... (SOLUTION): 1. Ensure the unit is plugged into a 110v outlet. 2. Check the wiring connections and connector - Schwinn 206 Recumbent Bike | Assembly Manual - Page 17
-
 1
1 -
 2
2 -
 3
3 -
 4
4 -
 5
5 -
 6
6 -
 7
7 -
8
-
9
-
10
-
11
-
12
-
13
-
14
-
15
-
16
-
17
 |
 |
20
6
Schwinn
®
Recumbent Exercise Bike
Parts List
Full Size Hardware Chart
Product Illustration
Assembly Instructions
20
6
Recumbent Exercise
Bike