Schwinn 206 Recumbent Bike Assembly Manual - Page 14
Assembly Stage #5
 |
View all Schwinn 206 Recumbent Bike manuals
Add to My Manuals
Save this manual to your list of manuals |
Page 14 highlights
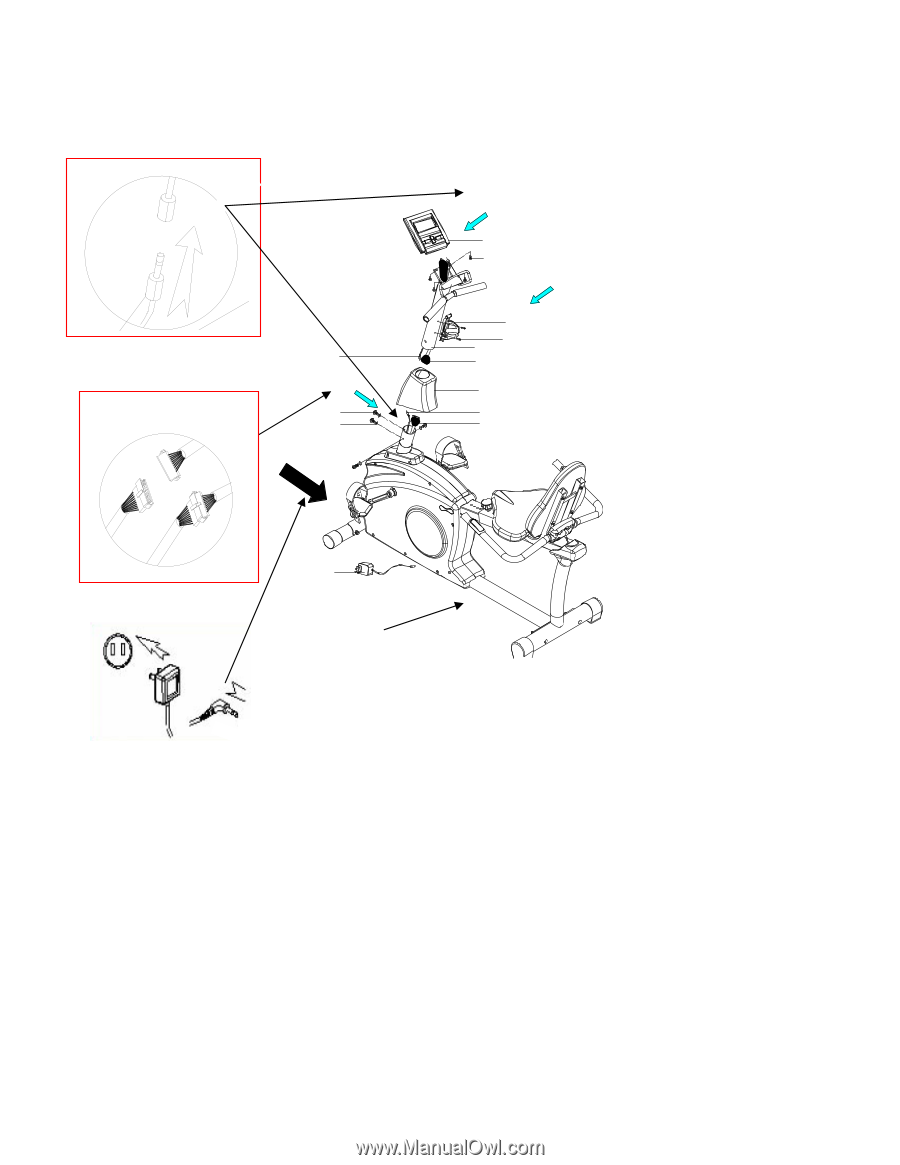
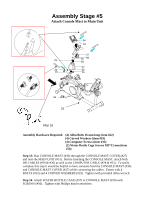
Assembly Stage #5 Attach Console Mast to Main Unit 31 STEP15 34 33 STEP14 29 STEP13 22 19 57 30 56 28 27 26 25 58 31 31 Step 16 Assembly Hardware Required: (4) Allen Bolts 16 mm long (item #22) (4) Curved Washers (item #19) (4) Computer Screws (item #33) (2) Water Bottle Cage Screws M5*12 mm (item #56) Step 13: Run CONSOLE MAST (#30) through the CONSOLE MAST COVER (#27) and onto the MAIN UNIT (#31). Before fastening the CONSOLE MAST, attach both HR CABLES (#29 & #26) as well as the COMPUTER CABLE (#28 & #25). To easily complete this step it would be helpful to have someone hold the CONSOLE MAST (#30) and CONSOLE MAST COVER (#27) while connecting the cables. Fasten with 4 BOLTS (#22) and 4 CURVED WASHERS (#19). Tighten with provided Allen wrench. Step 14: Attach WATER BOTTLE CAGE (#57) to CONSOLE MAST (#30) with SCREWS (#56). Tighten with Phillips head screwdriver.
-
 1
1 -
2
-
3
-
4
-
5
-
6
-
7
-
8
-
 9
9 -
 10
10 -
 11
11 -
 12
12 -
 13
13 -
 14
14 -
 15
15 -
 16
16 -
 17
17
 |
 |