Seagate Maxtor Central Axis Maxtor Central Axis Quick Start Guide - Page 1
Seagate Maxtor Central Axis Manual
 |
View all Seagate Maxtor Central Axis manuals
Add to My Manuals
Save this manual to your list of manuals |
Page 1 highlights
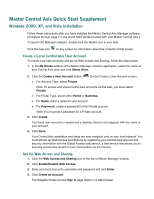
Maxtor Central Axis Quick Start Supplement Windows 2000, XP, and Vista Installation Follow these instructions after you have installed the Maxtor Central Axis Manager software. (Complete through page 7 in the Quick Start Guide provided with your Maxtor Central Axis.) To launch the Manager software, double-click the Maxtor icon in your task. Click the help icon on any screen for information about the contents of that screen. Create a Local Central Axis User Account To create local user accounts and set up Web Access and Sharing, follow the steps below. 1. In the My Drives window of the Maxtor Manager software application, select the name of your Central Axis drive and click Select Drive. 2. Click the Create a User Account button. On the Create a User Account screen, • For Account Type, select Private. Note: To access and share Central Axis accounts via the web, you must select Private. • For Folder Type, select either Home or Business. • For Name, enter a name for your account. • For Password, create a password for this Private account. Note: You must set a password for a Private account. 3. Click Create. Your local user account is created and a desktop shortcut icon appears with the name of your account. 4. Click Done. Your Central Axis installation and setup are now complete only on your local network. You must still set up Web Access and Sharing by registering your Central Axis account and security information with the Global Access web service, a free service that allows you to securely access files stored on your Central Axis via the Internet. Set Up Web Access and Sharing 1. Click the Web Access and Sharing icon at the top of Maxtor Manager window. 2. Click Enable/Disable Web Access. 3. Enter your local account's username and password and click Enter. 4. Click Create an Account. The Seagate Global Access Sign In page opens in a web browser.
-
 1
1 -
 2
2
 |
 |
