Seagate Mirra Installation Guide (Windows) - Page 11
Share
 |
View all Seagate Mirra manuals
Add to My Manuals
Save this manual to your list of manuals |
Page 11 highlights
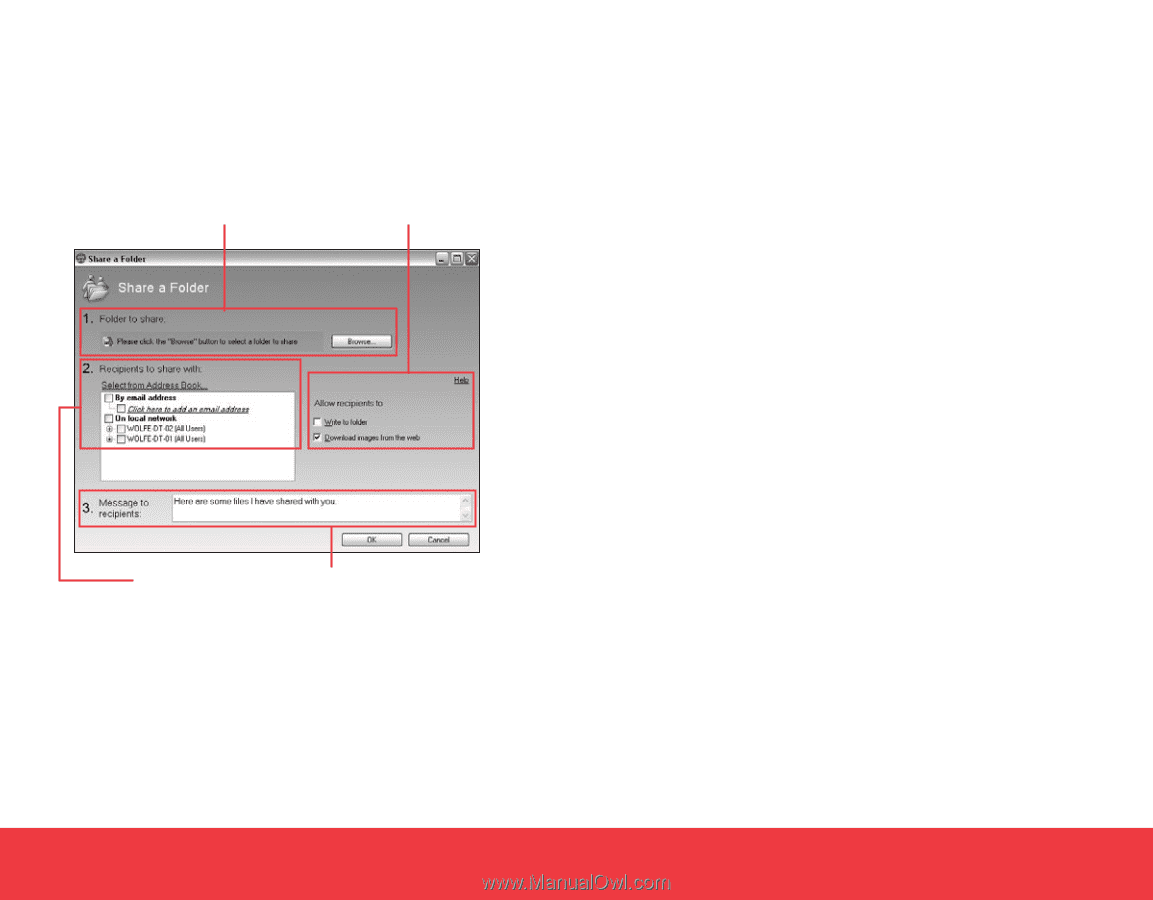
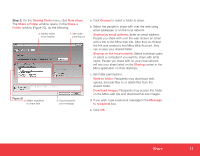
Step 2: On the Sharing Tasks menu, click New share. The Share a Folder window opens. In the Share a Folder window (Figure 20), do the following: a. Identify folder to be shared c. Set folder permissions Figure 20 b. Select recipients to share with d. Send recipients your message a. Click Browse to select a folder to share. b. Select the people to share with over the web using email addresses or on the local network: Sharing by email address: Enter an email address. People you share with over the web receive an email with a link to the Mirra web site. After they've clicked the link and created a free Mirra Web Account, they can access your shared folder. Sharing on the local network: Select individual users or select a computer if you want to share with all its users. People you share with on your local network will see your share listed on the Sharing screen in the Mirra application on their desktops. c. Set folder permissions: Write to folder: Recipients may download, edit, upload, and add files to or delete files from the shared folder. Download images: Recipients may access this folder on the Mirra web site and download full-size images. d. If you wish, type a personal message in the Message to recipients box. e. Click OK. Share 11
-
 1
1 -
2
-
3
-
4
-
5
-
 6
6 -
 7
7 -
 8
8 -
 9
9 -
 10
10 -
 11
11 -
 12
12 -
 13
13 -
 14
14 -
 15
15 -
 16
16 -
17
-
18
-
19
-
20
 |
 |