Sharp AL 1551CS AL-1651CS AL-1661CS Operation Manual
Sharp AL 1551CS - B/W Laser - All-in-One Manual
 |
UPC - 074000074507
View all Sharp AL 1551CS manuals
Add to My Manuals
Save this manual to your list of manuals |
Sharp AL 1551CS manual content summary:
- Sharp AL 1551CS | AL-1651CS | AL-1661CS Operation Manual - Page 1
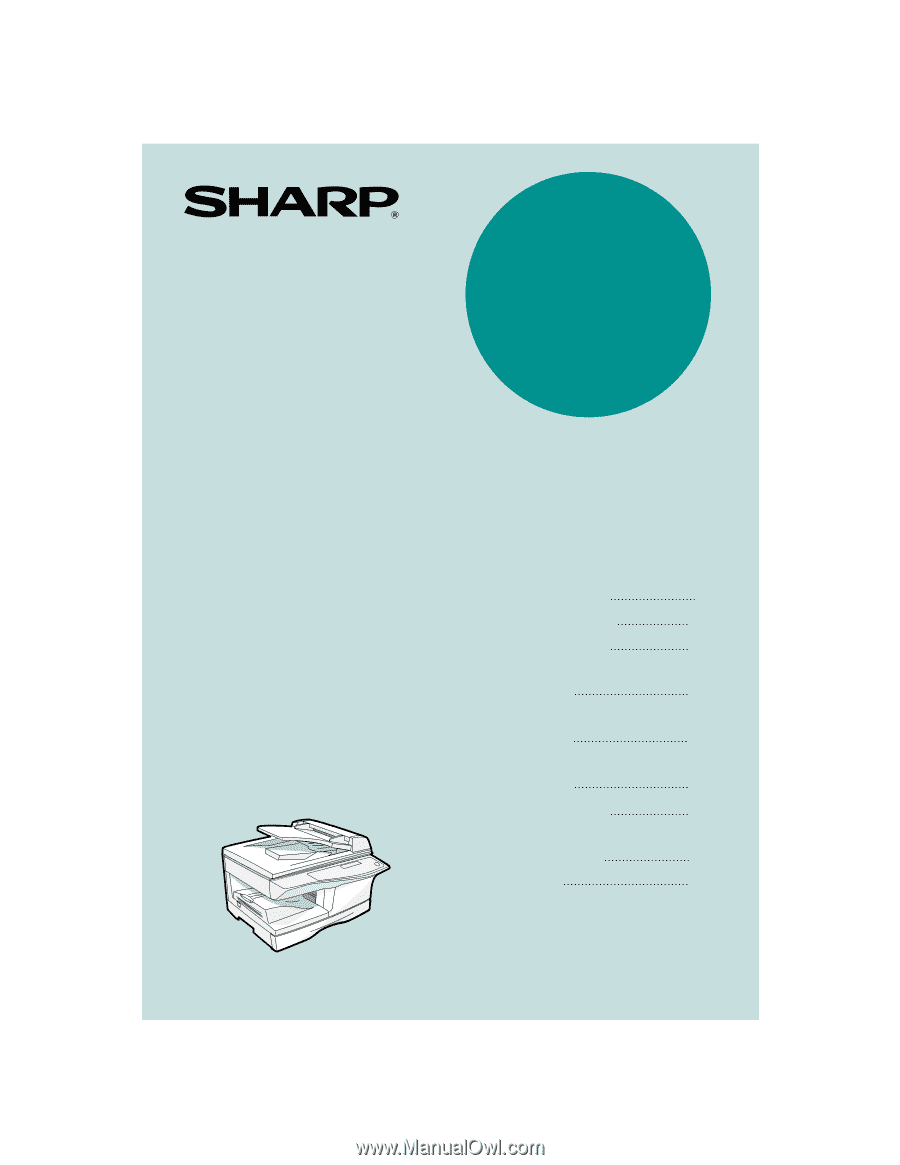
AL-1651CS AL-1661CS DIGITAL MULTIFUNCTIONAL SYSTEM OPERATION MANUAL Page PREPARATIONS 9 LOADING PAPER 18 MAKING COPIES 24 CONVENIENT COPY FUNCTIONS 30 SETTING UP THE SOFTWARE 40 PRINTER/SCANNER FUNCTIONS 59 USER SETTINGS 64 TROUBLESHOOTING AND MAINTENANCE 71 APPENDIX 92 AL - Sharp AL 1551CS | AL-1651CS | AL-1661CS Operation Manual - Page 2
service, or to obtain product literature, accessories, or supplies, please call or 1-(630)378-3590 in the USA 905-568-7140 in Canada. For customer assistance, please visit http://www.sharpusa.com/ (for USA) or http://www.sharp Bonds Stocks Bank drafts Checks Passports Driver's licenses - Sharp AL 1551CS | AL-1651CS | AL-1661CS Operation Manual - Page 3
ENVIRONMENTAL INFORMATION 5 INTRODUCTION ...6 MAIN FEATURES ...7 1 PREPARATIONS PART NAMES 9 CHECKING PACKED COMPONENTS AND ACCESSORIES 12 PREPARING THE CREATING MARGINS WHEN COPYING (Margin shift 38 5 SET UP THE SOFTWARE SOFTWARE FOR AL-1651CS/1661CS 40 BEFORE INSTALLATION 41 INSTALLING THE - Sharp AL 1551CS | AL-1651CS | AL-1661CS Operation Manual - Page 4
COMPUTER 62 OPERATION IN COPY, PRINTER, AND SCANNER MODES 62 HOW TO USE THE ONLINE MANUAL 63 7 USER SETTINGS USER PROGRAMS 64 SELECTING A SETTING FOR A USER PROGRAM 69 8 TROUBLESHOOTING AND MAINTENANCE DISPLAY MESSAGES 71 TROUBLESHOOTING THE MACHINE 73 PROBLEMS DURING SETUP THE SOFTWARE 77 - Sharp AL 1551CS | AL-1651CS | AL-1661CS Operation Manual - Page 5
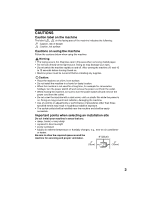
• Do not install the machine in a humid or dusty location. • When the machine is not used for a long time, for example for consecutive holidays, turn the power switch off and remove the power required space around the machine for servicing and proper ventilation. 8" (20cm) 4" (10cm) 4" (10cm) 3 - Sharp AL 1551CS | AL-1651CS | AL-1661CS Operation Manual - Page 6
before use. • If they are exposed to direct sunlight, smudges on copies may result. Do not touch the surface (green portion) of the drum cartridge. • Doing so will damage the surface of the cartridge, causing smudges on copies. Trademark acknowledgements • Microsoft® Windows® operating system - Sharp AL 1551CS | AL-1651CS | AL-1661CS Operation Manual - Page 7
STAR® Partner, SHARP has determined that this product meets the ENERGY STAR® guidelines for energy efficiency. Safety precautions: This Digital Copier is rated . A small amount of ozone is produced within the unit during operation. The emission level is insufficient to cause any health hazard. Note - Sharp AL 1551CS | AL-1651CS | AL-1661CS Operation Manual - Page 8
handy location. About the operation manuals The operation manuals for the machine are as follows: Operation Manual (this manual) Explains the machine and how to use it as a copier. Also explains how to install the software that allows the machine to be used as a printer and scanner for your computer - Sharp AL 1551CS | AL-1651CS | AL-1661CS Operation Manual - Page 9
depending on the power-supply voltage, ambient temperature, and other operating conditions. *2 "dpi" ("dots per inch") is unit that is used to measure resolution. Resolution indicates how much detail can be reproduced in a printed or scanned image. High-quality digital image • High-quality copying - Sharp AL 1551CS | AL-1651CS | AL-1661CS Operation Manual - Page 10
as a standard feature that allows the machine to be used as a network printer. Color scanner function • The accompanying scanner driver can be installed and the machine connected to a computer using a USB cable to enable use as a scanner. Environment and people friendly design • Preheat mode and - Sharp AL 1551CS | AL-1651CS | AL-1661CS Operation Manual - Page 11
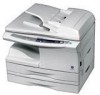
you should know before using the machine. PART NAMES 1 The following illustration shows the part names of the AL-1651CS. Note The illustrations in this manual show the AL-1651CS. The appearance of your machine may be different depending on the model, however, the basic operations are the same - Sharp AL 1551CS | AL-1651CS | AL-1661CS Operation Manual - Page 12
PREPARATIONS Operation panel 1 AL-1651CS 6 7 8 9 10 11 1 [MODE SELECT] key / Mode indicators Press this key to select the mode. The indicator of the selected mode lights (copy, printer, scanner, and fax mode indicators). 2 Display This shows messages indicating the machine status and any problems - Sharp AL 1551CS | AL-1651CS | AL-1661CS Operation Manual - Page 13
up when copying or scanning is possible. To begin copying, press the [START] key ( ). The [START] key ( ) is also pressed to return to normal operation from auto power shut-off mode. 17 [CLEAR ALL] key ( ) This returns all functions to the default settings. When pressed in a setting menu, this - Sharp AL 1551CS | AL-1651CS | AL-1661CS Operation Manual - Page 14
at 1-(630)378-3590 in the USA or 905-568-7140 in Canada. Note If the machine does not function properly during setup or use, or if a function cannot be used, see "TROUBLESHOOTING AND MAINTENANCE" (p.71). Operation manual Software CD-ROM TD cartridge Drum cartridge (installed in machine) 12 - Sharp AL 1551CS | AL-1651CS | AL-1661CS Operation Manual - Page 15
. 3 Release the scan head locking switch. The scan head locking switch is under the document glass. If the switch is locked ( ), the machine will not operate. Unlock the switch ( ) as shown below. Grasp here and turn in the direction of the arrow. Lock Unlock 13 - Sharp AL 1551CS | AL-1651CS | AL-1661CS Operation Manual - Page 16
INSTALLING THE TD CARTRIDGE 1 Open the bypass tray, and then open the side cover. 2 Remove the CAUTION tape from the front cover and remove the two protective pins from the fusing machine by pulling the strings upward one at a time. CAUTION tape 3 Press gently on both sides of the front cover to - Sharp AL 1551CS | AL-1651CS | AL-1661CS Operation Manual - Page 17
5 While pushing the lock release button, gently insert the TD cartridge until it locks into place. PREPARATIONS Lock release button 1 6 Close the front cover and then the side cover by pressing the round projections near the side cover open button. Note When closing the covers, be sure to close - Sharp AL 1551CS | AL-1651CS | AL-1661CS Operation Manual - Page 18
the machine. Warning If you use the machine in a country other cord into a properly grounded wall socket. Caution Do not use extension cords or power strips. The first time the power is can be changed in the user programs. (p.64) When in the copy mode AL-1651CS READY TO COPY 100% 8.5x11 0 - Sharp AL 1551CS | AL-1651CS | AL-1661CS Operation Manual - Page 19
indicating that the machine is in preheat mode, however, the keys on the operation panel can be used. Normal operation automatically resumes when a key on the operation panel is pressed, an original is placed, a print job is received. Auto power shut-off mode This function automatically switches the - Sharp AL 1551CS | AL-1651CS | AL-1661CS Operation Manual - Page 20
or is improperly installed. PAPER For best results, use only SHARP recommended paper. Paper tray type Paper type Size use non-standard envelopes or envelopes that have metal clasps, plastic snappers, strings, windows, linings, self-adhesive strips, patches or synthetic materials. Do not use - Sharp AL 1551CS | AL-1651CS | AL-1661CS Operation Manual - Page 21
(do not attempt continuous copying or printing). ● There are many varieties of special paper available on the market, and some cannot be used with this machine. Before using special paper, contact a SHARP service center. ● Before using other than SHARP recommended paper, make a test copy to - Sharp AL 1551CS | AL-1651CS | AL-1661CS Operation Manual - Page 22
ensure that there is no space between the paper and the guide, and make sure that the guide is not set too narrow and causes the paper to tray, go to "CHANGING A TRAY'S PAPER SIZE SETTING" (p.23) • When not using the machine for an extended period, remove all paper from the paper tray and store it - Sharp AL 1551CS | AL-1651CS | AL-1661CS Operation Manual - Page 23
that has already been printed on by a laser printer or plain paper fax machine. This may cause smudges or unclean images. Envelopes Do not use the following envelopes, as misfeeds will occur. • Envelopes with metal tabs, clasps, strings, holes, or windows. • Envelopes with rough fibers, carbon - Sharp AL 1551CS | AL-1651CS | AL-1661CS Operation Manual - Page 24
1 and then step 2 in the illustration and push the round projections at the right of the tray until they click. 2 Set the bypass tray paper guides to the paper width. Insert the paper (print face down) all the way into the bypass tray. 3 Press the [TRAY SELECT] key - Sharp AL 1551CS | AL-1651CS | AL-1661CS Operation Manual - Page 25
out of paper or a misfeed. • During printing (even in copy mode), the paper size setting guide Front guide • The front guide is a slide-type guide. Grasp the locking knob on the guide and slide the guide to the indicator line of the paper to be loaded. • The left guide is an insert-type guide - Sharp AL 1551CS | AL-1651CS | AL-1661CS Operation Manual - Page 26
3 Chapter 3 MAKING COPIES This chapter explains basic copying functions. NORMAL COPYING Using the document glass Note • The document glass can scan up to a 8-1/2" x 14" original. • When a copy is made, the edges will not be copied (image loss). - Sharp AL 1551CS | AL-1651CS | AL-1661CS Operation Manual - Page 27
loss). For the image loss, see the "SPECIFICATIONS" (p.92). • When using the margin shift function, check the position of the margins carefully. (p.38) guides to the size of the originals. 3 Set the original(s) face up in the document feeder tray. The RSPF indicator on the operation panel - Sharp AL 1551CS | AL-1651CS | AL-1661CS Operation Manual - Page 28
. • Originals that are creased, folded, or torn. • Glued originals, cut-out originals. • Originals with binder holes. • Originals printed using an ink ribbon (thermal transfer printing), originals on thermal transfer paper. Stream feeding mode "SET ORIGINALS FOR STREAM FEEDING" will appear in the - Sharp AL 1551CS | AL-1651CS | AL-1661CS Operation Manual - Page 29
level yourself, follow the steps below. (Select from two original types and five exposure levels for each original type.) The exposure level used in automatic exposure adjustment can also be changed with "AE LEVEL ADJUST" in the user programs (p.67). Original types ● AUTO ...... Automatic exposure - Sharp AL 1551CS | AL-1651CS | AL-1661CS Operation Manual - Page 30
as follows each time the [COPY RATIO] key is pressed: "100%" → "78%" → "64%" → "50%" → "25%" → "400%" → "200%" → "129%". 8.5x14 TO + Fine adjustment of the ratio The ratio can be adjusted from 25% to 400% in increments of 1%. Use the [ ] key ( ) or the [ ] key ( ) for fine adjustment. ZOOM - 99% - Sharp AL 1551CS | AL-1651CS | AL-1661CS Operation Manual - Page 31
( ). Each time, you press the [TRAY SELECT] key ( ), the location indicated by the tray location indicator changes in the following order : paper tray→bypass tray. AL-1651CS READY TO COPY 100% EXTRA Note The tray location indicator will blink when there is no paper in the paper tray, or when the - Sharp AL 1551CS | AL-1651CS | AL-1661CS Operation Manual - Page 32
COPY FUNCTIONS AUTOMATIC TWO-SIDED COPYING Two originals can be automatically copied onto both sides of a single sheet of paper. When the RSPF is used, two-sided copies of two-sided originals can easily be made. Document glass Original → Paper One-sided original → Two sides Usable paper - Sharp AL 1551CS | AL-1651CS | AL-1661CS Operation Manual - Page 33
CONVENIENT COPY FUNCTIONS Using the document glass 1 Place the original that make a copy of the first original, press the [ ] key. 5 When "[START] : NEXT SCAN [#] : START PRINT" appears, remove the first original and then place the original that you wish to copy onto the back side of the paper - Sharp AL 1551CS | AL-1651CS | AL-1661CS Operation Manual - Page 34
-sided copying, the last page will be one-sided. 2 Press the [2-SIDED COPY] key and select the two-sided copy mode that you wish to use. The mode changes as follows each time you press the [2-SIDED COPY] key: "1 TO 1", "1 TO 2", "2 TO 2", "2 TO 1". 2-SIDED COPY 2 TO 1 • Two-sided copies from one - Sharp AL 1551CS | AL-1651CS | AL-1661CS Operation Manual - Page 35
printer. The amount of memory allocated to the printer can be changed with "MEM. FOR PRINTER" in the user programs. (p.66) 1 2 3 3 2 1 1 2 3 1 2 3 Sort copy Using [START] key ( ). "[START] : NEXT SCAN [#] : START PRINT" appears and the original is scanned into memory. 5 Replace the original - Sharp AL 1551CS | AL-1651CS | AL-1661CS Operation Manual - Page 36
CONVENIENT COPY FUNCTIONS Using the RSPF 1 Place the originals. (p.25) 2 Press the [E-SORT/SP.FUN] key until "SORT" appears and then press the [ENTER] key. SPECIAL FUNCTION SORT 3 Press - Sharp AL 1551CS | AL-1651CS | AL-1661CS Operation Manual - Page 37
copying. • The 2 IN 1 layout pattern can be changed with "LAYOUT IN 2IN1" in the user programs (p.65). • The bypass tray cannot be used for 2 IN 1 copying. 4 Using the document glass 1 Place the first original. (p.24) 2 Press the [E-SORT/SP.FUN] key until "2IN1" appears and then press the [ENTER - Sharp AL 1551CS | AL-1651CS | AL-1661CS Operation Manual - Page 38
number of copies and any other settings, and then press the [START] key ( ). "[START] : NEXT SCAN [#] : START PRINT" appears and the original is scanned into memory. To immediately print the scanned image, press the [ ] key. 6 Replace the original with the next original, and then press the [START - Sharp AL 1551CS | AL-1651CS | AL-1661CS Operation Manual - Page 39
Using the RSPF 1 Place the originals. (p.25) CONVENIENT COPY FUNCTIONS 2 Press the [E-SORT/SP.FUN] key until "2IN1" appears and then press the [ENTER] key. SPECIAL - Sharp AL 1551CS | AL-1651CS | AL-1661CS Operation Manual - Page 40
SHORT EDGE can be selected. AB RSPF SHORT EDGE LONG EDGE AB AB Margin Margin Copy AB Document glass Original Note • This feature cannot be used with the 2 IN 1 feature. • The margin width can be changed with "MARGIN WIDTH" in the user programs. (p.66) • Note that a margin is created by - Sharp AL 1551CS | AL-1651CS | AL-1661CS Operation Manual - Page 41
CONVENIENT COPY FUNCTIONS 3 Press the [ ] key ( ) to move " " to the "ON" position and then press the [ENTER] key. MARGIN SHIFT ON OFF 4 Press the [ ] key ( ) or [ ] key ( ) to select the margin position and then press the [ENTER] key. Select "LONG EDGE" or "SHORT EDGE". For the margin position - Sharp AL 1551CS | AL-1651CS | AL-1661CS Operation Manual - Page 42
status, the name of the document currently being printed, and error messages. Please note that the Print Status Window does not operate when the machine is used as a network printer. Scanner driver (USB only) The scanner driver allows you to use the scanning function of the machine with TWAIN - Sharp AL 1551CS | AL-1651CS | AL-1661CS Operation Manual - Page 43
. Cable Operating system USB*1 LAN Windows 98/Me/2000/XP Windows 95/98/Me/ NT 4.0/2000/XP MFP Driver Printer Scanner driver driver Button Manager Sharpdesk Available*2 Available Not Available *1Windows 98/Me does not support USB 2.0. A USB 2.0 connection can be used in Windows 98/Me - Sharp AL 1551CS | AL-1651CS | AL-1661CS Operation Manual - Page 44
it is assumed that the mouse is configured for right hand operation. • The scanner feature only works when using a USB cable. • If an error message appears, follow the instructions on the screen to solve the problem. After the problem is solved, the installation procedure will continue. Depending on - Sharp AL 1551CS | AL-1651CS | AL-1661CS Operation Manual - Page 45
"Standard" button. To install particular packages, click the "Custom" button. If you selected "Custom", go to step 9. SET UP THE SOFTWARE 8 Read the message in the "Welcome" window and then click the "Next" button. If you selected "Standard" in step 7, installation will begin. Go to step 14. 9 If - Sharp AL 1551CS | AL-1651CS | AL-1661CS Operation Manual - Page 46
(if "MFP Driver" was selected). Follow the on-screen instructions. If you are running Windows 2000/XP and a warning message appears Caution regarding the Windows logo test or digital signature, be sure to click "Continue Anyway" or "Yes". When "The installation of the SHARP software is complete - Sharp AL 1551CS | AL-1651CS | AL-1661CS Operation Manual - Page 47
16 Begin installation of the scanner driver. "SHARP AL-XXXXCS" will appear in the "Found New Hardware Wizard" dialog box. Select "Install the software automatically (Recommended)" and click the "Next" button. Follow the on-screen instructions. If you are running Windows 2000/XP and a warning message - Sharp AL 1551CS | AL-1651CS | AL-1661CS Operation Manual - Page 48
17 Begin installation of the printer driver. "SHARP AL-XXXXCS" will appear in the "Found New Hardware Wizard" dialog box. Select "Install the software automatically (Recommended)" and click the "Next" button. Follow the on-screen instructions. If you are running Windows 2000/XP and a warning message - Sharp AL 1551CS | AL-1651CS | AL-1661CS Operation Manual - Page 49
, it must be connected to your computer with a USB interface cable. The scanner function cannot be used if the machine is connected with a LAN cable. • To install the software using a network connection in Windows 95, Internet Explorer version 4.01 or later must be installed on your computer. If - Sharp AL 1551CS | AL-1651CS | AL-1661CS Operation Manual - Page 50
use and click the "Next" button. (Normally the correct language is selected automatically.) 6 The "SOFTWARE LICENCE" window will appear. Make sure that you understand the contents of the software direct printing" (p.50). Set the IP Address This setting is only required once when using the machine on - Sharp AL 1551CS | AL-1651CS | AL-1661CS Operation Manual - Page 51
to the network will be detected. Click the printer to be configured (the machine) and click the "Next" button. SET UP THE SOFTWARE Note • The "Ethernet Address" is indicated on the left side of the machine near the LAN port. • If the machine is used on a different network after the IP address is - Sharp AL 1551CS | AL-1651CS | AL-1661CS Operation Manual - Page 52
page 51. LPR (TCP/IP) direct printing After step 1-7 on page 48 8 Click the "Printer Driver" button. If you have not set the IP Address, click the "Set the IP Address" button in first and go to step 8 on page 48. 9 Read the message in the "Welcome" window and then click the "Next" button - Sharp AL 1551CS | AL-1651CS | AL-1661CS Operation Manual - Page 53
the "Search" button. 12 In the window for setting the destination print port name, make sure that ":lp" appears at the end of the IP address and click the "Next" button. Note Any name can be entered in "Printer Port Name" (maximum of 38 characters). 5 13 A window appears to let you check your - Sharp AL 1551CS | AL-1651CS | AL-1661CS Operation Manual - Page 54
of the software. Sharing the printer using windows networking If the machine will be used as a shared printer on a network, follow these steps to install the printer driver in the client computer. Note To configure the appropriate settings in the print server, see the operation manual or help - Sharp AL 1551CS | AL-1651CS | AL-1661CS Operation Manual - Page 55
SET UP THE SOFTWARE 4 The "SOFTWARE LICENCE" window will appear. Make sure that you understand the contents of the software licence, and then click the "Yes" button. 5 Click the "Printer Driver" button. 6 Read the message in the "Welcome" window and then click the "Next" button. 7 Select "Shared - Sharp AL 1551CS | AL-1651CS | AL-1661CS Operation Manual - Page 56
list, check the settings in the printer server. 9 When the model selection window appears, select model name of your machine and click the "Next" button. For the model name of your machine, see the operation panel on the machine. 10 Follow the on-screen instructions. 11 When the "Finish" screen - Sharp AL 1551CS | AL-1651CS | AL-1661CS Operation Manual - Page 57
machine. Follow the steps below to link Button Manager to scanner events. Windows XP 1 Click the "start" button, click "Control Panel", click "Printers and Other Hardware", and then click "Scanners and Cameras". 2 Click the "SHARP AL-XXXXCS" icon and select "Properties" from the "File" menu. 3 In - Sharp AL 1551CS | AL-1651CS | AL-1661CS Operation Manual - Page 58
THE SOFTWARE 5 Select "Start this program" and then select "Sharp Button event" pull-down menu. Select "Start this program", select "Sharp Button Manager B" from the pull-down menu, and then click window of Button Manager. For the factory default settings of the scan menu, see "USING THE SCANNER - Sharp AL 1551CS | AL-1651CS | AL-1661CS Operation Manual - Page 59
THE SOFTWARE Windows 98/Me/2000 1 click the "Start" button, select "Settings", and then click "Control Panel". 2 Double-click the "Scanners and Cameras" icon. Note If the "Scanners and Cameras" icon does not appear in Windows Me, click "view all Control Panel options". 3 Select "SHARP AL-XXXXCS - Sharp AL 1551CS | AL-1651CS | AL-1661CS Operation Manual - Page 60
SOFTWARE 6 Select "Sharp "SC2:" through "SC6:". Select "SC2:" from the "Scanner events" pull-down menu. Select "Sharp Button Manager B" in "Send to this application" and click with the setting window of Button Manager. For the factory default settings of the scan menu, see "USING THE SCANNER MODE" (p. - Sharp AL 1551CS | AL-1651CS | AL-1661CS Operation Manual - Page 61
transmit the print data. To use the machine as a printer or scanner, the printer driver or scanner driver must first be installed as explained in the "Setting up the printer and scanner functions". Note • If a problem occurs in printer or scanner mode, see the Online Manual. • When using USB - Sharp AL 1551CS | AL-1651CS | AL-1661CS Operation Manual - Page 62
machine runs out of paper or toner, or when the drum cartridge reaches its replacement time. BASIC PROCEDURE FOR PRINTING The basic procedure for printing is explained in the following. To use convenient printer functions, see the "Online Manual" or the printer driver help file. 1 Make sure that - Sharp AL 1551CS | AL-1651CS | AL-1661CS Operation Manual - Page 63
mode and clear the previously set copy settings. Scanning from the operation panel of the machine 1 Press the [MODE SELECT] key to select scanner mode. The "SCAN" indicator lights up to indicate that scanner mode is selected. AL-1651CS 2 Place the original. (p.24) 6 3 Press the [ ] key ( ) or - Sharp AL 1551CS | AL-1651CS | AL-1661CS Operation Manual - Page 64
see the help file for the scanner driver or Windows Help. OPERATION IN COPY, PRINTER, AND SCANNER MODES Some operations cannot be performed simultaneously when the machine is being used in printer mode, copy mode, or scanner mode. Modes Copying Scanning Scanning Printing from a from the computer - Sharp AL 1551CS | AL-1651CS | AL-1661CS Operation Manual - Page 65
HOW TO USE THE ONLINE MANUAL The online manual provides detailed instructions for operating the unit as a printer and scanner. It also provides methods for dealing with printing or scanner problems. To access the online manual, your computer must have Acrobat Reader 5.0 or later. If this is not - Sharp AL 1551CS | AL-1651CS | AL-1661CS Operation Manual - Page 66
PREHEAT MODE 3 AUTO SHUT-OFF Setting codes (factory default setting appears in bold) This program is used to select the period operation panel can be used. Normal operation automatically resumes when a key on the operation panel is pressed, an original is placed, a print job is received. • Use - Sharp AL 1551CS | AL-1651CS | AL-1661CS Operation Manual - Page 67
name Setting codes (factory default used when the power is on. All lights except the power save indicator go off. To resume normal operation, press the [START] key ( ). Normal operation also resumes automatically when a print or copy job, and print jobs when using the printer function. • When two - Sharp AL 1551CS | AL-1651CS | AL-1661CS Operation Manual - Page 68
COPY MODE 11 MARGIN WIDTH 12 MEM. FOR PRINTER 13 AUTO KEY REPEAT 14 KEY PRESS TIME 15 KEY TOUCH SOUND Setting codes (factory default setting appears in bold) 1: • Use this setting to set the margin width. • Use this to change the proportion of machine memory used for printer mode. • Use this - Sharp AL 1551CS | AL-1651CS | AL-1661CS Operation Manual - Page 69
number Program name Setting codes (factory default setting appears in bold) 16 SOUND AT DEFAULT 1: ON 2: OFF 17 TONER SAVE MODE 1: ON 2: OFF 1: SPF/RSPF 18 AE LEVEL ADJUST 2: DOCUMENT GLASS 19 LANGUAGE 1: AMERICAN ENGLISH 20 RESET FACTORY 1: Yes 2: No Explanation • Use this to sound - Sharp AL 1551CS | AL-1651CS | AL-1661CS Operation Manual - Page 70
codes (factory default setting appears in bold) Explanation 1 FORCED OUTPUT 1: ON 2: OFF When this function is enabled, printing in printer mode will automatically continue using requirements (operating 2 USB 2.0 MODE SWITCH *1 1: FULL-SPEED 2: HI-SPEED system and driver), and then use this - Sharp AL 1551CS | AL-1651CS | AL-1661CS Operation Manual - Page 71
Press the [MENU] key and then press the [ENTER] key. In printer mode, the user programs are accessed by simply pressing the [MENU] then press the [ENTER] key. • See "USER PROGRAM" (p.64 to p.68) for the program name and program code. • You can also select a program by directly entering the program - Sharp AL 1551CS | AL-1651CS | AL-1661CS Operation Manual - Page 72
USER SETTINGS Audible signals (key entry beep, invalid key beep, base setting beep) The machine sounds three different types of beep signals: a key entry beep that sounds when a valid key is pressed, an invalid key beep that sounds when an invalid key is pressed, and a base setting beep that sounds - Sharp AL 1551CS | AL-1651CS | AL-1661CS Operation Manual - Page 73
online manual. DISPLAY MESSAGES When the following indicators light up or blink on the operation panel or the following alphanumeric codes appear in the display, solve the problem immediately referring to both the table below and the indicated page. Note Be sure to use only genuine SHARP parts and - Sharp AL 1551CS | AL-1651CS | AL-1661CS Operation Manual - Page 74
blinks, the 86 machine does not operate.) Error indicator TD CARTRIDGE Toner is low. Consult your dealer to IS NEAR EMPTY. purchase a new toner cartridge. 85 Steadily A DRUM Less than 1000 sheets can be printed lit CARTRIDGE WILL with the current drum cartridge. BE NEEDED Consult your - Sharp AL 1551CS | AL-1651CS | AL-1661CS Operation Manual - Page 75
TROUBLESHOOTING THE MACHINE The following problems are related to the general operation of the machine and copying. Problem Cause and solution Page [ ] key ( ) or [ ] Copies are too dark or key ( ) to manually select an too light. appropriate exposure. → If the copy is too light or too dark - Sharp AL 1551CS | AL-1651CS | AL-1661CS Operation Manual - Page 76
TROUBLESHOOTING AND MAINTENANCE Problem Part of the image is cut off or there is too The paper is outside of the specified size and weight range. → Use copy paper within the specified range. Paper curled or damp. → Do not use curled or crimped paper. Replace with dry copy paper. During periods when - Sharp AL 1551CS | AL-1651CS | AL-1661CS Operation Manual - Page 77
Problem Paper misfeed. White or black lines appear on copies. TROUBLESHOOTING AND MAINTENANCE Cause and solution Page Misfeed occur. → To remove the misfeed, see "MISFEED 80 REMOVAL". The paper is outside of the specified size and weight range. → Use copy paper within the specified 18 - Sharp AL 1551CS | AL-1651CS | AL-1661CS Operation Manual - Page 78
mode. Press the [START] key ( ) to resume normal operation. See "DISPLAY MESSAGES" to check Error indicator ( ) is the meaning of the error indicator and lit or blinking. error message in the display, and take appropriate action. Copies made using the RSPF are dirty. The underside of the RSPF - Sharp AL 1551CS | AL-1651CS | AL-1661CS Operation Manual - Page 79
PROBLEMS DURING SETUP THE SOFTWARE If the software does not install correctly, check the following items on your computer. To remove the software, see "Removing the software" (p.79) MFP driver cannot be installed (Windows 2000/XP) If the MFP driver cannot be installed in Windows 2000/XP, follow - Sharp AL 1551CS | AL-1651CS | AL-1661CS Operation Manual - Page 80
In Windows 98 use the USB port. If the "Universal Serial Bus controllers" shows a yellow exclamation point or does not appear, you must check your computer manual for USB troubleshooting or contact your computer manufacturer. 4 Once you have verified that the USB port is enabled, install the software - Sharp AL 1551CS | AL-1651CS | AL-1661CS Operation Manual - Page 81
"Add or Remove Programs". In Windows 95/98/Me/NT 4.0/2000, double-click the "Add/Remove Programs" icon. 3 Select the printer/scanner driver for the machine and Button 8 Manager from the list, and remove the software. For more information, refer to your operating manual or to the help files for - Sharp AL 1551CS | AL-1651CS | AL-1661CS Operation Manual - Page 82
, the error indicator blinks, "CLEAR PAPER JAM" appears in the display, and the machine stops operating. If a misfeed occurs when using the RSPF . Remove the misfed paper following the instructions for each location in the illustration below. If the error indicator blinks, proceed to "A: Misfeed in - Sharp AL 1551CS | AL-1651CS | AL-1661CS Operation Manual - Page 83
TROUBLESHOOTING AND MAINTENANCE A: Misfeed in the paper feed area 1 Gently remove the misfed paper from the paper feed area as shown in the illustration. If the error indicator blinks and the misfed paper is not visible in the paper feed area, pull out the paper tray and remove the misfed paper. If - Sharp AL 1551CS | AL-1651CS | AL-1661CS Operation Manual - Page 84
TROUBLESHOOTING of the drum (green portion) of the drum cartridge toner on the paper may stain the paper transport area, resulting in smudges on copies. 3 Raise the fusing unit release lever and then close the side cover by pressing the round projections near the side cover open button. The error - Sharp AL 1551CS | AL-1651CS | AL-1661CS Operation Manual - Page 85
TROUBLESHOOTING AND MAINTENANCE 4 Raise the fusing unit release lever, close the front cover and then close the side cover by pressing the round projections near the side cover open button. The error knob. Remove the misfed original following the instructions for each location. (A) Open the document - Sharp AL 1551CS | AL-1651CS | AL-1661CS Operation Manual - Page 86
TROUBLESHOOTING AND MAINTENANCE (C) If the original does not move easily into the exit area, remove it number of pages to the document feeder tray. Open and close the RSPF to clear the error indicator, and then return the required number of originals. Press the [START] key ( ) to resume copying. 84 - Sharp AL 1551CS | AL-1651CS | AL-1661CS Operation Manual - Page 87
until the toner runs out. When the toner runs out, the machine will stop operating, the error indicator will blink, and "REPLACE THE TONER CARTRIDGE" , we recycle used TD cartridges. Please read "COPIER TONER CARTRIDGE RECYCLING PROGRAM", which is enclosed in the new toner cartridge package. - Sharp AL 1551CS | AL-1651CS | AL-1661CS Operation Manual - Page 88
the error indicator blinks and "REPLACE THE DRUM CARTRIDGE" appears in the display, the machine will stop operating until the cartridge is replaced. Replace the drum cartridge at this time. Note Do not remove the protective cover on the drum portion (black paper) of a new drum cartridge before use - Sharp AL 1551CS | AL-1651CS | AL-1661CS Operation Manual - Page 89
• "COPIES": Total number of copies • "SPF/RSPF": Total number of pages scanned using the RSPF • "2-SIDED PRINT": Total number of pages printed by two-sided • "PRINTS": print Total number of pages printed the printer function 8 • "FAX": Total number of sent and received faxes • "FAX SEND - Sharp AL 1551CS | AL-1651CS | AL-1661CS Operation Manual - Page 90
parts of the fusing unit, creating a risk of fire or electrical shock. Caution • Before cleaning, be sure to turn the power switch off and remove the power cord from the outlet. • Do not use a glass cleaner. Document glass/scanning window RSPF RSPF Scanning window Wiped the area marked by the - Sharp AL 1551CS | AL-1651CS | AL-1661CS Operation Manual - Page 91
TROUBLESHOOTING AND MAINTENANCE TD cartridge and drum cartridge 1 Remove the TD cartridge and drum cartridge as explained in "TD CARTRIDGE REPLACEMENT" (p.85) and "DRUM CARTRIDGE REPLACEMENT" (p.86). 2 Wipe the parts of the TD cartridge and drum cartridge shown below with a clean cloth. Wipe only - Sharp AL 1551CS | AL-1651CS | AL-1661CS Operation Manual - Page 92
TROUBLESHOOTING AND MAINTENANCE Transfer charger 1 Turn the power switch off. (p.17) 2 Ensure of the transfer charger, gently slide the cleaner to the left end, and then remove it. Repeat this operation two or three times. Note Slide the charger cleaner from the right end to the left end along the - Sharp AL 1551CS | AL-1651CS | AL-1661CS Operation Manual - Page 93
, be sure to use only SHARP Genuine Supplies which are designed, engineered, and tested to maximize the life and performance of SHARP copiers. Look for the Genuine Supplies label on the toner package. Supply list Supply TD cartridge Drum cartridge Part number AL-110TD AL-100DR Usable life Approx - Sharp AL 1551CS | AL-1651CS | AL-1661CS Operation Manual - Page 94
AL-1651CS AL-1661CS Type Digital Multifunctional System, Desktop Photoconductive type OPC drum Document glass type Fixed Copy/printing steps) Fixed preset: 25%, 50%, 64%, 78%, 100%, 129%, 200%, 400% RSPF: Variable: 50% to 200% in 1% increments (total 151 steps) Fixed preset: 50%, 64%, 78%, - Sharp AL 1551CS | AL-1651CS | AL-1661CS Operation Manual - Page 95
) Scan: 600 x 600 dpi Output: 600 x 600 dpi(PHOTO mode) Gradation Power supply Scanning: 256 Printing: 2 value AC 120V, 60 Hz, 8A Power consumption Max. 1.0 kW Overall dimensions (with bypass tray ambient temperature, and other operating conditions. *2 Not includes TD and drum cartridges. 9 93 - Sharp AL 1551CS | AL-1651CS | AL-1661CS Operation Manual - Page 96
APPENDIX Printer Function Print speed Resolution Memory Emulation Interface port Interface cables 16ppm 600 dpi Approx. 10MB SPLC (Sharp Printer Language with Completion) 10 BASE-T Network Interface* USB 2.0 (Full-Speed/Hi-Speed compatible interface) [USB cable] USB cable that supports USB 2.0. - Sharp AL 1551CS | AL-1651CS | AL-1661CS Operation Manual - Page 97
edges 5/32" (4.0 mm) due to scanner driver Right and left edges 11/64" (4.5 mm) [USB cable] USB cable that supports USB 2.0. Please purchase a commercially available USB cable. Button Manager / Sharpdesk Note As a part of our policy of continuous improvement, SHARP reserves the right to make - Sharp AL 1551CS | AL-1651CS | AL-1661CS Operation Manual - Page 98
life 87 Cleaning the machine 88 Cleaning the TD cartridge and drum cartridge 89 [CLEAR ALL] key 11, 16 [CLEAR] key 10, 24, 80 Connecting a USB cable 46 Convenient copy function 30 Conventions used in this manual and online manual 6 [COPY RATIO] key 11, 28 D Display 10 Display messages 71 - Sharp AL 1551CS | AL-1651CS | AL-1661CS Operation Manual - Page 99
10, 17, 73, 76 Power save modes 17 Power switch 9, 16, 17 Preheat mode 17, 64 Preparations 9 Preparing the machine for installation 13 Preset ratio 28 Pressure plate lock 19 Printer driver 40 Printer/scanner functions 59 Problems during setup the software 77 Protective materials 13 97 - Sharp AL 1551CS | AL-1651CS | AL-1661CS Operation Manual - Page 100
85 Thick paper 18 Transfer charger 9, 90 Transparency film 18, 19, 21 Tray location indicator 10, 71 [TRAY SELECT] key 10, 22, 29 Troubleshooting 71 U USB 5, 42, 45, 59, 68 USB port 9, 46 User program 64 Using the printer mode 60 Using the scanner mode 61 Z Zoom setting 28 98 - Sharp AL 1551CS | AL-1651CS | AL-1661CS Operation Manual - Page 101
57 - Windows XP 55 Installing the software-Network connection 47 Installing the software 42 Online manual, using 63 Print job, canceling 60 Printer mode, using 60 Scanner mode, using 61 Scanning from your computer 62 Scanning using the keys on the machine 61 Troubleshooting and maintenance - Sharp AL 1551CS | AL-1651CS | AL-1661CS Operation Manual - Page 102
own the disk on which the Software is recorded but SHARP and/or SHARP'S Licensors retain title to the Software and related documentation. This License allows you to use the Software on one or more computers connected to a single printer and make one copy of the Software in machine-readable form for - Sharp AL 1551CS | AL-1651CS | AL-1661CS Operation Manual - Page 103
REQUIREMENTS, OR THAT THE OPERATION OF THE SOFTWARE WILL BE UNINTERRUPTED OR ERROR-FREE, OR THAT DEFECTS IN THE SOFTWARE WILL BE CORRECTED. FURTHERMORE, SHARP DOES NOT WARRANT OR MAKE ANY REPRESENTATIONS REGARDING THE USE OR THE RESULTS OF THE USE OF THE SOFTWARE OR RELATED DOCUMENTATION IN TERMS - Sharp AL 1551CS | AL-1651CS | AL-1661CS Operation Manual - Page 104
drum cartridge, cleaning of the unit and transfer charger, removal of dust and foreign matter, clearing of paper misfeeds, and proper routine and preventive maintenance. Service After Expiration of Warranty Coverage Should you require service repair after warranty coverage has expired, contact Sharp - Sharp AL 1551CS | AL-1651CS | AL-1661CS Operation Manual - Page 105
or inadequate maintenance by the purchaser (see Operation Manual) or the use of non-genuine Sharp toner/developer and drum cartridges. Service is available in the United States from Sharp. You may ship in your Product for repair or replacement. Replacement units may be remanufactured, rather - Sharp AL 1551CS | AL-1651CS | AL-1661CS Operation Manual - Page 106
Jul. 31, 2002 Data Issued: Jun. 1, 1998 MSDS NO. F-00831 1. PRODUCT AND COMPANY IDENTIFICATION Product Name : AL-100TD / DM-150TD / AL-110TD / AL-110DC (Black Toner) Supplier Identification : Sharp Corporation 22-22 Nagaike-cho, Abeno-ku, Osaka, Japan Local suppliers are listed below. Please - Sharp AL 1551CS | AL-1651CS | AL-1661CS Operation Manual - Page 107
the Products Human Health Effects :There are no anticipated carcinogenic effects from exposure based on animal tests performed using toner. When used as intended according to instructions, studies do not indicate any symptoms of fibrosis will occur. Environmental Effects :No data are available - Sharp AL 1551CS | AL-1651CS | AL-1661CS Operation Manual - Page 108
Protection :Not required under intended use. Eye Protection :Not required under intended use. Skin Protection :Not required under intended use. Other Protective equipment :Use of a dust mask and goggles are recommended when handling a large quantity of toner or during long term exposure, as - Sharp AL 1551CS | AL-1651CS | AL-1661CS Operation Manual - Page 109
Chemicals to Humans, Vol. 65, Printing Process And Printing Inks, Carbon Black and Some Nitro Toner upon Chronic Inhalation Exposure in Rats. Fundamental and Applied Toxicology 17, pp.280-299. The information on this data sheet represents our current data and best opinion as to the proper use - Sharp AL 1551CS | AL-1651CS | AL-1661CS Operation Manual - Page 110
.31, 2002 Data Issued: Jun. 1, 1998 MSDS NO. F-30831 1. PRODUCT AND COMPANY IDENTIFICATION Product Name : AL-100TD / DM-150TD / AL-110TD / AL-110DC (Black Developer) Supplier Identification : Sharp Corporation 22-22 Nagaike-cho, Abeno-ku, Osaka, Japan Local suppliers are listed below. Please - Sharp AL 1551CS | AL-1651CS | AL-1661CS Operation Manual - Page 111
the Products Human Health Effects :There are no anticipated carcinogenic effects from exposure based on animal tests performed using toner. When used as intended according to instructions, studies do not indicate any symptoms of fibrosis will occur. Environmental Effects :No data are available - Sharp AL 1551CS | AL-1651CS | AL-1661CS Operation Manual - Page 112
show any association between carbon black and lung tumors. Moreover, a two-year cancer bioassay using a typical toner preparation containing carbon black demonstrated no association between toner exposure and tumor development in rats. Chronic Effect :In a study in rats of chronic inhalation - Sharp AL 1551CS | AL-1651CS | AL-1661CS Operation Manual - Page 113
Chemicals to Humans, Vol. 65, Printing Process And Printing Inks, Carbon Black and Some Nitro Toner upon Chronic Inhalation Exposure in Rats. Fundamental and Applied Toxicology 17, pp.280-299. The information on this data sheet represents our current data and best opinion as to the proper use - Sharp AL 1551CS | AL-1651CS | AL-1661CS Operation Manual - Page 114
Caution: This connector is only intended for service purposes. Any connection to this terminal may cause malfunctions of the copy machine. Instruction for service technician: The cable length for the service terminal has to be less than 10 feet (3 m). RSPF connector USB connector LAN connector - Sharp AL 1551CS | AL-1651CS | AL-1661CS Operation Manual - Page 115
any interference received, including interference that may cause undesired operation. Model Number: AL-1651CS/AL-1661CS Responsible Party: SHARP ELECTRONICS CORPORATION Sharp Plaza, Mahwah, New Jersey 07430-1163 TEL: 1-800-BE-SHARP This product utilizes tin-lead solder, and a fluorescent lamp - Sharp AL 1551CS | AL-1651CS | AL-1661CS Operation Manual - Page 116
SHARP ELECTRONICS CORPORATION Sharp Plaza, Mahwah, New Jersey 07430-1163. www.sharpusa.com SHARP ELECTRONICS OF CANADA LTD. 335 Britannia Road East, Mississauga, Ontario, L4Z 1W9 SHARP CORPORATION Printed on 100% post-consumer recycled paper PRINTED IN CHINA 2003J KS 1 TINSE1143QSZZ
-
 1
1 -
 2
2 -
 3
3 -
 4
4 -
 5
5 -
 6
6 -
 7
7 -
8
-
9
-
10
-
11
-
12
-
13
-
14
-
15
-
16
-
17
-
18
-
19
-
20
-
21
-
22
-
23
-
24
-
25
-
26
-
27
-
28
-
29
-
30
-
31
-
32
-
33
-
34
-
35
-
36
-
37
-
38
-
39
-
40
-
41
-
42
-
43
-
44
-
45
-
46
-
47
-
48
-
49
-
50
-
51
-
52
-
53
-
54
-
55
-
56
-
57
-
58
-
59
-
60
-
61
-
62
-
63
-
64
-
65
-
66
-
67
-
68
-
69
-
70
-
71
-
72
-
73
-
74
-
75
-
76
-
77
-
78
-
79
-
80
-
81
-
82
-
83
-
84
-
85
-
86
-
87
-
88
-
89
-
90
-
91
-
92
-
93
-
94
-
95
-
96
-
97
-
98
-
99
-
100
-
101
-
102
-
103
-
104
-
105
-
106
-
107
-
108
-
109
-
110
-
111
-
112
-
113
-
114
-
115
-
116
 |
 |
DIGITAL MULTIFUNCTIONAL
SYSTEM
OPERATION MANUAL
Page
PREPARATIONS
LOADING PAPER
MAKING COPIES
SETTING UP THE
SOFTWARE
PRINTER/SCANNER
FUNCTIONS
USER SETTINGS
TROUBLESHOOTING AND
MAINTENANCE
9
18
24
40
59
64
71
92
CONVENIENT COPY
FUNCTIONS
30
APPENDIX
AL-1651CS
AL-1661CS
MODEL
AL-1651CS/AL-1661CS