Sharp MX-2600N Quick Start Guide - Page 41
Selecting A Special Mode
 |
View all Sharp MX-2600N manuals
Add to My Manuals
Save this manual to your list of manuals |
Page 41 highlights
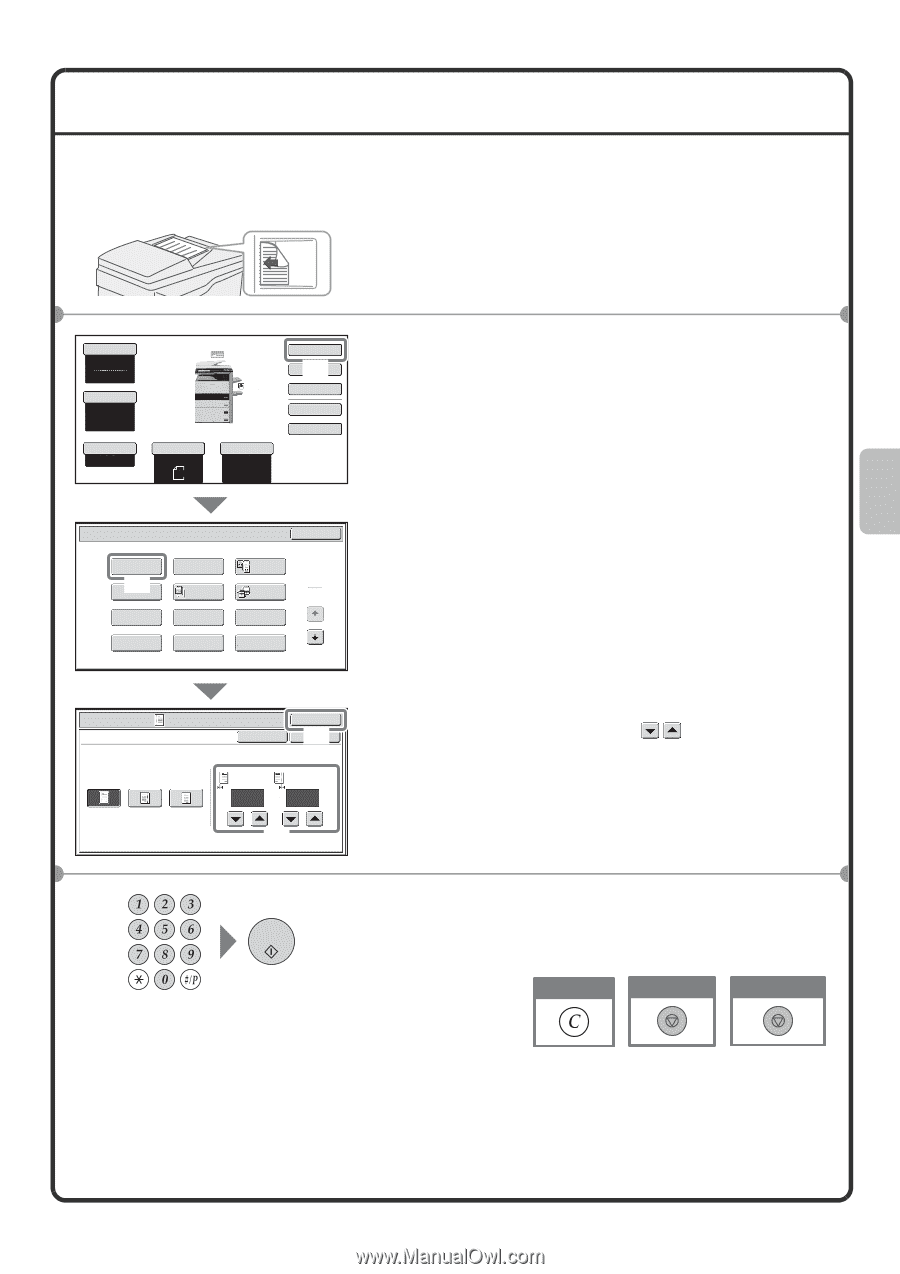
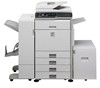
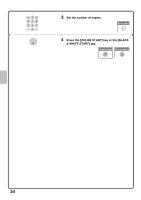
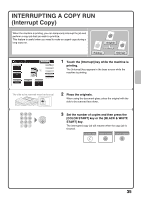
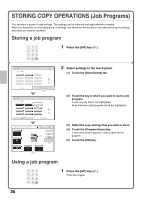
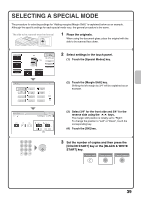
SELECTING A SPECIAL MODE The procedure for selecting settings for "Adding margins (Margin Shift)" is explained below as an example. Although the specific settings for each special mode vary, the general procedure is the same. The side to be scanned must be face up! 1 Place the originals. When using the document glass, place the original with the side to be scanned face down. Color Mode Full Color Exposure Auto Copy Ratio 100% 1. 8½x11 2. 8½x11R 3. 8½x14 4. 11x17 Plain 8½x11 Original Auto 8½x11 Paper Select Auto 8½x11 Plain Special Modes (1) 2-Sided Copy Output File Quick File Special Modes OK Margin Shift (2) Pamphlet Copy Erase Job Build Dual Page Copy 1 Tandem 2 Copy Covers/Inserts Transparency Inserts Multi Shot Book Copy Tab Copy Card Shot 2 Select settings in the touch panel. (1) Touch the [Special Modes] key. (2) Touch the [Margin Shift] key. Shifting the left margin by 3/4" will be explained as an example. Special Modes Margin Shift Cancel OK (O4K ) Right Left Down Side 1 Side 2 3/4 3/4 (0~1) (0~1) inch inch (3) (3) Select 3/4" for the front side and 3/4" for the reverse side using the keys. The margin shift position is initially set to "Right". To change the position to "Left" or "Down", touch the corresponding key. (4) Touch the [OK] key. 3 Set the number of copies and then press the [COLOR START] key or the [BLACK & WHITE START] key. Correct sets Cancel scanning Cancel copying 39
-
 1
1 -
2
-
3
-
4
-
5
-
6
-
7
-
8
-
9
-
10
-
11
-
12
-
13
-
14
-
15
-
16
-
17
-
18
-
19
-
20
-
21
-
22
-
23
-
24
-
25
-
26
-
27
-
28
-
29
-
30
-
31
-
32
-
33
-
34
-
35
-
 36
36 -
 37
37 -
 38
38 -
 39
39 -
 40
40 -
 41
41 -
 42
42 -
 43
43 -
 44
44 -
 45
45 -
 46
46 -
47
-
48
-
49
-
50
-
51
-
52
-
53
-
54
-
55
-
56
-
57
-
58
-
59
-
60
-
61
-
62
-
63
-
64
-
65
-
66
-
67
-
68
-
69
-
70
-
71
-
72
-
73
-
74
-
75
-
76
-
77
-
78
-
79
-
80
-
81
-
82
-
83
-
84
-
85
-
86
-
87
-
88
-
89
-
90
-
91
-
92
-
93
-
94
-
95
-
96
-
97
-
98
-
99
-
100
-
101
-
102
-
103
-
104
-
105
-
106
-
107
-
108
-
109
-
110
-
111
-
112
-
113
-
114
-
115
-
116
-
117
-
118
-
119
-
120
 |
 |