Singer 1 One Instruction Manual 19 - Page 12
Remove, Insert, Needles
 |
View all Singer 1 One manuals
Add to My Manuals
Save this manual to your list of manuals |
Page 12 highlights
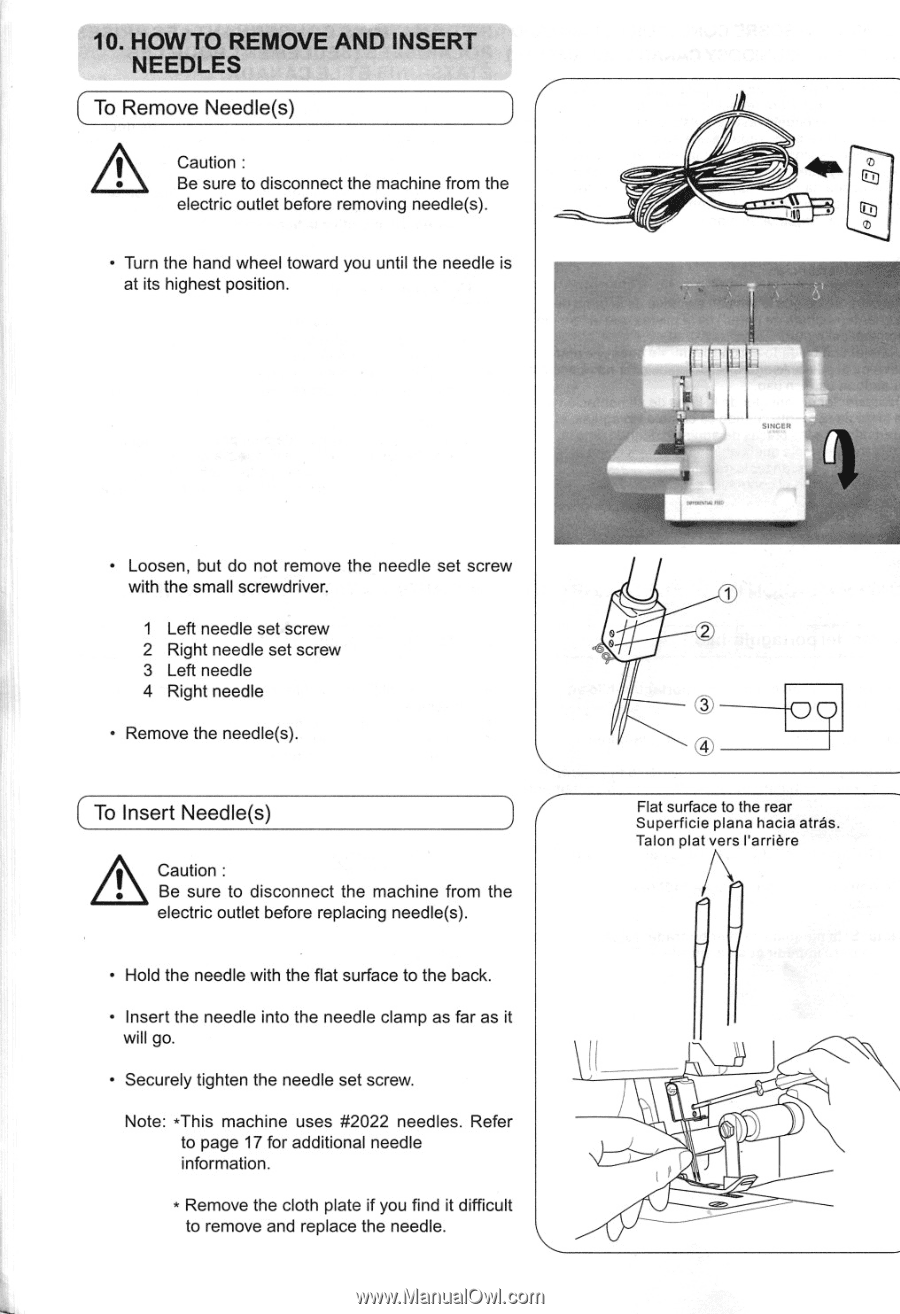
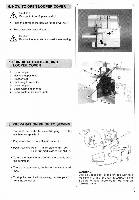
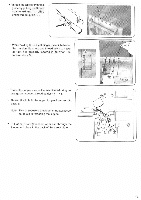
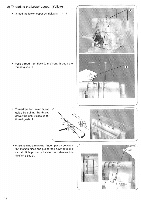
10. HOW TO REMOVE AND INSERT NEEDLES To Remove Needle(s) Caution : Be sure to disconnect the machine from the electric outlet before removing needle(s). • Turn the hand wheel toward you until the needle is at its highest position. 1,9 U • Loosen, but do not remove the needle set screw with the small screwdriver. 1 Left needle set screw 2 Right needle set screw 3 Left needle 4 Right needle • Remove the needle(s). To Insert Needle(s) A Caution Be sure to disconnect the machine from the electric outlet before replacing needle(s). • Hold the needle with the flat surface to the back. • Insert the needle into the needle clamp as far as it will go. • Securely tighten the needle set screw. Note: *This machine uses #2022 needles. Refer to page 17 for additional needle information. * Remove the cloth plate if you find it difficult to remove and replace the needle. vner•out RP, 1 2 Flat surface to the rear Superficie plana hacia atras. Talon plat vers l'arriere afl j4
-
 1
1 -
2
-
3
-
4
-
5
-
6
-
 7
7 -
 8
8 -
 9
9 -
 10
10 -
 11
11 -
 12
12 -
 13
13 -
 14
14 -
 15
15 -
 16
16 -
 17
17 -
18
-
19
-
20
-
21
-
22
-
23
-
24
-
25
-
26
-
27
-
28
-
29
-
30
-
31
-
32
-
33
-
34
-
35
-
36
-
37
-
38
-
39
-
40
-
41
-
42
-
43
-
44
-
45
-
46
-
47
-
48
 |
 |