Singer 1 One Instruction Manual 18 - Page 48
outlet, sortie, l'usine, 5/Dobladi, enrollado, cuando, envia, desde, fabrica, 5/Rolled, shipped,
 |
View all Singer 1 One manuals
Add to My Manuals
Save this manual to your list of manuals |
Page 48 highlights
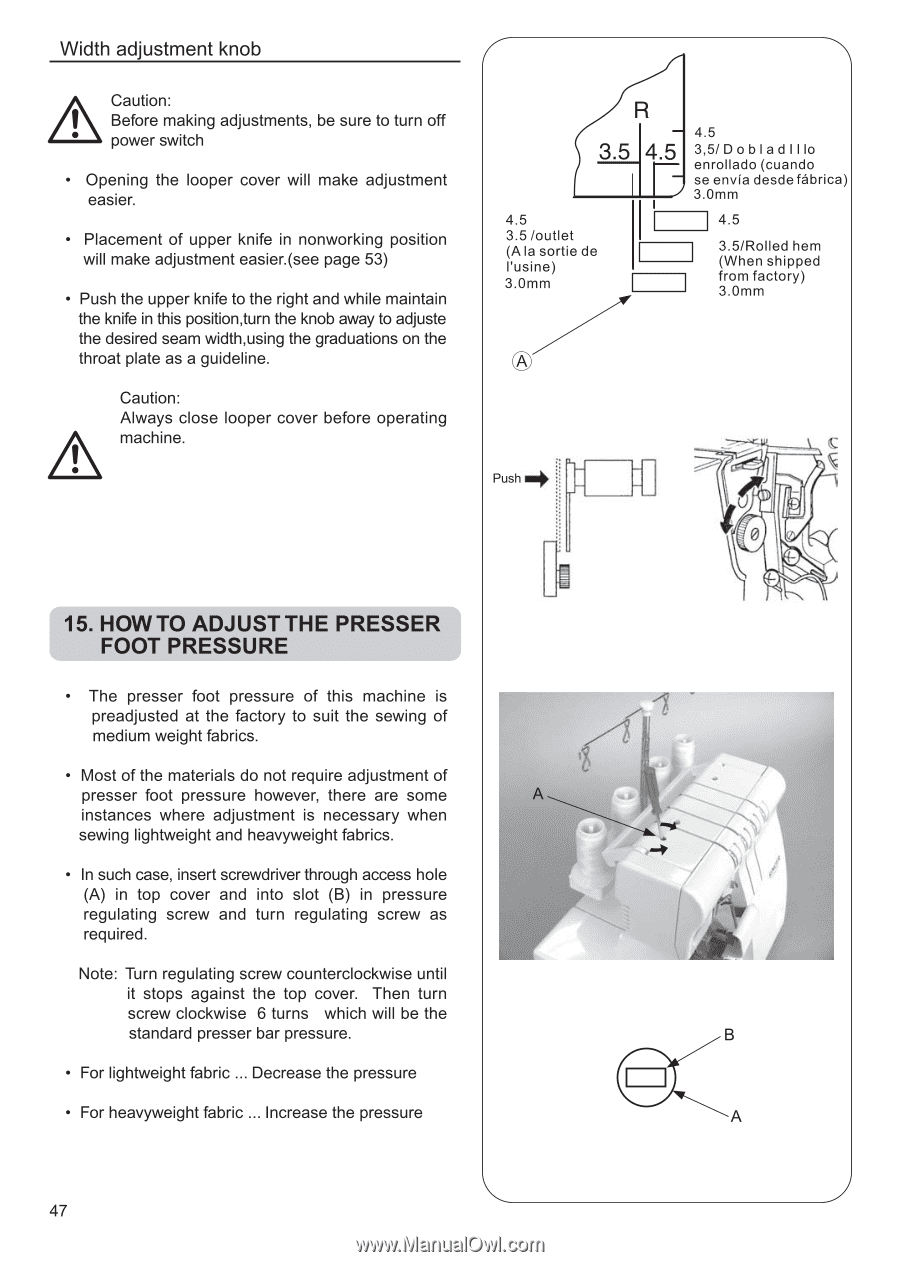
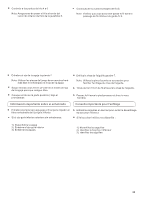
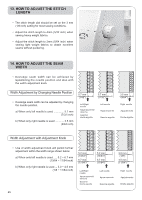
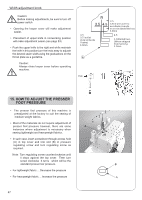
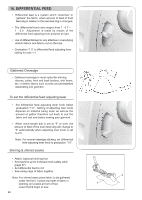
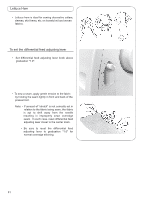
Width adjustment knob A Caution: I Before making adjustments, be sure to turn off • power switch • Opening the looper cover will make adjustment easier. • Placement of upper knife in nonworking position will make adjustment easier.(see page 53) • Push the upper knife to the right and while maintain the knife in this position,turn the knob away to adjuste the desired seam width,using the graduations on the throat plate as a guideline. Caution: Always close looper cover before operating machine. R 3.5 4.5 4.5 3,5/Dobladi l lo enrollado (cuando se envia desde fabrica) 3.0mm 4.5 3.5 /outlet (Ala sortie de l'usine) 3.0mm 4.5 3.5/Rolled hem (When shipped from factory) 3.0mm 1 Push 0 15. HOW TO ADJUST THE PRESSER FOOT PRESSURE • The presser foot pressure of this machine is preadjusted at the factory to suit the sewing of medium weight fabrics. • Most of the materials do not require adjustment of presser foot pressure however, there are some instances where adjustment is necessary when sewing lightweight and heavyweight fabrics. • In such case, insert screwdriver through access hole (A) in top cover and into slot (B) in pressure regulating screw and turn regulating screw as required. Note: Turn regulating screw counterclockwise until it stops against the top cover. Then turn screw clockwise 6 turns which will be the standard presser bar pressure. • For lightweight fabric ... Decrease the pressure • For heavyweight fabric ... Increase the pressure 47
-
 1
1 -
2
-
3
-
4
-
5
-
6
-
7
-
8
-
9
-
10
-
11
-
12
-
13
-
14
-
15
-
16
-
17
-
18
-
19
-
20
-
21
-
22
-
23
-
24
-
25
-
26
-
27
-
28
-
29
-
30
-
31
-
32
-
33
-
34
-
35
-
36
-
37
-
38
-
39
-
40
-
41
-
42
-
 43
43 -
 44
44 -
 45
45 -
 46
46 -
 47
47 -
 48
48 -
 49
49 -
 50
50 -
 51
51 -
 52
52 -
 53
53 -
54
-
55
-
56
-
57
-
58
-
59
-
60
-
61
-
62
-
63
-
64
-
65
-
66
-
67
-
68
-
69
-
70
-
71
-
72
-
73
-
74
-
75
-
76
-
77
-
78
-
79
-
80
-
81
-
82
-
83
-
84
-
85
-
86
-
87
-
88
-
89
-
90
-
91
-
92
-
93
-
94
-
95
-
96
-
97
-
98
-
99
-
100
-
101
 |
 |