Singer 1 One Instruction Manual 33 - Page 8
thread, machine, correctly
 |
View all Singer 1 One manuals
Add to My Manuals
Save this manual to your list of manuals |
Page 8 highlights
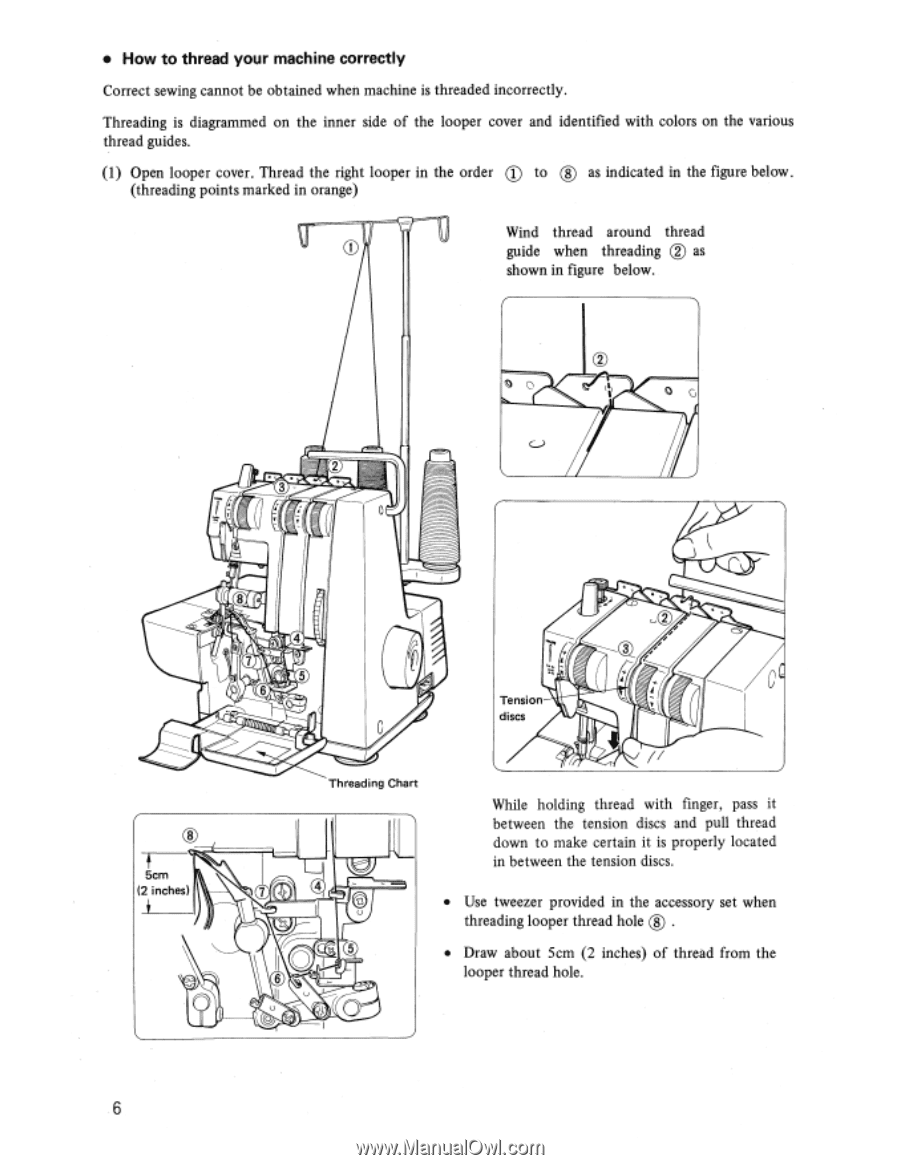
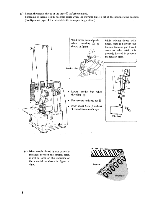
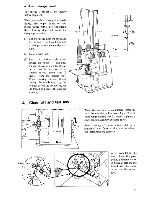
• How to thread your machine correctly Correct sewing cannot be obtained when machine is threaded incorrectly. Threading is diagrammed on the inner side of the looper cover and identified with colors on the various thread guides. (1) Open looper cover. Thread the right looper in the order 0 to ® as indicated in the figure below. (threading points marked in orange) Wind thread around thread guide when threading C) as shown in figure below. 2 ( 0 c„ C-) 8 4 7 5 6 0 Tension discs 5cm (2 inches) 11 0 Threading Chart While holding thread with finger, pass it between the tension discs and pull thread down to make certain it is properly located in between the tension discs. • Use tweezer provided in the accessory set when threading looper thread hole ® . • Draw about 5cm (2 inches) of thread from the looper thread hole. 6
-
 1
1 -
2
-
 3
3 -
 4
4 -
 5
5 -
 6
6 -
 7
7 -
 8
8 -
 9
9 -
 10
10 -
 11
11 -
 12
12 -
 13
13 -
14
-
15
-
16
-
17
-
18
-
19
-
20
-
21
-
22
-
23
-
24
 |
 |