Singer 1 One Instruction Manual 35 - Page 8
removal.
 |
View all Singer 1 One manuals
Add to My Manuals
Save this manual to your list of manuals |
Page 8 highlights
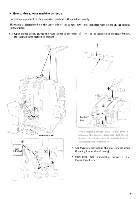
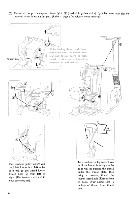
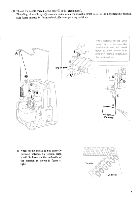
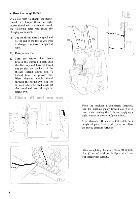
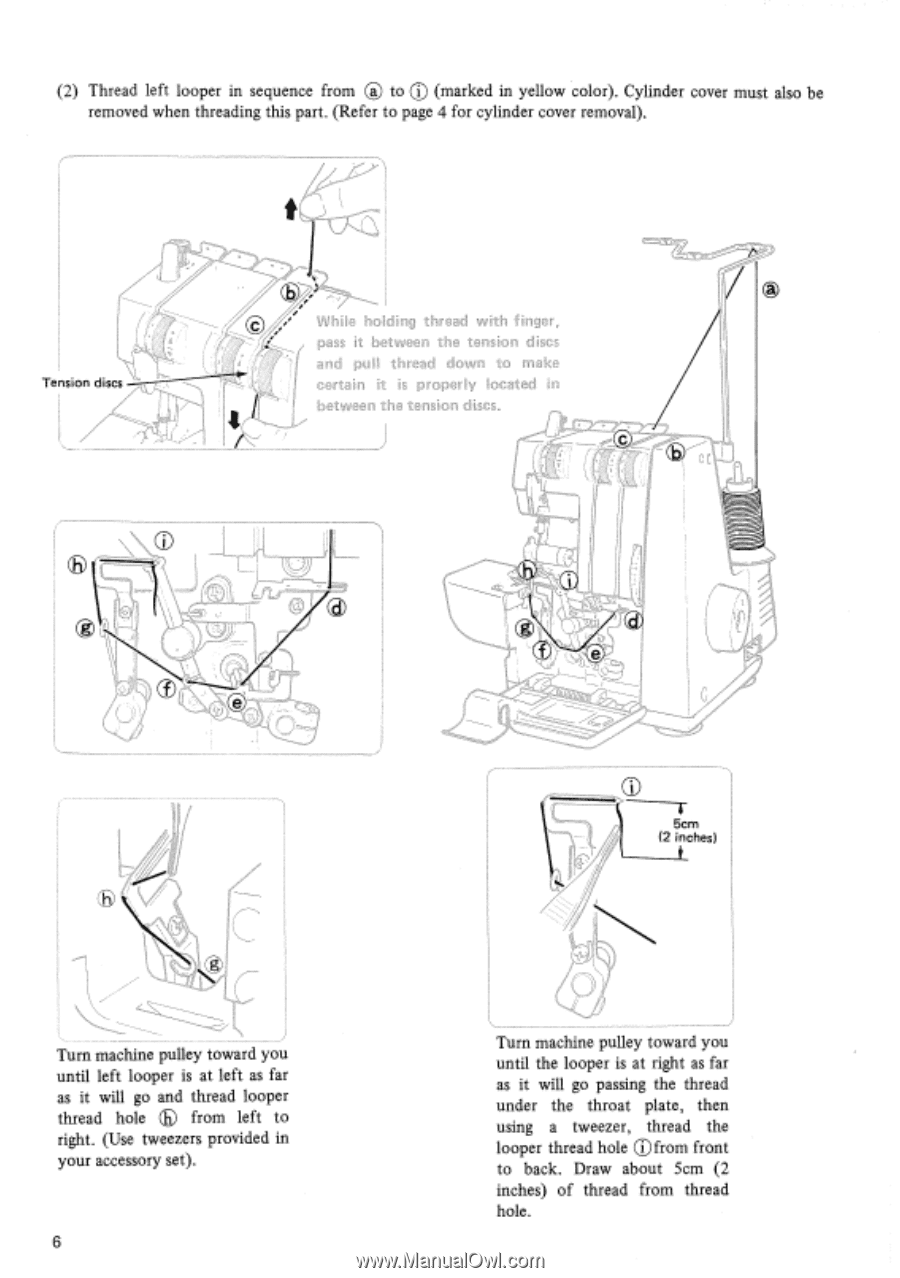
(2) Thread left looper in sequence from ® to C) (marked in yellow color). Cylinder cover must also be removed when threading this part. (Refer to page 4 for cylinder cover removal). L4, 1 Tension discs Whige three 'own c • between the tens, Turn machine pulley toward you until left looper is at left as far as it will go and thread looper thread hole G from left to right. (Use tweezers provided in your accessory set). 6 T 5cm (2 inches) Turn machine pulley toward you until the looper is at right as far as it will go passing the thread under the throat plate, then using a tweezer, thread the looper thread hole C)from front to back. Draw about Scm (2 inches) of thread from thread hole.
-
 1
1 -
2
-
 3
3 -
 4
4 -
 5
5 -
 6
6 -
 7
7 -
 8
8 -
 9
9 -
 10
10 -
 11
11 -
 12
12 -
 13
13 -
14
-
15
-
16
-
17
-
18
-
19
-
20
-
21
-
22
-
23
-
24
 |
 |
(2)
Thread
left
looper
in
sequence
from
®
to
C)
(marked
in
yellow
color).
Cylinder
cover
must
also
be
removed
when
threading
this
part.
(Refer
to
page
4
for
cylinder
cover
removal).
L
4
,
1
Tension
discs
Whige
c
•
three
'own
between
the
tens,
Turn
machine
pulley
toward
you
until
left
looper
is
at
left
as
far
as
it
will
go
and
thread
looper
thread
hole
G
from
left
to
right.
(Use
tweezers
provided
in
your
accessory
set).
T
5cm
(2
inches)
Turn
machine
pulley
toward
you
until
the
looper
is
at
right
as
far
as
it
will
go
passing
the
thread
under
the
throat
plate,
then
using
a
tweezer,
thread
the
looper
thread
hole
C)from
front
to
back.
Draw
about
Scm
(2
inches)
of
thread
from
thread
hole.
6