Singer 1 One Instruction Manual 37 - Page 16
adjust, stitch, length, overedge, width
 |
View all Singer 1 One manuals
Add to My Manuals
Save this manual to your list of manuals |
Page 16 highlights
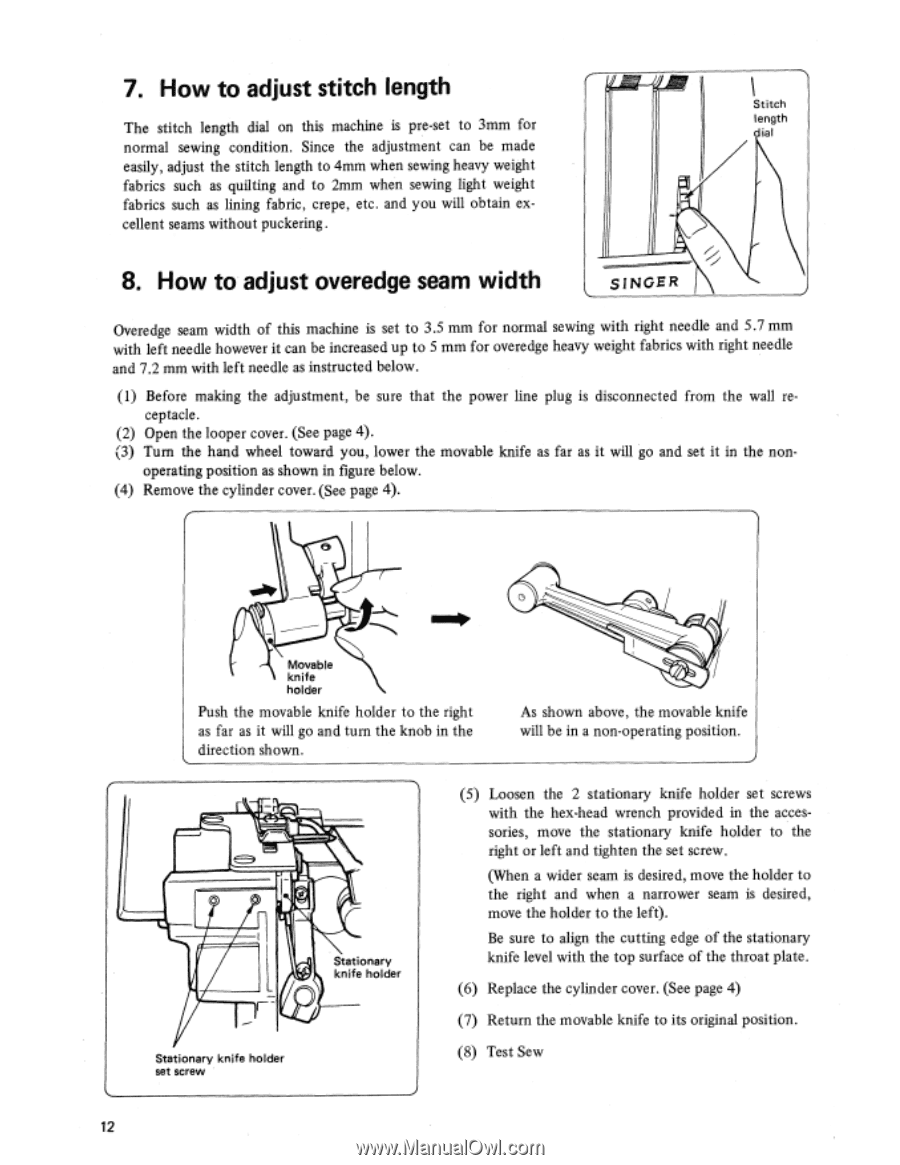
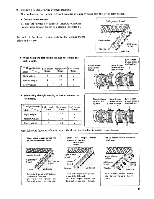
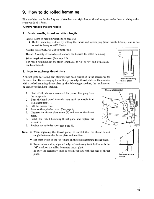
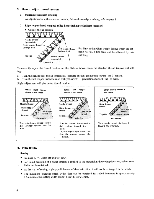
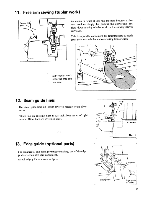
7. How to adjust stitch length The stitch length dial on this machine is pre-set to 3mm for normal sewing condition. Since the adjustment can be made easily, adjust the stitch length to 4mm when sewing heavy weight fabrics such as quilting and to 2mm when sewing light weight fabrics such as lining fabric, crepe, etc. and you will obtain excellent seams without puckering. Stitch length dial 8. How to adjust overedge seam width SINGER Overedge seam width of this machine is set to 3.5 mm for normal sewing with right needle and 5.7 mm with left needle however it can be increased up to 5 mm for overedge heavy weight fabrics with right needle and 7.2 mm with left needle as instructed below. (1) Before making the adjustment, be sure that the power line plug is disconnected from the wall receptacle. (2) Open the looper cover. (See page 4). (3) Turn the hand wheel toward you, lower the movable knife as far as it will go and set it in the non- operating position as shown in figure below. (4) Remove the cylinder cover. (See page 4). Movable knife holder Push the movable knife holder to the right as far as it will go and turn the knob in the direction shown. As shown above, the movable knife will be in a non-operating position. 0 Stationary knife holder Stationary knife holder set screw (5) Loosen the 2 stationary knife holder set screws with the hex-head wrench provided in the accessories, move the stationary knife holder to the right or left and tighten the set screw. (When a wider seam is desired, move the holder to the right and when a narrower seam is desired, move the holder to the left). Be sure to align the cutting edge of the stationary knife level with the top surface of the throat plate. (6) Replace the cylinder cover. (See page 4) (7) Return the movable knife to its original position. (8) Test Sew 12
-
 1
1 -
2
-
3
-
4
-
5
-
6
-
7
-
8
-
9
-
10
-
 11
11 -
 12
12 -
 13
13 -
 14
14 -
 15
15 -
 16
16 -
 17
17 -
 18
18 -
 19
19 -
 20
20 -
 21
21 -
22
-
23
-
24
-
25
-
26
-
27
-
28
-
29
-
30
-
31
 |
 |