Singer CE-250 Futura Instruction Manual - Page 104
Adjusting Top Thread Tension, Changing Presser Foot
 |
View all Singer CE-250 Futura manuals
Add to My Manuals
Save this manual to your list of manuals |
Page 104 highlights
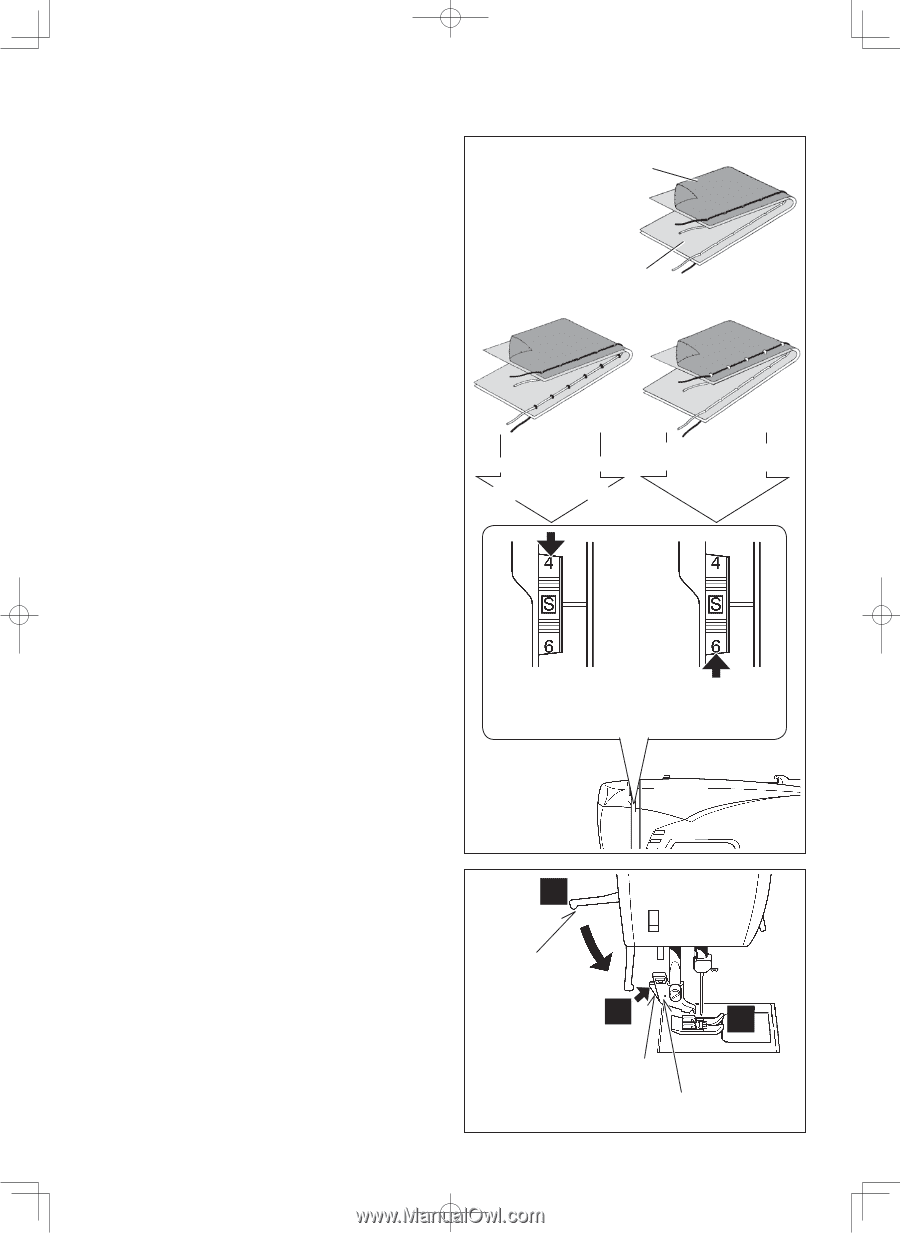
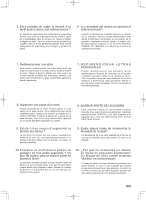
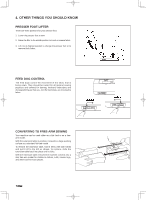
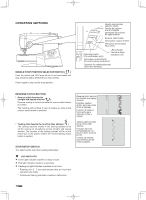
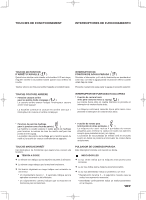
ADJUSTING TOP THREAD TENSION STRAIGHT STITCHING The correct appearance of your stitching is largely determined by the balanced tension of both top and bobbin threads. The tension is well balanced when these two threads 'lock' in the middle of layers of fabric you are sewing. If, when you start to sew, you find that the stitching is irregular, you will need to adjust the tension control. Make any adjustments with presser foot 'down'. Under side Côté de dessous Reverso Well balanced Correct Bien equilibrada Top side Côté de dessus Cara BOBBIN TENSION The bobbin tension has been correctly set at the factory, so you do not need to adjust it. Top stitch too tight Fil supérieur trop tendu Puntada superior demasiado apretada Top stitch too loose Fil supérieur trop lâche Puntada superior demasiado floja Decrease tension Diminuer la tension Disminuir tensión Increase tension Augmenter la tension Aumentar tensión CHANGING PRESSER FOOT Be sure the needle is in the highest position. Raise presser foot lifter. 1. Push presser foot release button to remove the foot. 2. Place the desired foot on the needle plate aligning the presser foot pin with the foot holder. 3. Lower the presser foot lifter so that the foot holder snaps on the foot. 104 3 Presser foot lifter Levier de verrouillage du pied 1 Palanca pie prensatelas Foot release button Levier de verrouillage du pied Palanca de desprendimiento prensatelas 2 Foot holder Support du pied Sujetador prensatelas
-
 1
1 -
2
-
3
-
4
-
5
-
6
-
7
-
8
-
9
-
10
-
11
-
12
-
13
-
14
-
15
-
16
-
17
-
18
-
19
-
20
-
21
-
22
-
23
-
24
-
25
-
26
-
27
-
28
-
29
-
30
-
31
-
32
-
33
-
34
-
35
-
36
-
37
-
38
-
39
-
40
-
41
-
42
-
43
-
44
-
45
-
46
-
47
-
48
-
49
-
50
-
51
-
52
-
53
-
54
-
55
-
56
-
57
-
58
-
59
-
60
-
61
-
62
-
63
-
64
-
65
-
66
-
67
-
68
-
69
-
70
-
71
-
72
-
73
-
74
-
75
-
76
-
77
-
78
-
79
-
80
-
81
-
82
-
83
-
84
-
85
-
86
-
87
-
88
-
89
-
90
-
91
-
92
-
93
-
94
-
95
-
96
-
97
-
98
-
 99
99 -
 100
100 -
 101
101 -
 102
102 -
 103
103 -
 104
104 -
 105
105 -
 106
106 -
 107
107 -
 108
108 -
 109
109 -
110
-
111
-
112
-
113
-
114
-
115
-
116
-
117
-
118
-
119
-
120
-
121
-
122
-
123
-
124
 |
 |