Singer S16 I Studio Instruction Manual
Singer S16 I Studio Manual
 |
View all Singer S16 I Studio manuals
Add to My Manuals
Save this manual to your list of manuals |
Singer S16 I Studio manual content summary:
- Singer S16 I Studio | Instruction Manual - Page 1
INSTRUCTION MANUAL S16 SINGER and STUDIO are trademarks of The Singer Company Limited S.à.r.l. or its Affiliates. ©2014 The Singer Company Limited S.à.r.l. or its Affiliates. All rights reserved. - Singer S16 I Studio | Instruction Manual - Page 2
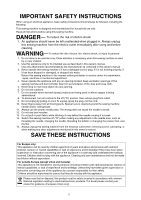
the presser foot, and the like. 15. Always unplug this sewing machine from the electrical outlet when removing covers, lubricating, or when making any other adjustments mentioned in this owner's manual. SAVE THESE INSTRUCTIONS For Europe only: This appliance can be used by children aged - Singer S16 I Studio | Instruction Manual - Page 3
Narrow Hemmer Foot...19 Using Darning / Embroidery Foot 20 Using Quarter Inch Foot with Guide 20 CARE & MAINTENANCE Cleaning the Hook and Feed Dog Area 21 Oiling the Machine...21 Replacing the Light Bulb...22 Replacing the Light Bulb on the Underside of the Sewing Arm 22 Troubleshooting...23 3 - Singer S16 I Studio | Instruction Manual - Page 4
!7 !6 !5 !4 #8 w @7 @6 @5 @1 @2 @3 @4 #7 !3 e MACHINE IDENTIFICATION r t y u i o !0 !1 !2 @8 Name of Parts q Presser foot pressure dial w Bobbin winding tension disc e Retractable thread guide r Bobbin winder spindle t Bobbin winder lever/stopper y Speed control lever u Stitch length display - Singer S16 I Studio | Instruction Manual - Page 5
Fabric guide and Setscrew HL x 5 -16.... 1 HL x 5 -14.... 1 HL x 5 -11.... 2 HL x 5 -9...... 1 Needles Darning plate Small screwdriver Bobbins Accessory box Oil Knee lifter Instruction book Attatching Knee Lifter q ew The knee lifter is very helpful when quilting, sewing appliques - Singer S16 I Studio | Instruction Manual - Page 6
Sewing speed is varied by the foot control and the speed control lever. The heavier the foot presses down on the controller the faster the machine runs. The machine runs at the maximum speed set by the speed control slider when the foot control is being fully depressed. Operating Instructions - Singer S16 I Studio | Instruction Manual - Page 7
dial. The stitch length chosen will be shown on the stitch length display q. Reverse Stitch Lever The machine will sew in reverse while the reverse stitch lever is pressed down. The machine will sew forward when the lever is released. Use the reverse stitch lever to secure the beginning and end of - Singer S16 I Studio | Instruction Manual - Page 8
dial w Setting indicator The presser foot pressure control dial should be set at "3" for regular sewing. Reduce the pressure for sewing on fine synthetics and elastic fabrics. Set the dial at "1" when sewing extra fine fabrics. NOTE Do not reduce the foot pressure lower than "0". q Setscrew To - Singer S16 I Studio | Instruction Manual - Page 9
To Remove Bobbin Case and Bobbin z x e q w t r Positioning Thread Spools CAUTION Turn the power switch off and unplug the sewing machine from the electrical outlet. q Bobbin case cover plate w Bobbin case cover e Latch r Bobbin case t Bobbin r Step z Raise the needle and presser - Singer S16 I Studio | Instruction Manual - Page 10
Pull the thread guide bar up as far as it will go. Stoppers will click when fully extended. q Thread guides w Bobbin winding z Pass the thread through the thread guides q from behind. Step x Pass the the bobbin is fully wound, the machine will stop automatically. Return the bobbin - Singer S16 I Studio | Instruction Manual - Page 11
Inserting a Bobbin z Step z Place a bobbin in the bobbin case making sure the thread winds clockwise on the bobbin as illustrated. x Step x q Draw the thread through the slit q in the bobbin case. q Slit w c e Step c Continue to pull the thread under the tension spring w and - Singer S16 I Studio | Instruction Manual - Page 12
pre-tenison disks e behind the pre-tension dial r. Certain threads may twist or become loose when sewing at high speeds. You may need to t thread through the three holes in the guide plate as illustrated in fig.(A). The standard setting of the pre-tension dial is that the - Singer S16 I Studio | Instruction Manual - Page 13
eye as illustrated. c w v Step c Holding the thread with both hands, draw the thread along the thread path w. Then hook the thread around the guide e. e Step v Draw the thread under the hook r. Hold the end of thread with your hand while pulling up the thread lightly in the - Singer S16 I Studio | Instruction Manual - Page 14
and rotate handwheel one complete revolution q. The upper thread will bring up the loop through the needle plate w. When the power is on the machine you can push the Up/Down q needle button twice to bring up bobbin thread. w c Step c Slide 4" of both threads to the rear under - Singer S16 I Studio | Instruction Manual - Page 15
as it will go. Tighten the clamp screw q firmly. w Needle clamp e Flat side * Remember to use only Style HL x 5 needles in your SINGER® Studio™ S16 sewing machine. To Check the Needle To determine if the needle is defective, place the flat side of needle on something flat (a needle plate, piece - Singer S16 I Studio | Instruction Manual - Page 16
HOW TO BALANCE THREAD TENSIONS Different threads and fabric types can cause irregular tension. Before making adjustments determine closely that the machine is threaded correctly and the proper needle is being used. Balanced Needle Thread Tension The needle thread and bobbin thread should interlock - Singer S16 I Studio | Instruction Manual - Page 17
and adjust the needle thread tension t as necessary. Step b Press the auto thread cutter button y to trim the threads. You can continue sewing without pulling the bobbin thread up again through the needle plate. * Do not use the thread cutter u if the thread is heavier than - Singer S16 I Studio | Instruction Manual - Page 18
Securing a Seam / Reverse Stitching The machine will sew in reverse as long as the reverse stitch lever is pressed. Secure the beginning and end of a seam by sewing in reverse for about 3/8". (1/4") (1/4") Securing a Seam / Knotting the Threads Pull the bobbin thread to bring the needle thread - Singer S16 I Studio | Instruction Manual - Page 19
raise the presser foot. If needed hold onto tails of machine thread. Insert the fabric fold into the spiral opening of the foot y. Move fabric back and forth until the fold forms a scroll shape. Lower the presser foot and start sewing. Slowly guide the raw edge of the fabric in front of the - Singer S16 I Studio | Instruction Manual - Page 20
Foot w q q r e t Darning and free motion sewing is used for repairing holes or torn areas in cloth. the quilt 1/8" or less per stitch. Using the Quarter Inch Foot with Guide q w The Quarter Inch Foot with guide provides a 1/4" seam allowance. This helps provide accuracy for quilting. r e - Singer S16 I Studio | Instruction Manual - Page 21
r Needle plate t Hook y Feed dog u Lint brush t Oiling the Machine q e NOTE Unplug the machine before oiling. Oil the points as shown (q, w and e) with two or three drops of oil. Use only SINGER® sewing machine oil for this sewing machine. If the machine is used up to 2-4 hours per day, it should - Singer S16 I Studio | Instruction Manual - Page 22
cap. Replace the bulb with the same type, rated 12 V, 5 W. Replacing the Light Bulb on the Underside of the Sewing Arm Lay the machine on its back. q w Detach the lamp window q from the machine with the screw driver as shown. Pull out the light bulb e from the socket. e Insert a new bulb into - Singer S16 I Studio | Instruction Manual - Page 23
Troubleshooting set under the presser foot when starting to sew. 6. The thread is either too heavy page 10. Change the needle. Seam puckering Fabric feeding problems 1. The needle thread tension is too tight. 2. on underside of fabric Power is off to machine 1. The needle thread tension is too loose
-
 1
1 -
 2
2 -
 3
3 -
 4
4 -
 5
5 -
 6
6 -
 7
7 -
8
-
9
-
10
-
11
-
12
-
13
-
14
-
15
-
16
-
17
-
18
-
19
-
20
-
21
-
22
-
23
 |
 |

INSTRUCTION MANUAL
S16
SINGER and STUDIO are trademarks of The Singer Company Limited S.à.r.l. or its Affiliates.
©2014 The Singer Company Limited S.à.r.l. or its Affiliates. All rights reserved.