Singer The SINGER 160 Instruction Manual 4 - Page 8
etting, machine, Changing, light
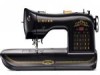 |
View all Singer The SINGER 160 manuals
Add to My Manuals
Save this manual to your list of manuals |
Page 8 highlights
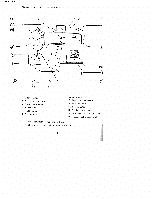
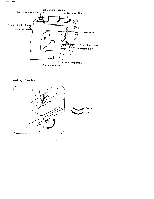
02/01/2008 etting up your machine Changing light bulb Sewing light / On the base of the machine there is a rating plate with information about voltage and frequency. Be fore you connect the machine to an electrical outlet make sure that the voltage indicated on the rating plate conforms to that of the electrical outlet. 1. Connect the machine plug. 2. Connect the wall plu, 3. Speed is controlled by means of the foot control. 1. Open the face cover in the di rection of the arrow. 2. Remove the bulb through turn ing it counter clockwise. 3. Install a new bulb through turn ing it clockwise. 4. Use a bulb with screw base 120 V/15W(max.) -5-
-
 1
1 -
2
-
 3
3 -
 4
4 -
 5
5 -
 6
6 -
 7
7 -
 8
8 -
 9
9 -
 10
10 -
 11
11 -
 12
12 -
 13
13 -
14
-
15
-
16
-
17
-
18
-
19
-
20
-
21
-
22
-
23
-
24
-
25
-
26
-
27
-
28
-
29
-
30
-
31
-
32
-
33
-
34
-
35
 |
 |

02/01/2008
etting
up
your
machine
On
the
base
of
the
machine
there
is
a
rating
plate
with
information
about
voltage
and
frequency.
Be
fore
you
connect
the
machine
to
an
electrical
outlet
make
sure
that
the
voltage
indicated
on
the
rating
plate
conforms
to
that
of
the
electrical
outlet.
1.
Connect
the
machine
plug.
2.
Connect
the
wall
plu,
3.
Speed
is
controlled
by
means
of
the
foot
control.
Sewing
light
/
1.
Open
the
face
cover
in
the
di
rection
of
the
arrow.
2.
Remove
the
bulb
through
turn
ing
it
counter
clockwise.
3.
Install
a
new
bulb
through
turn
ing
it
clockwise.
4.
Use
a
bulb
with
screw
base
120
V/15W(max.)
Changing
light
bulb
—5—