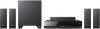
Sony BDV-T37 Operating Instructions
Sony BDV-T37 - Blu-ray Disc™ / Dvd Home Theater System Manual
 |
View all Sony BDV-T37 manuals
Add to My Manuals
Save this manual to your list of manuals |
Sony BDV-T37 manual content summary:
- Sony BDV-T37 | Operating Instructions - Page 1
of this system may be updated in the future. To find out details on any available updates, please visit: http://www.sony.com/bluraysupport/ Printed in Malaysia (1) Blu-ray Disc/DVD Home Theatre System Operating Instructions BDV-E870 / E570 / E470 / E370 / T57 / T37 © 2010 Sony Corporation - Sony BDV-T37 | Operating Instructions - Page 2
the unit from the mains, connect the unit to an easily and maintenance (servicing) instructions in the Sony dealer regarding this product. Model No. BDV-E570/BDV-E470/ BDV-E370/BDV-T57/BDV-T37 Serial No The following FCC statement applies only to the version of this model manufactured for sale - Sony BDV-T37 | Operating Instructions - Page 3
with the manufacturer's instructions. 8) Do not BDV-E570/ BDV-T57 only) Pursuant to FCC regulations, you are cautioned that any changes or modifications not expressly approved in this manual could void your authority to operate this equipment. To prevent radio interference to the licensed service - Sony BDV-T37 | Operating Instructions - Page 4
to this product and service. See the Gracenote website "PhotoTV HD" logo are trademarks of Sony Corporation. • MPEG Layer-3 audio coding electronic accessory has been designed to connect specifically to iPod and has been certified regulatory standards. • Other system and product names are generally - Sony BDV-T37 | Operating Instructions - Page 5
DVDs, Super Audio CDs, or CDs unless otherwise specified by the text or illustrations. • The instructions in this manual are for BDV-E870, BDV-E570, BDV-E470, BDV-E370, BDV-T57, and BDV-T37. BDV-E870 is the model used for illustration purposes. Any difference in operation is clearly indicated in the - Sony BDV-T37 | Operating Instructions - Page 6
Table of Contents About These Operating Instructions ....... 5 Unpacking 7 Index to Parts and Control 10 Getting Started Step 1: Installing the System .......15 Step 2: Connecting the System ...22 Step 3: Performing the Easy Setup 28 Step 4: Selecting the Source .......29 Step 5: Enjoying - Sony BDV-T37 | Operating Instructions - Page 7
Unpacking BDV-E870 • Front speakers (2) • Subwoofer (1) • R6 (size AA) batteries (2) • Surround speakers (2) • Center Video cord (1) • Remote commander (remote) (1) • Operating Instructions • Speaker Installation Guide • Quick Setup Guide • End user license agreement • Easy Setup Disc (DVD) - Sony BDV-T37 | Operating Instructions - Page 8
(1) or • Surround speakers (2) • Speaker cords (6, white/red/ blue/gray/green/purple) • Operating Instructions • Quick Setup Guide • End user license agreement • Easy Setup Disc (DVD) For BDV-E570/BDV-T57 • USB Wireless LAN Adapter (UWA-BR100) • Center speaker (1) • Subwoofer (1) • Video cord - Sony BDV-T37 | Operating Instructions - Page 9
BDV-E370/BDV-T37 • Front speakers (2) • Surround speakers (2) • Center speaker (1) • Speaker cords (5, white/red/ blue/gray/green) • Video cord (1) • Remote commander (remote) (1) • Operating Instructions • Quick Setup Guide • End user license agreement For U.S. and Canadian models • Easy Setup - Sony BDV-T37 | Operating Instructions - Page 10
a title/track is the last point you played or the last photo for a photo folder. FUNCTION Selects the playback source. VOLUME +/- Adjusts the system's volume. C (USB) port (page 33) Used for connecting a USB device. D Front panel display E (remote sensor) F Power indicator Lights up while the - Sony BDV-T37 | Operating Instructions - Page 11
VIDEO OUT jacks. D Lights up when the HDMI OUT jack is correctly connected to an HDCP (Highbandwidth Digital Content Protection)compliant device with HDMI or DVI unit and S-AIR receiver is not activated. (page 42) I Displays system's status such as chapter, title, or track number, time information, - Sony BDV-T37 | Operating Instructions - Page 12
Rear panel SPEAKERS FRONT R FRONT L SUBWOOFER CENTER Screws* LAN(100) VIDEO OUT SPEAKERS Y PB / CB PR / CR COMPONENT VIDEO OUT SAT/CABLE TV DIGITAL IN DIGITAL IN ARC OUT SUR R SUR L COAXIAL OPTICAL FM COAXIAL 75 ANTENNA A. CAL MIC ECM-AC2 EZW-T100 AUDIO R AUDIO IN L A (USB) port - Sony BDV-T37 | Operating Instructions - Page 13
ONE-TOUCH THEATER PLAY TV BRAVIA Sync 123 SLEEP 456 SYSTEM MENU 789 FAVORITES AUDIO YELLOW BLUE SUBTITLE 0 D.TUNING TV or sets it to standby mode. "/1 (on/standby) (pages 28, 40) Turns on the system or sets it to standby mode. B Number buttons (pages 41, 52) Enters the title/chapter numbers, - Sony BDV-T37 | Operating Instructions - Page 14
in the front panel display. I Z (open/close) Opens or closes the disc tray. SLEEP (page 52) Sets the sleep timer. SYSTEM MENU (pages 30, 36, 38, 40) Enters the system menu. FAVORITES Displays the Internet contents added to the Favorites List. You can save 18 favorite Internet contents. 14US - Sony BDV-T37 | Operating Instructions - Page 15
Getting Started Getting Started Step 1: Installing the System Positioning the speakers For the best possible surround sound, place all speakers at the same distance from the listening position (A). The distance can be between 0 - Sony BDV-T37 | Operating Instructions - Page 16
on a vertical and flat wall where reinforcement is applied. • Sony is not responsible for accidents or damage caused by improper installation, screw installation, natural calamity, etc. Before installing the front speakers of BDV-E870 on a wall, you need to disassemble the speakers. You can - Sony BDV-T37 | Operating Instructions - Page 17
To disassemble the speaker (Front speakers of BDV-E870 only) 1 Disconnect the speaker cords from the speaker. Getting Started Rear of the speaker 2 Remove the screw (pre-installed) at the rear of the - Sony BDV-T37 | Operating Instructions - Page 18
Getting Started 4 Pull out the speaker cord from the bottom of the lower part of the speaker. The removed speaker cord is used when installing the speaker on a wall. Lower part of the speaker , Speaker cord 5 Remove the protection paper from the speaker-bottom cover, then attach the speaker- - Sony BDV-T37 | Operating Instructions - Page 19
Getting Started To install the speakers on a wall Before installing the speakers on a wall, connect the speaker cord to the speaker. Be sure to match the speaker cords to the appropriate terminals on the speakers: the speaker cord with the - Sony BDV-T37 | Operating Instructions - Page 20
For the front speakers 304 mm (12 inches) 8 to 10 mm (11/32 to 13/32 inch) For the center speaker 219 mm (8 5/8 inches) BDV-E570/BDV-E470/BDVE370/BDV-T57/BDV-T37 For the center speaker 219 mm (8 5/8 inches) 8 to 10 mm (11/32 to 13/32 inch) For the other speakers 8 to 10 mm - Sony BDV-T37 | Operating Instructions - Page 21
Getting Started 3 Hang the speakers on the screws. 5 mm (7/32 inch) 10 mm (13/32 inch) Hole on the back of the speaker Rear of the speaker 21US - Sony BDV-T37 | Operating Instructions - Page 22
Getting Started Step 2: Connecting the System For connecting the system, read the information on the following pages. Do not connect the AC power cord (mains lead) of the unit to a wall outlet (mains) until all the other connections are made. Note • When you connect another component with a volume - Sony BDV-T37 | Operating Instructions - Page 23
of the TV. To the HDMI IN jack of the TV. * The HDMI cable is supplied with BDV-E370 (Latin American models), BDV-T57, and BDV-T37 only. Method 1: HDMI cable (A) connection If your TV has an HDMI jack, connect to the TV with an HDMI cable. Picture quality will be improved compared to using the - Sony BDV-T37 | Operating Instructions - Page 24
from the TV. To listen to TV sound via the system, perform this connection. Rear panel of the unit SDAIGT/ICTAALBILNE TV DIGITAL IN digital optical out jack of the TV. With a digital audio connection, the system receives a Dolby Digital multiplex broadcast signal and you can enjoy multiplex - Sony BDV-T37 | Operating Instructions - Page 25
sent to the TV, and audio signals from the components are sent to the system as follows. TV System Signal flow : Video signal : Audio signal You can enjoy connected components via the system's speakers. • VCR or digital satellite receiver, etc. (not supplied), which has a digital coaxial output - Sony BDV-T37 | Operating Instructions - Page 26
panel of the unit FM ACNOTAEXNIANLA75 or FM wire antenna (aerial) (supplied) Note • Be sure to fully extend the FM wire antenna (aerial). • After connecting the FM wire antenna (aerial), keep it as horizontal as possible. Tip • If you have poor FM reception, use a 75-ohm coaxial cable (not supplied - Sony BDV-T37 | Operating Instructions - Page 27
a wireless LAN via the USB Wireless LAN Adapter (Sony UWA-BR100* only) (supplied with BDV-E570 and BDV-T57). The USB Wireless LAN Adapter may not be available in some regions/countries. * As of January 2010. Turn the unit off before connecting the extension cable or inserting the USB Wireless LAN - Sony BDV-T37 | Operating Instructions - Page 28
Started Step 3: Performing the Easy Setup Before performing Step3 Make sure all connections are secure, and then connect the AC power cord (mains lead). Follow the Steps below to make the basic adjustments for using the system. Displayed items vary depending on the country model. Note • To use the - Sony BDV-T37 | Operating Instructions - Page 29
Perform the [Easy Setup]. Follow the on-screen instructions to make the basic settings using C/X/x/c, and "AUDIO" Source Disc that is played by the system USB device, iPod, or BRAVIA Internet Video FM radio (page 40) Component (TV, etc.) that is connected to the TV (DIGITAL IN OPTICAL) jack on the - Sony BDV-T37 | Operating Instructions - Page 30
for surround sound setting descriptions. 4 Press . The setting is made. 5 Press SYSTEM MENU. The system menu turns off. About speaker output of each surround setting The table below describes the options when you connect all the speakers to the unit. The default setting is "A.F.D. MULTI." Sound - Sony BDV-T37 | Operating Instructions - Page 31
the S-AIR receiver, sound from the S-AIR receiver may skip. • When you play a Super Audio CD, surround settings are not activated. Tip • The system memorizes the last surround setting selected for each function. Whenever you select a function such as "BD/DVD" or "TUNER FM," the surround setting that - Sony BDV-T37 | Operating Instructions - Page 32
1 Switch the input selector on your TV so that the signal from the system appears on your TV screen. 2 Press Z, and place a disc on the Connection] to [Allow] (page 56). 2 Insert a BD-ROM with BONUSVIEW/ BD-LIVE. The operation method differs depending on the disc. Refer to the operating instructions - Sony BDV-T37 | Operating Instructions - Page 33
the USB device to the (USB) port on the unit. Refer to the operating instructions of the USB device before connecting. Enjoying an iPod You can enjoy the sound and charge the battery of an iPod via the system. Compatible iPod models The compatible iPod models are as follows. Update your iPod with - Sony BDV-T37 | Operating Instructions - Page 34
the iPod. Same operation as the Center button of the iPod. Note • The iPod is charged when connected to the system while the system is turned on. • You cannot transfer songs onto the iPod. • Sony cannot accept responsibility in the event that data recorded to iPod is lost or damaged when using an - Sony BDV-T37 | Operating Instructions - Page 35
[Search Contents] Searches for BRAVIA Internet Video content based on keywords from Gracenote via the Information Display (only for BDV-E370 (Latin American models), and BDV-E870). [Repeat Setting] Sets the repeat play. [Favorites List] Displays the Favorites List. [Play/Stop] Starts or stops - Sony BDV-T37 | Operating Instructions - Page 36
SYNC) When the sound does not match the pictures on the TV screen, you can adjust the delay between the picture and sound. 1 Press SYSTEM MENU. 2 Press X/x repeatedly until "A/V SYNC" appears in the front panel display, then press or c. 3 Press X/x to adjust the delay between the picture and sound - Sony BDV-T37 | Operating Instructions - Page 37
"AUTO," the beginning of the sound may be cut off as the system selects the optimum mode automatically. To avoid cutting the sound, select other than not work. Selecting the Audio Format, Multilingual Tracks, or Channel When the system is playing a BD/DVD VIDEO or DATA CD/DATA DVD (DivX video - Sony BDV-T37 | Operating Instructions - Page 38
Multiplex Broadcast Sound (DUAL MONO) You can enjoy multiplex broadcast sound when the system receives or plays a Dolby Digital multiplex broadcast signal. Note • To receive the Dolby Digital signal, you need to connect a TV or other component to the unit with a digital coaxial or optical cord - Sony BDV-T37 | Operating Instructions - Page 39
"NIGHT MODE" appears in the front panel display, then press or c. 3 Press X/x to select a setting. • "NIGHT ON": On. • "NIGHT OFF": Off. 4 Press SYSTEM MENU. The system menu turns off. Note • When sound is output from the center speaker, this effect is more pronounced, as speech (movie dialog, etc - Sony BDV-T37 | Operating Instructions - Page 40
+/- until the auto scanning starts. [Auto Tuning] appears on the TV screen. Scanning stops when the system tunes in a station. To stop the automatic tuning manually, press TUNING +/- or x. Manual tuning Press TUNING +/- repeatedly. 40US 3 Adjust the volume by pressing VOL +/-. If an FM program is - Sony BDV-T37 | Operating Instructions - Page 41
6 Press . "COMPLETE" appears in the front panel display, and the station is stored. 7 Repeat Steps 2 to 6 to store other stations. 8 Press SYSTEM MENU. The system menu turns off. To change the preset number Select the desired preset number by pressing PRESET +/-, then perform the procedure from Step - Sony BDV-T37 | Operating Instructions - Page 42
enjoy surround speaker sound wirelessly. - S-AIR receiver (optional): You can enjoy system sound in another room. Room A S-AIR main unit S-AIR sub unit ( transceiver, make sure that the AC power cord (mains lead) is not connected to a wall outlet (mains). • Do not touch the terminals of the - Sony BDV-T37 | Operating Instructions - Page 43
receiver, see the operating instructions of the S-AIR sub unit. Tip • When you change the S-AIR configuration, Sony recommends that you perform the S-AIR receiver Refer to the operating instructions of the S-AIR receiver. To enjoy a 7.1 channel system You can enjoy the more realistic surround sound - Sony BDV-T37 | Operating Instructions - Page 44
. • [Off]: You cannot enjoy the S-AIR receiver while the unit is in standby mode. 7 Press . The setting is made. Note • When you turn the system off while [Standby] is set to [On], "S-AIR" flashes (when wireless transmission between the unit and S-AIR receiver is not activated), or lights up (when - Sony BDV-T37 | Operating Instructions - Page 45
• To set the ID of the S-AIR receiver, refer to the operating instructions of the S-AIR receiver. 3 Press HOME. The home menu appears on the TV screen. 4 Press C/c to select [Setup]. 5 Press X/x to select [System Settings], then press . 6 Press X/x to select [S-AIR Settings], then press . The [S-AIR - Sony BDV-T37 | Operating Instructions - Page 46
6 - S-AIR ID C: equivalent channel for IEEE 802.11b/g channel 11 • The transmission may be improved by changing the transmission channel (frequency) of the other wireless system(s). For details, refer to the operating instructions of the other wireless - Sony BDV-T37 | Operating Instructions - Page 47
for HDMI - Easy Setting function, set the Control for HDMI function of the system and TV manually. Note • For details on setting the TV, refer to the operating instructions of the TV. 1 Make sure that the system and the TV are connected with an HDMI cable. 2 Turn on the TV and press [/1 to turn on - Sony BDV-T37 | Operating Instructions - Page 48
details, refer to the operating instructions of the TV. Watching BD/DVD by a single button press (One-Touch Play) Press ONE-TOUCH PLAY. The system and your TV turn on, your TV's input is set to the HDMI input to which the system is connected, and the system starts playing a disc automatically. The - Sony BDV-T37 | Operating Instructions - Page 49
via the TV remote (Remote Easy Control) You can control the basic functions of the system via the TV remote when the system's video output is displayed on the TV screen. For details, refer to the operating instructions of the TV. 1 Press HOME. The home menu appears on the TV screen. 2 Press C/c to - Sony BDV-T37 | Operating Instructions - Page 50
Press . [Auto Calibration] starts. The system adjusts the speaker settings automatically. Be quiet during Speaker Settings] to [Yes] (page 50) 8 Confirm the conclusions of [Auto Calibration]. The speakers connected to the unit are listed as [Yes] on the TV screen. Note • If measurement fails, follow - Sony BDV-T37 | Operating Instructions - Page 51
the subwoofer level. * This item appears when you set it to [Yes] in the [Connection] setting. x [Test Tone] The speakers will emit a test tone to adjust [Level]. . 6 Repeat Steps 3 to 5. 7 Press RETURN. The system returns to the previous display. 8 Press X/x to select [Test Tone], then press - Sony BDV-T37 | Operating Instructions - Page 52
is activated and the buttons on the unit are locked. (You can operate the system by using the remote.) To cancel, press x for more than 5 seconds so the remote, the code number may reset itself to the default (SONY) setting. Reset the appropriate code number. Preparing the remote for controlling - Sony BDV-T37 | Operating Instructions - Page 53
Other Operations Saving Power in Standby Mode Check that the following settings are made: - [Control for HDMI] in [HDMI Settings] is set to [Off] (page 47). - [Standby] in [S-AIR Settings] is set to [Off] (page 44). - [Quick Start Mode] is set to [Off] (page 58). 53US - Sony BDV-T37 | Operating Instructions - Page 54
Makes the screen settings according to the type of connecting jacks. [Network Update] You can update and improve the functions of the system. For information about update functions, refer to the following website: http://www.sony.com/bluraysupport/ [Screen Settings] x [TV Type] [16:9]: Select this - Sony BDV-T37 | Operating Instructions - Page 55
[Component Video] resolution, try another resolution setting. x [BD/DVD-ROM 1080/24p Output] [Auto]: Outputs 1920 × 1080p/24 Hz video signals only when connecting a 1080/24pcompatible TV using the HDMI OUT jack. [Off]: Select this when your TV is not compatible with 1080/24p video signals. x [YCbCr - Sony BDV-T37 | Operating Instructions - Page 56
sound from the HDMI OUT jack only. Sound format depends on the connected component. Note • When you set [Audio Output] to [HDMI], the SOUND MODE, "D.BASS," "NIGHT MODE," and "SUR.SETTING" functions are disabled. • When the System Audio Control function (page 48) is activated, this setting may change - Sony BDV-T37 | Operating Instructions - Page 57
x [BD Internet Connection] [Allow]: Normally select this. [Do not allow]: Prohibits Internet connection. x [BD replaced with different scenes. Follow the on-screen instructions and enter your four-digit password. x [ System Settings] You can make the system-related settings. x [OSD] You can select your - Sony BDV-T37 | Operating Instructions - Page 58
this function. [Mode]: You can enjoy the system's sound in another room. [Standby]: You can enjoy the S-AIR receiver while the unit is in standby mode. x [Dimmer] [Bright]: Bright lighting. [Dark]: Low lighting. x [HDMI Settings] By connecting Sony components that are compatible with the Control for - Sony BDV-T37 | Operating Instructions - Page 59
more information, go to http://www.sony.com/bluraysupport/ x [Network Connection Diagnostics] (Except for BDV-E370 (U.S. models)) You can run settings. Follow the on-screen instructions. [Resetting] x [Reset to Factory Default Settings] You can reset the system settings to the factory default by - Sony BDV-T37 | Operating Instructions - Page 60
medical device before using the wireless LAN function (BDV-E570/BDV-T57 only). On operation • If the system is brought directly from a cold to a or benzine. If you have any questions or problems concerning your system, please consult your nearest Sony dealer. On cleaning discs, disc/lens cleaners - Sony BDV-T37 | Operating Instructions - Page 61
an extended period of time you risk permanent damage to your television screen. Projection televisions are especially susceptible to this. On moving the system • Before moving the system, make sure that there is no disc inserted, and remove the AC power cord (mains lead) from the wall outlet (mains - Sony BDV-T37 | Operating Instructions - Page 62
system, use this troubleshooting guide to help remedy the problem before requesting repairs. Should any problem persist, consult your nearest Sony dealer. Note that if service view pictures from the system. • Check the output method on your system (page 23). • The unit is connected to an input - Sony BDV-T37 | Operating Instructions - Page 63
• If the picture output from your system goes through your VCR to get to your TV, the copy-protection signal applied to some BD/DVD programs could affect picture quality. If you still experience problems even when you connect your unit directly to your TV, try connecting your unit to the other input - Sony BDV-T37 | Operating Instructions - Page 64
48 kHz. The system does not output • Set [Audio Return Channel] in [HDMI Settings] of [System Settings] to [Off] sound correctly when connected (page 49). to in. Problems and solutions • Check that the antenna (aerial) is connected securely. Adjust the antenna (aerial) or connect an external - Sony BDV-T37 | Operating Instructions - Page 65
Problems and solutions The disc does not play. • You are attempting to play a disc with a format that cannot be played back by this system (page 69). • The region code on the BD/DVD does not match the system the operating instructions supplied with Sony dealer or local authorized Sony service facility - Sony BDV-T37 | Operating Instructions - Page 66
for HDMI function. Refer to the operating instructions supplied with the component. • If you change the HDMI connection, connect and disconnect the AC power cord (mains lead), or have a power failure, set [Control for HDMI] in [HDMI Settings] of [System Settings] to [Off], then set [Control for - Sony BDV-T37 | Operating Instructions - Page 67
Sony recommends a connection speed of at least 2.5 Mbps for standard- motion or dark scenes. definition video and 10 Mbps for high-definition video. • Not all videos contain sound. The picture is small. • Press X to zoom in. Network connection Symptom Problems and solutions The system Manual - Sony BDV-T37 | Operating Instructions - Page 68
LAN Adapter (BDV-E570 and BDV-T57 only) Symptom Problems and solutions The system cannot connect to the • The distance between the unit and the wireless LAN router is too far (page 27). network or the network • Change the USB Wireless LAN Adapter position. connection is unstable. Other - Sony BDV-T37 | Operating Instructions - Page 69
the audio output differs depending on the source, connected output jack, and selected audio settings. 2)BD For more information, refer to the operating instructions supplied with the recording device. Discs that cannot code (BD-ROM/DVD VIDEO only) Your system has a region code printed on the rear - Sony BDV-T37 | Operating Instructions - Page 70
keyboards (front (USB) port only). • To avoid data corruption or damage to USB memory or other devices, turn the system off before connecting or removing USB memory or other devices. • The system may not play high bit rate video files from a DATA CD smoothly. It is recommended to play high bit rate - Sony BDV-T37 | Operating Instructions - Page 71
Audio Formats Audio formats supported by this system are as follows. Function Format LPCM 2ch LPCM 5.1ch, Dolby Digital Dolby DTS LPCM 7.1ch TrueHD, Dolby Digital Plus "BD/DVD" a a a a a "SAT/CABLE" a - a - a "TV" (DIGITAL IN) a: Supported format. -: Unsupported format. DTS - Sony BDV-T37 | Operating Instructions - Page 72
19 pin) BD/DVD/Super Audio CD/CD System Signal format system NTSC USB Section (USB) port: Type A (For connecting USB memory, memory card reader, digital still (SS-TSB101) for BDV-E570/ BDV-E470/BDV-E370/BDV-T57/BDV-T37 Surround (SS-TSB101) for BDV-E870 Speaker system Full range Bass reflex - Sony BDV-T37 | Operating Instructions - Page 73
/BDV-T37 Speaker system Subwoofer Bass reflex Speaker unit 160 mm (6 3/8 in) cone type Rated impedance 3 ohms Dimensions (approx.) 260 mm × 320 mm × 260 mm (10 1/4 in × 12 5/8 in × 10 1/4 in) (w/h/d) Mass (approx.) 5.2 kg (11 lb 8 oz) Subwoofer (SS-WSB102) for BDV-E570/ BDV-E470/BDV-T57 - Sony BDV-T37 | Operating Instructions - Page 74
Language Code List The language spellings conform to the ISO 639: 1988 (E/F) standard. Code Language 1027 1028 1032 1039 1044 1045 1051 1052 1053 1057 1059 1060 1061 1066 1067 1070 1079 1093 1097 1103 1105 1109 1130 1142 1144 1145 1149 1150 1151 1157 1165 1166 1171 1174 1181 Afar Abkhazian - Sony BDV-T37 | Operating Instructions - Page 75
data, and the Dolby Digital or Linear PCM system is used to compress audio data. The MPEG-4 -J application The BD-ROM format supports Java for interactive functions. "BD (D.C.A.C) Digital Cinema Auto Calibration was developed by Sony to automatically measure and adjust the speaker settings - Sony BDV-T37 | Operating Instructions - Page 76
times per second. LTH (Low to High) LTH is a recording system that supports organic pigment type BD-R. Parental Control A function of the BD/DVD to pictures, and photo-like expression of subtle textures and colors. By connecting Sony "PhotoTV HD" compatible devices using an HDMI cable, a whole new - Sony BDV-T37 | Operating Instructions - Page 77
scanning lines (525 lines for the NTSC system). The overall picture quality increases and still 525 or 625 progressive format. S-AIR (Sony Audio Interactive Radio frequency) Recent times have frames do not appear at an even pace. When connected to a TV with 24p capabilities, the player displays each - Sony BDV-T37 | Operating Instructions - Page 78
BD Data Jack Selection 57 BD Hybrid Disc Playback Layer 57 BD Internet Connection 57 BD Parental Control 57 BD Remote Device Registration 59 BD/DVD Menu LTH 76 M Multiplex broadcast sound 38 Music Settings 57 N Network Connection Diagnostics 59 Network Settings 59 Network Update 54 NIGHT MODE 39 O - Sony BDV-T37 | Operating Instructions - Page 79
Surround amplifier 42 System Information 59 SYSTEM MENU 30, 36, 38, 39 T Test Tone 51 TV Type 54 U Update 54 USB 33 W WEP 27 WPA2-PSK (AES) 27 WPA2-PSK (TKIP) 27 WPA-PSK (AES) 27 WPA-PSK (TKIP) 27 79US
-
 1
1 -
 2
2 -
 3
3 -
 4
4 -
 5
5 -
 6
6 -
 7
7 -
8
-
9
-
10
-
11
-
12
-
13
-
14
-
15
-
16
-
17
-
18
-
19
-
20
-
21
-
22
-
23
-
24
-
25
-
26
-
27
-
28
-
29
-
30
-
31
-
32
-
33
-
34
-
35
-
36
-
37
-
38
-
39
-
40
-
41
-
42
-
43
-
44
-
45
-
46
-
47
-
48
-
49
-
50
-
51
-
52
-
53
-
54
-
55
-
56
-
57
-
58
-
59
-
60
-
61
-
62
-
63
-
64
-
65
-
66
-
67
-
68
-
69
-
70
-
71
-
72
-
73
-
74
-
75
-
76
-
77
-
78
-
79
 |
 |
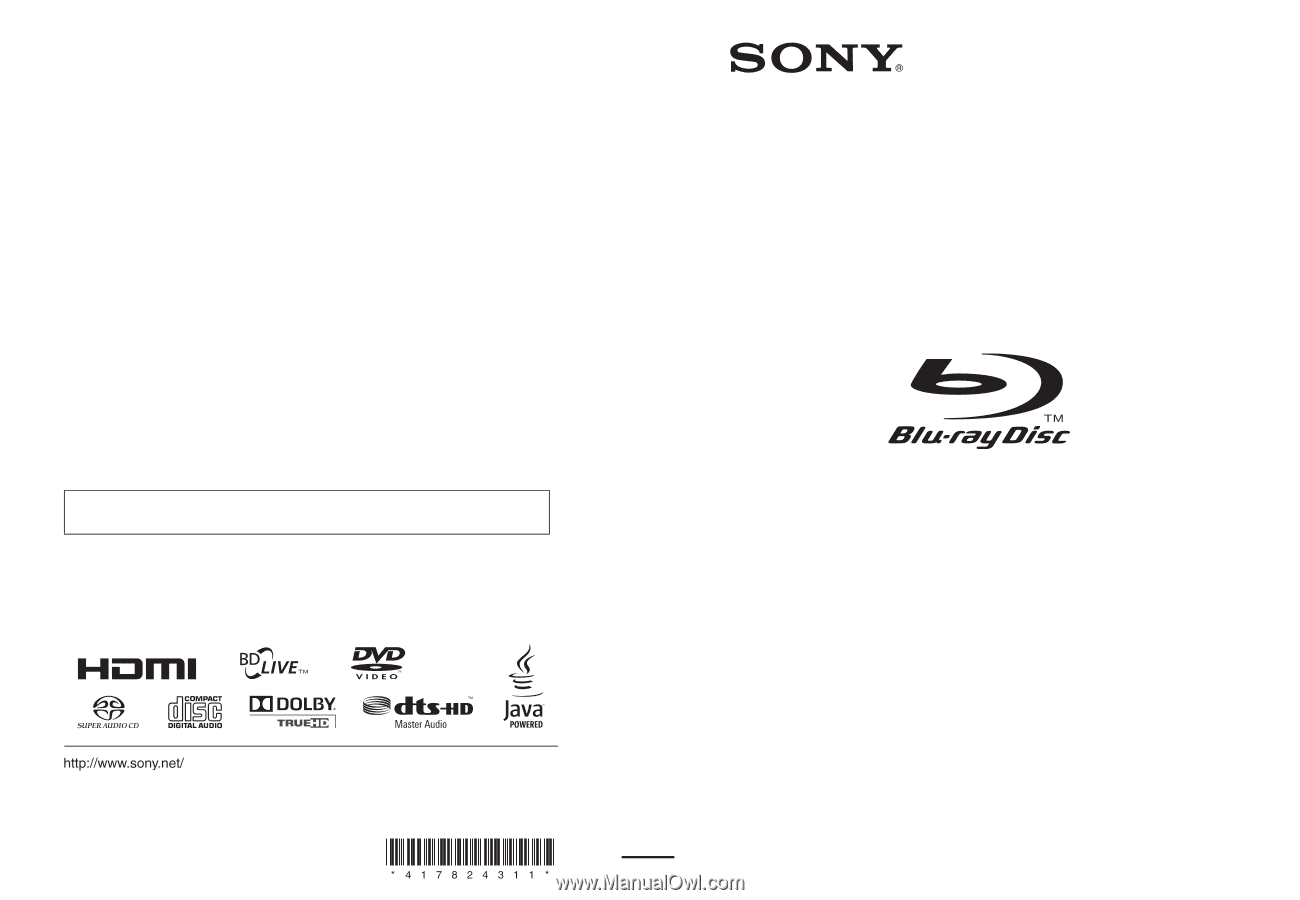
© 2010 Sony Corporation
Printed in Malaysia
(1)
The software of this system may be updated in the future. To find out details on any
available updates, please visit: http://www.sony.com/bluraysupport/
4-178-243-
11
(1)
Operating Instructions
BDV-E870 / E570 / E470 / E370 / T57 / T37
Blu-ray Disc/DVD
Home Theatre System