Sony CDP-CX400 Operating Instructions - Page 21
Changing the Disc Name, Storing Information About CDs Custom Files
 |
View all Sony CDP-CX400 manuals
Add to My Manuals
Save this manual to your list of manuals |
Page 21 highlights
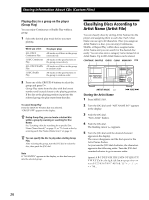
Storing Information About CDs (Custom Files) 4 Turn the JOG dial until the desired character appears in the display. The cursor disappears and the first space for the Disc Name flashes. As you turn the JOG dial clockwise, the characters appear in the following order. Turn the JOG dial counterclockwise to go in reverse order. (space) A B C D E F G H I J K L M N O P Q R S T U V W X Y Z a b c d e f g h i j k l m n o p q r s t u v w x y z 0 1 2 3 4 5 6 7 8 9 2nd NEXT DISC ART. HIT TRACK GROUP ART. MIN STEP SEC S************ ALL 1 DISCS SHUFFLE REPEAT 1 GROUP PROGRAM 1 2 3 X-FADE DELETE MULTI CD TEXT NO DELAY CD1 CD2 CD3 5 Push the JOG dial to select the character. The selected character lights up, and the flashing cursor appears at the next space to be input. 2nd NEXT DISC ART. HIT TRACK GROUP ART. MIN STEP SEC S************ ALL 1 DISCS SHUFFLE REPEAT 1 GROUP PROGRAM 1 2 3 X-FADE DELETE MULTI CD TEXT NO DELAY CD1 CD2 CD3 To make a correction Press CLEAR and begin again by inputting the correct characters. 6 Repeat steps 4 and 5 to input more characters. 7 Press YES to store the Disc Name. The display shows the Disc Name. 2nd NEXT DISC ART. HIT TRACK GROUP ART. MIN STEP SEC SONYHITS***** ALL 1 DISCS SHUFFLE REPEAT 1 GROUP PROGRAM 1 2 3 X-FADE DELETE MULTI CD TEXT NO DELAY CD1 CD2 CD3 Repeat steps 1 to 7 to assign Disc Names to other discs. z To change the character type quickly while inputting characters Press SCROLL in step 4 above. The character on the cursor changes to the first character of each character type. Each time you press SCROLL, the character type changes as follows: t A t a t 0 t ! t (space) Changing the Disc Name 1 Follow steps 1 to 3 in "Labeling discs on the player" on page 20 to select the Disc Name you want to change. 2 Turn the . AMS > dial to move the cursor to the position you want to change. When the cursor position is on a character, the character flashes but when the cursor position is on a blank space, the cursor ( ) appears in the display. To change characters Turn the JOG dial until the desired character appears in the display. To add characters Push the JOG dial. The new blank space appears next to the selected character, then turn the JOG dial until the desired character appears in the display. To erase characters Press CLEAR. The selected character disappears. To erase all characters for the current Disc Name Turn the . AMS > dial to move the cursor to the first character, then press and hold CLEAR until all the characters are erased. 3 Repeat step 2 to change more characters. 4 Press YES to store the Disc Name. Erasing the Disc Name 1 Follow steps 1 to 3 in "Labeling discs on the player" on page 20 to select the Disc Name you want to erase. 2 Turn the . AMS > dial to move the cursor to the first character, then press and hold CLEAR until all the characters are erased. 3 Press YES. The Disc Name disappears. 21
-
 1
1 -
2
-
3
-
4
-
5
-
6
-
7
-
8
-
9
-
10
-
11
-
12
-
13
-
14
-
15
-
 16
16 -
 17
17 -
 18
18 -
 19
19 -
 20
20 -
 21
21 -
 22
22 -
 23
23 -
 24
24 -
 25
25 -
 26
26 -
27
-
28
-
29
-
30
-
31
-
32
-
33
-
34
-
35
-
36
 |
 |
