Sony CDX-GT705DX Operating Instructions - Page 12
DSO 3D Tuning, I-TA Tuning, Smart mode, Pro mode
 |
View all Sony CDX-GT705DX manuals
Add to My Manuals
Save this manual to your list of manuals |
Page 12 highlights
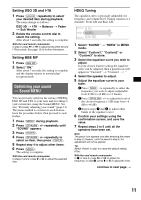
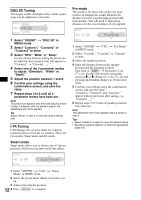
DSO 3D Tuning The height, width and depth of the virtual sound stage can be adjusted to your taste. Pro mode This mode is for those who wish to be more creative in shaping the sound. Measure the distance between your listening position and each speaker. You will need to input these distances for the correct delay(s) to be applied. 1 Select "SOUND" t "DSO 3D" in MENU mode. 2 Select "Custom1," "Custom2" or "Custom3" to store. 3 Select "STD," "Wide" or "Deep." In your chosen Custom setting the preset can be adjusted, then a pencil icon will appear as "Custom1" t "Custom1 ." 4 Select one of the 3 parameter modes to adjust: "Elevation," "Width" or "Depth." 5 Adjust the position between 1 and 8. 6 Confirm your settings using the confirmation screen, and save the value. 7 Repeat steps 3 to 6 until all 3 parameter modes have been set. Note The pencil icon appears only after selecting the preset in step 3, however, until it is saved in step 6, the adjustment will not be applied. Tip Select "Reset" in step 4 to reset the default setting (off). I-TA Tuning I-TA Tuning sets a precise delay for sound to reach the listener from the car speaker. There are two modes: Smart mode and Pro mode. Smart mode Smart mode allows you to choose one of 4 preset positions which you can then easily fine adjust. 1 Select "SOUND" t "I-TA" t "Pro Mode" in MENU mode. 2 Select "Custom1," "Custom2" or "Custom3" to store. 3 Select the speaker position. 4 Enter the distance between the speaker position and the listening position. One click of (SEEK) -/+ represents 2 cm (13/16 in). On the card remote commander, pressing M or m changes in 2 cm (13/16 in) and pressing and holding changes in 10 cm (4 in) steps. 5 Confirm your settings using the confirmation screen, and save the value. "Custom1," "Custom2" and "Custom3" appear with a pencil icon after saving, e.g., "Custom1 ." 6 Repeat steps 3 to 5 until all speaker positions have been set. Note The adjustment will not be applied until it is saved in step 5. Tips • Select "Initialize" in step 3 to reset the default values. • See the conversion table for cm and inch equivalents (page 23). 1 Select "SOUND" t "I-TA" t "Smart Mode" in MENU mode. 2 Select the preset mode which you wish to set up. 3 Adjust precisely the position. 12 4 Press (ENTER) to complete.
-
 1
1 -
2
-
3
-
4
-
5
-
6
-
 7
7 -
 8
8 -
 9
9 -
 10
10 -
 11
11 -
 12
12 -
 13
13 -
 14
14 -
 15
15 -
 16
16 -
 17
17 -
18
-
19
-
20
-
21
-
22
-
23
-
24
-
25
-
26
-
27
-
28
-
29
-
30
-
31
-
32
-
33
-
34
-
35
-
36
-
37
-
38
-
39
-
40
-
41
-
42
-
43
-
44
-
45
-
46
-
47
-
48
-
49
-
50
-
51
-
52
-
53
-
54
-
55
-
56
-
57
-
58
-
59
-
60
-
61
-
62
-
63
-
64
-
65
-
66
-
67
-
68
-
69
-
70
-
71
-
72
 |
 |
