Sony D-193 Operating Instructions (primary manual) - Page 1
Sony D-193 - Discman Manual
 |
View all Sony D-193 manuals
Add to My Manuals
Save this manual to your list of manuals |
Page 1 highlights
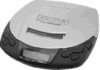
3-865-743-21 (1) Compact Disc Compact Player Operating Instructions About area code The area code of the player you purchased is shown on upper left of the bar code label on the package. For accessories supplied with your player, check the area code of your model and refer to "Supplied accessories" toward the end of this manual. Playing a CD right away! If you want to play a CD right now, choose to use your player on house current. Other choices are the following three: rechargeable batteries, dry batteries (see "Power Sources" on the reverse side) and car battery. 1 Connect to a wall outlet When using earphones AC power adaptor Earphones or Headphones* DC IN 4.5 V To Find the beginning of the current track (AMS*) Find the beginning of previous tracks (AMS) Find the beginning of the next track (AMS) Find the beginning of succeeding tracks (AMS) Go forward quickly Go backwards quickly Press = once = repeatedly** + once + repeatedly*** Hold down + Hold down = * AMS = Automatic Music Sensor ** When using =: previous track n previous track ...... first track n last track ...... ***When using +: next track n next track ...... last track n first track n second track ...... To remove the CD Remove the CD while pressing the pivot. D-193 Sony Corporation ©1999 Printed in Malaysia Welcome! Thank you for purchasing the Sony Compact Disc Compact Player. Before operating your player, please read this manual and retain it for future reference. Owner's Record The model and the serial numbers are located at the bottom. Record the serial number in the space provided below. Refer to these numbers whenever you call upon your Sony dealer regarding this product. Model No. D-193 Serial No WARNING To prevent fire or shock hazard, do not expose the unit to rain or moisture. To avoid electrical shock, do not open the cabinet. Refer servicing to qualified personnel only. CAUTION The use of optical instruments with this product will increase eye hazard. For the customers in the USA This equipment has been tested and found to comply with the limits for a Class B digital device, pursuant to Part 15 of the FCC Rules. These limits are designed to provide reasonable protection against harmful interference in a residential installation. This equipment generates, uses, and can radiate radio frequency energy and, if not installed and used in accordance with the instructions, may cause harmful interference to radio communications. However, there is no guarantee that interference will not occur in a particular installation. If this equipment does cause harmful interference to radio or television reception, which can be determined by turning the equipment off and on, the user is encouraged to try to correct the interference by one or more of the following measures: - Reorient or relocate the receiving antenna. - Increase the separation between the equipment and receiver. - Connect the equipment into an outlet on a circuit different from that to which the receiver is connected. - Consult the dealer or an experienced radio/TV technician for help. You are cautioned that any changes or modifications not expressly approved in this manual could void your authority to operate this equipment. For the customers in Australia The supply cord of the AC power adaptor cannot be replaced; if the cord is damaged, the AC power adaptor should be discarded. For the customers not in Poland The mark on the unit is valid only for products marketed in Poland. For the customers not in Europe The CE mark on the unit is valid only for products marketed in the European Union. For the customers not in Russia This mark on the unit and package is valid only for products marketed in Russia. * Supplied with U2 model PHONES For models supplied with the AC plug adaptor If the AC power adaptor does not fit the wall outlet, use the AC plug adaptor. 2 Place a CD OPEN Notes on display • When you press (, the total number of tracks in the CD and the total playing time appear. • During play, the track number and the elapsed playing time of the current track appear. • Between tracks, the time to the beginning of the next track will appear with the "-" indication. Notes on handling CDs • To keep the CD clean, handle it by its edge. Do not touch the surface. • Do not stick paper or tape onto the CD. • Do not expose the CD to direct sunlight or heat sources such as hot air ducts. Do not leave the CD in a car parked under direct sunlight. 1 Press OPEN to open the lid. 3 Play Label side up 2 Fit the CD to the pivot. 3 Close the lid. 1 Press (. 2 Adjust the volume. To stop play, press p. Note If you press p, the setting of the volume will be canceled. Whenever you play a CD, set it again by pressing VOL + or -. Not these ways zOther Operations Selecting play mode You can enjoy the following five play modes: "Normal play", "Repeat play - all the tracks", "Single track play", "Repeat play - a single track" and "Repeat shuffle play". Using other functions To enjoy more powerful bass sound (Sound function) You can enjoy a powerful bass-boosted sound. Connecting to other stereo equipment You can listen to the CD through other stereo equipment or record a CD on a cassette tape. Refer to the instruction manual of the other equipment for details. Before making connections, turn off each piece of equipment. MENU Press MENU during play. Each time you press the button, the play mode indication in the display changes as follows: Play mode indication . No indication (Normal play) The player plays all the tracks on the CD once. . "REPEAT" (Repeat play - all the tracks) The player plays all the tracks on the CD repeatedly. . "1" (Single track play) The player plays a single track you've selected once. . "REPEAT 1" (Repeat play - a single track) The player plays a single track you've selected repeatedly. . "REPEAT SHUFFLE " (Repeat shuffle play) The player plays all the track on the CD in random order repeatedly. PHONES Set MEGA BASS to ON. "BASS" appears in the display. Note • If the sound is distorted when emphasizing bass, turn down the volume. To lock the buttons You can lock your player against any accidental operations. Slide HOLD in the direction of the arrow. When you press any button, "Hold" appears in the display and you cannot operate the player. To unlock, slide HOLD back. To protect your hearing (AVLS) The AVLS (Automatic Volume Limiter System) function keeps down the maximum volume to protect your ears. Connecting cord RK-G129HG Left (white) Right (red) LINE IN or REC IN Stereo system, cassette recorder, radio cassette recorder, etc. Notes • Before you play the CD, turn down the volume of the connected equipment so as not to damage the connected speakers. • When you connect other equipment to the PHONES jack of this player, adjust the volume on the connected equipment. • If you turn up the volume to more than " ", the sound may be distorted. Continue to the reverse side m MENU Hold down MENU until "AVLS" appears in the display. If you turn up the volume to " ", you cannot turn up the volume any more. If you want to turn up the volume to more than " ", hold down MENU until "AVLS" disappears from the display. Note • If you use the sound function and the AVLS function at the same time, sound may be distorted. If this happens, turn down the volume.
-
 1
1 -
 2
2
 |
 |
