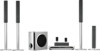
Sony DAV-FX100W DAVFX100W Instructions (entire component system)
Sony DAV-FX100W - Wireless Dvd Dream System Manual
 |
View all Sony DAV-FX100W manuals
Add to My Manuals
Save this manual to your list of manuals |
Sony DAV-FX100W manual content summary:
- Sony DAV-FX100W | DAVFX100W Instructions (entire component system) - Page 1
2-590-764-11(1) DVD Home Theatre System Operating Instructions DAV-FX100W ©2005 Sony Corporation - Sony DAV-FX100W | DAVFX100W Instructions (entire component system) - Page 2
) instructions in the literature accompanying the appliance. Owner's Record The model and serial numbers are located at the bottom of the unit. Record the serial number in the space provided below. Refer to them whenever you call upon your Sony dealer regarding this product. Model No. DAV-FX100W - Sony DAV-FX100W | DAVFX100W Instructions (entire component system) - Page 3
mark. As an ENERGY STAR® partner, Sony Corporation has determined that this product meets the ENERGY STAR® guidelines for energy efficiency. Welcome! Thank you for purchasing Sony DVD Home Theatre System. Before operating this system, please read this manual thoroughly and retain it for future - Sony DAV-FX100W | DAVFX100W Instructions (entire component system) - Page 4
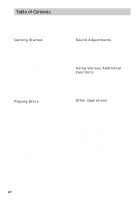
Step 6: Turning off the Demonstration 33 Step 7: Adjusting the Wireless System 34 Step 8: Performing the Quick Setup ..... 36 Speaker Setup 38 Playing Discs Playing Discs 40 Using the DVD's Menu 45 Selecting [ORIGINAL] or [PLAY LIST] on a DVD-RW 46 Selecting a Playback Area for a Super Audio - Sony DAV-FX100W | DAVFX100W Instructions (entire component system) - Page 5
86 [SPEAKER SETUP] Additional Information Precautions 89 Notes about the Discs 90 Troubleshooting 90 Self-diagnosis Function 94 (When letters/numbers appear in the display) Specifications 94 Glossary 96 Language Code List 99 Index to Parts and Controls 100 DVD Setup Display List 106 AMP - Sony DAV-FX100W | DAVFX100W Instructions (entire component system) - Page 6
instructions in this manual describe the controls on the remote. You can also use the controls on the system if they have the same or similar names as those on the remote. • The Control Menu items may be different depending on the area. • "DVD" may be used as a general term for DVD VIDEOs, DVD+RWs - Sony DAV-FX100W | DAVFX100W Instructions (entire component system) - Page 7
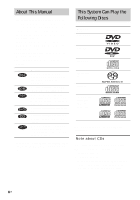
in the formats listed on page 6 • CD-ROMs recorded in PHOTO CD format • Data part of CD-Extras • DVD Audios • DVD-RAMs Also, the system cannot play the following discs: • A DVD VIDEO with a different region code (page 8, 98). • A disc that has a non-standard shape (e.g., card, heart). • A disc with - Sony DAV-FX100W | DAVFX100W Instructions (entire component system) - Page 8
music reproduction extremely faithful to the original sound. Types of Super Audio Region code Your system has a region code printed on the back of the unit and will only play DVDs labeled with the same region code. DVD VIDEOs labeled ALL will also play on this system. If you try to play any other DVD - Sony DAV-FX100W | DAVFX100W Instructions (entire component system) - Page 9
surround decoder and the DTS*2 Digital Surround System. *1 Manufactured under license from Dolby Laboratories. "Dolby," "Pro Logic," and the double-D symbol are trademarks of Dolby Laboratories. *2 Manufactured under license from Digital Theater Systems, Inc. "DTS" and "DTS Digital Surround" are - Sony DAV-FX100W | DAVFX100W Instructions (entire component system) - Page 10
Guide to the Control Menu Display DISPLAY Use the Control Menu to select a function and to view related information. Press DISPLAY repeatedly to turn on 12 (27) 18 (34) T 1:32:55 OFF OFF DISC TITLE CHAPTER DVD VIDEO Type of disc being played*3 Playing time*4 Current setting Options Function name - Sony DAV-FX100W | DAVFX100W Instructions (entire component system) - Page 11
DVD-RW) to be played, the [ORIGINAL] one, or an edited [PLAY LIST]. [TIME/TEXT] (page 57) Checks the elapsed time and the remaining playback time. Input the time code for picture and music searching. Displays the DVD page 69) Sets to prohibit playback on this system. [SETUP] (page 81) [QUICK] Setup - Sony DAV-FX100W | DAVFX100W Instructions (entire component system) - Page 12
CD Tip • The Control Menu icon indicator lights up in green t when you select any item except [OFF] ([PROGRAM], [SHUFFLE], [REPEAT] only). The [ORIGINAL/PLAY LIST] indicator lights up in green when you select [PLAY LIST] (default setting). The [MULTI/2CH] indicator lights up in green when you - Sony DAV-FX100W | DAVFX100W Instructions (entire component system) - Page 13
cords (5 m × 6) (16.5 ft. × 6) • Video Cord (1) • Remote Commander (remote) (1) • Size AAA (R03) batteries (2) • Wall-mount pads • Operating Instructions • Speaker and TV connections (card) (1) * The cords of the IR transmitter and IR receiver are for this system only. You cannot use a commercially - Sony DAV-FX100W | DAVFX100W Instructions (entire component system) - Page 14
following Steps 1 to 8. "Step 1: Speaker System Hookup" (page 15) "Step 2: Antenna Turning off the Demonstration" (page 33) "Step 7: Adjusting the Wireless System" (page 34) "Step 8: Performing the Quick Setup" (page this system and output from the speakers of this system. You can also enjoy sound - Sony DAV-FX100W | DAVFX100W Instructions (entire component system) - Page 15
the label of the jacks to be connected. Gray (+) (+) (-) Color tube (-) Black Required equipments for the wireless system IR transmitter Transmits the sound by the infrared ray. Connect it to the system. IR receiver Receive the sound by the infrared ray. Connect it to the surround amplifier - Sony DAV-FX100W | DAVFX100W Instructions (entire component system) - Page 16
When using the IR receiver stand, attach the stand so that both delta marks on the IR receiver and stand are aligned. IR receiver Delta marks IR receiver stand Surround amplifier Receive the sound from the IR receiver and send to the surround speakers. Connect the surround speakers and the IR - Sony DAV-FX100W | DAVFX100W Instructions (entire component system) - Page 17
Getting Started The long post is for floor use, the short post is for tabletop use. Post (long) or Post (short) Screw holes Base 2 Secure the base to the post by screws. Bottom of the base Screws (3) 3 Draw the speaker cord through the hole on the base, then stand it up. Bottom of the base - Sony DAV-FX100W | DAVFX100W Instructions (entire component system) - Page 18
4 Draw the speaker cord through the hole on the speaker. Hole Speaker Speaker cord , Speaker 5 Mount the speaker on the post. , Note • Do not catch the speaker cord between the speaker and the post. • Do not drop the speaker when mounting. 18US - Sony DAV-FX100W | DAVFX100W Instructions (entire component system) - Page 19
Getting Started 6 Connect the speaker cord to the speaker, then adjust the length of the speaker cord. Adjust the length of the speaker cord. 7 Attach the terminal cover to the speaker by screws. Terminal cover Screws (2) 19US - Sony DAV-FX100W | DAVFX100W Instructions (entire component system) - Page 20
SPEAKER COAXIAL IN R AUDIO IN L VIDEO IN Y PB/CB PR/CR DIR-T1 OPTICAL DIGITAL IN VIDEO 2 HDMI OUT VIDEO 1 R (DVD ONLY) L AUDIO IN VIDEO 2 COMPONENT VIDEO OUT (DVD ONLY) VIDEO IN MON IR transmitter IR receiver Subwoofer Rear side of the surround speaker Rear side of the surround - Sony DAV-FX100W | DAVFX100W Instructions (entire component system) - Page 21
exposed to direct sunlight or strong light such as an incandescent lamp. • The cords of the IR transmitter and IR receiver are for this system only. You cannot use a commercially available extension cord. Notes on placing the surround amplifier and speaker base • Do not step and place objects other - Sony DAV-FX100W | DAVFX100W Instructions (entire component system) - Page 22
Examples of poor conditions of the speaker cord Stripped speaker cord is touching another speaker terminal. Stripped cords are touching each other due to excessive removal of insulation. After connecting all the components, speakers, and AC power cord (mains lead), output a test tone to check - Sony DAV-FX100W | DAVFX100W Instructions (entire component system) - Page 23
and flat wall where reinforcement is applied. • Contact a screw shop or installer regarding the wall material or screws to be used. • Sony is not responsible for accident or damage caused by improper installation, insufficient wall strength or improper screw installation, natural calamity, etc. 23US - Sony DAV-FX100W | DAVFX100W Instructions (entire component system) - Page 24
About the wireless system This wireless system adopts the Digital Infrared Audio Transmission system (page 96). The following diagram indicates the infrared transmission area (the range that the infrared rays . • Do not use the IR transmitter or IR receiver that is not supplied with the system. 24US - Sony DAV-FX100W | DAVFX100W Instructions (entire component system) - Page 25
the radio. AM loop antenna (aerial) FM wire antenna (aerial) Note • To prevent noise pickup, keep the AM loop antenna (aerial) away from the system and other components. • Be sure to fully extend the FM wire antenna (aerial). • After connecting the FM wire antenna (aerial), keep it as horizontal as - Sony DAV-FX100W | DAVFX100W Instructions (entire component system) - Page 26
the video connection, and then audio connection. With your TV's audio output connected to this system, you can listen to TV sound through the system speakers. Connecting the video/HDMI* cords Sends a played back DVD image to a TV. Check the jacks of your TV, and choose the A, B, C, or D connection - Sony DAV-FX100W | DAVFX100W Instructions (entire component system) - Page 27
format signals, you must use this connection and set the output channel of the system to progressive format (page 28). Green Blue Red D To connect to a jack. To connect to a TV with DVI (digital visual interface) input Use an HDMI (high-definition multimedia interface)-DVI (digital visual interface - Sony DAV-FX100W | DAVFX100W Instructions (entire component system) - Page 28
FUNCTION PROGRESSIVE With cover opened. "P AUTO" or "P VIDEO" appears in the front panel display when the system outputs progressive signals. 1 Press FUNCTION repeatedly to select "DVD." 2 Press PROGRESSIVE. Each time you press PROGRESSIVE, the display changes as follows: t P AUTO (PROGRESSIVE AUTO - Sony DAV-FX100W | DAVFX100W Instructions (entire component system) - Page 29
IN (DVD ONLY) VIDEO MONITOR OUT AM COAXIAL FM 75 To connect the AUDIO OUT jacks of a TV to the VIDEO 2 (AUDIO IN) jacks of this system Connect a TV to the VIDEO 2 (AUDIO IN) jacks using an audio cord (not supplied). When connecting a cord, be sure to match the color-coded sleeves to - Sony DAV-FX100W | DAVFX100W Instructions (entire component system) - Page 30
to avoid hum and noise. • If your TV does not have AUDIO OUT jacks, you cannot output the TV sound from the speakers of this system. Tip • To listen to the TV sound, select the function by pressing FUNCTION. For details, see page 66. • When you want to output the TV - Sony DAV-FX100W | DAVFX100W Instructions (entire component system) - Page 31
system. VCR COAXIAL DIGITAL OUT VIDEO OUT AUDIO OUT L R To VIDEO 1 (COAXIAL IN) To VIDEO 1 (VIDEO/AUDIO IN) FRONT R FRONT L CENTER WOOFER SPEAKER COAXIAL IN R AUDIO IN L VIDEO IN Y PB/CB PR/CR S VIDEO (DVD cord, be sure to match the color-coded sleeves to the appropriate jacks on the - Sony DAV-FX100W | DAVFX100W Instructions (entire component system) - Page 32
OUT jack Connect the digital satellite receiver to the VIDEO 1 or VIDEO 2 AUDIO IN jacks only of the system. Note • Be sure to make connections securely to avoid hum and noise. Tip • When you connect another component to the system, you can enjoy the component by pressing FUNCTION (page 76). 32US - Sony DAV-FX100W | DAVFX100W Instructions (entire component system) - Page 33
the AC power cord (mains lead), the demonstration appears in the front panel display. When you press "/1 on the remote, the demonstration turns off. Note • When you press "/1 on the system, the demonstration does not turn off. • When you set the demonstration mode in the AMP menu to on, the - Sony DAV-FX100W | DAVFX100W Instructions (entire component system) - Page 34
speaker (R) TV Subwoofer 1 Press "/1 on the system and POWER on the surround amplifier. The system and surround amplifier turn on and the POWER/ON in red, the IR receiver is receiving an infrared ray from another Sony's wireless product. Move the IR transmitter and/or the IR receiver so that - Sony DAV-FX100W | DAVFX100W Instructions (entire component system) - Page 35
To hang the IR receiver on a wall 1 Install a commercially available screw in the wall so that it protrudes 4 mm. IR transmitter Getting Started 4 mm 2 Detach the IR receiver stand and hang it via hole on the rear side of the IR receiver on the screw. Make sure that the IR receiver does not move - Sony DAV-FX100W | DAVFX100W Instructions (entire component system) - Page 36
IR transmitter or IR receiver to a wall of low strength. • Sony is not liable for any damage or accident incurred by incorrect installation (i.e. sure that the function is set to "DVD." 3 Switch the input selector on your TV so that the signal from the system appears on the TV screen. [Press [ENTER - Sony DAV-FX100W | DAVFX100W Instructions (entire component system) - Page 37
on-screen display appears. LANGUAGE SETUP OSD: MENU: AUDIO: SUBTITLE: ENGLISH ENGLISH FRENCH SPANISH PORTUGUESE 5 Press X/x to select a language. The system displays the menu and subtitles in the selected language. Note • The selectable language is different depending on the area. 6 Press ENTER - Sony DAV-FX100W | DAVFX100W Instructions (entire component system) - Page 38
[SETUP] appear. 1 2 ( 2 7 ) 1 8 ( 3 4 ) : : DVD VIDEO QUICK QUICK CUSTOM RESET BNR 3 Press X/x to select [QUICK], then press ENTER. The the subwoofer should be the same distance from the listening position (A). However, this system allows you to place the center speaker up to 1.6 meters (5 ft) - Sony DAV-FX100W | DAVFX100W Instructions (entire component system) - Page 39
Getting Started If color irregularity is observed again... Place the speaker further away from the TV set. If howling occurs Reposition the speakers or turn down the volume on the system. 39US - Sony DAV-FX100W | DAVFX100W Instructions (entire component system) - Page 40
input selector on the TV to this system. 3 Press "/1. The system turns on. Unless the system is set to "DVD," press FUNCTION to select "DVD SKIP on the remote or DISC 1-5 of the system. Adjust the volume on the system. Tip • The the instructions on the menu. (DVD: page 45), (VIDEO CD: page - Sony DAV-FX100W | DAVFX100W Instructions (entire component system) - Page 41
/DVD-RWs/DVD-Rs only. *2 DVD VIDEOs/DVD-RWs/DVD-Rs/DVD+RWs only. *3 DATA CDs only. Note • If there is no disc in the system, "No Disc" appears in the front panel display. Tip • The Instant Replay function is useful when you want to review a scene or dialogue that you missed. • The Instant Advance - Sony DAV-FX100W | DAVFX100W Instructions (entire component system) - Page 42
(page 85). Note • If [MULTI-DISC RESUME] in [CUSTOM SETUP] is set to [ON] (page 85) and you playback a recorded 42US disc such as DVD-RW, the system may playback other recorded discs from the same resume point. To play from the beginning, press x twice and then press H. Creating your own program - Sony DAV-FX100W | DAVFX100W Instructions (entire component system) - Page 43
CDs and Super VCDs with PBC playback. Playing in random order (Shuffle Play) (VIDEO CD, Super Audio CD, CD only) You can have the system "shuffle" tracks. Subsequent "shuffling" may produce a different playing order. Note • You can shuffle the track on the current disc only. 1 Press DISPLAY during - Sony DAV-FX100W | DAVFX100W Instructions (entire component system) - Page 44
Menu is turned off. Tip • You can set Shuffle Play while the system is stopped. After selecting the [SHUFFLE] option, press H. Shuffle Play select the item to be repeated. The default setting is underlined. x When playing a DVD VIDEO or DVDRW • [OFF]: does not play repeatedly. • [ALL DISCS]: repeats - Sony DAV-FX100W | DAVFX100W Instructions (entire component system) - Page 45
Discs Tip • You can set Repeat Play while the system is stopped. After selecting the [REPEAT] option, press is set to [IMAGE (JPEG)] (page 52), you cannot select [TRACK]. Using the DVD's Menu A DVD is divided into a lot of sections, which make up a picture or music feature. These sections are called - Sony DAV-FX100W | DAVFX100W Instructions (entire component system) - Page 46
With cover opened. 1 Press DISPLAY when the system is in stop mode. The Control Menu appears. 2 Press X/x to select [ORIGINAL/ PLAY LIST], then press ENTER. The options for [ORIGINAL/PLAY LIST] appear. 1 (44) 3 ( 28) T 1:30:50 PLAY LIST PLAY LIST ORIGINAL DVD-RW Selecting a playback area on - Sony DAV-FX100W | DAVFX100W Instructions (entire component system) - Page 47
select the playback layer you want to listen to. Press SA-CD/CD when the system is in stop mode. Each time you press the button, an HD layer or you want by the number buttons. 3 Press ENTER. 4 Follow the instructions in the menu for interactive operations. Refer to the operation details supplied - Sony DAV-FX100W | DAVFX100W Instructions (entire component system) - Page 48
the discs must be recorded according to ISO 9660 Level 1, Level 2 or Joliet format for the system to recognize the tracks (or files). You can also play discs recorded in Multi Session. See the instructions supplied with the CD-R/ CD-RW drives and the recording software (not supplied) for details on - Sony DAV-FX100W | DAVFX100W Instructions (entire component system) - Page 49
cameras regulated by Japan Electronics and Information Technology Industries Association (JEITA). Note • The system will play any data with the this data may generate a loud noise which could damage your speaker system. • The system does not conform to audio in MP3PRO format. Playback order of MP3 - Sony DAV-FX100W | DAVFX100W Instructions (entire component system) - Page 50
and JPEG image files recorded on DATA CDs (CD-ROMs/CD-Rs/ CD-RWs) can be played on this system. H C/X/x/c ENTER x MENU PICTURE NAVI With cover opened. Tip • You can view the disc information while playing MP3 audio tracks and JPEG image files (page 59). • You can select Repeat Play while playing - Sony DAV-FX100W | DAVFX100W Instructions (entire component system) - Page 51
album list. To return to the previous display Press O RETURN. To turn off the display Press MENU. Selecting a JPEG image file 1 Load a DATA CD. The system starts playing from the first album. 2 Press MENU. The albums recorded on the DATA CD appear. When an album is being played, its title is - Sony DAV-FX100W | DAVFX100W Instructions (entire component system) - Page 52
back the DATA CD, select [AUTO] mode as explained below. H X/x ENTER x MENU DISPLAY 1 Load a DATA CD. The system starts playing from the first album. 2 Press x. The system stops playback. 3 Press DISPLAY. The Control Menu appears. 4 Press X/x to select [MODE (MP3, JPEG)], then press ENTER - Sony DAV-FX100W | DAVFX100W Instructions (entire component system) - Page 53
DATA CD appears. 7 Press X/x to select the album you want and press H. The system starts playing the selected album. You can turn the album list on and off by pressing the sound may skip. It is recommended that you set the MP3 bit rate to 128 kbps or lower when creating the file. If the sound still - Sony DAV-FX100W | DAVFX100W Instructions (entire component system) - Page 54
not adjust. • SYNC ON: adjusts the difference between picture and sound. 4 Press ENTER or AMP MENU. The AMP menu turns off. Note • Depending on the input stream, this function may not be effective. • Depending on the sound field, this function may not be effective. 54US - Sony DAV-FX100W | DAVFX100W Instructions (entire component system) - Page 55
the "2M"/ "2m" and the "2M"/"2m" playback speed is faster than "1M"/"1m." Watching frame by frame (Slow-motion Play) (DVD, DVD-RW, VIDEO CD only) Press m or M when the system is in pause mode. To return to the normal playback speed, press H. Each time you press m or M during Slow-motion Play - Sony DAV-FX100W | DAVFX100W Instructions (entire component system) - Page 56
, press DISPLAY twice.) The Control Menu appears. 2 Press X/x to select the search method. x When playing a DVD VIDEO/DVD-RW [TITLE] [CHAPTER] [TIME/TEXT] Select [TIME/TEXT] to search for a starting point by inputting the time code. x When playing a VIDEO CD/Super VCD without PBC Playback [TRACK] - Sony DAV-FX100W | DAVFX100W Instructions (entire component system) - Page 57
The system starts playback from the selected number. To search for a scene using the time code (DVD VIDEO only) 1 In Step 2, select [TIME/TEXT]. [T **:**:**] (playing time of the current title) is selected. 2 Press ENTER. [T **:**:**] changes to [T --:--:--]. 3 Input the time code - Sony DAV-FX100W | DAVFX100W Instructions (entire component system) - Page 58
may not be able to select some items. 2 Press PICTURE NAVI repeatedly to select an item. • [TITLE VIEWER] (DVD VIDEO only): displays the first scene of each title. • [CHAPTER VIEWER] (DVD VIDEO only): displays the first scene of each chapter. • [TRACK VIEWER] (VIDEO CD/ Super VCD only): displays - Sony DAV-FX100W | DAVFX100W Instructions (entire component system) - Page 59
DISPLAY With cover opened. Viewing the Playing Time and Remaining Time in the Front Panel Display You can check disc information, such as the remaining time, total number of titles in a DVD, tracks in a VIDEO CD, Super Audio CD, CD, or MP3, using the front panel display (page 101). Press DISPLAY - Sony DAV-FX100W | DAVFX100W Instructions (entire component system) - Page 60
name. • You can also check the time information and text using the Control Menu. Note • displayed "NO TEXT." • The system can only display the first level of the DVD/CD text, such as the Disc station (page 78). *2 Returns to the original display when several seconds has elapsed. Checking the - Sony DAV-FX100W | DAVFX100W Instructions (entire component system) - Page 61
displayed. • Depending on the type of disc being played, the system can only display a limited number of characters. Also, depending on the disc, not all text characters will be displayed. Checking the play information of the Disc To check DVD/Super Audio CD/CD text Press DISPLAY repeatedly in Step - Sony DAV-FX100W | DAVFX100W Instructions (entire component system) - Page 62
select the desired audio signal. x When playing a DVD VIDEO Depending on the DVD VIDEO, the choice of language varies. When 4 digits are displayed, they indicate a language code. Refer to "Language Code List" (page 99) to see which language the code represents. When the same language is displayed - Sony DAV-FX100W | DAVFX100W Instructions (entire component system) - Page 63
during playback, the format of the current audio signal (PCM, Dolby Digital, DTS, etc.) appears as shown below. x When playing a DVD VIDEO Example: Dolby Digital 5.1 ch Surround (L/R) LFE (Low Frequency Effect) 1:ENGLISH DOLBY DIGITAL 3 / 2 .1 Front (L/R) + Center L CR LFE LS RS Currently - Sony DAV-FX100W | DAVFX100W Instructions (entire component system) - Page 64
by Using Sound Field You can take advantage of surround sound simply by selecting one of system's preprogrammed sound fields. They bring the exciting and powerful sound of movie theaters into your home. SOUND FIELD C/c Press SOUND FIELD. Each time you press SOUND FIELD repeatedly until the sound - Sony DAV-FX100W | DAVFX100W Instructions (entire component system) - Page 65
properties of the original recording without adding any new sounds or tonal colorations. Note • When the input signal is multi channel Sony's own DSP (Digital Signal Processor) technology to develop "Digital Cinema Sound." "Digital Cinema Sound" simulates in a home theater an ideal movie theater - Sony DAV-FX100W | DAVFX100W Instructions (entire component system) - Page 66
watching movies at night. Enjoying the surround sound by headphones x HEADPHONE THEATER This mode outputs the sound as surround from headphone L/R. x HEADPHONE . Tip • The system memorizes the last sound field selected for each function mode. Whenever you select a function such as DVD or TUNER, the - Sony DAV-FX100W | DAVFX100W Instructions (entire component system) - Page 67
Using the Sound Effect 4 Press ENTER or AMP MENU. The AMP menu turns off. Note • AUDIO DRC only applies to Dolby Digital sources. Sound Adjustments X/x/c ENTER DSGX AMP MENU With cover opened. Reinforcing bass frequencies You can reinforce bass frequencies. Press DSGX. Bass frequencies are - Sony DAV-FX100W | DAVFX100W Instructions (entire component system) - Page 68
VIDEO. With cover opened. Press SUBTITLE during playback. Each time you press SUBTITLE, the subtitle language changes. Note • Depending on the DVD VIDEO, you may not be able to change the subtitles even if multilingual subtitles are recorded on it. You also may not be able to - Sony DAV-FX100W | DAVFX100W Instructions (entire component system) - Page 69
Custom Parental Control You can set playback restrictions so that the system will not play inappropriate discs. • Parental Control Playback of some DVD VIDEOs can be limited according to a predetermined level such as the age of the users. Scenes may be blocked or replaced with different scenes. The - Sony DAV-FX100W | DAVFX100W Instructions (entire component system) - Page 70
playback for children [PARENTAL CONTROL] (DVD only) Playback of some DVD VIDEOs can be limited according to a predetermined level such as the age of the users. The [PARENTAL CONTROL] function allows you to set a playback limitation level. 1 Press DISPLAY while the system is in stop mode. The Control - Sony DAV-FX100W | DAVFX100W Instructions (entire component system) - Page 71
The area is selected. When you select [OTHERS t], select and enter a standard code in the table on page 72 using the number buttons. 7 Press X/x to do not have the Parental Control function, playback cannot be limited on this system. • Depending on the disc, you may be asked to change the parental - Sony DAV-FX100W | DAVFX100W Instructions (entire component system) - Page 72
Canada 2079 Chile 2090 China 2092 Denmark 2115 Finland 2165 France 2174 Germany 2109 India 2248 Indonesia 2238 Italy 2254 Japan 2276 Korea 2304 Standard Code you press ENTER and input the correct number. Changing the password 1 Press DISPLAY while the system is in stop mode. - Sony DAV-FX100W | DAVFX100W Instructions (entire component system) - Page 73
code number, the code number previously entered will be erased. • When you replace the batteries of the remote, the code number may reset itself to the default (SONY) setting. Reset the appropriate code number. Controlling TVs with the remote TV's input source between the TV and other input sources. - Sony DAV-FX100W | DAVFX100W Instructions (entire component system) - Page 74
above. • The TV mode turns off when you do not operate the remote for 10 seconds. Using the THEATRE SYNC Function THEATRE SYNC allows you to turn on your SONY TV and this system, changes the system mode to "DVD," and then switches the TV's input source you set with one button push. TV TV CH - Sony DAV-FX100W | DAVFX100W Instructions (entire component system) - Page 75
VIDEO8 COMPONENT 1 INPUT COMPONENT 2 INPUT COMPONENT 3 INPUT COMPONENT 4 INPUT * Except for North American models. Operating for the THEATRE SYNC function Point the remote to the direction of TV and this system, then press THEATRE SYNC once. While transmitting the code from the remote, the TV - Sony DAV-FX100W | DAVFX100W Instructions (entire component system) - Page 76
for further information on the operation. Press FUNCTION repeatedly until "VIDEO 1" or "VIDEO 2" appears in the front panel display. Each time you press FUNCTION, the mode of the system changes in the following sequence. DVD t TUNER FM t TUNER AM t VIDEO 1 t VIDEO 2 t DVD t ... Enjoying Multiplex - Sony DAV-FX100W | DAVFX100W Instructions (entire component system) - Page 77
band you want appears in the front panel display. 2 Press and hold TUNING + or - until the auto scanning starts. Scanning stops when the system tunes in a station. "TUNED" and "ST" (for stereo program) appear in the front panel display. 3 Press TUNER MENU. 4 Press C/X/x/c repeatedly until "Memory - Sony DAV-FX100W | DAVFX100W Instructions (entire component system) - Page 78
AM station, then turn off the system by pressing "/1 on the system. While holding down > (on the system), press "/1 on the system to turn on the power. Press "/1. To listen to non-preset radio stations Use manual or automatic tuning in Step 2. For manual tuning, press TUNING + or - repeatedly. For - Sony DAV-FX100W | DAVFX100W Instructions (entire component system) - Page 79
the cursor to the next position. Letters, numbers, and other symbols can be input for a radio station name. If you make a mistake Press C/c repeatedly ENTER. The station name is stored. Using the Sleep Timer You can set the system to turn off at a preset time, so you can fall asleep listening to - Sony DAV-FX100W | DAVFX100W Instructions (entire component system) - Page 80
3 Press X/x to select the brightness of the front panel display. 4 Press ENTER or AMP MENU. The AMP menu turns off. 1 Press "/1 to turn on the system. 2 Press x, A, and "/1 on the system at the same time. "COLD RESET" appears in the front panel display and the default settings are returned. 80US - Sony DAV-FX100W | DAVFX100W Instructions (entire component system) - Page 81
X/x ENTER DISPLAY 1 Press DISPLAY when the system is in stop mode. The Control Menu appears. 1 2 ( 2 7 ) 1 8 ( 3 4 ) : : DVD VIDEO QUICK QUICK CUSTOM RESET BNR 3 Press X/x to select [CUSTOM], then OSD: MENU: AUDIO: SUBTITLE: ENGLISH ENGLISH ORIGINAL ENGLISH 4 Press X/x to select the setup - Sony DAV-FX100W | DAVFX100W Instructions (entire component system) - Page 82
the system as it takes a few seconds to complete. Note • When you turn the system on after resetting and no disc is in the system, the guide message ORIGINAL], the language given priority in the disc is selected. x [SUBTITLE] (DVD VIDEO only) Switches the language of the subtitle recorded on the DVD - Sony DAV-FX100W | DAVFX100W Instructions (entire component system) - Page 83
• Depending on the DVD, [4:3 LETTER BOX] system outputs video signals of the highest resolution acceptable for your TV. If the picture is not clear, natural or to your satisfaction, try another option that suits the disc and your TV/projector, etc. For details, refer also to the instruction manual - Sony DAV-FX100W | DAVFX100W Instructions (entire component system) - Page 84
ratio progressive signals. If you can change the aspect ratio on your progressive format compatible TV, change the setting on your TV, not the system. Note that this setting is effective only for HDMI connection or progressive signals output from the COMPONENT VIDEO OUT jacks. Note • This setting is - Sony DAV-FX100W | DAVFX100W Instructions (entire component system) - Page 85
off. Resume playback point can be stored in memory for up to 40 different DVD VIDEO/ VIDEO CD discs (page 41). [ON] [OFF] Stores the resume Dolby Digital, DTS (digital theater system), or 96 kHz/24 bit PCM (pulse code modulation) signals to 48 kHz/ 16 bit PCM (pulse code modulation). Note • A loud - Sony DAV-FX100W | DAVFX100W Instructions (entire component system) - Page 86
the Setup Display" (page 81). The default settings are underlined. Note • You cannot operate these setup items when you connect headphones to the system. SPEAKER SETUP SIZE: DISTANCE: LEVEL(FRONT): LEVEL(SURROUND): TEST TONE: OFF FRONT: CENTER: SURROUND: SUBWOOFER: YES YES BEHIND YES To return to - Sony DAV-FX100W | DAVFX100W Instructions (entire component system) - Page 87
from your listening position than the front speakers. • Depending on the input stream, the [DISTANCE] setting may not be effective. x [ volume of all the speakers at one time Press VOLUME +/- on the system, or press VOLUME +/- on the remote. x [TEST TONE] The speakers will emit a test tone to adjust - Sony DAV-FX100W | DAVFX100W Instructions (entire component system) - Page 88
The Control Menu appears. 2 Press X/x to select then press ENTER. [SETUP], The options for [SETUP] appear. 3 Press X/x to select [CUSTOM], then press ENTER. The Setup Display appears. 4 Press X/x repeatedly to select [SPEAKER SETUP], then press ENTER or c. 5 Press X/x repeatedly to select [TEST - Sony DAV-FX100W | DAVFX100W Instructions (entire component system) - Page 89
Information Additional Information Precautions On placement • Place the system in a location with adequate ventilation to prevent heat build-up in the system or problems concerning your system, please consult your nearest Sony dealer. On cleaning discs • Do not use a commercially available CD/DVD - Sony DAV-FX100W | DAVFX100W Instructions (entire component system) - Page 90
while using the system, use this troubleshooting guide to help remedy the problem before requesting repairs. Should any problem persist, consult your nearest Sony dealer. In the event of a problem of the surround amplifier, have a Sony dealer check other parts of the system together (system, IR - Sony DAV-FX100W | DAVFX100W Instructions (entire component system) - Page 91
DVD programs could affect picture quality. If you still experience problems even when you connect your system directly to your TV, try connecting your system to your TV's S video input on the remote if "MUTING ON" is displayed in the front panel display. • The system is in pause Information 91US - Sony DAV-FX100W | DAVFX100W Instructions (entire component system) - Page 92
other nearby wireless system(s). • Point the IR transmitter at the IR receiver. The disc does not play. • There is no disc inserted. • The disc is upside down. Insert the disc with the playback side facing down. • The system cannot play CD-ROMs, etc. (page 7). • The region code on the DVD does not - Sony DAV-FX100W | DAVFX100W Instructions (entire component system) - Page 93
has been selected. During stop, press x on the system or the remote and then start playback (page 41). • The title, DVD or PBC menu automatically appears on the TV screen. The system starts playing the disc automatically. • The DVD features an auto playback function. Playback stops automatically - Sony DAV-FX100W | DAVFX100W Instructions (entire component system) - Page 94
E XX To prevent a malfunction, the (xx is a number) system has performed the selfdiagnosis function. ,Contact your nearest Sony dealer or local authorized Sony service facility and give the 5- character service number. Example: E 61 10 Specifications AUDIO POWER SPECIFICATIONS POWER OUTPUT - Sony DAV-FX100W | DAVFX100W Instructions (entire component system) - Page 95
Information Tuner section System PLL quartz-locked digital synthesizer system frequency 450 kHz Video section Outputs Input Video: 1 Vp-p 75 ohms ohms Speakers Front Speaker system Speaker unit Rated impedance Dimensions (approx 7/8 inches) (w/h/d) incl. projecting parts 5.1 kg (11 lb 4 oz - Sony DAV-FX100W | DAVFX100W Instructions (entire component system) - Page 96
the rapid spread of DVDs, Digital Broadcasting Satellite Receiver with no accompanying deterioration, Sony developed a technology called and Information Technology extracts the spatial properties of the original recording without adding any new sounds developed by Digital Theater Systems, Inc. This - Sony DAV-FX100W | DAVFX100W Instructions (entire component system) - Page 97
1/40 of its original size. The DVD also uses the variable rate coding technology that processes theaters. Video based DVDs, such as television dramas or sit-coms, displays images at 30 frames (or 60 fields) per second. HDMI (high-definition multimedia interface) HDMI is an interface that supports - Sony DAV-FX100W | DAVFX100W Instructions (entire component system) - Page 98
Region Code This system is used to protect copyrights. A region number is allocated on each DVD system or DVD disc according to the sales region. Each region code is shown on the system as well as on the disc packaging. The system can play discs that match its region code. The system information - Sony DAV-FX100W | DAVFX100W Instructions (entire component system) - Page 99
Additional Information Language Code List The language spellings conform to the ISO 639: 1988 (E/F) standard. Code 1027 1028 1032 1039 Gaelic Galician Guarani Gujarati Hausa Hindi Croatian Hungarian Armenian Interlingua Interlingue Code 1245 1248 1253 1254 1257 1261 1269 1283 1287 1297 1298 - Sony DAV-FX100W | DAVFX100W Instructions (entire component system) - Page 100
Index to Parts and Controls For more information, refer to the pages indicated in parentheses. Front panel A Disc slot (40) B (remote sensor) (13) C Front panel display (101) D PHONES jack (40) E VOLUME +/- (40) F FUNCTION (40) G ./> (41) H x (stop) (41, 80) I X (pause) (41) J H (play) (40) K A ( - Sony DAV-FX100W | DAVFX100W Instructions (entire component system) - Page 101
(DVD function only) H Lights up when the HDMI OUT jack is correctly connected to a HDCP (highbandwidth digital content protection) compliant device with HDMI or DVI (digital visual interface) input. (26) I Lights up during MULTI channel playback. (Super Audio CD only) (46) Additional Information - Sony DAV-FX100W | DAVFX100W Instructions (entire component system) - Page 102
CENTER WOOFER SPEAKER COAXIAL IN R AUDIO IN L VIDEO IN Y PB/CB PR/CR S VIDEO (DVD ONLY) DIR-T1 OPTICAL DIGITAL IN VIDEO 2 HDMI OUT VIDEO 1 R (DVD ONLY) L AUDIO IN VIDEO 2 COMPONENT VIDEO OUT VIDEO IN (DVD ONLY) VIDEO MONITOR OUT AM COAXIAL FM 75 A SPEAKER jacks (15) B DIR-T1 jack - Sony DAV-FX100W | DAVFX100W Instructions (entire component system) - Page 103
Remote Open the cover. A TV (73) B DISC SKIP (40) C SOUND FIELD (64) Additional Information D ./> PRESET -/+, TV CH -/+ (36, 41, MENU (28, 77) Q TV [/1 (on/standby) (73) R "/1 (on/standby) (33, 40, 78) S THEATRE SYNC (74) T TV/VIDEO, SLEEP (73, 79) U FUNCTION (28, 40, 66, 76) V m/M / SLOW, - Sony DAV-FX100W | DAVFX100W Instructions (entire component system) - Page 104
eg TV CH -/+ (73) The TV CH + button has a tactile dot.* eh TV VOL +/- (73) ej MULTI/2CH (46) ek SA-CD/CD (46) el AMP MENU (33, 54, 67, 76) * Use the tactile dot as a reference when operating the system. 104US - Sony DAV-FX100W | DAVFX100W Instructions (entire component system) - Page 105
Surround amplifier POWER/ON LINE POWER SPEAKER DIR-R2 SURROUND L SURROUND R Front panel Rear panel A POWER/ON LINE indicator (34) B POWER (34) C DIR-R2 jack (15) D SPEAKER jacks (15) Additional Information 105US - Sony DAV-FX100W | DAVFX100W Instructions (entire component system) - Page 106
Setup Display List You can set the following items with the DVD Setup Display. The order of the displayed items may be different from the actual display. LANGUAGE SETUP SCREEN SETUP OSD (Select the language you want - Sony DAV-FX100W | DAVFX100W Instructions (entire component system) - Page 107
- 23 ft LEVEL (FRONT) LEVEL (SURROUND) TEST TONE L R CENTER SUBWOOFER L R OFF ON -6 dB - 0 dB -6 dB - 0 dB -6 dB - +6 dB -6 dB - +6 dB -6 dB - +6 dB -6 dB - +6 dB Additional Information 107US - Sony DAV-FX100W | DAVFX100W Instructions (entire component system) - Page 108
AMP Menu List You can set the following items with AMP MENU on the remote. AMP menu AUDIO DRC DUAL MONO A/V SYNC DIMMER DEMO DRC STD DRC MAX DRC OFF MAIN SUB MAIN+SUB MAIN/SUB SYNC OFF SYNC ON DIMMER ON DIMMER OFF DEMO ON DEMO OFF 108US - Sony DAV-FX100W | DAVFX100W Instructions (entire component system) - Page 109
Pro Logic II 96 Dolby Surround Pro Logic 96 DSGX 67 DTS 62, 96 DUAL MONO 76 DVD 97 DVD+RW 97 DVD's menu 45 DVD-RW 46, 97 E EFFECT 54 F Fast forward 55 Fast reverse 55 FILE 56 File 98 PROGRESSIVE VIDEO 28 Q Quick Setup 36 R Radio 78 Rear Panel 102 Region Code 8, 98 Remote 13, 73, 103 continued 109US - Sony DAV-FX100W | DAVFX100W Instructions (entire component system) - Page 110
Speaker setup 38 Speaker System Hookup 15 SUBTITLE 68, 82 Super Audio CD 7, 46 T TEST TONE 87 THEATRE SYNC 74 TIME/TEXT 57 TITLE 56 Title 98 TRACK 56 Track 98 TRACK SELECTION 85 Troubleshooting 90 TUNER MENU 77 TV Hookup 26 TV TYPE 83 U Usable discs 6 V VIDEO CD 98 W Wireless system 24, 34 110US - Sony DAV-FX100W | DAVFX100W Instructions (entire component system) - Page 111
- Sony DAV-FX100W | DAVFX100W Instructions (entire component system) - Page 112
Sony Corporation Printed in Korea
-
 1
1 -
 2
2 -
 3
3 -
 4
4 -
 5
5 -
 6
6 -
 7
7 -
8
-
9
-
10
-
11
-
12
-
13
-
14
-
15
-
16
-
17
-
18
-
19
-
20
-
21
-
22
-
23
-
24
-
25
-
26
-
27
-
28
-
29
-
30
-
31
-
32
-
33
-
34
-
35
-
36
-
37
-
38
-
39
-
40
-
41
-
42
-
43
-
44
-
45
-
46
-
47
-
48
-
49
-
50
-
51
-
52
-
53
-
54
-
55
-
56
-
57
-
58
-
59
-
60
-
61
-
62
-
63
-
64
-
65
-
66
-
67
-
68
-
69
-
70
-
71
-
72
-
73
-
74
-
75
-
76
-
77
-
78
-
79
-
80
-
81
-
82
-
83
-
84
-
85
-
86
-
87
-
88
-
89
-
90
-
91
-
92
-
93
-
94
-
95
-
96
-
97
-
98
-
99
-
100
-
101
-
102
-
103
-
104
-
105
-
106
-
107
-
108
-
109
-
110
-
111
-
112
 |
 |
©2005 Sony Corporation
2-590-764-
11
(1)
DVD Home Theatre
System
Operating Instructions
DAV-FX100W