Sony DCR PC55 Operating Guide - Page 60
Dubbing sound to a recorded tape, Connecting
 |
UPC - 027242669734
View all Sony DCR PC55 manuals
Add to My Manuals
Save this manual to your list of manuals |
Page 60 highlights
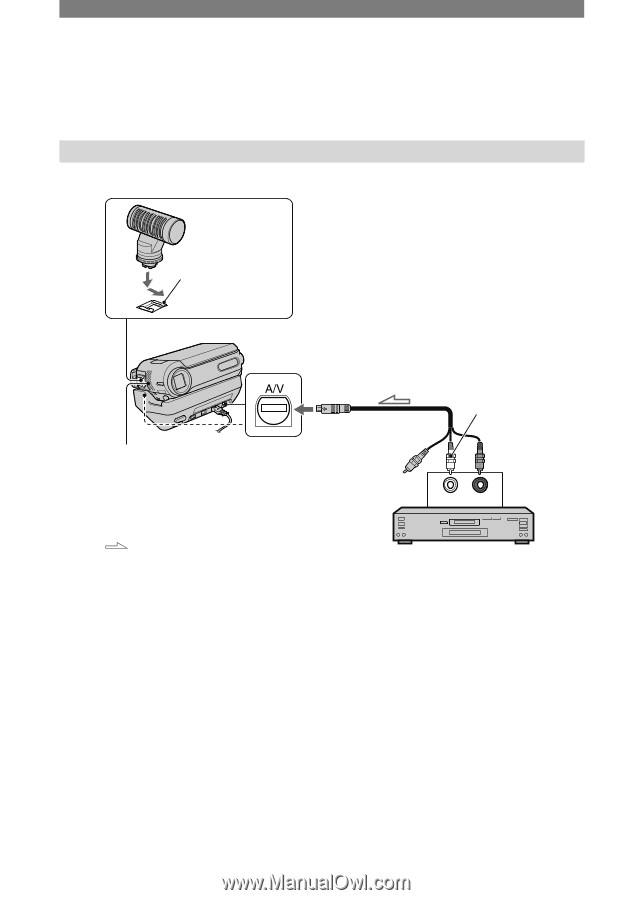
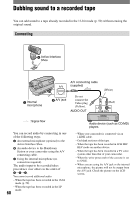
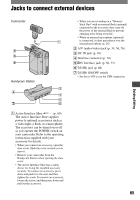
Dubbing sound to a recorded tape You can add sound to a tape already recorded in the 12-bit mode (p. 50) without erasing the original sound. Connecting Active Interface Shoe Internal microphone A/V connecting cable (supplied) (White) A/V jack Do not connect the Video plug (Yellow). AUDIO OUT (Red) L R LINE OUT : Signal flow You can record audio by connecting in one of the following ways. An external microphone (optional) to the Active Interface Shoe. An audio device to the Handycam Station or your camcorder using the A/V connecting cable. Using the internal microphone (no connection required). The audio input to be recorded takes precedence over others in the order of You cannot record additional audio: - When the tape has been recorded in the 16-bit mode (p. 50). - When the tape has been recorded in the LP mode. 60 Audio device (such as CD/MD) players - When your camcorder is connected via an i.LINK cable. - On blank sections of the tape. - When the tape has been recorded in 4CH MIC REC mode on another device. - When the tape has been recorded in a TV color system other than that of your camcorder. - When the write-protect tab of the cassette is set to SAVE. • When you are using the A/V jack or the internal microphone, the picture will not be output from the A/V jack. Check the picture on the LCD screen.
-
 1
1 -
2
-
3
-
4
-
5
-
6
-
7
-
8
-
9
-
10
-
11
-
12
-
13
-
14
-
15
-
16
-
17
-
18
-
19
-
20
-
21
-
22
-
23
-
24
-
25
-
26
-
27
-
28
-
29
-
30
-
31
-
32
-
33
-
34
-
35
-
36
-
37
-
38
-
39
-
40
-
41
-
42
-
43
-
44
-
45
-
46
-
47
-
48
-
49
-
50
-
51
-
52
-
53
-
54
-
 55
55 -
 56
56 -
 57
57 -
 58
58 -
 59
59 -
 60
60 -
 61
61 -
 62
62 -
 63
63 -
 64
64 -
 65
65 -
66
-
67
-
68
-
69
-
70
-
71
-
72
-
73
-
74
-
75
-
76
-
77
-
78
-
79
-
80
-
81
-
82
-
83
-
84
-
85
-
86
-
87
-
88
-
89
-
90
-
91
-
92
-
93
-
94
-
95
-
96
-
97
-
98
-
99
-
100
-
101
-
102
-
103
-
104
-
105
-
106
-
107
-
108
-
109
-
110
-
111
-
112
-
113
-
114
-
115
 |
 |