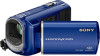
Sony DCR-SX41/L Handycam® Handbook
Sony DCR-SX41/L - Palm-sized Camcorder W/ 60x Optical Zoom Manual
 |
View all Sony DCR-SX41/L manuals
Add to My Manuals
Save this manual to your list of manuals |
Sony DCR-SX41/L manual content summary:
- Sony DCR-SX41/L | Handycam® Handbook - Page 1
Click Handycam Handbook DCR-SX40/SX41/SX60 Table of Contents Useful Recording Techniques Index 2009 Sony Corporation 4-132-760-11(1) US - Sony DCR-SX41/L | Handycam® Handbook - Page 2
for illustration purposes are captured using a digital still camera, and therefore may appear different from images and screen indicators that actually appear on your camcorder. In this Handycam Handbook, the internal memory of your camcorder and "Memory Stick PRO Duo" media are called "recording - Sony DCR-SX41/L | Handycam® Handbook - Page 3
operating your camcorder 13 Getting started Step 1: Charging the battery pack Handycam Operation) ...20 Recording movies 20 Shooting photos 22 Playing movies 23 Viewing photos 25 Recording 26 Recording movies 26 Shooting photos 28 Useful functions for recording movies and photos 30 Zooming - Sony DCR-SX41/L | Handycam® Handbook - Page 4
desired images by date (Date Index 36 Using PB zoom with photos 37 Playing back a series of photos (Slide with a recorder, etc 53 Checking the battery information 54 Utilizing recording media Changing the on the internal memory from being recovered 59 Customizing your camcorder MOVIE SETTINGS ( - Sony DCR-SX41/L | Handycam® Handbook - Page 5
set in the OPTION MENU 74 Troubleshooting Troubleshooting 81 Self-diagnosis display/Warning indicators 85 battery pack 88 Expected recording time of movies 88 Expected number of recordable photos 89 Using your camcorder abroad 90 File/folder structure on the internal memory and "Memory - Sony DCR-SX41/L | Handycam® Handbook - Page 6
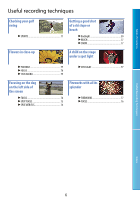
Table of Contents Useful recording techniques Checking your golf swing SPORTS 77 Getting a good shot of a ski slope or beach Backlight 30 BEACH 77 SNOW 77 Flowers in close-up A child on the stage under a spot light PORTRAIT 77 FOCUS 76 TELE MACRO 75 SPOTLIGHT 77 - Sony DCR-SX41/L | Handycam® Handbook - Page 7
facing out. This is convenient during playback operations. Useful Recording Techniques Index Power zoom lever (30, 37) PHOTO button (23, 28) MODE button (22, 28) (Movie)/ (Photo) lamps (17) Battery pack (15) Tripod receptacle POWER button (17) EASY button (21) RESET button - Sony DCR-SX41/L | Handycam® Handbook - Page 8
Guide) "Memory Stick Duo" media slot (56) Access lamp (Internal memory, "Memory Stick PRO Duo" media) (56) While the lamp is lit or flashing, the camcorder -IN ZOOM MIC (79) MICREF LEVEL low (80) WIDE SELECT (60) Remaining battery Return button (9) Meaning Recording status (21, 27) Photo size (64 - Sony DCR-SX41/L | Handycam® Handbook - Page 9
(HOME), the HOME MENU appears. You can change the settings of your camcorder, etc. (HOME) Using the HELP function To see the descriptions on the setting. Menu item Useful Recording Techniques Index Category Follow the instructions on the screen. After completing the setting, touch . - Sony DCR-SX41/L | Handycam® Handbook - Page 10
the item you want is not on the screen, touch another tab. (There may be no tab.) You cannot use the OPTION MENU during Easy Handycam operation. The tabs and items that appear on the screen depend on the recording/playback status of your - Sony DCR-SX41/L | Handycam® Handbook - Page 11
CAMERA CONNECT USB CONNECT USB CONNECT DISC BURN BATTERY INFO p. 41 p. 41 p. 43 p. 44 48 p. 49 p. 49 p. 49 p. 52 p. 52 Operating Guide p. 54 (MANAGE MEDIA) category MOVIE MEDIA SET* p. 55 DIGITAL ZOOM STEADYSHOT AUTO SLW SHUTTR GUIDEFRAME REMAINING SET FACE SET* PHOTO SETTINGS IMAGE SIZE - Sony DCR-SX41/L | Handycam® Handbook - Page 12
Easy Handycam operation. List of the OPTION MENU Following items are available on the OPTION MENU only. tab SPOT MTR/FCS SPOT METER SPOT FOCUS TELE MACRO EXPOSURE FOCUS SCENE SELECTION WHITE BAL. p. 74 p. 74 p. 75 p. 75 p. 76 p. 76 p. 77 p. 78 tab FADER p. 79 tab BLT-IN ZOOM MIC MICREF - Sony DCR-SX41/L | Handycam® Handbook - Page 13
battery pack NP-FH30 (1) CD-ROM "Handycam Application Software" (1) "PMB" (software, including "PMB Guide" ) "Handycam Handbook" (PDF) "Operating Guide" (1) See page 55 for the "Memory Stick" media you can use with this camcorder. Using the camcorder Do not hold the camcorder - Sony DCR-SX41/L | Handycam® Handbook - Page 14
your computer (see Operating Guide). Also, you can save your image data using a DVD writer, a VCR, or a DVD/HDD recorder (p. 50). Notes on battery pack/AC Adaptor Be sure to remove the battery pack or the AC Adaptor after turning off the camcorder. When the camcorder is connected to a computer - Sony DCR-SX41/L | Handycam® Handbook - Page 15
is charged, disconnect the AC Adaptor from the DC IN jack of your camcorder. See page 88 on recording and playing time. When your camcorder is on, you can check the approximate amount of remaining battery power with the remaining battery indicator at the upper left on the LCD screen. 15 Index - Sony DCR-SX41/L | Handycam® Handbook - Page 16
turned off. The CHG (charge) lamp flashes during charging under the following conditions: The battery pack is not attached correctly. The battery pack is damaged. In the default setting, the power turns off automatically if you leave your camcorder without any operation for about 5 minutes - Sony DCR-SX41/L | Handycam® Handbook - Page 17
Recording Techniques Step 2: Turning the power on, and setting the date and time 1 Open the LCD screen of your camcorder. Your camcorder is turned on. To turn on your camcorder when the LCD screen is open, press POWER. POWER button (Movie): To record movies (Photo): To record photos 2 Select - Sony DCR-SX41/L | Handycam® Handbook - Page 18
, calibrate the touch panel (p. 96). To turn off the power Close the LCD screen. The off. (Movie) lamp flashes for a few seconds and the power is turned POWER button You can turn off your camcorder also by pressing POWER. When [POWER ON BY LCD] (p. 73) is set to [OFF], turn off your - Sony DCR-SX41/L | Handycam® Handbook - Page 19
arms close to your body. The SteadyShot function is effective against camera-shake, however, it is essential that you not move the camcorder. Zooming smoothly Zoom in and out slowly and smoothly. And, use zooming sparingly. Excessive zooming will make movies that may make the viewer feel tired when - Sony DCR-SX41/L | Handycam® Handbook - Page 20
the settings that were made before Easy Handycam operation.) Recording movies In the default setting, movies are recorded on the internal memory (p. 55). Fasten the grip belt. Open the lens cover. Open the LCD screen of your camcorder. Your camcorder is turned on. To turn on your - Sony DCR-SX41/L | Handycam® Handbook - Page 21
Table of Contents Useful Recording Techniques Press EASY. appears on the LCD screen. Press START/STOP to start recording. START/STOP button [STBY] [REC] To stop recording, press START/STOP again. Tips The [REC MODE] is fixed to [SP] (p. 60). 21 Index - Sony DCR-SX41/L | Handycam® Handbook - Page 22
Table of Contents Useful Recording Techniques Shooting photos Open the lens cover. Open the LCD screen of your camcorder. Your camcorder is turned on. To turn on your camcorder when the LCD screen is already open, press POWER (p. 17). Press EASY. appears on the LCD screen. Press - Sony DCR-SX41/L | Handycam® Handbook - Page 23
it fully. Table of Contents Useful Recording Techniques When Flashes Lights up disappears, the photo is recorded on the internal memory. Playing movies Open the LCD screen of your camcorder. Your camcorder is turned on. To turn on your camcorder when the LCD screen is already open, press - Sony DCR-SX41/L | Handycam® Handbook - Page 24
touch the movie or photo with , you can continue playback from the previous time. ( appears on the photo recorded on "Memory Stick PRO Duo" media.) Your camcorder starts playing the selected movie. Volume adjustment Previous Next To stop To fast-reverse To fast-forward To pause/play Tips - Sony DCR-SX41/L | Handycam® Handbook - Page 25
a desired photo (). Table of Contents Useful Recording Techniques Your camcorder starts playing the selected photo. Previous To the VISUAL INDEX screen recording media on [PHOTO MEDIA SET] (p. 55). To cancel Easy Handycam operation After you finish recording, or close menu setting screen, press - Sony DCR-SX41/L | Handycam® Handbook - Page 26
movies In the default setting, movies are recorded on the internal memory (p. 55). Fasten the grip belt. Open the lens cover. Open the LCD screen of your camcorder. Your camcorder is turned on. To turn on your camcorder when the LCD screen is already open, press POWER (p. 17). 26 - Sony DCR-SX41/L | Handycam® Handbook - Page 27
stops recording. If the access lamp is lit or flashing after recording is finished, it means that data is still being written onto the recording media. Do not apply shock or vibration to your camcorder, and do not remove the battery or AC Adaptor. You can check the recordable time and the - Sony DCR-SX41/L | Handycam® Handbook - Page 28
66). Shooting photos In the default setting, photos are recorded on the internal memory (p. 55). Open the lens cover. Open the LCD screen of your camcorder. Your camcorder is turned on. To turn on your camcorder when the LCD screen is already open, press POWER (p. 17). Press MODE to - Sony DCR-SX41/L | Handycam® Handbook - Page 29
Press PHOTO lightly to adjust the focus, then press it fully. Flashes Lights up When disappears, the photo is recorded. See page 89 on the recordable number of photos. To change the image size, touch (HOME) [ IMAGE SIZE] a desired setting You cannot record photos while is displayed - Sony DCR-SX41/L | Handycam® Handbook - Page 30
recorded. The minimum possible distance between camcorder and subject while maintaining sharp focus is about 1 cm (about 13/32 in.) for wide angle and about 150 cm (about 59 1/8 in.) for telephoto. Tips You can set [DIGITAL ZOOM] (p. 61) if you want to zoom to a greater level. Adjusting the - Sony DCR-SX41/L | Handycam® Handbook - Page 31
Table of Contents Useful Recording Techniques Recording in mirror mode Open the LCD panel 90 degrees to the camcorder , then rotate it 180 degrees to the lens side . Tips A mirror-image of the subject appears on the LCD screen, but the image will be - Sony DCR-SX41/L | Handycam® Handbook - Page 32
In the default setting, movies and photos that are recorded on the internal memory are played (p. 55). Playing movies Open the LCD screen of your camcorder. Your camcorder is turned on. To turn on your camcorder when the LCD screen is already open, press POWER (p. 17). Touch (VIEW IMAGES - Sony DCR-SX41/L | Handycam® Handbook - Page 33
Table of Contents Your camcorder starts playing the selected movie. Previous Volume adjustment To stop To fast-reverse Next OPTION To fast-forward To pause/play Tips When playback from - Sony DCR-SX41/L | Handycam® Handbook - Page 34
Table of Contents Your camcorder displays the selected photo. Previous To the VISUAL INDEX screen To start/stop slide show Next OPTION MENU Tips When viewing photos recorded on "Memory Stick PRO Duo" media, the screen. (playback folder) appears on Useful Recording Techniques Index 34 - Sony DCR-SX41/L | Handycam® Handbook - Page 35
Table of Contents Useful functions for playing movies and photos Searching for desired scene by pinpoint (Film Roll Index) Movies can be divided by a set time and the first scene of each division is displayed on the INDEX screen. You can start playing back a movie from the selected thumbnail. - Sony DCR-SX41/L | Handycam® Handbook - Page 36
wearing glasses or hats, or who do not face towards the camera. Searching for desired images by date (Date Index) You can (p. 55). Notes You cannot use the Date Index function for photos on the "Memory Stick PRO Duo" media. Touch (VIEW IMAGES). The VISUAL INDEX screen appears. - Sony DCR-SX41/L | Handycam® Handbook - Page 37
screen, you can use the Date Index function by following the steps 3 to 4. Using PB zoom with photos You can magnify photos from about 1.1 to 5 times the original size. Magnification can be adjusted with the power zoom lever. Play back the photo you want to magnify. Magnify the photo with - Sony DCR-SX41/L | Handycam® Handbook - Page 38
slide show begins from the selected photo. To stop the slide show Touch . To restart the slide show Touch again. Notes You cannot operate playback zoom during slide show. Tips You can also play back the slide show by touching (OPTION) tab [SLIDE SHOW] on the VISUAL INDEX screen. You - Sony DCR-SX41/L | Handycam® Handbook - Page 39
A/V Remote Connector Set the input selector of the TV to the input your camcorder will be connected to. For details, refer to the instruction manuals supplied with the TV. Connect your camcorder to a TV with the A/V connecting cable (, supplied) or an A/V connecting cable with S VIDEO - Sony DCR-SX41/L | Handycam® Handbook - Page 40
[TV TYPE] [16:9] or [4:3 Notes When you connect your camcorder to a TV compatible with the ID-1/ID-2 system, set [TV TYPE] to [16:9]. The TV switches to full mode automatically. Refer also to the instruction manuals supplied with your TV. Tips To check information (counter, etc.) on - Sony DCR-SX41/L | Handycam® Handbook - Page 41
battery pack or the AC Adaptor from your camcorder while deleting the images. It may damage the recording media. Do not eject "Memory Stick PRO Duo" media while deleting images from the "Memory the media, format the media (p. 58). Reduced-size images which enable you to view many images at the - Sony DCR-SX41/L | Handycam® Handbook - Page 42
Table of Contents Useful Recording Techniques Touch / to select the recording date of the desired movies/photos, then touch . The movies/photos recorded on the selected date are displayed on the screen. Tips Touch the image down on the LCD screen to confirm the image. Touch to return to the - Sony DCR-SX41/L | Handycam® Handbook - Page 43
capturing, touch , then repeat steps from step 3. To capture a photo from another movie, touch , then repeat steps from step 2. 5 Touch . Notes The image size is fixed depending on the aspect ratio of the movie: [ 0.2M] in the aspect ratio 16:9 [VGA(0.3M)] in the aspect ratio 4:3 The - Sony DCR-SX41/L | Handycam® Handbook - Page 44
memory of your camcorder to "Memory Stick PRO Duo" media. Insert "Memory Stick PRO Duo" media into your camcorder before the operation. Notes When you record a movie on the "Memory as the source of dubbing, follow the on-screen instructions to dub the Playlist. Select the movie to be - Sony DCR-SX41/L | Handycam® Handbook - Page 45
back (p. 55). Copying photos You can copy photos from the internal memory of the camcorder to "Memory Stick PRO Duo" media. Insert "Memory Stick PRO Duo" media into your camcorder before the operation. Notes Connect your camcorder to the wall outlet (wall socket) using the supplied AC Adaptor - Sony DCR-SX41/L | Handycam® Handbook - Page 46
step 3. disappears. To protect all the movies and photos recorded on the same day at one time You can protect photos recorded on the internal memory by selecting their recording date. In step 2, touch [ PROTECT] [ PRT. by date]. To protect all photos on the same day at one time, touch - Sony DCR-SX41/L | Handycam® Handbook - Page 47
. 4 Touch [YES] . Notes You cannot restore movies once they are divided. Do not remove the battery pack or the AC Adaptor from your camcorder while dividing the movie. It may damage the recording media. Also, do not eject the "Memory Stick PRO Duo" media while dividing movies on the - Sony DCR-SX41/L | Handycam® Handbook - Page 48
battery pack or the AC Adaptor from your camcorder while adding movies to the Playlist. It may damage the recording media. Also, do not eject the "Memory Stick PRO Duo" media while editing movies on the "Memory as it is, by using the supplied software. Playing the Playlist Select the recording media - Sony DCR-SX41/L | Handycam® Handbook - Page 49
Table of Contents Touch the movie you want to play back. The Playlist is played back from the selected movie to the end, then the screen returns to the Playlist screen. To erase unnecessary movies from the Playlist Touch (HOME) (OTHERS) [PLAYLIST EDIT]. Touch [ ERASE]. To erase all the - Sony DCR-SX41/L | Handycam® Handbook - Page 50
disc. Refer also to the instruction manual supplied with the DVD writer. DVDirect Express is referred to as "DVD writer" in this section. Only unused discs of the following types can be used: 12cm DVD-R 12cm DVD+R The device does not support two-layered discs. Sony DVD writer may not be - Sony DCR-SX41/L | Handycam® Handbook - Page 51
to confirm the image. Touch to return to the previous screen. By touching date, you can search for images by date. Touch [YES] on the camcorder screen. The disc tray on the DVD writer opens after creating the disc. Remove the disc from the DVD writer, and close the disc tray - Sony DCR-SX41/L | Handycam® Handbook - Page 52
of your camcorder with the USB cable (supplied). The [USB SELECT] screen appears on Useful Recording Techniques Tips If the total memory size of the instruction manuals supplied with the device to be connected. Index connecting your camcorder to disc creation devices, such as a Sony DVD - Sony DCR-SX41/L | Handycam® Handbook - Page 53
on a disc or video cassette, by connecting your camcorder to a disc recorder, a Sony DVD writer other than DVDirect Express, etc., with the A/V connecting cable. Connect the device in either way of or . Refer also to the instruction manuals supplied with the devices to be connected. Select the - Sony DCR-SX41/L | Handycam® Handbook - Page 54
instruction manuals supplied with your recording device for details. When dubbing is finished, stop the recording device, and then your camcorder setting To record the date/time or camera settings data, touch (HOME) ( ] [V-OUT/PANEL When the screen size of display devices (TV, etc.) is - Sony DCR-SX41/L | Handycam® Handbook - Page 55
Useful Recording Techniques Utilizing recording media Changing the recording media You can select the internal memory or "Memory Stick PRO Duo" media as the recording, playback, or editing medium on your camcorder. Select the medium to be used for movies and photos separately. In the default - Sony DCR-SX41/L | Handycam® Handbook - Page 56
89 for the recordable time of "Memory Stick PRO Duo" media. "Memory Stick PRO Duo"media/"Memory Stick PRO-HG Duo" media . (This size can be used with your camcorder.) "Memory Stick"media. (You cannot use it in your camcorder.) You cannot use any type of memory card other than those mentioned - Sony DCR-SX41/L | Handycam® Handbook - Page 57
Easy Handycam operation, you cannot check the media information. Cancel Easy Handycam operation. size of the whole internal memory space will be slightly smaller than the size shown below despite displaying both free and used internal memory space. DCR-SX40: 4,000 MB DCR-SX41: 8,000 MB DCR-SX60 - Sony DCR-SX41/L | Handycam® Handbook - Page 58
loss of important images, you should save them (p. 50, see Operating Guide too) before formatting the recording media. Protected movies and photos the camcorder, disconnect the AC Adaptor, or eject the "Memory Stick PRO Duo" media from your camcorder (The access lamp is lit or flashing while - Sony DCR-SX41/L | Handycam® Handbook - Page 59
for [ EMPTY] is as follows: DCR-SX40: about 1 minute DCR-SX41: about 1 minute DCR-SX60: about 2 minutes If you stop performing [ EMPTY] while [Executing...] appears, be sure to complete the operation by performing [MEDIA FORMAT] or [ EMPTY] when you use the camcorder next time. Index 59 - Sony DCR-SX41/L | Handycam® Handbook - Page 60
Table of Contents Customizing your camcorder MOVIE SETTINGS (Items for recording movies) The default settings are marked select the horizontal to vertical ratio according to the TV connected. Refer also to the instruction manuals supplied with your TV. Steps (HOME) (SETTINGS) [MOVIE SETTINGS] - Sony DCR-SX41/L | Handycam® Handbook - Page 61
to 60 × zoom is performed optically. Up to 60 × zoom is performed optically, and after that, up to 120 × zoom is performed digitally. Up to 60 × zoom is performed optically, and after that, up to 2000 × zoom is performed digitally. STEADYSHOT You can compensate for camera shake. Set [ STEADYSHOT - Sony DCR-SX41/L | Handycam® Handbook - Page 62
Does not display the guide frame. ON Displays the guide frame. Tips Positioning the subject at the cross point of the guide frame makes a balanced in situations such as those described below. When your camcorder recognizes the remaining recording media capacity while the (Movie) - Sony DCR-SX41/L | Handycam® Handbook - Page 63
the Face Index screen (p. 35). Face icons and their meanings : This icon appears when the setting is [ON]. : This icon flashes when your camcorder detects a face. The icon stops flashing when the face is recorded in Face Index. : This icon appears when faces cannot be recorded in Face Index. Does - Sony DCR-SX41/L | Handycam® Handbook - Page 64
640 × 480). Allows the maximum number of photos to be recorded (640 × 360). The image size is set to [ 0.2M] automatically in the 16:9 (wide) aspect ratio. Notes becomes larger each time you record a photo. Even if the "Memory Stick PRO Duo" media is replaced with another one, the file number - Sony DCR-SX41/L | Handycam® Handbook - Page 65
Steps (HOME) (SETTINGS) [PHOTO SETTINGS] [GUIDEFRAME] a desired setting OFF Does not display the guide frame. ON Displays the guide frame. Tips Positioning the subject at the cross point of the guide frame makes a balanced composition. Useful Recording Techniques Index 65 - Sony DCR-SX41/L | Handycam® Handbook - Page 66
default settings are marked with . DATA CODE During playback, your camcorder displays the information (data code) recorded automatically at the time of /TIME CAMERA DATA Data code is not displayed. Displays the date and time. Displays camera setting data. DATE/TIME Date Time CAMERA DATA - Sony DCR-SX41/L | Handycam® Handbook - Page 67
Table of Contents Useful Recording Techniques Tips The data code is displayed on the TV screen if you connect your camcorder to a TV. Depending on the recording media condition, bars [--:--:--] appear. 67 Index - Sony DCR-SX41/L | Handycam® Handbook - Page 68
SOUND/DISP SET] [LCD BL LEVEL] a desired setting NORMAL BRIGHT Standard brightness. Brightens the LCD screen. Notes When you connect your camcorder to the wall outlet (wall socket) using the supplied AC Adaptor, [BRIGHT] is automatically selected for the setting. When you select - Sony DCR-SX41/L | Handycam® Handbook - Page 69
Table of Contents If you open the LCD panel 180 degrees to face the screen outside and close the LCD panel to the camcorder body, the setting becomes [NORMAL] automatically. Tips This adjustment does not affect the recorded images in any way. LCD COLOR You can adjust the color - Sony DCR-SX41/L | Handycam® Handbook - Page 70
Table of Contents OUTPUT SETTINGS (Items for when connected to a TV) The default settings are marked with . TV TYPE See page 40. DISP OUTPUT (Display output) You can set where the screen displays are to be output. Steps (HOME) (SETTINGS) [OUTPUT SETTINGS] [DISP OUTPUT] a desired - Sony DCR-SX41/L | Handycam® Handbook - Page 71
marked with . CLOCK SET See page 17. AREA SET You can adjust a time difference without stopping the clock. Set your local area when using your camcorder in other time zones. Refer to the world time difference on page 91. Steps (HOME) (SETTINGS) [CLOCK/ LANG] [AREA SET] set your local area - Sony DCR-SX41/L | Handycam® Handbook - Page 72
Table of Contents Useful Recording Techniques GENERAL SET (Other setup items) The default settings are marked with . DEMO MODE When your camcorder is connected to a wall outlet (wall socket), a demonstration movie appear about 10 minutes after you turn on the (Movie) lamp by pressing MODE. - Sony DCR-SX41/L | Handycam® Handbook - Page 73
the LCD screen. Steps (HOME) (SETTINGS) [GENERAL SET] [POWER ON BY LCD] a desired setting ON OFF The camcorder turns on and off when the LCD screen opens and closes. The camcorder does not turn on and off when the LCD screen opens and closes. Useful Recording Techniques Index - Sony DCR-SX41/L | Handycam® Handbook - Page 74
the brightness and focus on [END] To adjust the brightness and focus automatically, touch [AUTO]. Notes [EXPOSURE] and [FOCUS] are automatically set to [MANUAL]. SPOT METER (Flexible spot meter) You can adjust and fix the exposure to the subject, so that it is recorded in suitable brightness - Sony DCR-SX41/L | Handycam® Handbook - Page 75
) The zoom (p. 30) moves to the top of the T (telephoto) side automatically and allows recording subjects at a close distance down to about 50 cm (19 3/4 in.). Notes When recording a distant subject, focusing may be difficult and can take some time. Adjust the focus manually ([FOCUS], p. 76 - Sony DCR-SX41/L | Handycam® Handbook - Page 76
Notes When you set [FOCUS] to [MANUAL], appears. The minimum possible distance between camcorder and subject while maintaining sharp focus is about zoom lever to W (wide angle), then adjust the focus. The focal distance information (distance at which the subject is focused on; used as a guide - Sony DCR-SX41/L | Handycam® Handbook - Page 77
shots of fireworks. LANDSCAPE*( ) PORTRAIT (Soft portrait) ( ) Shoots distant subjects clearly. This setting also prevents your camcorder from focusing on glass or metal mesh in windows between the camcorder and the subject. Brings out the subject such as people or flowers while creating a soft - Sony DCR-SX41/L | Handycam® Handbook - Page 78
set. When [ONE PUSH] was selected, if keeps flashing after touching , set [WHITE BAL.] to [AUTO]. If you set [WHITE BAL.], [SCENE SELECTION] is set to [AUTO]. Tips If you have changed the battery pack while [AUTO] was selected, or taken your camcorder outdoors after inside use (or vice versa - Sony DCR-SX41/L | Handycam® Handbook - Page 79
with [ONE PUSH], if the lighting conditions changed by bringing your camcorder outdoors from inside the house, or vice versa, you need to ZOOM MIC (Built-in zoom microphone) You can record a movie with directional sound as you zoom in or out. Steps In recording mode, (OPTION) [BLT-IN ZOOM - Sony DCR-SX41/L | Handycam® Handbook - Page 80
OPTION) [MICREF LEVEL] a desired setting NORMAL LOW ( ) Records various ambient sounds, converting them into the appropriate level. Records ambient sound faithfully. Select [LOW] when you want to record an exciting and powerful sound in a - Sony DCR-SX41/L | Handycam® Handbook - Page 81
into any problems using your camcorder, use the following list to troubleshoot the problem. If the problem persists, disconnect the power source and contact your Sony dealer. Overall operations/Easy Handycam operation p. 81 Batteries/power sources p. 82 LCD screen p. 82 "Memory Stick PRO - Sony DCR-SX41/L | Handycam® Handbook - Page 82
15). The CHG (charge) lamp flashes while the battery pack is being charged. Attach the battery pack to the camcorder correctly (p. 15). If the problem persists, disconnect the AC Adaptor from the wall outlet (wall socket) and contact your Sony dealer. The battery pack may be damaged. The remaining - Sony DCR-SX41/L | Handycam® Handbook - Page 83
The data file name is not indicated correctly or flashes. The file is damaged. The file format is not supported by your camcorder (p. 94). Recording the point that the recording movie is started or stopped actually. On your camcorder, there may be a slight time difference between the point - Sony DCR-SX41/L | Handycam® Handbook - Page 84
) when playing back on 2ch stereo devices. Refer to the instruction manual supplied with your playback device for details. Change the sound to 2ch when creating a disc using the supplied software "PMB." Playing back images stored on "Memory Stick PRO Duo" media on other devices Images cannot be - Sony DCR-SX41/L | Handycam® Handbook - Page 85
. Contact your Sony dealer or local authorized Sony service facility. Inform them of the 5-digit code, which starts from "E." 101-0001 (Warning indicator pertaining to files) Slow flashing The file is damaged. The file is unreadable. (Battery level warning) Slow flashing The battery pack is - Sony DCR-SX41/L | Handycam® Handbook - Page 86
flashing There are not enough free space for recording images. After storing the images on other media (p. 50, see Operating Guide too), delete unnecessary images, or format the "Memory the instructions. Recording media Internal memory format error. The internal memory of the camcorder is set - Sony DCR-SX41/L | Handycam® Handbook - Page 87
able to record or play images correctly. Use "Memory Stick" media recommended for your camcorder (p. 55). Do not eject the Memory Stick during writing. Data may be damaged. Reinsert the "Memory Stick PRO Duo" media, and follow the instructions on the LCD screen. Deleting images Protecting - Sony DCR-SX41/L | Handycam® Handbook - Page 88
shorter when you use your camcorder in low temperatures. The recording and playback time will be shorter depending on the conditions under which you use your camcorder. Playing time Approximate time available when you use a fully charged battery pack. Internal memory/"Memory Stick PRO Duo"media - Sony DCR-SX41/L | Handycam® Handbook - Page 89
8GB 16GB 2800 5700 11500 23000 47000 94000 The number of recordable photos shown is for the maximum image size of your camcorder. The actual number of recordable photos is displayed on the LCD screen during recording (p. 8). Notes Numbers in the table are based on using Sony "Memory Stick - Sony DCR-SX41/L | Handycam® Handbook - Page 90
50 Hz/60 Hz range. On TV color systems Your camcorder is an NTSC-system-based camcorder. If you want to view the playback image on a Canada, Central America, Chile, Colombia, Ecuador, Guyana, Jamaica, Japan, Korea, Mexico, Peru, Surinam, Taiwan, the Philippines, the USA, Venezuela, etc. Australia - Sony DCR-SX41/L | Handycam® Handbook - Page 91
Setting to the local time You can easily set the clock to the local time by setting a time difference when using your camcorder abroad. Touch (HOME) (SETTINGS) [CLOCK/ LANG] [AREA SET] and [DST SET] or [SUMMERTIME] (p. 71). World time difference Table of Contents Useful Recording Techniques - Sony DCR-SX41/L | Handycam® Handbook - Page 92
camcorder. To enjoy movies or photos by connecting your camcorder to a computer, see "PMB Guide" then use the supplied application. Table of Contents Useful Recording Techniques * Only for the internal memory supplied software "PMB." Do not modify the files or folders on the camcorder through the - Sony DCR-SX41/L | Handycam® Handbook - Page 93
operation of all types of "Memory Stick Duo" media on your camcorder. Types of"Memory Stick"media Recording/Playback "Memory Stick Duo" - media (with MagicGate) "Memory Stick PRO Duo" media "Memory Stick PRO-HG * Duo" media * This product does not support 8-bit parallel data transfer - Sony DCR-SX41/L | Handycam® Handbook - Page 94
PRO Duo" media that can be used with your camcorder is 16 GB. Notes on using "Memory Stick Micro" media To use "Memory Stick Micro" media with your camcorder, you need a Duo-sized M2 Adaptor. Insert the "Memory Stick Micro" media into the Duo-sized M2 Adaptor, and then insert the adaptor into the - Sony DCR-SX41/L | Handycam® Handbook - Page 95
to direct sunlight. This damages the LCD screen. Operate your camcorder on DC 6.8 V/7.2 V (battery pack) or DC 8.4 V (AC Adaptor). For DC or AC operation, use the accessories recommended in these operating instructions. Do not let your camcorder get wet, for example, from rain or sea water. If - Sony DCR-SX41/L | Handycam® Handbook - Page 96
battery electrolytic liquid has leaked: Consult your local authorized Sony service facility. Wash off any liquid that may have contacted your skin. If any liquid gets in your eyes, wash with plenty of water and consult a doctor. When not using your camcorder the corner of "Memory Stick PRO Duo" - Sony DCR-SX41/L | Handycam® Handbook - Page 97
pre-installed rechargeable battery Connect your camcorder to a camcorder or a computer, you may not delete data from the "Memory Stick PRO Duo" media completely. When you give the "Memory Stick PRO Duo" media to somebody, it is recommended that you delete date completely using data deletion software - Sony DCR-SX41/L | Handycam® Handbook - Page 98
and redistribute source code for these software programs under the conditions of the supplied GPL/LGPL. Source code is provided on the web. Use the following URL to download it. When downloading the source code, select DCR-SR87 as the model for your camcorder. http://www.sony.net/Products/Linux/ We - Sony DCR-SX41/L | Handycam® Handbook - Page 99
DIGITAL ZOOM 61 DISC BURN 11 Disc recorder 53 DISP OUTPUT 70 DIVIDE 47 DST SET 71 Dubbing 44 DVDirect Express 50 DVD writer 52 E Easy Handycam ID-1/ID-2 40 Image management file 92 IMAGE SIZE 64 INDOOR 78 "InfoLITHIUM" battery pack 94 Internal memory 92 J JPEG 92 L LANDSCAPE 77 99 - Sony DCR-SX41/L | Handycam® Handbook - Page 100
Useful Recording Techniques Playlist 48 PMB Guide 2 PORTRAIT 77 Power on 17 &SUNSET 77 Supplied items 13 T TELE MACRO 75 Telephoto 30 Thumbnail 41 Tripod 7 Troubleshooting 81 TV 39 TV color systems 90 TV TYPE 70 TWILIGHT 77 U USB cable WIDE SELECT 60 Z Zoom 30, 37 Index 100 - Sony DCR-SX41/L | Handycam® Handbook - Page 101
Table of Contents Useful Recording Techniques Index Additional information on this product and answers to frequently asked questions can be found at our Customer Support Website. http://www.sony.net/ 101
-
 1
1 -
 2
2 -
 3
3 -
 4
4 -
 5
5 -
 6
6 -
 7
7 -
8
-
9
-
10
-
11
-
12
-
13
-
14
-
15
-
16
-
17
-
18
-
19
-
20
-
21
-
22
-
23
-
24
-
25
-
26
-
27
-
28
-
29
-
30
-
31
-
32
-
33
-
34
-
35
-
36
-
37
-
38
-
39
-
40
-
41
-
42
-
43
-
44
-
45
-
46
-
47
-
48
-
49
-
50
-
51
-
52
-
53
-
54
-
55
-
56
-
57
-
58
-
59
-
60
-
61
-
62
-
63
-
64
-
65
-
66
-
67
-
68
-
69
-
70
-
71
-
72
-
73
-
74
-
75
-
76
-
77
-
78
-
79
-
80
-
81
-
82
-
83
-
84
-
85
-
86
-
87
-
88
-
89
-
90
-
91
-
92
-
93
-
94
-
95
-
96
-
97
-
98
-
99
-
100
-
101
 |
 |

Table of Contents
Useful Recording Techniques
Index
Click
Handycam Handbook
DCR-SX40/SX41/SX60
2009 Sony Corporation
4-132-760-
11
(1)
US