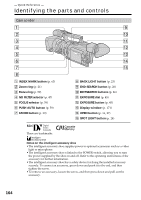
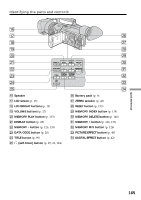
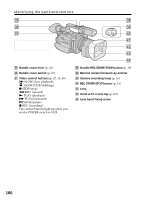
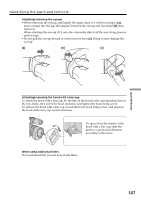
Sony DCR VX2100 Operating Instructions - Page 167
Attaching/removing the hood with a lens cap, When using additional filters - hood with lens cap
 |
UPC - 027242639812
View all Sony DCR VX2100 manuals
Add to My Manuals
Save this manual to your list of manuals |
Page 167 highlights
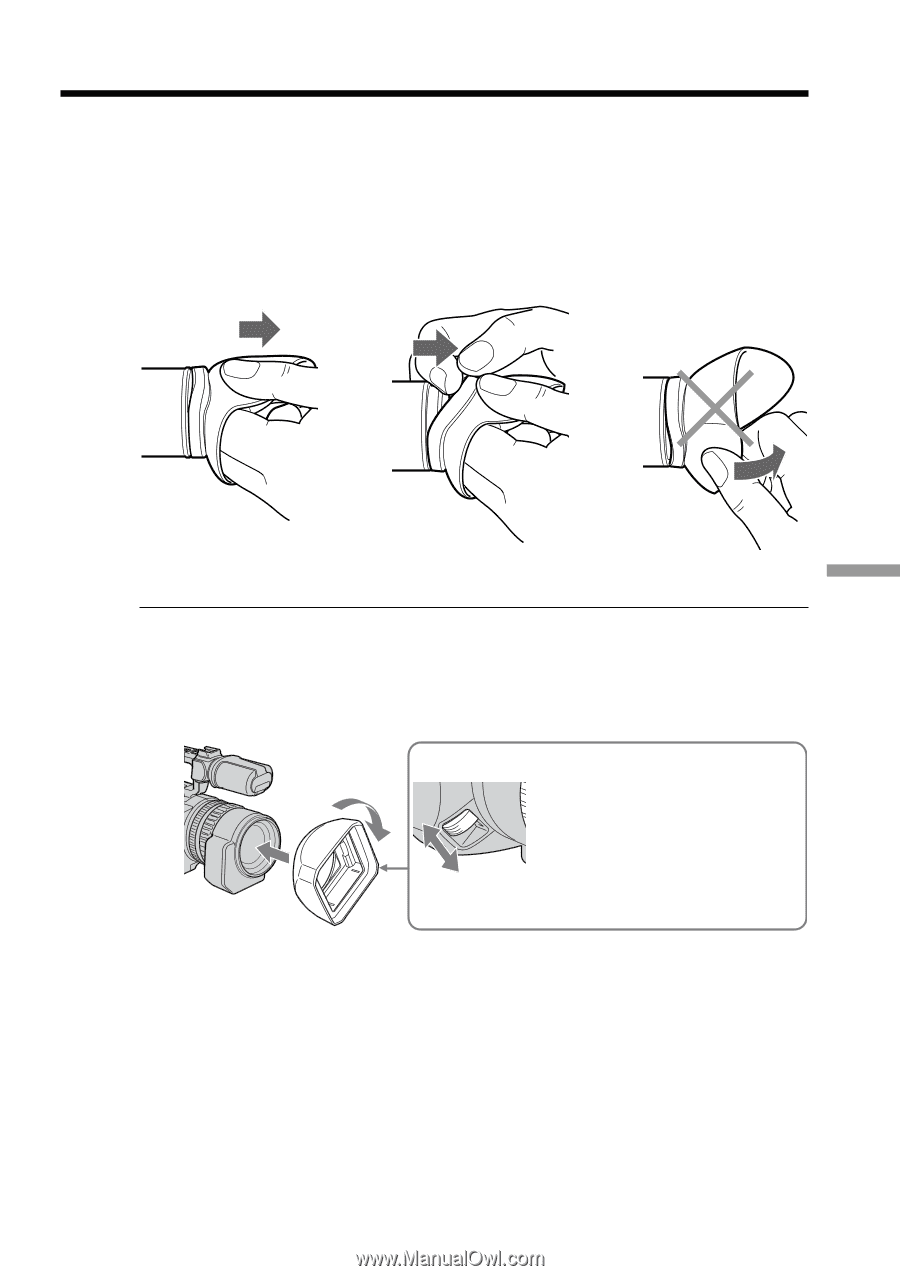
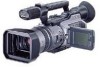
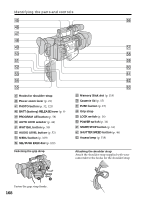
Identifying the parts and controls Attaching/removing the eyecup •When removing the eyecup, pull lightly the upper edge of it with your fingers [a], insert a finger into the gap that appears between the eyecup and viewfnder [b], then remove it. When attaching the eyecup, fit it onto the camcorder slide it all the way along grooves until it stops. •Do not pull the eyecup inward or with excessive force [c]. Doing so may damage the eyecup. [a] [b] [c] Quick Reference Attaching/removing the hood with a lens cap To attach the hood with a lens cap, fit the line on the hood to the corresponding line on the lens frame, then screw the hood clockwise and tighten the hood fixing screw. To remove the hood with a lens cap, loosen the lower hood fixing screw, and unscrew the hood with a lens cap counterclockwise. OPEN CLOSE To open/close the shutter of the hood with a lens cap, slide the knob to your desired direction according to the arrow. When using additional filters We recommend that you use Sony made filters. 167
-
 1
1 -
2
-
3
-
4
-
5
-
6
-
7
-
8
-
9
-
10
-
11
-
12
-
13
-
14
-
15
-
16
-
17
-
18
-
19
-
20
-
21
-
22
-
23
-
24
-
25
-
26
-
27
-
28
-
29
-
30
-
31
-
32
-
33
-
34
-
35
-
36
-
37
-
38
-
39
-
40
-
41
-
42
-
43
-
44
-
45
-
46
-
47
-
48
-
49
-
50
-
51
-
52
-
53
-
54
-
55
-
56
-
57
-
58
-
59
-
60
-
61
-
62
-
63
-
64
-
65
-
66
-
67
-
68
-
69
-
70
-
71
-
72
-
73
-
74
-
75
-
76
-
77
-
78
-
79
-
80
-
81
-
82
-
83
-
84
-
85
-
86
-
87
-
88
-
89
-
90
-
91
-
92
-
93
-
94
-
95
-
96
-
97
-
98
-
99
-
100
-
101
-
102
-
103
-
104
-
105
-
106
-
107
-
108
-
109
-
110
-
111
-
112
-
113
-
114
-
115
-
116
-
117
-
118
-
119
-
120
-
121
-
122
-
123
-
124
-
125
-
126
-
127
-
128
-
129
-
130
-
131
-
132
-
133
-
134
-
135
-
136
-
137
-
138
-
139
-
140
-
141
-
142
-
143
-
144
-
145
-
146
-
147
-
148
-
149
-
150
-
151
-
152
-
153
-
154
-
155
-
156
-
157
-
158
-
159
-
160
-
161
-
 162
162 -
 163
163 -
 164
164 -
 165
165 -
 166
166 -
 167
167 -
 168
168 -
 169
169 -
 170
170 -
 171
171 -
 172
172 -
173
-
174
-
175
-
176
 |
 |