Sony DRN-XM01C Operating Instructions - Page 2
Using the JOG Roller MENU - remote commander
 |
UPC - 027242609839
View all Sony DRN-XM01C manuals
Add to My Manuals
Save this manual to your list of manuals |
Page 2 highlights
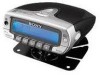
Parts and Identifications Main unit JOG roller (MENU/ENTER) Cradle release button Display window Preset buttons (1-5)* POWER* Cradle release button DSPL/BACK MEMO Remote sensor * The POWER and preset button No. 3 have a tactile dot. Remote commander * MEMO POWER * BACK DSPL ENTER MENU 1 2 3 4 5 Preset buttons * The X and POWER button have a tactile dot. Using the JOG Roller (MENU/ ENTER) Turn up or down to select channels, select the menu items and settings, or scroll the stored text information in the menu operation. Press to display the menu display, or execute the items or settings in the menu operation. Displaying the Radio ID The receiver has its own ID, and an ID number is required when registering in XM. 1 Press POWER to turn on the main unit. 2 Turn JOG roller (or press X ⁄ x on the remote) to select " XM CH0 RADIO ID". The radio ID appears. XM CHO RADIO ID XXXXXXXX Radio ID Note The Radio ID can be displayed only in Channel Scroll mode. See "Playing the Receiver". Adjusting the Time Difference This unit displays the current time by correcting the time difference between the local time and UTC (coordinated universal time) data being transmitted. Set the "hour" of your local time in the menu display. The factory-set is the eastern standard time. If the current UTC data is not received appears in the display. 1 Press POWER to turn on the main unit. 2 Press JOG roller (or MENU on the remote) to show the menu display. The first menu item appears. MENU SCROLL MODE Menu icon Menu item 3 Turn JOG roller (or press X ⁄ x on the remote) to select "TIME ADJUST" and press JOG roller (or ENTER on the remote). The "hour" flashes. MENU TIME ADJUST 11:12AM 12:00 AM = midnight 12:00 PM = noon 4 Turn JOG roller (or press X ⁄ x on the remote) to adjust the hour and press JOG roller (or ENTER on the remote). The display returns to the tuned channel display. Note This unit does not have the Daylight Saving Time (summer time) function. To check the current time while listening to a broadcast Press DSPL/BACK (or DSPL on the remote) until the " INFO " and " TIME " display appears. See "Checking the Tuned Channel Information". To cancel a selection Press DSPL/BACK (or BACK on the remote) to return to the previous display during menu operation. Press MENU on the remote commander to exit the menu display. The display returns to the tuned channel display. Playing the Receiver Notes • Turn down the volume of the component connected to the unit before playing the unit. • Adjust the volume of the component connected to the unit. • If sound distortion occurs when playing the unit with the cassette adaptor, adjust the Line Out Level. See "Using Other Functions". Manual Tuning 1 Make settings on your car audio or amplifier, etc. so that you can listen to the sound from this unit. 2 Press POWER to turn on the main unit. The channel that you last tuned in to is displayed. XM CH13 CHAN TOP 20 Channel Number Channel Name 3 Turn JOG roller (or press X ⁄ x on the remote) to select desired channel. • Holding down X ⁄ x makes the channel readout to rapidly increase or decrease respectively. • This unit has two scroll modes: Channel Scroll and Category Scroll. See "Using the Category Scrolls". Channel Scroll: searches for a channel by scrolling every single channel among authorized channels. Category Scroll: searches for a channel using the Channel Category you selected in the menu display. To turn off the receiver Press POWER. Using the Category Scrolls In Category Scroll mode, you can search for a channel among authorized channels that have the corresponding Channel Category you selected in the menu display. 1 Press JOG roller (or MENU on the remote) to show the menu display. "SCROLL MODE" appears in the display. 2 Press JOG roller (or MENU on the remote). The current scroll mode appears in the display. MENU SCROLL MODE CHANNEL SCROLL 3 Turn JOG roller (or press X ⁄ x on the remote) to select "CATEGORY SCROLL" and press JOG roller (or ENTER on the remote). The selected Channel Category appears in the display. MENU CATEGORY SCROLL NEWS 4 Turn JOG roller (or press X ⁄ x on the remote) to select the desired Channel Category and press JOG roller (or ENTER on the remote). The unit searches for a channel that has the selected Channel Category from the Channel Number next to the current channel. The CATEGORY indicator appears in the upper left corner of the display. To cancel a selection Press DSPL/BACK (or BACK on the remote) to return to the previous display during menu operation. Press MENU on the remote commander to exit the menu display. The display returns to the tuned channel display. Tips • When you tune in to a channel in Category Scroll mode, the Channel Category appears for about 2 seconds in the display. XM CH50 CAT News Channel Category • When there is no channel that has the specified Channel Category is displayed. Note When the Category list cannot be received depending on the receiving condition is displayed in step 3 above, and you cannot select the Channel Category. Presetting your Favorite Channels Preset Tuning You can preset up to 5 channels onto the preset buttons (1-5). To access the preset channels, simply press the corresponding preset buttons (1-5). All the preset buttons are preset to Channel Number 1 at the factory. Presetting a channel 1 Follow steps 1 to 3 in "Playing the Receiver", and manually tune in to the channel you wish to preset. 2 Hold down the preset button on the unit for more than 2 seconds. The preset number appears. XM CH50 PRESET1 CHAN Financial News Preset number The previous preset channel is deleted and the unit presets the channel being received. Note You cannot preset channels using the remote. Tuning in to a preset channel 1 Press POWER to turn on the main unit. 2 Press the desired preset button (1-5). Checking the Tuned Channel Information This unit has three display modes in the tuned channel display. 1 Press DSPL/BACK (or DSPL on the remote). The display mode changes as follows: XM CH13 CHAN TOP 20 Channel Number Channel Name NAME Maria TITLEChristmas Song Artist Name/Feature Song/Program Title INFO Concert starts TIME 11:00AM 12/24/01 Additional Information Current time and date Tips • When the Additional Information text has more than 16 characters, text will be scrolled every 2 seconds. After all Additional Information is displayed appears for about 2 seconds and then repeats displaying from the beginning. • As the unit memorizes the display mode when the power is turned off, the display appears in the last display mode when you turn on the unit. Note If the channel has no text information will appear in the display. Storing the Information You can store the text information contained in the tuned-in channel. This unit can store ten sets of the following information: - Channel Number - Channel Name - Artist Name or Feature - Song or Program Title - Additional Information and time/date Note When you store the eleventh set of information, the oldest one will be deleted. 1 Press MEMO when the channel you wish to store the information is received. "MEMORIZED" appears for about 2 seconds and the information is stored in "MEMO 1". The memory numbers of already stored information increases by one. MEMORIZED Viewing the stored information 1 Press JOG roller (or MENU on the remote) to show the menu display. 2 Turn JOG roller (or press X ⁄ x on the remote) to select "MEMO" and press JOG roller (or ENTER on the remote). MENU MEMO MEMO 1 Memory number If no information is stored, "NO MEMO" will appear. 3 Turn JOG roller (or press X ⁄ x on the remote) to select the desired memory number and press JOG roller (or ENTER on the remote). 4 Turn JOG roller (or press X ⁄ x on the remote) to scroll the stored text information. The information appears in the following order: Artist Name/Feature t Song/Program Title t Additional Information t Channel Number t Channel Name t Time and date. To return to the display for selecting the memory number Press DSPL/BACK (or BACK on the remote). To exit the menu display Press MENU on the remote commander. The display returns to the tuned channel display. Using other Functions You can also use the following functions in the menu display. Menu Scroll mode Memo Back Light Beep Time Adjust Contrast Auto Power Down Line Out Level See "Using the Category Scroll" "Storing the Information" below below "Adjusting the Time Difference" below below below To cancel a selection Press DSPL/BACK (or BACK on the remote) to return to the previous display. Press MENU on the remote commander to exit the menu display. Note When no operation is performed for about 1 minute in the menu display, the unit cancels a selection and the display returns to the tuned channel display. Back Light You can select the lighting level of the display window. The factory-set is "BRIGHT". 1 Press JOG roller (or MENU on the remote) to show the menu display. 2 Turn JOG roller (or press X ⁄ x on the remote) to select "BACK LIGHT" and press JOG roller (or ENTER on the remote). The current setting appears in the display. MENU BACK LIGHT BRIGHT 3 Turn JOG roller (or press X ⁄ x on the remote) to select the desired setting and press JOG roller (or ENTER on the remote). BRIGHT: makes the display window bright. DIM: makes the display window dim. OFF: turns off the lighting of the display window. Beep You can turn the beep on or off. The factory-set is "ON". 1 Press JOG roller (or MENU on the remote) to show the menu display. 2 Turn JOG roller (or press X ⁄ x on the remote) to select "BEEP" and press JOG roller (or ENTER on the remote). The current setting appears in the display. MENU BEEP ON 3 Turn JOG roller (or press X ⁄ x on the remote) to select "ON" or "OFF" and press JOG roller (or ENTER on the remote). Contrast You can adjust the contrast of the display window in 8 levels. The factoryset is level 4. 1 Press JOG roller (or MENU on the remote) to show the menu display. 2 Turn JOG roller (or press X ⁄ x on the remote) to select "CONTRAST" and press JOG roller (or ENTER on the remote). The current setting appears in the display. MENU CONTRAST L H 3 Turn JOG roller (or press X ⁄ x on the remote) to adjust contrast while checking the display and press JOG roller (or ENTER on the remote). Auto Power Down Auto Power Down function automatically turns off the unit when the specified time passes from the last button operation. The factory-set is "60 min". 1 Press JOG roller (or MENU on the remote) to show the menu display. 2 Turn JOG roller (or press X ⁄ x on the remote) to select "AUTO POWER DOWN" and press JOG roller (or ENTER on the remote). The current setting appears in the display. MENU AUTO POWER DOWN 60min 3 Turn JOG roller (or press X ⁄ x on the remote) to select setting and press JOG roller (or ENTER on the remote). The setting changes as follows: OFF 60 min 120 min 180 min When you select a setting other than "OFF", the Auto Power Down indicator appears in the lower left corner of the display. To disable the Auto Power Down function, select "OFF." When the specified time passes, the following messages appear in the display. POWERING DOWN 2 seconds NO POWER DOWN? PRESS ANY KEY When no button is pressed, the unit turns off the power. If you press any button, the timer duration will begin from the start. Line Out Level You can adjust the output level of the signal from the LINE OUT jack in 8 levels. The factory-set is level 8 (Maximum.). Standard level adjustment • When the car connecting pack is connected to the LINE OUT jack of the unit and using it in a car, turn down the Line Out Level to avoid sound distortion. • When the car connecting pack is not connected to the LINE OUT jack, set the Line Out Level to the maximum level. 1 Press JOG roller (or MENU on the remote) to show the menu display. 2 Turn JOG roller (or press X ⁄ x on the remote) to select "LINE OUT LEVEL" and press JOG roller (or ENTER on the remote). The current setting appears in the display. MENU LINE OUT LEVEL 3 Turn JOG roller (or press X ⁄ x on the remote) to adjust the Line Out Level while listening to the radio and press JOG roller (or ENTER on the remote).
-
 1
1 -
 2
2
 |
 |
