Sony DSC-RX100M2 Cyber-shot® User Guide (Printable PDF) - Page 112
DRO/Auto HDR, D-Range Optimizer, Auto HDR
 |
View all Sony DSC-RX100M2 manuals
Add to My Manuals
Save this manual to your list of manuals |
Page 112 highlights
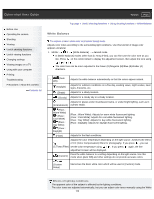
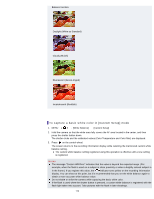
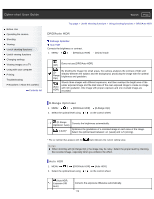
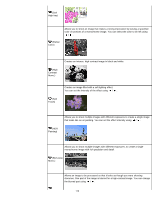
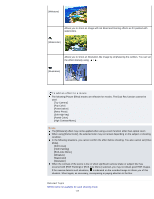
Cyber-shot User Guide Search Print Before Use Operating the camera Shooting Viewing Useful shooting functions Useful viewing functions Changing settings Viewing images on a TV Using with your computer Printing Troubleshooting Precautions / About this camera Contents list Top page > Useful shooting functions > Using shooting functions > DRO/Auto HDR DRO/Auto HDR D-Range Optimizer Auto HDR Corrects the brightness or contrast. 1. MENU 3 [DRO/Auto HDR] desired mode Does not use [DRO/Auto HDR]. (Off) By dividing the image into small areas, the camera analyzes the contrast of light and (D- shadow between the subject and the background, producing the image with the optimal Range brightness and gradation. Opt.) (Auto HDR) Shoots three images with different exposures, and then overlays the bright area of the under exposed image and the dark area of the over exposed image to create an image with rich gradation. One image with proper exposure and one overlaid image are recorded. D-Range Optimizer 1. MENU 3 [DRO/Auto HDR] [D-Range Opt.] 2. Select the optimal level using / on the control wheel. (D-Range Corrects the brightness automatically. Optimizer: Auto) (Level)* Optimizes the gradations of a recorded image in each area of the image. Select the optimal level between Lv1 (weak) and Lv5 (strong). * The Lv number that appears with the mark indicates the current setting value. Notes When shooting with [D-Range Opt.], the image may be noisy. Select the proper level by checking the recorded image, especially when you enhance the effect. Auto HDR 1. MENU 3 [DRO/Auto HDR] [Auto HDR] 2. Select the optimal level using / on the control wheel. (Auto HDR: Exposure Diff. Auto) Corrects the exposure difference automatically. 112
-
 1
1 -
2
-
3
-
4
-
5
-
6
-
7
-
8
-
9
-
10
-
11
-
12
-
13
-
14
-
15
-
16
-
17
-
18
-
19
-
20
-
21
-
22
-
23
-
24
-
25
-
26
-
27
-
28
-
29
-
30
-
31
-
32
-
33
-
34
-
35
-
36
-
37
-
38
-
39
-
40
-
41
-
42
-
43
-
44
-
45
-
46
-
47
-
48
-
49
-
50
-
51
-
52
-
53
-
54
-
55
-
56
-
57
-
58
-
59
-
60
-
61
-
62
-
63
-
64
-
65
-
66
-
67
-
68
-
69
-
70
-
71
-
72
-
73
-
74
-
75
-
76
-
77
-
78
-
79
-
80
-
81
-
82
-
83
-
84
-
85
-
86
-
87
-
88
-
89
-
90
-
91
-
92
-
93
-
94
-
95
-
96
-
97
-
98
-
99
-
100
-
101
-
102
-
103
-
104
-
105
-
106
-
 107
107 -
 108
108 -
 109
109 -
 110
110 -
 111
111 -
 112
112 -
 113
113 -
 114
114 -
 115
115 -
 116
116 -
 117
117 -
118
-
119
-
120
-
121
-
122
-
123
-
124
-
125
-
126
-
127
-
128
-
129
-
130
-
131
-
132
-
133
-
134
-
135
-
136
-
137
-
138
-
139
-
140
-
141
-
142
-
143
-
144
-
145
-
146
-
147
-
148
-
149
-
150
-
151
-
152
-
153
-
154
-
155
-
156
-
157
-
158
-
159
-
160
-
161
-
162
-
163
-
164
-
165
-
166
-
167
-
168
-
169
-
170
-
171
-
172
-
173
-
174
-
175
-
176
-
177
-
178
-
179
-
180
-
181
-
182
-
183
-
184
-
185
-
186
-
187
-
188
-
189
-
190
-
191
-
192
-
193
-
194
-
195
-
196
-
197
-
198
-
199
-
200
-
201
-
202
-
203
-
204
-
205
-
206
-
207
-
208
-
209
-
210
-
211
-
212
-
213
-
214
-
215
-
216
-
217
-
218
-
219
-
220
-
221
-
222
-
223
-
224
-
225
-
226
-
227
-
228
-
229
-
230
-
231
-
232
-
233
-
234
-
235
-
236
-
237
-
238
-
239
-
240
-
241
-
242
-
243
-
244
-
245
-
246
-
247
-
248
-
249
-
250
-
251
-
252
-
253
-
254
-
255
-
256
-
257
-
258
-
259
-
260
-
261
-
262
-
263
-
264
-
265
-
266
-
267
 |
 |