Sony HDR TG1 Operating Guide
Sony HDR TG1 - Handycam Camcorder - 1080i Manual
 |
UPC - 027242729810
View all Sony HDR TG1 manuals
Add to My Manuals
Save this manual to your list of manuals |
Sony HDR TG1 manual content summary:
- Sony HDR TG1 | Operating Guide - Page 1
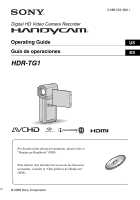
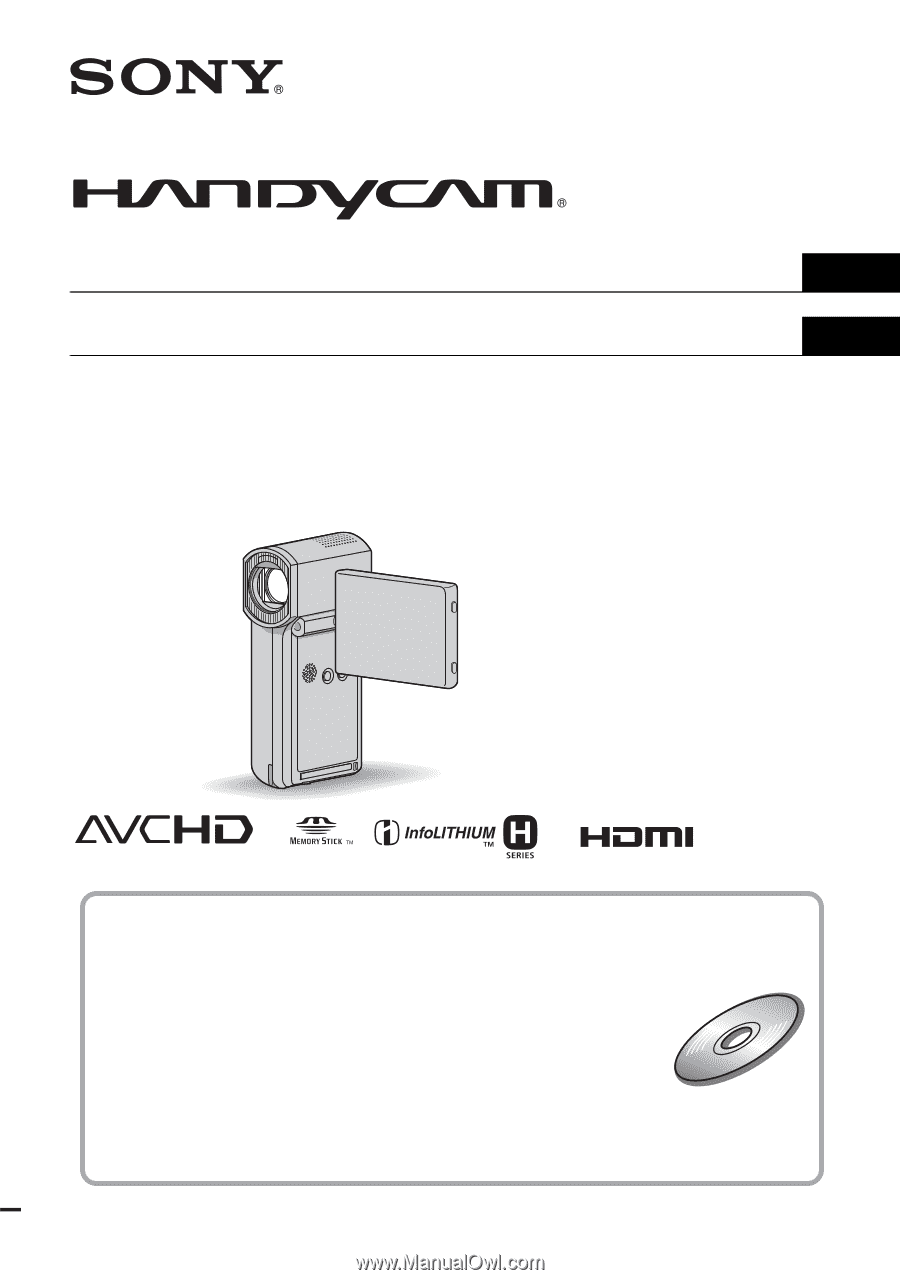
HD Video Camera Recorder Operating Guide Guía de operaciones HDR-TG1 3-288-522-12(1) US ES For details on the advanced operations, please refer to "Handycam Handbook" (PDF). Para obtener más información acerca de las funciones avanzadas, consulte la "Guía práctica de Handycam" (PDF). © 2008 Sony - Sony HDR TG1 | Operating Guide - Page 2
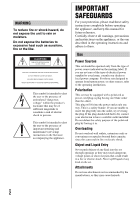
servicing) instructions in the literature accompanying the appliance. IMPORTANT SAFEGUARDS For your protection, please read these safety instructions completely before operating the appliance, and keep this manual from battery power, or other sources, refer to the operating instructions. - Sony HDR TG1 | Operating Guide - Page 3
. Accessories Do instructions. Improper adjustment of other controls may result in damage and will often require extensive work by a qualified technician to restore the set to normal operation. - When the set exhibits a distinct change in performance - this indicates a need for service. Servicing - Sony HDR TG1 | Operating Guide - Page 4
. Record the serial number in the space provided below. Refer to these numbers whenever you call your Sony dealer regarding this product. Model No. HDRSerial No. Model No. ACSerial No. Battery pack and "Memory Stick PRO Duo" This device complies with Part 15 of the FCC Rules. Operation is subject to - Sony HDR TG1 | Operating Guide - Page 5
(1) F • USB adaptor cap (1) G • Rechargeable battery pack NP-FH50 (1) • Wrist strap (1) • CD-ROM "Handycam Application Software" (1) (p. 27) - Picture Motion Browser (Software) - PMB Guide - Handycam Handbook (PDF) • "Operating Guide" (This manual) (1) US A B C D E F G * The Dedicated USB - Sony HDR TG1 | Operating Guide - Page 6
. • See page 15 for the recordable time of a "Memory Stick PRO Duo." • "Memory Stick PRO Duo" and "Memory Stick PRO-HG Duo" are both called as "Memory Stick PRO Duo" in this manual. Using the camcorder • The camcorder is not dustproofed, dripproofed or waterproofed. See "Precautions" (p. 33 - Sony HDR TG1 | Operating Guide - Page 7
also to "Handycam Handbook" (PDF) and "PMB Guide." IMPORTANT SAFEGUARDS..........2 Read this first 4 Getting Started Step 1: Charging the battery pack ...8 Step 2: Turning the power on, and setting the date and time 11 Changing the language setting 12 Step 3: Inserting a "Memory Stick PRO Duo - Sony HDR TG1 | Operating Guide - Page 8
). 3 Make sure that the LCD panel is closed. 4 Insert the battery. 1 Open the battery/Memory Stick Duo cover. 2 Insert the battery pack all the way in until it clicks. 3 Close the battery/Memory Stick Duo cover. 5 Place the camcorder on the Handycam Station as shown above, and insert it into the - Sony HDR TG1 | Operating Guide - Page 9
is not flashing before charging the battery pack. To remove the battery pack Turn off your camcorder and open the battery/Memory Stick Duo cover. Slide the battery eject lever. Be sure not to drop the battery pack. Battery eject lever b Notes • When you remove the battery pack or disconnect the AC - Sony HDR TG1 | Operating Guide - Page 10
/ regions using the AC Adaptor supplied with your camcorder. Also, you can charge the battery pack. Use a commercially available AC plug adaptor [a], if necessary, depending on the design of the wall outlet (wall socket) [b]. AC-L200/L200B [a] [b] US See "Handycam Handbook" (PDF) for details. 10 - Sony HDR TG1 | Operating Guide - Page 11
to record or play (2). You can rotate the LCD panel 270 degrees to the lens side (2) to record in mirror mode. 190 degrees to the camcorder 2270 degrees (max.) 2 Slide the (Movie)/ (Still) select switch repeatedly in the direction of the arrow until the respective lamp lights up. (Movie): To record - Sony HDR TG1 | Operating Guide - Page 12
do not appear during recording, but they are automatically recorded on the "Memory Stick PRO Duo," and can be displayed during playback. • You can turn and your camcorder goes to sleep mode. If [QUICK ON STBY] is set to [OFF] on the HOME MENU (p. 23), closing the LCD panel makes your camcorder turn - Sony HDR TG1 | Operating Guide - Page 13
screen appears. See page 6 on the "Memory Stick" you can use with your camcorder. 1 Insert the "Memory Stick PRO Duo." 1 Open the battery/Memory Stick Duo cover. 2 Insert the "Memory Stick PRO Duo" all the way in until it clicks. 3 Close the battery/Memory Stick Duo cover. 2 Open the LCD panel and - Sony HDR TG1 | Operating Guide - Page 14
3 Start recording. Movies Still Images Press START/STOP A. To stop recording, press START/STOP A again. • See "Handycam Handbook" (PDF) to display the image of SD (standard definition) image quality. Press PHOTO B lightly to adjust the focus A (a beep sounds), then press it fully B (a shutter - Sony HDR TG1 | Operating Guide - Page 15
• When measuring "Memory Stick PRO Duo" capacity, 1 GB equals 1 billion bytes, a portion of which is used for data management. • Check the number of recordable still images on the LCD screen of your camcorder (p. 20). • You can capture still images from recorded movies. See "Handycam Handbook" (PDF - Sony HDR TG1 | Operating Guide - Page 16
recording screen 7 Displays movies with HD (high definition) image quality* 8 Displays still images 9 Searches for images by date 0 (OPTION) * appears when you select the movie with SD (standard definition) image quality. 1 Open the LCD panel to turn on your camcorder. 2 Touch (VIEW IMAGES). The - Sony HDR TG1 | Operating Guide - Page 17
and quality of the image (HD (high definition)/SD (standard definition)) viewed on the TV screen differ depending on what type of TV is connected, and the connectors used. Use the supplied AC Adaptor as the power source (p. 8). Refer also to the instruction manuals supplied with the device to be - Sony HDR TG1 | Operating Guide - Page 18
are not explained in other chapters, are explained here. Handycam Station Recording/Playback A Flash The flash will flash automatically flashing stops and the power turns off automatically if you do not operate your camcorder for a certain period during sleep mode ([QUICK ON STBY], p. 23). D - Sony HDR TG1 | Operating Guide - Page 19
and recorded. I Access lamp When the access lamp is lit or flashing, your camcorder is writing/reading data on the "Memory Stick PRO Duo." J POWER button Press POWER to turn on your camcorder. When you press it while the power is on, your camcorder turns off. • When you press POWER to turn on your - Sony HDR TG1 | Operating Guide - Page 20
recording/playback Recording movies Recording still images Viewing movies Viewing still images A HOME button B Remaining battery (approx.) C Recording status ([STBY] (standby) or [REC] (recording)) D Recording quality (HD/SD) and Recording mode (FH/HQ/SP/LP) E Media F Counter (hour/minute/second - Sony HDR TG1 | Operating Guide - Page 21
the settings of your camcorder. Upper left Center Upper WIDE SELECT BLT-IN ZOOM MIC Meaning IMAGE SIZE Continuous slide Picture effect Digital effect Manual focus SCENE SELECTION Handycam Handbook" (PDF) for details. • The recording date and time are recorded automatically on the "Memory Stick - Sony HDR TG1 | Operating Guide - Page 22
screen by touching (HOME)/ (OPTION). For details of the menu items, see "Handycam Handbook" (PDF) (p. 27). (HOME) To see the explanation of the HOME 1 Touch the desired category then item to change the setting. 2 Follow the instructions on the screen. z Tips • If the item is not on the screen, - Sony HDR TG1 | Operating Guide - Page 23
], [ MOVE], [ MOVE] PRINT USB [ USB CONNECT], [DISC CONNECT BURN] TV CONNECT Guide* (MANAGE MEDIA) category / SET MEDIA INFO MEDIA FORMAT* REPAIR IMG.DB F. (SETTINGS) You can set these items also during Easy Handycam operation. ** The menu name is changed to [SOUND SETTINGS] during Easy - Sony HDR TG1 | Operating Guide - Page 24
the images recorded on your camcorder with HD (high definition) image quality or SD (standard definition) image quality. You can rewrite movies with HD (high definition) image quality from the computer to your camcorder, if necessary. For details, see "PMB Guide" (p. 29). Creating a disc with One - Sony HDR TG1 | Operating Guide - Page 25
Deleting images Connecting with the USB cable You can dub to movie dubbing compatible DVD writers, etc., with HD (high definition) image quality. Select the image quality of the movie you want to delete before the operation. 1 Touch (HOME) t (OTHERS) t [DELETE]. 2 Touch [ DELETE]. 3 Touch [ DELETE - Sony HDR TG1 | Operating Guide - Page 26
b Notes • Formatting will delete all data recorded on the "Memory Stick PRO Duo." US 26 - Sony HDR TG1 | Operating Guide - Page 27
disc b Notes • The supplied software "Picture Motion Browser" is not supported by Macintosh computers. To use a Macintosh computer connected to your camcorder, see the following website for details. http://guide.d-imaging.sony.co.jp/mac/ms/us/ Installing and viewing "Handycam Handbook" (PDF) To view - Sony HDR TG1 | Operating Guide - Page 28
the Memory Stick slot is slow. x Installation procedure You need to install the software to your Windows computer before connecting your camcorder to the computer. The installation is required only for the first time. Contents to be installed and procedures may differ depending on your OS. 1 Confirm - Sony HDR TG1 | Operating Guide - Page 29
] screen of your camcorder. 7 Click [Continue]. 8 Read [License Agreement], select [I accept the terms of the license agreement] if you agree, then click [Next]. 9 Confirm the installation settings, then click [Install]. 0 Follow the on-screen instructions to install the software. Depending on the - Sony HDR TG1 | Operating Guide - Page 30
b Notes • If you close the LCD panel when your camcorder is connected to other devices with the USB cable, the recorded images may be lost. z Tips • If the [USB SELECT] screen does not appear, touch (HOME) t (OTHERS) t [USB CONNECT]. US 30 - Sony HDR TG1 | Operating Guide - Page 31
table to troubleshoot the problem. If the problem persists, disconnect the power source and contact your Sony dealer. • For the symptoms of your camcorder, see "Handycam Handbook" (PDF) and for connecting to the computer, see "PMB Guide." The power does not turn on. • Insert a charged battery pack - Sony HDR TG1 | Operating Guide - Page 32
. • Battery power is low. • The temperature of your camcorder is getting high. Turn off your camcorder and leave it in a cool place. US 32 Indicators - Causes/Solutions • When the indicator flashes slowly, free space for recording images are running out. For the type of "Memory Stick" you - Sony HDR TG1 | Operating Guide - Page 33
camcorder on DC 6.8 V/7.2 V (battery pack) or DC 8.4 V (AC Adaptor). • For DC or AC operation, use the accessories recommended in these operating instructions. • Do not let your camcorder • If the battery electrolytic liquid has leaked: - consult your local authorized Sony service facility. - wash - Sony HDR TG1 | Operating Guide - Page 34
camcorder at all. Use your camcorder after charging the preinstalled rechargeable battery. However, even if the pre-installed rechargeable battery is not charged, the camcorder HD Vario-Tessar 10 × (Optical camcorder's setting information at the time of recording. *2 The unique pixel array of Sony - Sony HDR TG1 | Operating Guide - Page 35
power consumption: During camera recording using the LCD with normal brightness: HD: 3.4 W SD: 2.7 W Operating temperature: 0 °C to battery pack attached Mass (approx.): 240 g (8 oz) main unit only 300 g (10 oz) including the supplied rechargeable battery pack, and a "Memory Stick PRO Duo" Handycam - Sony HDR TG1 | Operating Guide - Page 36
On trademarks • "Handycam" and are registered trademarks of Sony Corporation. • "AVCHD" and "AVCHD" logotype are trademarks of Matsushita Electric Industrial Co., Ltd. and Sony Corporation. • "Memory Stick," " ," "Memory Stick Duo," " ," "Memory Stick PRO Duo," " ," "Memory Stick PRO-HG - Sony HDR TG1 | Operating Guide - Page 37
- Sony HDR TG1 | Operating Guide - Page 38
lea detenidamente esta manual y consérvelo para futuras consultas. Nombre del producto: Videocámara Modelo: HDR-TG1 ADVERTENCIA Para reducir cantidades suministradas. • "Memory Stick PRO Duo" de 4 GB (1) • Adaptador de alimentación de ca (1) • Cable de alimentación (1) • Handycam Station (1) A • - Sony HDR TG1 | Operating Guide - Page 39
"Memory Stick PRO Duo". • "Memory Stick PRO Duo" y "Memory Stick PRO-HG Duo" son ambos referidos como "Memory Stick PRO Duo" en este manual. sean funcionales. Sin embargo, es posible que aparezcan constantemente algunos pequeños puntos negros y/o brillantes (blancos, rojos, azules o verdes) en - Sony HDR TG1 | Operating Guide - Page 40
HD (alta definición). Por lo tanto, no se pueden reproducir imágenes grabadas con calidad de imagen HD • No intente formatear el "Memory Stick PRO Duo" en la videocámara 10). Acerca de este manual • Las imágenes de la pantalla LCD usadas en este manual Handycam" (PDF) y la "Guía de PMB". ES 4 - Sony HDR TG1 | Operating Guide - Page 41
fecha y la hora .........9 Cambio del ajuste de idioma ....... 10 Paso 3: Inserción de un "Memory Stick PRO Duo 11 Grabación/reproducción Grabación 12 Reproducción 14 26 Instalación y visualización de la "Guía práctica de Handycam" (PDF 26 Instalación de "Picture Motion Browser 27 Resolución - Sony HDR TG1 | Operating Guide - Page 42
FH50. 4 Inserte la batería. 1 Abra la cubierta de la batería/Memory Stick Duo. 2 Inserte la batería completamente hasta que encaje. 3 Cierre la cubierta de la batería/Memory Stick Duo. 1 Conecte el adaptador de ca a la toma DC IN de la Handycam Station. Compruebe que la marca v de la clavija de cc - Sony HDR TG1 | Operating Guide - Page 43
videocámara y abra la cubierta del compartimiento de la batería/del Memory Stick Duo. Deslice la palanca de expulsión de la batería. Procure evitar para calidad de imagen en definición estándar. (Unidad:min) HD SD Tiempo de recarga 135 Tiempo de grabación*1*2 Tiempo de grabación - Sony HDR TG1 | Operating Guide - Page 44
de reproducción*2 HD SD 130 a la toma DC IN de la videocámara o de la Handycam Station, aunque el cable de alimentación esté desconectado del tomacorriente de a una temperatura de 25°C (se recomienda usar a una temperatura de 10°C a 30°C) • El tiempo de grabación y de reproducción disponible ser - Sony HDR TG1 | Operating Guide - Page 45
Para comenzar Paso 2: Conexión de la alimentación y ajuste de la fecha y la hora Al usar la videocámara por primera vez, la pantalla [AJUS.RELOJ] aparece en la pantalla LCD. (HOME) Botón POWER Toque el botón que aparece en la pantalla LCD. Selector (Película)/ (Imagen fija) 1 Abra el panel LCD - Sony HDR TG1 | Operating Guide - Page 46
La fecha y la hora no aparecen durante la grabación, aunque se graban automáticamente en el "Memory Stick PRO Duo", y se pueden mostrar durante la reproducción. • Puede apagar los pitidos durante la operaci ] y, a continuación, seleccione el idioma deseado. El reloj se pone en funcionamiento. ES 10 - Sony HDR TG1 | Operating Guide - Page 47
estén encendidos o parpadeen. Si lo hace, podría dañar el soporte, perder las imágenes grabadas o provocar otras fallas de funcionamiento. - Expulsar el "Memory Stick PRO Duo" de la videocámara. - Extraer la batería o el adaptador de alimentación de ca - Agitar o golpear la videocámara. • No abra la - Sony HDR TG1 | Operating Guide - Page 48
Películas Imágenes fijas Presione START/STOP A. Para detener la grabación, presione START/STOP A de nuevo. • Consulte la "Guía práctica de Handycam" (PDF) para mostrar con calidad de imagen en SD (definición estándar). Presione PHOTO B ligeramente para enfocar A (se oye un pitido), luego presione - Sony HDR TG1 | Operating Guide - Page 49
se crea automáticamente. • El tiempo máximo de grabación del Sony "Memory Stick PRO Duo" es tal como se presenta a continuación con el modo de grabación [HD SP] (el ajuste predeterminado): 1 GB: aprox. 15 minuto 2 . Consulte la "Guía práctica de Handycam" (PDF) para obtener más detalles. ES 13 - Sony HDR TG1 | Operating Guide - Page 50
a (HOME) 4 6 imágenes anteriores 5 6 imágenes posteriores 6 Permite volver a la pantalla de grabación 7 Muestra las películas con calidad de imagen HD (alta definición).* 8 Muestra las imágenes fijas 9 Permite buscar imágenes por fecha 0 (OPTION) * aparece al seleccionar la película con calidad de - Sony HDR TG1 | Operating Guide - Page 51
televisor Los métodos de conexión y la calidad de imagen (HD (alta definición)/SD (definición estándar)) visualizada en la pantalla Cambie la entrada del televisor a la toma conectada. Consulte los manuales de instrucciones del televisor. r Para conectar la videocámara y Handycam Station ES 15 - Sony HDR TG1 | Operating Guide - Page 52
de conexión de A/V para la emisión de imágenes, éstas se emiten con calidad de imagen en SD (definición estándar). • La videocámara y la Handycam Station disponen de un Conector remoto de A/V o de una toma A/V OUT. Conecte el cable de conexión de A/V o cable de componente de A/V a la - Sony HDR TG1 | Operating Guide - Page 53
reproducción Nombre y funciones de las piezas Botones, tomas, etc., que no se explican en otros capítulos, se explican en éste. Handycam Station Grabación/reproducción A Flash El flash parpadeará automáticamente en función de las condiciones de grabación en el ajuste predeterminado. Toque (HOME - Sony HDR TG1 | Operating Guide - Page 54
mara está leyendo o grabando datos en el "Memory Stick PRO Duo". J Botón POWER Presione POWER para el bucle para evitar que la videocámara sufra daños ocasionados por una caída. Conexión a otros dispositivos K cable USB a la videocámara sin utilizar la Handycam Station. P Botón (DISC BURN) Haga un - Sony HDR TG1 | Operating Guide - Page 55
fijas A Botón HOME B Energía restante de la batería (aprox.) C Estado de grabación ([ESPERA] (en espera) o [GRAB.] (grabación)) D Calidad de grabación (HD/SD) y modo de grabación (FH/HQ/SP/LP) E Soporte F Contador (hora/minuto/segundo) G Tiempo de grabación restante H Botón OPTION I DETECCIÓN CARA - Sony HDR TG1 | Operating Guide - Page 56
. NIVEL REFMIC bajo SELEC.PANOR. MIC.ZOOM INCOR. Parte central Indicador E Efecto de imagen Efectos digitales Enfoque manual SELEC.ESCENA n Balance de blancos ctica de Handycam" (PDF) para obtener más detalles. • La fecha y hora de grabación se graba automáticamente en el "Memory Stick PRO Duo - Sony HDR TG1 | Operating Guide - Page 57
Puede mostrar la pantalla si toca (HOME)/ (OPTION). Para obtener más información sobre los elementos del menú, consulte la "Guía práctica de Handycam" (PDF) (pág. 26). (HOME) • La situación actual de grabación/reproducción no le permite seleccionar ni activar simultáneamente los elementos atenuados - Sony HDR TG1 | Operating Guide - Page 58
el elemento, significa que la función no está disponible en la situación actual. • No se puede usar (OPTION) MENU durante el funcionamiento de Easy Handycam. Elementos del HOME MENU Categoría (TOMA DE IMÁGENES) PELÍCULA* FOTO* GR.LEN.UNIF. Categoría (VISUALIZAR IMÁGENES) VISUAL INDEX* INDEX - Sony HDR TG1 | Operating Guide - Page 59
MIC.ZOOM INCOR.], [NIVEL REFMIC], [AUTODISPAR.], [TEMPORIZ.], [GRABAR SONIDO] - (Las fichas dependen de la situación/Sin ficha) [PRES.DIAP.], [AJUS.PASE DIAPO.], [COPIAS], [FECHA/HORA], [TAMAÑO] Almacenamiento de imágenes Debido a la capacidad limitada del "Memory Stick de imagen HD (alta definici - Sony HDR TG1 | Operating Guide - Page 60
dispositivos Para obtener más información, consulte la "Guía práctica de Handycam" (PDF). Conexión mediante el cable de conexión de A/V Permite compatible con la copia de películas DVD, etc., con calidad de imagen HD (alta definición). Eliminación de imágenes Seleccione la calidad de imagen de la - Sony HDR TG1 | Operating Guide - Page 61
Grabación/reproducción Para borrar todas las imágenes (formatear) Toque (HOME) t (GESTIONAR SOPORTE) t [FORMAT.SOPORTE] t [SÍ] t [SÍ] t . b Notas • Al formatear, se borrarán todos los datos grabados en el "Memory Stick PRO Duo". ES 25 - Sony HDR TG1 | Operating Guide - Page 62
Editar imágenes importadas - Crear un disco b Notas • El software suministrado "Picture Motion Browser" no es compatible con computadoras Macintosh. guide.d-imaging.sony.co.jp/mac/ms/es/ Instalación y visualización de la "Guía práctica de Handycam" (PDF) Para visualizar la "Guía práctica de Handycam - Sony HDR TG1 | Operating Guide - Page 63
la instalación: Aproximadamente 500 MB (10 GB o más son necesarios al crear Memory Stick Duo. - Un "Memory Stick PRO Duo" no puede ser leído en una ranura para Memory Stick. - La lectura de datos desde una ranura Memory Stick es lenta. x Procedimiento de instalación Hay que instalar el software - Sony HDR TG1 | Operating Guide - Page 64
aplicaciones que se estén ejecutando en la computadora antes de instalar el software. 3 Coloque el CD-ROM incluido en la unidad de disco de Handycam Station y al tomacorriente de pared. 2 Coloque la videocámara en la Handycam Station, y luego enciéndala. 3 Conecte la toma (USB) de la Handycam - Sony HDR TG1 | Operating Guide - Page 65
ón con una computadora instrucciones para instalar el software requerido. qa Reinicie la computadora si se le "Guía de PMB". Para mostrar la "Guía de PMB", haga clic en [Start] t [All Programs] t [Sony Picture Utility] t [Ayuda] t [Guía de PMB]. b Notas • Si cierra el panel LCD mientras la videoc - Sony HDR TG1 | Operating Guide - Page 66
distribuidor Sony. • Para obtener información sobre los síntomas de la videocámara, consulte la "Guía práctica de Handycam" El "Memory Stick PRO Duo" está lleno. Utilice un "Memory Stick PRO Duo" nuevo o formatee el "Memory Stick PRO ún corresponda (pág. 27). El software "Picture Motion Browser" no - Sony HDR TG1 | Operating Guide - Page 67
Handycam Station o de la videocámara (pág. 6). • Desconecte la fuente de alimentación. Conéctela de nuevo y vuelva a poner en funcionamiento la videocámara. Indicadores E:20:ss/ E:31:ss/ E:61 Sony o con un centro de servicio técnico local autorizado de Sony o formatee el "Memory Stick PRO Duo" tras - Sony HDR TG1 | Operating Guide - Page 68
Indicadores - Causas y soluciones • El "Memory Stick PRO Duo" está dañado. Formatee el "Memory Stick PRO Duo" con su videocámara. • Se ha insertado un "Memory Stick PRO Duo" incompatible. • Se ha restringido el acceso al "Memory Stick PRO Duo" en otro dispositivo. • Existe algún tipo de problema - Sony HDR TG1 | Operating Guide - Page 69
- En lugares extremadamente cálidos, fríos o húmedos. No los deje expuestos mara con cc o ca utilice los accesorios recomendados en este manual de instrucciones. • No permita que la videocámara se con un centro de servicio técnico local autorizado de Sony. - lave con agua la piel que haya estado - Sony HDR TG1 | Operating Guide - Page 70
/60i Formato de grabación: Película (HD): AVCHD 1080/60i Película (SD): 1 990 000 píxeles Objetivo: Carl Zeiss Vario-Tessar 10 × (óptico), 20 ×, 120 × (digital) Distancia focal Sony y el sistema de procesamiento de imágenes (BIONZ) permiten una resolución de imágenes fijas equivalente a los tamaños - Sony HDR TG1 | Operating Guide - Page 71
la grabación con la cámara mediante la pantalla de cristal líquido con un brillo normal: HD: 3,4 W SD: 2,7 W Temperatura de funcionamiento: De 0 °C a + 40 °C g incluida la batería recargable suministrada y un "Memory Stick PRO Duo" Handycam Station DCRA-C230 Conectores de entrada/salida Toma A/V - Sony HDR TG1 | Operating Guide - Page 72
• "Handycam" y son marcas comerciales registradas de Sony Corporation. • "AVCHD" y el logotipo de "AVCHD" son marcas comerciales de Matsushita Electric Industrial Co., Ltd. y Sony Corporation. • "Memory Stick", " ", "Memory Stick Duo", " ", "Memory Stick PRO Duo", " ", "Memory Stick PRO - Sony HDR TG1 | Operating Guide - Page 73
- Sony HDR TG1 | Operating Guide - Page 74
- Sony HDR TG1 | Operating Guide - Page 75
- Sony HDR TG1 | Operating Guide - Page 76
US/ES Additional information on this product and answers to frequently asked questions can be found at our Customer Support Website. Puede encontrar más información sobre este producto y respuestas a las preguntas más frecuentes en nuestro sitio Web de atención al cliente. Printed on 70% or more
-
 1
1 -
 2
2 -
 3
3 -
 4
4 -
 5
5 -
 6
6 -
 7
7 -
8
-
9
-
10
-
11
-
12
-
13
-
14
-
15
-
16
-
17
-
18
-
19
-
20
-
21
-
22
-
23
-
24
-
25
-
26
-
27
-
28
-
29
-
30
-
31
-
32
-
33
-
34
-
35
-
36
-
37
-
38
-
39
-
40
-
41
-
42
-
43
-
44
-
45
-
46
-
47
-
48
-
49
-
50
-
51
-
52
-
53
-
54
-
55
-
56
-
57
-
58
-
59
-
60
-
61
-
62
-
63
-
64
-
65
-
66
-
67
-
68
-
69
-
70
-
71
-
72
-
73
-
74
-
75
-
76
 |
 |
3-288-522-
12
(1)
© 2008 Sony Corporation
US
ES
Digital HD Video Camera Recorder
Operating Guide
Guía de operaciones
HDR-TG1
For details on the advanced operations, please refer to
“Handycam Handbook” (PDF).
Para obtener más información acerca de las funciones
avanzadas, consulte la “Guía práctica de Handycam”
(PDF).