Sony HTDDWG700 Operating Instructions - Page 19
If you connect a DVD recorder, or Blu-ray disc player, see Changing button assignments - remote
 |
UPC - 027242728042
View all Sony HTDDWG700 manuals
Add to My Manuals
Save this manual to your list of manuals |
Page 19 highlights
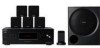
Getting Started If you connect a DVD recorder or Blu-ray disc player • Be sure to change the factory setting of the DVD/BD input button on the remote so that you can use the button to control your DVD recorder or Blu-ray disc player. For details, see "Changing button assignments" (page 47). • You can also rename the DVD/BD input so that it can be displayed on the receiver's display. For details, see "Naming inputs" (page 45). Notes • To input multi channel digital audio from the DVD player, DVD recorder or Blu-ray disc player, set the digital audio output setting on the DVD player, DVD recorder or Blu-ray disc player. Refer to the operating instructions supplied with the DVD player, DVD recorder or Blu-ray disc player. • To output sound from the front speakers and the subwoofer only when you select DVD/BD input, be sure to: - connect your DVD player, DVD recorder or Bluray disc player to the DIGITAL COAXIAL DVD/BD IN jack on the receiver. - press 2CH. • When connecting optical digital cords, insert the plugs straight in until they click into place. • Do not bend or tie optical digital cords. • Be sure to connect the video output of the DVD player/DVD recorder/Blu-ray disc player and satellite tuner/set-top box to the TV, so that the image is displayed on the TV. Refer to the operating instructions of each component connected for details. • You cannot do recording on the DVD recorder via this receiver. For details, refer to the operating instructions supplied with the DVD recorder. Tips • All the digital audio jacks are compatible with 32 kHz, 44.1 kHz, 48 kHz, and 96 kHz sampling frequencies. • To output the sound of the TV from the speakers connected to the receiver, be sure to: - connect the audio output jacks of the TV to the TV AUDIO IN jacks of the receiver. - turn off the TV's volume or activate the TV's muting function. 19US
-
 1
1 -
2
-
3
-
4
-
5
-
6
-
7
-
8
-
9
-
10
-
11
-
12
-
13
-
 14
14 -
 15
15 -
 16
16 -
 17
17 -
 18
18 -
 19
19 -
 20
20 -
 21
21 -
 22
22 -
 23
23 -
 24
24 -
25
-
26
-
27
-
28
-
29
-
30
-
31
-
32
-
33
-
34
-
35
-
36
-
37
-
38
-
39
-
40
-
41
-
42
-
43
-
44
-
45
-
46
-
47
-
48
-
49
-
50
-
51
-
52
-
53
-
54
-
55
-
56
 |
 |
