Sony ICF-C470 Operating Instructions - Page 1
Sony ICF-C470 - Fm/am Wide Manual
 |
View all Sony ICF-C470 manuals
Add to My Manuals
Save this manual to your list of manuals |
Page 1 highlights
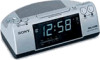
3-865-470-31 (1) FM/AM Clock Radio ICF-C470 FM/MW/LW 3 Band Clock Radio ICF-C470L Operating Instructions Istruzioni per I'uso Manual de instrucciones (en el reverso) Manual de instruções (no lado inverso) Dream Machine is a trademark of Sony Corporation. Dream Machine è un marchio registrato della Sony Corporation. Dream Machine es marca comercial de Sony Corporation. Dream Machine é marca registada de Sony Corporation. Sony Corporation © 1999 Printed in Malaysia B BUZZER VOLUME ALARM RESET/OFF SLEEP OFF RADIO ON SNOOZE/DATE/SLEEP OFF CLOCK - TIME SET + A ALARM B RADIO BUZZER BRIGHTNESS HIGH LOW AC power cord Cavo di alimentazione CA FM wire antenna Antenna FM a filo A FREQUENCY 50Hz 60Hz ICF-C470 TUNING BAND VOLUME AM FM ICF-C470L TUNING BAND VOLUME LW MW FM English WARNING To prevent fire of shock hazard, do not expose the unit to rain or moisture. To avoid electrical shock, do not open the cabinet. Refer servicing to qualified personnel only. Before You Begin Thank you for choosing the Sony Dream Machine! The Dream Machine will give you many hours of reliable service and listening pleasure. Before operating the Dream Machine, please read these instructions thoroughly and retain them for future reference. These instructions cover two models: the ICF-C470 and ICF-C470L. The band for each model and the area where the model is available are shown below. North and ICF-C470 South America Other countries ICF-C470 ICF-C470L FM/AM FM/AM FM/MW/LW Features • Dual alarm • Date display • Forward/reverse time setting • Full power backup to keep the clock and the alarm (radio and buzzer) operating during a power interruption with a 6F22 battery (not supplied) installed. (For models other than the North American model, the power backup is only for the clock.) • Alarm BUZZER volume control (small, medium, big) • Brightness control (Low, High) • AM wide band Installing the Battery To keep good time, your Dream Machine needs one 6F22 battery (not supplied), in addition to house current. The battery keeps the clock operating in the event of a power interruption. Before setting the time on your Dream Machine, open the lid at the bottom of the unit, install the battery with correct polarity and then close the lid. • After a power interruption, the displayed time may not be always correct (It may gain or lose about 10 minutes per hour). Knowing When To Replace the Battery To check the battery power, unplug the power cord from the wall outlet and plug it in again after a few minutes. If the displayed time is incorrect, replace the battery with a new one. Adapting to the Local Power Line (See Fig. A) For South American countries, this model is equipped with a frequency selector (220-230V, AC 50/60 Hz), located at the bottom of this unit. If your unit has a frequency selector, make sure that it is set correctly to match your local power supply. If necessary, switch the selector with a thin bladed object such as a screwdriver. Setting the Clock and the Date Setting the Clock 1 Plug in the unit. The display will flash "AM 12:00" or "0:00". 2 While holding down CLOCK, press TIME SET + or - till the correct time appears in the display. When you release CLOCK, the clock begins to operate. • The clock system varies depending on the model you own. 12-hour system: "AM 12:00" = midnight 24-hour system: "0:00" = midnight • To set the current time rapidly, keep pressing TIME SET + or - while holding down CLOCK. Setting the Date 1 While holding down SNOOZE/DATE/ SLEEP OFF, press TIME SET + or - till the correct date appears in the display. Then, release SNOOZE/DATE/SLEEP OFF. • To display the date, press SNOOZE/DATE/SLEEP OFF. The display returns to the current time when you release SNOOZE/DATE/SLEEP OFF. When SNOOZE/DATE/SLEEP OFF is pressed while the SNOOZE function is operating, the year and date will not appear in the display. Operating the Radio 1 Press RADIO ON/SLEEP to turn on the radio and adjust VOLUME (volume). 2 Select FM, AM(MW), or LW and tune in to a station using TUNING. Adjusting the brightness of the clock display Set BRIGHTNESS to the position which gives you the desired display visibility (HIGH or LOW). • To turn off the radio, press RADIO OFF/ALARM RESET/OFF. • To improve radio reception FM: Extend the FM wire antenna fully to improve FM reception. AM(MW)/LW: Rotate the unit horizontally for optimum reception. A ferrite bar antenna is built into the unit. Setting the Alarm To set the radio alarm, first tune in to a station and adjust the volume. 1 While holding down ALARM A RADIO (for the radio) or B BUZZER (for the buzzer), press TIME SET + or - till the desired time appears in the display. When you release ALARM A or B, the ALARM A or B indicator stops flashing and lights up, and the current time appears in the display. The alarm will come on at the preset time and will automatically turn itself off after 59 minutes. Adjusting the Alarm Level (BUZZER VOLUME) Adjust the loudness of the alarm by setting B BUZZER VOLUME to (small), (medium), or (big). • If you set ALARM A and ALARM B to the same time, only ALARM A will work. • The B BUZZER VOLUME switch affects only the loudness of the buzzer alarm. Use VOLUME to adjust the volume of the radio alarm. • To shut off the alarm, press RADIO OFF/ALARM RESET/OFF. The alarm will come on at the preset time the next day. • To cancel either alarm, press RADIO OFF/ALARM RESET/OFF while holding down ALARM A or B. • To doze for a few more minutes, press SNOOZE/ DATE/SLEEP OFF. The alarm will shut off, but will come on again after about 6 minutes. You can repeat this process as many times as you like. • To check the preset time, press ALARM A or B. Setting the Sleep Timer Enjoy falling asleep to the radio using the built-in sleep timer. 1 Press RADIO ON/SLEEP. The radio turns on. 2 Press RADIO ON/SLEEP repeatedly until the desired preset time appears on the display (90, 60, 45, 30 or 15 minutes). Every push changes the display as follows: Current time On 90 60 15 30 45 The radio will play for the duration you have set, and will then turn off automatically. • To turn off the radio before the preset time, press SNOOZE/DATE/SLEEP OFF. Italiano Precautions • Operate the unit on the power sources specified in "Specifications". • The nameplate indicating operating voltage, etc. is located at the bottom of the unit. • To disconnect the power cord (mains lead), pull it out by the plug, not the cord. • The unit is not disconnected from AC power source (mains) as long as it is connected to the wall outlet even if the unit itself is turned off. • Do not place the unit on surfaces (rugs, blankets, etc.) or near materials (curtains, draperies) that block the ventilation holes. • Should anything fall into the unit, unplug the unit and have it checked by qualified personnel before operating it further. • To clean the casing, use a soft cloth dampened with a mild detergent solution. Battery Warning When the unit will be left unplugged for a long time, remove the battery to avoid undue battery discharge and damage to the unit from battery leakage. If you have any questions or problems concerning your unit, please consult your nearest Sony dealer. Specifications Time display North and South America, UK and Australia: 12-hour system Other countries: 24-hour system Frequency range North and Italy South America Band ICF-C470 ICF-C470L FM 87.5-108 MHz - AM 530-1,710 kHz - FM 87.5-108 MHz - AM 526.5-1,606.5 kHz - FM - 65-108 MHz AM(MW) - 530-1,605 kHz LW - 153-255 kHz FM 87.5-108 MHz 87.5-108 MHz AM(MW) 530-1,605 kHz 530-1,605 kHz LW - 153-255 kHz CIS Other countries Speaker Approx. 6.6 cm ( 2 5/8 inches) dia. 8 Ohms Power output 100 mW (at 10% harmonic distortion) Power requirements North America: 120 V AC, 60 Hz South America: 220-230 V AC, 50/60 Hz Other countries: 220-230 V AC, 50 Hz For power backup: 9V DC, one 6F22 battery Battery life Approx. 35 hours (for clock backup) using the S-006P (U) battery Dimensions Approx. 200 × 77 × 150 mm (w/h/d) (7 7/8 × 3 1/8 × 6 inches) incl. projecting parts and controls Mass UK model: Approx. 700g (1 lb 9 oz) not incl. battery Other models: Approx. 650g (1 lb 7 oz) not incl. battery Design and specifications are subject to change without notice. Si dichiara che l'apparecchio è stato fabbricato in conformità all'art. 2, Comma 1 del D.M. 28. 08. 1995 n. 548. ATTENZIONE Per evitare il rischio di incendi o scosse elettriche, l'apparecchio non deve essere esposto alla pioggia o all'umidità. Per evitare scosse elettriche, non aprire l'apparecchio. Per le riparazioni rivolgersi solo a personale qualificato. Prima di cominciare Grazie per aver scelto la Dream Machine Sony! La Dream Machine vi darà molte ore di funzionamento affidabile e piacere di ascolto. Prima di usare la Dream Machine, leggere attentamente queste istruzioni e conservarle per riferimenti futuri. Queste istruzioni riguardano due modelli: l'ICF-C470 e l'ICF-C470L. Le bande di ciascun modello e l'area in cui ciascun modello è disponibile sono indicate sotto. America del Nord ICF-C470 e del Sud Altri paesi ICF-C470 ICF-C470L FM/AM FM/AM FM/MW/LW Caratteristiche • Doppia sveglia • Indicazione della data • Regolazione dell'orario in avanti/indietro • Sostegno alimentazione completo per mantenere il funzionamento dell'orologio e della sveglia (radio e cicalino) durante interruzioni di corrente, usando una pila 6F22 (non in dotazione). (Per i modelli diversi dal modello per l'America del Nord il sostegno elimentazione è solo per l'orologio.) • Controllo del volume della sveglia BUZZER (basso, medio, alto). • Controllo della luminosità (Low, High) • Banda ampia AM Inserimento della pila Per mantenere l'orario corretto, la Dream Machine necessita di una pila 6F22 (non in dotazione) oltre che della corrente domestica. La pila mantiene il funzionamento dell'orologio in caso di interruzioni della corrente. Prima di regolare l'orario sulla Dream Machine, aprire il coperchio sul fondo dell'apparecchio, inserire la pila con la corretta polarità e richiudere il coperchio. • Dopo un'interruzione di corrente l'orario visualizzato può non essere sempre corretto (può perdere o guadagnare circa 10 minuti per ora). Quando sostituire la pila Per controllare la carica della pila, scollegare il cavo di alimentazione dalla presa di corrente e ricollegarlo dopo qualche minuto. Se l'orario visualizzato non è corretto, sostituire la pila con un'altra nuova. Adattamento alla rete elettrica locale (vedere la Fig. A) Per i paesi del Sud America, questo modello è dotato di un selettore di frequenza (220-230 V CA, 50/60 Hz) situato sul fondo dell'apparecchio. Se l'apparecchio acquistato édotato di selettore di frequenza , assicurarsi che sia regolato correttamente per la rete elettrica locale. Se necessario, spostare il selettore usando un oggetto a lama sottile come un cacciavite. Regolazione dell'orologio e della data Regolazione dell'orologio 1 Collegare l'apparecchio alla presa di corrente. Sul display lampeggia l'indicazione "AM 12:00" o "0:00". 2 Premere TIME SET + o - tenendo premuto CLOCK fino a quando l'orario corretto appare sul display. Quando si rilascia CLOCK l'orologio comincia a funzionare. • Il sistema orario varia a seconda del modello acquistato. Sistema 12 ore: "AM 12:00" = mezzanotte Sistema 24 ore: "0:00" = mezzanotte • Per regolare rapidamente l'orario attuale, tenere premuto TIME SET + o - mentre si tiene premuto CLOCK. Regolazione della data 1 Tenere premuto TIME SET + o - tenendo premuto SNOOZE/DATE/SLEEP OFF fino a che la data corretta appare sul display. Quindi rilasciare SNOOZE/ DATE/SLEEP OFF. • Per visualizzare la data, premere SNOOZE/DATE/ SLEEP OFF. Il display torna all'orario attuale quando si rilascia SNOOZE/DATE/SLEEP OFF. Se si preme SNOOZE/DATE/SLEEP OFF mentre è attivata la funzione di ripetizione della sveglia, l'anno e la data non appaiono sul display. Uso della radio 1 Premere RADIO ON/SLEEP per accendere la radio e regolare VOLUME (volume). 2 Selezionare FM, AM(MW) o LW e sintonizzare la stazione usando TUNING. Regolazione della luminosità dell' indicazione dell' orario Regolare BRIGHTNESS sulla posizione che fornisce la visibilità desiderata per il display (HIGH o LOW). • Per spegnere la radio, premere RADIO OFF/ ALARM RESET/OFF. • Per migliorare la ricezione radio FM: Estendere completamente l'antenna FM a filo per migliorare la ricezione FM. AM(MW)/LW: Ruotare l'apparecchio orizzontalmente per ottenere la ricezione migliore. Un'antenna a barra di ferrite è incorporata nell'apparecchio. Regolazione della sveglia Per regolare la sveglia al suono della radio, sintonizzare prima la stazione e regolare il volume. 1 Premere TIME SET + o - tenendo premuto ALARM A RADIO (per la radio) o B BUZZER (per il cicalino) fino a quando l'ora desiderata appare sul display. Quando si rilascia ALARM A o B, l'indicatore ALARM A o B cessa di lampeggiare e si illumina stabilmente e l'orario attuale appare sul display. La sveglia suona all'orario fissato e si ferma automaticamente dopo 59 minuti. Regolazione del livello della sveglia (BUZZER VOLUME) Regolare il volume della sveglia regolando B BUZZER VOLUME su (basso), (medio) o (alto). • Se si regola ALARM A e ALARM A sullo stesso orario, si attiva solo ALARM B. • L'interruttore B BUZZER VOLUME controlla solo il volume della sveglia con il cicalino. Usare VOLUME per regolare il volume della sveglia con la radio. • Per fermare la sveglia, premere RADIO OFF/ ALARM RESET/OFF. La sveglia suona nuovamente all'orario fissato il giorno successivo. • Per annullare la sveglia, premere RADIO OFF/ ALARM RESET/OFF tenendo premuto ALARM A o ALARM B. • Per dormire ancora qualche minuto, premere SNOOZE/DATE/SLEEP OFF. La sveglia si ferma ma suona di nuovo dopo 6 minuti circa. È possibile ripetere questa operazione quante volte si desidera. • Per controllare l'orario fissato, premere il tasto ALARM A o B. Regolazione del timer per lo spegnimento ritardato È possibile addormentarsi al suono della radio usando il timer di spegnimento ritardato incorporato. 1 Premere RADIO ON/SLEEP. La radio si accende. 2 Premere ripetutamente RADIO ON/ SLEEP fino a che il tempo desiderato appare sul display (90, 60, 45, 30 o 15 minuti). A ciascuna pressione l'indicazione cambia come segue: Orario attuale On 90 60 15 30 45 La radio suona per il tempo fissato e quindi si spegne automaticamente. • Per spegnere la radio prima che sia trascorso il tempo prefissato, premere SNOOZE/DATE/SLEEP OFF. Precauzioni • Usare l'apparecchio con le fonti di alimentazione specificate in "Caratteristiche tecniche". • La piastrina indicante la tensione operativa, ecc. si trova sul fondo dell'apparecchio. • Per scollegare il cavo di alimentazione, estrarlo tenendolo per la spina, non tirando il cavo. • L'apparecchio non è scollegato dalla fonte di alimentazione CA (corrente di rete) fintanto che è collegato alla presa a muro, anche se l'apparecchio stesso è stato spento. • Non collocare l'apparecchio su superfici (tappeti, coperte, ecc.) o vicino a materiali (tende, drappeggi) che possano bloccare i fori di ventilazione. • Se qualcosa penetra all'interno dell'apparecchio, scollegare il cavo di alimentazione e far controllare l'apparecchio da personale qualificato prima di usarlo nuovamente. • Per pulire il rivestimento usare un panno morbido inumidito con una blanda soluzione detergente. Avvertenza sulla pila Quando l'apparecchio rimane scollegato dalla presa di corrente per lunghi periodi, estrarre la pila per evitare uno scaricamento eccessivo e danni all'apparecchio dovuti a perdite del fluido della pila. In caso di interrogativi o problemi riguardanti l'apparecchio consultare il proprio rivenditore Sony. Caratteristiche tecniche Indicazione dell'orario America del Nord e del Sud, Regno Unito e Australia: sistema 12 ore Altri paesi: sistema 24 ore Campo di frequenza* Banda ICF-C470 ICF-C470L del Sud Italia del Nord e America FM 87,5-108 MHz - AM 530-1.710 kHz - FM 87,5-108 MHz - CIS AM 526,5-1.606,5 kHz - FM - 65-108 MHz AM (MW) - 530-1.605 kHz LW - 153-255 kHz FM 87,5-108 MHz 87,5-108 MHz AM (MW) 530-1.605 kHz 530-1.605 kHz LW - 153-255 kHz Altri paesi Diffusore Circa 6,6 cm dia., 8 ohm Uscita di potenza 100 mW (al 10% di distorsione armonica) Alimentazione America del Nord: 120 V CA, 60 Hz America del Sud: 220-230 V CA, 50/60 Hz Altri paesi: 220-230 V CA, 50 Hz Per la funzione di sostegno alimentazione: 9 V CC, una pila 6F22 Durata della pila Circa 35 ore (sostegno dell'orologio), usando una pila Sony S-006P (U) Dimensioni Circa 220 x 77 x 150 mm (l/a/p) inclusi comandi e parti sporgenti Massa Modello per il Regno Unito: Circa 700 g, esclusa la pila Altri modelli: Circa 650 g, esclusa la pila Disegno e caratteristiche tecniche soggetti a modifiche senza preavviso. Nota BANDE DI FREQUENZA 1. Bande di frequenza: FM: 87,5 MHz - 108 MHz OM: 526,5 kHz - 1.606,5 kHz 2. Frequenza intermedia: FM: 10,7 MHz AM: 455 kHz 3. Oscillatore locale: Frequenza oscillatore locale superiore a quella del segnale * di cui al par. 3 dell'Allegato A al D.M. 25/06/85 e al par. 3 dell'Allegato 1 al D.M. 27/08/87
-
 1
1 -
 2
2
 |
 |