Sony KDL-42XBR950 Operating Instructions (Large File - 14.6 MB) - Page 31
Please adjust speaker position slightly in vertical direction so that screws fit
 |
View all Sony KDL-42XBR950 manuals
Add to My Manuals
Save this manual to your list of manuals |
Page 31 highlights
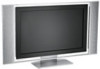
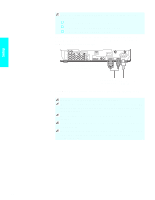
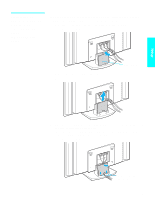
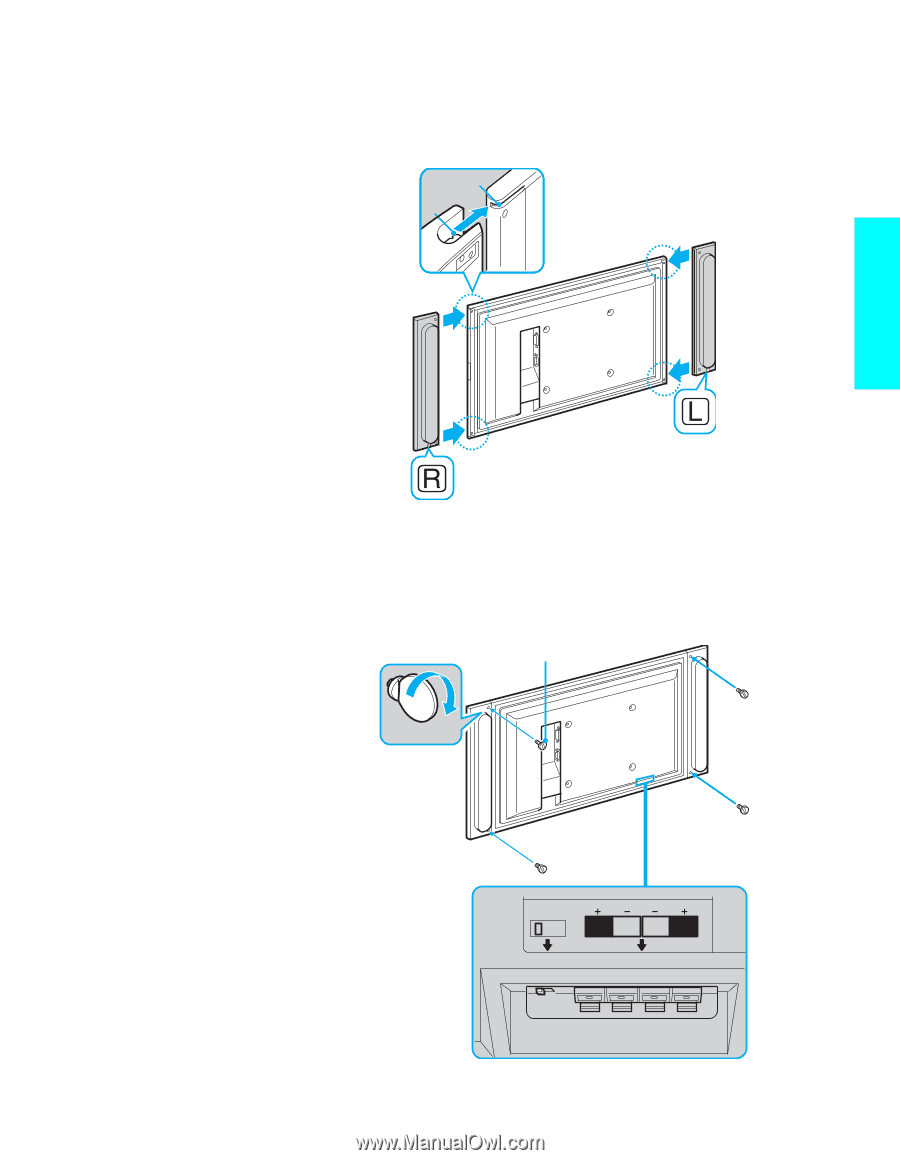
2 Attach the speakers. Be sure to attach the right speaker (marked as R) to the right side of the display unit and the left speaker (marked as L) to the left side. Rear of the display unit B A Insert A to B. Setup 3 Fasten the four screws to the rear of the speaker. Please adjust speaker position slightly in vertical direction so that screws fit in correctly. Make sure that the EXT SP switch is set to OFF to use the attached speakers. Rear of the display unit Screw R L OFF ON 29
-
 1
1 -
2
-
3
-
4
-
5
-
6
-
7
-
8
-
9
-
10
-
11
-
12
-
13
-
14
-
15
-
16
-
17
-
18
-
19
-
20
-
21
-
22
-
23
-
24
-
25
-
 26
26 -
 27
27 -
 28
28 -
 29
29 -
 30
30 -
 31
31 -
 32
32 -
 33
33 -
 34
34 -
 35
35 -
 36
36 -
37
-
38
-
39
-
40
-
41
-
42
-
43
-
44
-
45
-
46
-
47
-
48
-
49
-
50
-
51
-
52
-
53
-
54
-
55
-
56
-
57
-
58
-
59
-
60
-
61
-
62
-
63
-
64
-
65
-
66
-
67
-
68
-
69
-
70
-
71
-
72
-
73
-
74
-
75
-
76
-
77
-
78
-
79
-
80
-
81
-
82
-
83
-
84
-
85
-
86
-
87
-
88
-
89
-
90
-
91
-
92
-
93
-
94
-
95
-
96
-
97
-
98
-
99
-
100
-
101
-
102
-
103
-
104
-
105
-
106
-
107
-
108
-
109
-
110
-
111
-
112
-
113
-
114
-
115
-
116
-
117
-
118
-
119
-
120
-
121
-
122
-
123
-
124
-
125
-
126
-
127
-
128
-
129
-
130
-
131
-
132
-
133
-
134
-
135
-
136
 |
 |
29
Setup
2
Attach the speakers.
Be sure to attach the right speaker (marked as
R
) to the right side of the display
unit and the left speaker (marked as
L
) to the left side.
3
Fasten the four screws to the rear of the speaker.
Please adjust speaker position slightly in vertical direction so that screws fit in
correctly.
Make sure that the EXT SP switch is set to OFF to use the attached speakers.
B
A
Rear of the display unit
Insert
A
to
B
.
OFF
ON
R
L
Rear of the display unit
Screw