Sony KDL-46W4100 Operating Instructions - Page 6
Getting Started, 1. Installing the TV, Carrying the TV, Preparation for Table-Top Stand - table top stand screw
 |
UPC - 027242736597
View all Sony KDL-46W4100 manuals
Add to My Manuals
Save this manual to your list of manuals |
Page 6 highlights
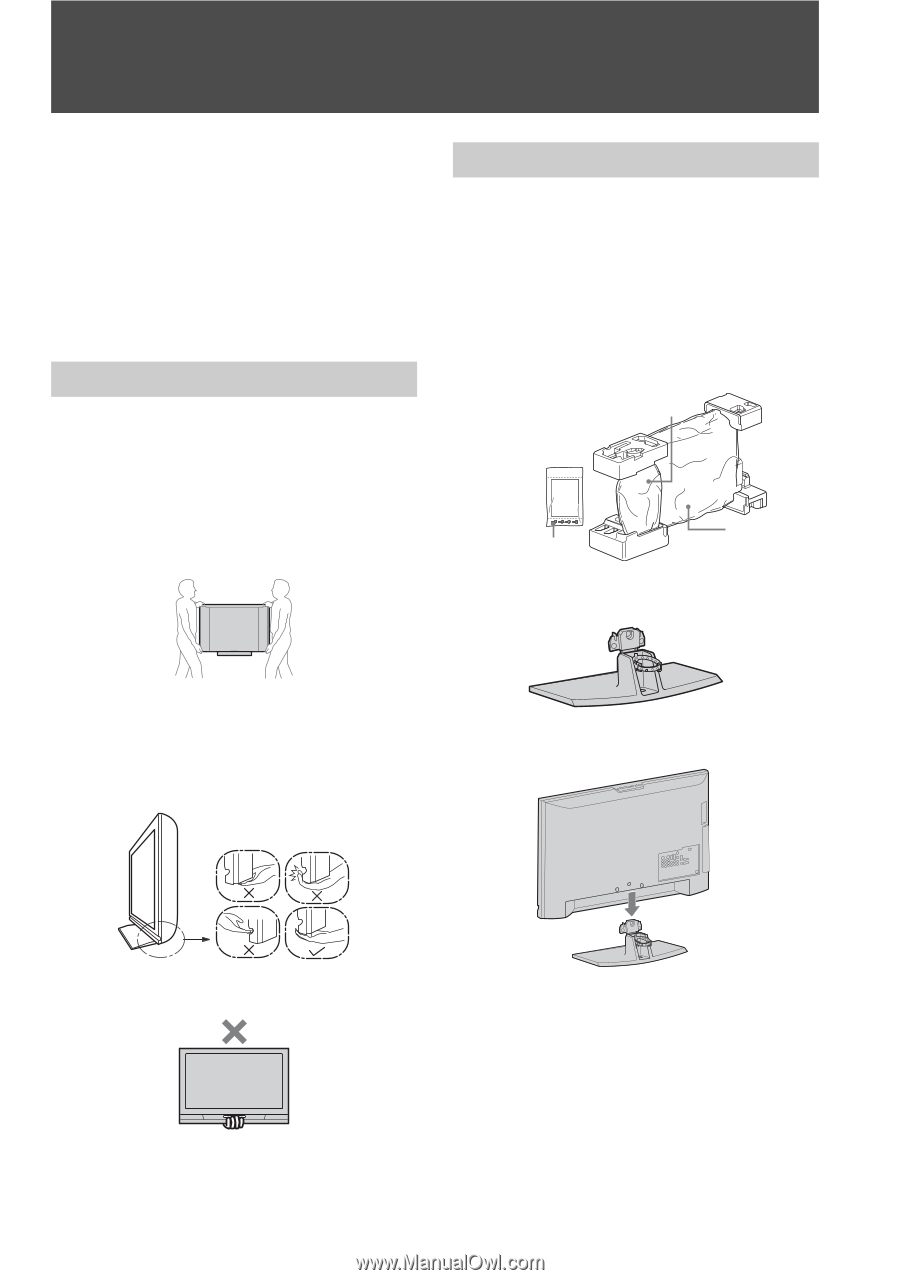
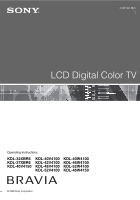
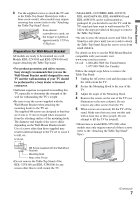
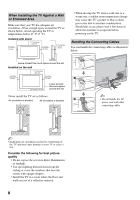
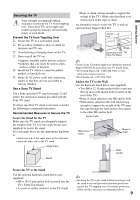
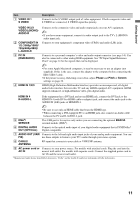
Getting Started 1. Installing the TV This TV can be mounted on a wall using a WallMount Bracket or placed on a TV stand (each sold separately). This section will explain: • How to carry the TV • Preparation for a Table-Top stand • Preparation for a Wall-Mount Bracket • Installation against a wall or enclosed area • Bundling the connecting cables • Securing the TV Carrying the TV Be sure to follow these guidelines to protect your property and avoid causing serious injury. • Before carrying the TV, disconnect all cables. • Carrying the large size TV requires two or more people. • When carrying the TV, place your hand as illustrated and hold it securely. Do not subject the TV to shocks, vibration, or excessive force. Preparation for Table-Top Stand Follow the assembling steps required to place on a TV stand (except models: KDL-52V4100 and KDL-52W4100). 1 Remove the Table-Top Stand and screws from the carton. The screws can be found in the accessory bag. For product protection and safety reasons, Sony strongly recommends that you use the screws provided with the TV. Table-Top Stand Screws TV Unit 2 Place the Table-Top Stand on a level and stable surface. • Lift the TV by placing your palm directly underneath the panel but do not: • squeeze the speaker grill area • place your fingers in the groove above the speaker grill area • put stress on the LCD panel. 3 Gently slide the TV unit onto the neck of the Table-Top Stand and align the screw holes. • Do not lift the TV from the bottom center. ~ • Do not put stress on the LCD panel or the frame around the screen. • Be careful to not pinch your hands or the AC power cord when you install the TV unit to the Table-Top Stand. 6
-
 1
1 -
 2
2 -
 3
3 -
 4
4 -
 5
5 -
 6
6 -
 7
7 -
 8
8 -
 9
9 -
 10
10 -
 11
11 -
 12
12 -
13
-
14
-
15
-
16
-
17
-
18
-
19
-
20
-
21
-
22
-
23
-
24
-
25
-
26
-
27
-
28
-
29
-
30
-
31
-
32
-
33
-
34
-
35
-
36
-
37
-
38
-
39
-
40
-
41
-
42
-
43
-
44
-
45
-
46
-
47
-
48
 |
 |