Sony KDL-55HX800 Setup Guide (Operating Instructions) - Page 14
Running initial setup, Detaching the Table-Top Stand from the TV, Initial, Setup, ENERGY SAVING - availability
 |
UPC - 027242784819
View all Sony KDL-55HX800 manuals
Add to My Manuals
Save this manual to your list of manuals |
Page 14 highlights
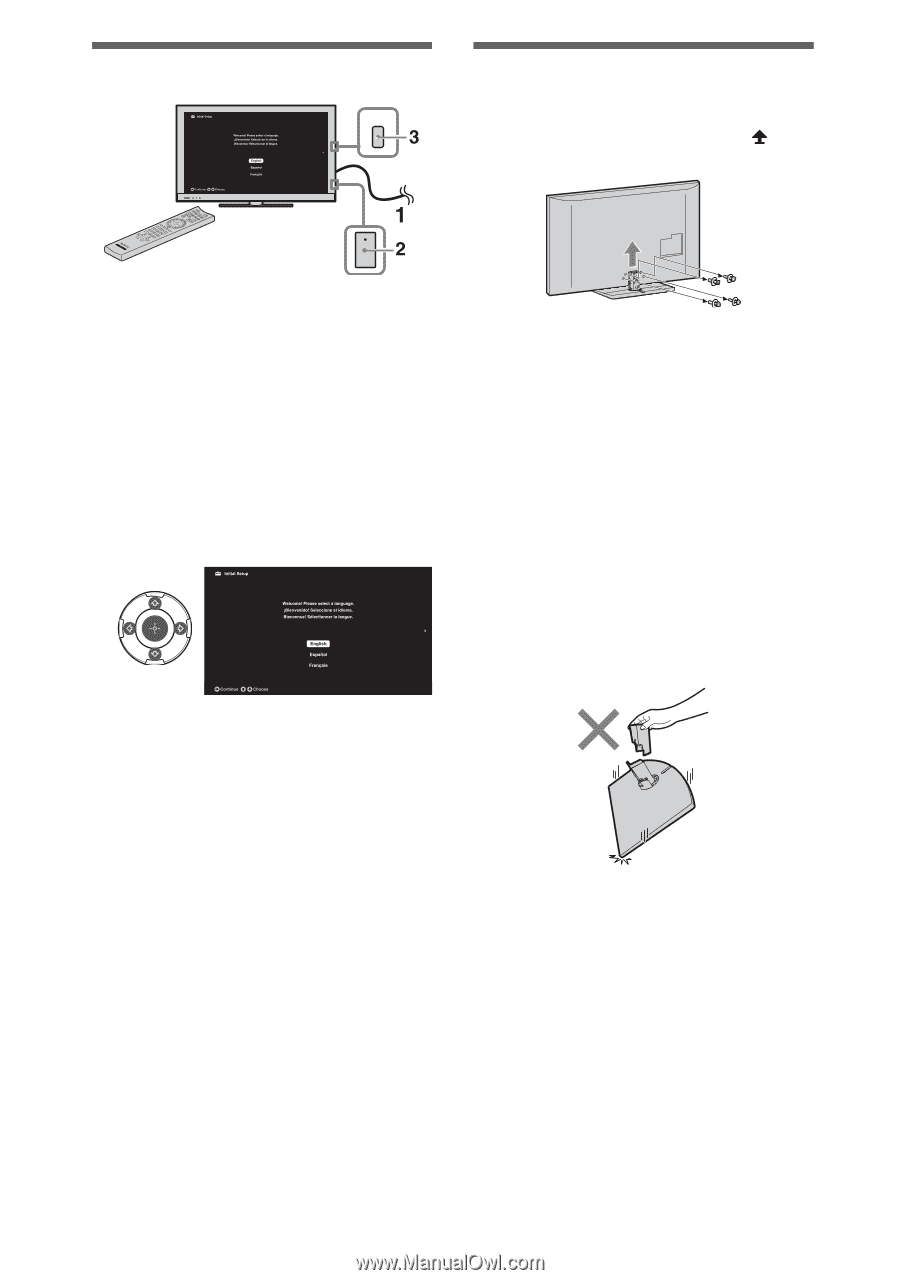
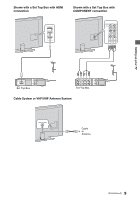
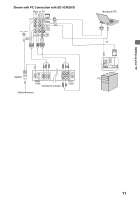
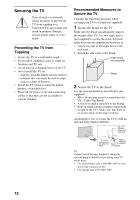
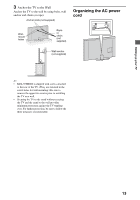
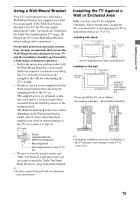
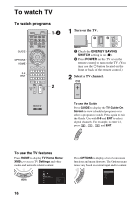
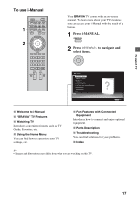
Running initial setup POWER Detaching the Table-Top Stand from the TV Remove only the screws marked with on the TV. 1 Complete your cable connections before proceeding with the Initial Setup. Connect the TV to your nearest power outlet. 2 Check the ENERGY SAVING SWITCH setting is on (z). 3 Press POWER on the TV. When you switch the TV on for the first time, the Language menu appears on the screen. 4 Follow the instructions on the screen. ~ • The ENERGY SAVING SWITCH must be on (z) to set the clock and obtain program information for the TV Guide. • Home mode sets the TV to settings optimized for home viewing (this setting is ENERGY STAR compliant). 5 Select Continue to scan for available channels and enable the TV Guide On Screen® feature. If you receive channels from a cable box or satellite receiver and do not wish to use the TV's built-in tuner, select Skip. Selecting Skip will disable the TV Guide On Screen feature, which is only available when the TV's tuner is used. ~ • If you skip the channel scan while in the setup menus, TV Guide will be disabled. ~ • Do not remove the Table-Top Stand for any reason other than to install corresponding accessories on the TV. • For XBR-52/46HX909 and KDL-40HX800, remove the stand rear cover prior to detaching the Table-Top Stand. • For KDL-55HX800, when installing the TV on a wall, remove the four screws from the rear of the TV. (They are fastened in the screw holes for wall mounting.) Be sure to store the removed screws in a safe place, keeping them away from children. • For KDL-55HX800, when attaching the TableTop Stand again, be sure to fasten the four screws (previously removed) to the original holes on the rear of the TV. • Do not hold by the stand rear cover while carrying the Table-Top Stand to prevent dropping the stand which may cause an injury or damage to the property. 14
-
 1
1 -
2
-
3
-
4
-
5
-
6
-
7
-
8
-
 9
9 -
 10
10 -
 11
11 -
 12
12 -
 13
13 -
 14
14 -
 15
15 -
 16
16 -
 17
17 -
 18
18 -
 19
19 -
20
-
21
-
22
-
23
-
24
 |
 |