Sony NTM-910 Operating Instructions - Page 2
Transmitter, Receiver, NTM-910, NTM-900, NTM-910/NTM-900, Transmisor, Receptor
 |
UPC - 027242595279
View all Sony NTM-910 manuals
Add to My Manuals
Save this manual to your list of manuals |
Page 2 highlights
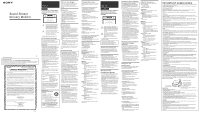
The NTM-910 is used in the figure. En las ilustraciones se muestra el modelo NTM-910. Transmitter Transmisor Built-in microphone Micrófono incorporado * * CHANNEL SELECT CH selectors Selectores de canales (CH) Receiver Receptor Front Parte frontal MONITOR indicators Indicadores de escucha (MONITOR) RANGE ALM. indicator Indicador de alarma de alcance (RANGE ALM.) Speaker Altavoz CH windows Ventanas de canales (CH) Lid of the DC IN 9V jack Tapa de la toma DC IN 9V DC IN 9V jack Toma de entrada de CC (DC IN 9V) CHARGE indicator* Indicador de carga (CHARGE)* Rear Parte posterior Antenna Antena POWER indicator Indicador de alimentación (POWER) OFF/ON switch Interruptor de alimentación (ON/OFF) CH windows Ventanas de canales (CH) Antenna Antena POWER/BATT indicator Indicador de alimentación/ batería (POWER/BATT) OFF/ON/VOICE ACT switch Selector de desconexión/ conexión/activación con la voz (OFF/ON/VOICE ACT) * * CHANNEL SELECT CH selectors Selectores de canales (CH) Cavity for hook Cavidad para el gancho * NTM-910 only * NTM-910 solamente A Belt clip Presilla para el cinturón VOL To a wall outlet A un tomacorriente de la red AC power cord Cable de alimentación de CA B NTM-910 Tab Lengüeta LOCK OPEN LOCK Black Negro k Red Rojo BP-T51 battery pack Batería BP-T51 OPEN Packing* Empaquetadura* * The attached packing is used to ensure water-resistance of the battery compartment. Therefore, make sure to close the battery compartment lid securely. * La empaquetadura adjunta se utiliza para asegurar la resistencia al agua del compartimiento de la batería. Por lo tanto, cerciórese de cerrar con seguridad la tapa del compartimiento de la batería. j Battery wires Conductores de la batería OPEN K NTM-910/NTM-900 The NTM-910 is used in the figure. En las ilustraciones se muestra el modelo NTM-910. To a wall outlet A un tomacorriente de la red AC power adaptor Adaptador de alimentación de CA DC IN 9V jack Toma de entrada de CC (DC IN 9V) CHARGE indicator* Indicador de carga (CHARGE)* * NTM-910 only * NTM-910 solamente NTM-900 Size AA (R6) battery × 2 Pilas de tamaño AA (R6) x 2 k Insert E side of the battery first. Inserte en primer lugar el extremo E de las pilas. C The NTM-910 is used in the figure. En las ilustraciones se muestra el modelo NTM-910. English Cavity for hook Cavidad para el gancho Cavity for hook Cavidad para el gancho j Belt clip Presilla para el cinturón Cavity for hook Cavidad para el gancho Power Sources Transmitter (See Fig. A) Connect the AC power cord to a wall outlet. Receiver To operate on battery (See Fig. B- ) 1 Turn the tab of the battery compartment lid at the rear of the receiver to the OPEN position with a coin. Pull the depressions on both sides to open the lid. 2 Connect the battery connector to the battery terminal with correct polarity. Black wire goes on the left side and red wire goes on the right side. 3 Insert one rechargeable battery pack BP-T51 (supplied) into the battery compartment. Make sure the battery wires are positioned properly so that the wires are not pushed out of the compartment when closing the lid. 4 Close the lid, then turn the tab to the LOCK position with a coin. Note When operating the receiver on a rechargeable battery pack, make sure that the lid of the DC IN 9V jack of the receiver is closed securely to ensure water-resistance of the receiver. Battery life (approx. hours for continuous standby) (JEITA*) Sony rechargeable battery pack BP-T51 19 * Measured by JEITA (Japan Electronics and Information Technology Industries Association) standards. The actual battery life may vary depending on the circumstance of the unit. When to recharge the rechargeable battery pack If the sound becomes distorted or interrupted, we recommend that you recharge the battery pack. When the battery pack is used up, the POWER/ BATT indicator starts flashing and the receiver sounds a beep. If the battery pack is extremely used up, the beep may be interrupted or the POWER/ BATT indicator may flash when you turn on the power. Recharge the battery pack as soon as possible in either case. Recharge the battery pack for more than 15 hours so that the battery pack is fully charged. Turn off the receiver before charging the battery pack. The CHARGE indicator remains lit even after charging has been completed. Charging duration Approximately 15 hours are required to charge the battery pack to its full capacity. Notes on the rechargeable battery pack • The battery pack will gradually discharge over a long period of time, even if not in use. • If you leave the weak battery pack inside the receiver without charging it, the battery pack will be completely discharged. It may require several times of charging to recover to its full capacity. Notes on replacing the rechargeable battery pack • If the battery pack lasts only a few minutes even after 15 hours of charging, the battery life has expired and needs replacement. • Before replacing the battery pack, make sure that the receiver is turned off. • Replace the battery pack with a new one. Contact your local Sony authorized dealer or service center, and ask for a Sony BP-T51 rechargeable battery pack. • Do not use any other rechargeable battery pack. To operate on house current (See Fig. B- ) Open the lid of the DC IN 9V jack of the receiver. Connect the supplied AC power adaptor to the DC IN 9V jack and plug it in to a wall outlet. The CHARGE indicator (NTM-910) will light up whether or not the receiver is turned on. Notes on AC power adaptor • When the AC power adaptor is not used, be sure to turn off the receiver, and unplug it from the DC IN 9V jack and the wall outlet. Then close the lid of the DC IN 9V jack securely. • Use only the supplied AC power adaptor. Do not use any other AC power adaptor. • Replace the AC power adaptor with the same type as the one supplied if replacement is necessary. Polarity of the plug To operate on batteries (See Fig. B- ) Open the battery compartment lid at the rear of the receiver and install two size AA (R6) batteries (not supplied, alkaline recommended) with correct polarity, then close the lid. Note When operating the receiver on batteries, make sure that the lid of the DC IN 9V jack of the receiver is closed securely to ensure waterresistance of the receiver. Battery life (approx. hours for continuous standby) Sony alkaline size AA (LR6) battery 76 Sony size AA (R6) battery 20 (JEITA*) * Measured by JEITA (Japan Electronics and Information Technology Industries Association) standards. The actual battery life may vary depending on the circumstance of the unit. When to replace the batteries If the sound becomes distorted or interrupted, we recommend that you replace the batteries with new ones. When the batteries are used up, the POWER/ BATT indicator starts flashing and the receiver sounds a beep. If the batteries are extremely used up, the beep may be interrupted or the POWER/ BATT indicator may flash when you turn on the power. Replace the batteries with new ones as soon as possible in either case. Note on replacing the batteries Before replacing the batteries, make sure that the receiver is turned off. Notes on the batteries • Do not charge the dry batteries. • Do not carry the dry batteries together with coins or other metallic objects. It can generate heat if the positive and negative terminals of the batteries accidentally come into contact with metallic objects. To operate on house current (See Fig. B- ) Open the lid of the DC IN 9V jack of the receiver. Connect the supplied AC power adaptor to the DC IN 9V jack and plug it in to a wall outlet. Notes on AC power adaptor • When the AC power adaptor is not used, be sure to turn off the receiver, and unplug it from the DC IN 9V jack and the wall outlet. Then close the lid of the DC IN 9V jack securely. • Use only the supplied AC power adaptor. Do not use any other AC power adaptor. • Replace the AC power adaptor with the same type as the one supplied if replacement is necessary. Polarity of the plug Setting Up Turning on the power Set the OFF/ON switch of the transmitter and the OFF/ON/VOICE ACT switch of the receiver to ON to turn on the power. The POWER indicator of the transmitter and the POWER/BATT indicator of the receiver will light up. To turn off the power, set the OFF/ON switch of the transmitter and the OFF/ON/VOICE ACT switch of the receiver to OFF. Setting the frequency channels Up to 27 channels (NTM-910), or 9 channels (NTM900) can be set through the CH selectors by changing the combination of three colors (red, yellow and green) on the CH windows. Set the CH selectors of both the transmitter and receiver so that the settings of color combinations shown in the CH windows are the same. Otherwise, the transmitter and receiver will not function. If the settings of the receiver and transmitter are not the same, the RANGE ALM. indicator starts flashing and the receiver sounds a beep. If signal interference occurs Set the CH selectors of both the transmitter and receiver to another setting. Make sure that both the settings shown in the CH windows are the same. Setting up the transmitter (See Fig. C- ) Place the transmitter within 2 to 3 meters (6 to 10 feet) from a crib or play area. If the child moves outside of this range, the transmitter may not be able to detect his/her sounds. The transmitter must be placed upright during operation. Tips for better reception • Place the transmitter at a location as high as practically possible such as on a table or on a wall. • Make sure that the transmitter is not covered or obstructed for picking up sounds. • Make sure that nothing touches the antenna during operation. Notes • Keep the transmitter out of the reach of the baby. Do not place the transmitter inside a crib or playpen. • Position the transmitter with the front side where the built-in microphone is located facing the baby. • Do not use the antenna as a carrying handle. • Do not use the antenna to hang the transmitter on the wall. Be sure to use the cavity for hook. Monitoring through the receiver (See Fig. C- ) The longest distance you can place the receiver from the transmitter varies according to obstructions and other conditions. First, test the operating range with the assistance of another adult, or by placing a radio, etc., near the transmitter. If you move outside the effective operating range of the system, the RANGE ALM. indicator lights up and the buzzer sounds. In such a case, move closer toward the transmitter until the indicator and the buzzer turn off. Tips for better reception • Keep the receiver upright during operation. • Make sure that nothing touches the antenna during operation. The VOICE ACT function eliminates most background noise when the receiver does not detect any sound. Set the OFF/ON/VOICE ACT switch to VOICE ACT to turn on this function. When the receiver receives sounds from the transmitter, the MONITOR indicators light up from left to right in five steps depending on the sound level. Only one indicator may light up if the sound from the transmitter is not loud, or all the indicators may light up if the sound is very loud. You can also hear sounds through the speaker. To adjust the volume The volume of the sounds you receive varies depending on the loudness of the baby's voice, distance between the transmitter and the baby, direction of the built-in microphone of the transmitter, obstructions, etc. Set the volume as required using VOL. If the volume level is set too high and is accompanied by a shrill noise, reduce the volume. The volume level can be adjusted between the smallest and biggest dots on the VOL. Notes • Avoid placing the units near heat sources or where they are subject to direct sunlight, excessive dust, moisture, or mechanical shock. • Be careful not to drop the receiver in water, or drop any liquid over it. • Do not use the antenna as a carrying handle. • Do not use the antenna to hang the receiver on the wall. Be sure to use the cavity for hook. Using Belt Clip (See Fig. C- ) The receiver has a belt clip located on the rear. It is convenient when you move around, for example, when you clean up the room, etc. Insert your finger into the cavity for hook and slide upwards as illustrated, then hang the belt clip onto your belt. When fixing the receiver onto your belt, be sure to turn off the receiver, and disconnect the AC power adaptor from the DC IN 9V jack and the wall outlet. Then close the lid of the DC IN 9V jack securely. Notes • When using the belt clip, the receiver can be operated only on battery/batteries. • When you are not using the belt clip, push it back to its original position. • Make sure that you do not move outside the effective operating range of the system. Español Fuentes de alimentación Transmisor (Consulte la Fig. A) Conecte el cable de alimentación a un tomacorriente de la red. Receptor Alimentación con batería (Consulte la Fig. B- ) 1 Deslice la tapa del compartimiento de la batería hacia la parte posterior del receptor hasta la posición OPEN con una moneda. Tire de las hendiduras de ambos lados para abrir la tapa. 2 Conecte el conector de la batería a los terminales para la misma con la polaridad correcta. El conductor negro deberá al lado izquierdo y el rojo al derecho. 3 Inserte una batería BP-T51 (suministrada) en el compartimiento para la misma. Cerciórese de que los conductores de la batería hayan quedado correctamente colocados de forma que no sobresalgan de del compartimiento cuando cierre la tapa. 4 Cierre la tapa y después deslice la lengüeta hasta la posición LOCK con una moneda. Nota Cuando alimente el receptor con una batería, cerciórese de que la tapa de la toma DC IN 9V del receptor esté bien cerrada para que no se pierda la resistencia al agua del receptor. Duración de la batería (horas aproximadas de espera continua) (JEITA*) Batería BP-T51 Sony 19 * Mediciones realizadas de acuerdo con los estándares de la JEITA (Japan Electronics and Information Technology Industries Association). La duración real de las pilas puede variar en función de cada unidad. Para recargar la batería Si el sonido se oye distorsionado o se interrumpe, le recomendamos que recargue la batería. Cuando la batería se descargue, el indicador POWER/BATT comenzará a parpadear y el receptor emitirá un pitido. Si la batería se agota por completo, el pitido puede interrumpirse o el indicador POWER/BATT puede parpadear cuando conecte la alimentación. Recargue la batería tan pronto como sea posible en cualquiera de los casos. Recargue la batería durante más de 15 horas para que quede completamente cargada. Antes de cargar la batería, desconecte la alimentación del receptor. El indicador CHARGE permanecerá encendido aunque haya finalizado la carga. Duración de la carga Para cargar la batería hasta su capacidad completa, se necesitarán aproximadamente 15 horas. Notas sobre la batería • La batería se descargará gradualmente con el tiempo, incluso aunque no se utilice la unidad. • Si deja una batería débil dentro del receptor sin haberla cargado, se descargará completamente. Para que adquiera su capacidad completa es posible que tenga que cargarla varias veces. Notas sobre el reemplazo de la batería • Si la batería dura solamente algunos minutos incluso después de 15 horas de carga, la duración útil de la misma habrá finalizado y tendrá que reemplazarse. • Antes de reemplazar la batería, cerciórese de que la alimentación del receptor esté desconectada. • Reemplace la batería por otra nueva. Póngase en contacto con un proveedor autorizado por Sony, y solicítele una batería BP-T51 Sony. • No utilice ninguna otra batería recargable. Alimentación con la corriente de la red (Consulte la Fig. B- ) Abra la tapa de la toma DC IN 9V del receptor. Conecte el adaptador de alimentación de CA suministrado a la toma DC IN 9V y a una toma de la red. El indicador CHARGE (NTM-910) permanecerá encendido esté conectada o no la alimentación del receptor. Notas sobre el adaptador de alimentación de CA • Cuando no vaya a utilizar el adaptador de alimentación de CA, cerciórese de desconectar la alimentación del receptor y de desconectar la clavija DC IN 9V. Después, cierre con seguridad la tapa de la toma DC IN 9V. • Utilice solamente el adaptador de alimentación de CA suministrado. No utilice ningún otro adaptador de alimentación de CA. • Cuando sea necesario reemplazar el adaptador de alimentación, adquiera otro del mismo tipo que el del suministrado. Polaridad de la clavija Alimentación con pilas (Consulte la Fig. B- ) Abra la tapa del compartimiento de las pilas de la parte posterior del receptor e instale dos pilas de tamaño AA (R6) (no suministradas, se recomienda utilizar alcalinas) con la polaridad correcta, y después cierre la tapa. Nota Cuando alimente el receptor con pilas, cerciórese de que la toma de DC IN 9V del receptor esté cerrada con seguridad para asegurar la resistencia al agua del receptor. Duración de las pilas (horas aproximadas de espera continua) (JEITA*) Pila alcalina de tamaño AA (LR6) Sony 76 Pila de tamaño AA (R6) Sony 20 * Mediciones realizadas de acuerdo con los estándares de la JEITA (Japan Electronics and Information Technology Industries Association). La duración real de las pilas puede variar en función de cada unidad. Cuándo reemplazar las pilas Si el sonido oye distorsionado o se interrumpe, le recomendamos que cambie las pilas por otras nuevas. Cuando las pilas se descarguen, el indicador POWER/BATT comenzará a parpadear y el receptor emitirá un pitido. Si las pilas se agotan por completo, el pitido puede interrumpirse o el indicador POWER/BATT puede parpadear cuando conecte la alimentación. Remplace las pilas por otras nuevas tan pronto como sea posible en cualquiera de los casos. Nota sobre el reemplazo de las pilas Antes de reemplazar las pilas, cerciórese de que la alimentación del receptor esté desconectada. Notas sobre las pilas • No cargue las pilas. • No lleve las pilas junto con monedas ni otros objetos metálicos. Si los polos positivo y negativo de las pilas se cortocircuitasen accidentalmente con objetos metálicos, generarían calor. Alimentación con la corriente de la red (Consulte la Fig. B- ) Abra la tapa de la toma DC IN 9V del receptor. Conecte el adaptador de alimentación de CA suministrado a la toma DC IN 9V y a una toma de la red. Notas sobre el adaptador de alimentación de CA • Cuando no vaya a utilizar el adaptador de alimentación de CA, cerciórese de desconectar la alimentación del receptor y de desconectar la clavija DC IN 9V. Después, cierre con seguridad la tapa de la toma DC IN 9V. • Utilice solamente el adaptador de alimentación de CA suministrado. No utilice ningún otro adaptador de alimentación de CA. • Cuando sea necesario reemplazar el adaptador de alimentación, adquiera otro del mismo tipo que el del suministrado. Polaridad de la clavija Configuración Conexión de la alimentación Ponga el interruptor OFF/ON del transmisor y el selector OFF/ON/VOICE ACT del receptor en ON para conectar la alimentación. El indicador POWER del transmisor y el indicador POWER/BATT del receptor se encenderán. Para desconectar la alimentación, ponga el interruptor OFF/ON del transmisor y el selector OFF/ON/ VOICE ACT del receptor en OFF. Ajuste de los canales de frecuencia Usted podrá ajustar hasta 27 canales (NTM-910) o 9 canales (NTM-900) con los selectores CH cambiando la combinación de los tres colores (rojo, amarillo, y verde) de las ventanas CH. Ajuste los selectores CH del transmisor y del receptor de forma que las combinaciones de colores mostrada en las ventanas CH sean iguales. De lo contrario, el transmisor y el receptor no funcionarán. Si los ajustes del receptor y del transmisor no son iguales, el indicador RANGE ALM. comenzará a parpadear y el receptor emitirá un pitido. Si se producen interferencias en las señales Ajuste los selectores CH del transmisor y del receptor a otras posiciones. Cerciórese de que ambos ajustes de las ventanas CH sea iguales. Ajuste del transmisor (Consulte la Fig. C- ) Coloque el transmisor dentro de 2 a 3 metros de las cuna o el área de juego. Si los niños salen fuera de este margen, es posible que el transmisor no pueda captar sus voces. El transmisor deberá colocarse vertical durante la operación. Para lograr una mejor recepción • Coloque el transmisor en un lugar lo más alto posible, como sobre una mesa o en una pared. • Cerciórese de que el transmisor no quede cubierto ni obstruido por la captación de sonidos. • Cerciórese de que nada toque la antena durante la operación. Notas • Mantenga el transmisor fuera del alcance de los niños. No coloque el transmisor dentro de una cuna ni de un parque de juegos. • Coloque el transmisor con la parte frontal encarada hacia los niños. • No utilice la antena como asa de transporte. • No utilice la antena para colgar el transmisor de una pared. Cerciórese de utilizar la cavidad para gancho. Escucha a través del receptor (Consulte la Fig. C- ) La mayor distancia a la que podrá colocar el receptor del transmisor variará de acuerdo con las obstrucciones y otras condiciones. En primer lugar, pruebe el alcance de operación con la ayuda de otro adulto, o colocando una radio, etc. cerca del transmisor. Si se aleja del alcance de operación efectiva del sistema, se encenderá el indicador RANGE ALM. y sonará el zumbador. En tal caso, acérquese más al transmisor hasta que se apague el indicador y se silencie el zumbador. Sugerencias para conseguir una mejor recepción • Mantenga vertical el receptor durante la operación. • Cerciórese de que nada toque la antena durante la operación. La función VOICE ACT elimina la mayoría del ruido de fondo cuando el receptor no detecta sonido. Ponga el selector OFF/ON/VOICE ACT en VOICE ACT para activar esta función. Cuando el receptor reciba sonidos del transmisor, los indicadores MONITOR se encenderán de izquierda a derecha en cinco pasos dependiendo del nivel del sonido. Si el sonido no es intenso es posible que solamente se encienda un indicador o, si es demasiado intenso, quizás se enciendan todos. Usted también podrá oír los sonidos a través de los altavoces. Para ajustar el volumen El volumen de los sonidos que reciba variará dependiendo de la voz de los niños, la distancia entre el transmisor y los niños, la orientación del micrófono incorporado del transmisor, las obstrucciones, etc. Ajuste el volumen en la forma requerida utilizando VOL. Si ajusta el volumen a un nivel demasiado alto, y se oye ruido estridente, redúzcalo. El nivel del volumen podrá ajustarse entre los puntos más pequeño y más grande de VOL. Notas • Evite colocar las unidades cerca de fuentes térmicas, sometidas a la luz solar directa, humedad, o golpes. • Tenga cuidado de que el receptor no caiga en el agua y de o verter líquidos sobre él. • No utilice la antena como asa de transporte. • No utilice la antena para colgar el receptor de una pared. Cerciórese de utilizar la cavidad para gancho. Utilización de la presilla para el cinturón (Consulte la Fig. C- ) El receptor posee una presilla para el cinturón en su parte posterior. Será muy útil para poder moverse, por ejemplo cuando haga la limpieza de una habitación, etc. Introduzca un dedo en la cavidad del gancho, deslícelo hacia arriba como muestra la ilustración, y después cuélgueselo del cinturón. Antes de colocar el receptor en su cinturón, desconecte la alimentación del mismo, desenchufe el adaptador de alimentación de CA de la toma DC IN 9V y del tomacorriente de la red. Por último, cierre con seguridad la tapa de la toma DC IN 9V. Notas • Cuando utilice la presilla para el cinturón, el receptor solamente podrá utilizarse con la batería o con pilas. • Cuando no vaya a utilizar la presilla para el cinturón, empújela hacia atrás hasta su posición original. • Tenga cuidado de no salir del alcance de operación efectivo del sistema.
-
 1
1 -
 2
2
 |
 |
